There are many important steps in the painting process, but every painter will tell you that the most important of all is starting with a solid, clean base. Your final paintjob will only be as good as what's underneath it.
Sometimes the start of a good base paintjob can begin with just a good dual-action sander to remove the paint, followed up by some hand-sanding to get the tight spots, however if you're hoping to go past just the exterior panels and also want to get the interior down to bare metal or get the chassis free of old paint and undercoating you've really got your work cut out for you.
That goes doubly so if your project has several coats of paint, old repairs, or rust, and trust us, you don't know about all of them. If you truly want a clean slate to start from on your paint and body project, forget steam cleaning followed by days or weeks of sanding, scraping, and grinding, it's time to call in the pros and get blasted!
To be honest, we should have done this before we started the first modifications on our Max Effort 1967 Cougar project car. Clean steel is so much easier to work with, but we had been overeager to make it look like a more complete project through the build to help you see our vision for it.
We recommend you don't follow our example on that; make your life easy and get your project blasted before you tear into it. We're finally ready for paint and body on Project Max Effort, so we've stripped it down and placed it in the hands of Kevin Garcia and his crew at Pacific Coast Powder Coating (PCPC). They service some of Southern California's premier hot rod shops and private builders, and make life oh-so-easy with their door-to-door pickup and delivery service.
There's just nothing like working with clean, fresh steel when you're building a project. No paint, filler, grime, oil, or any other gooey contaminants; you get to pretend it's brand new. We'll always regret not doing this to Max from the start. We're not even exaggerating when we say that getting your car blasted could be one of the best and most satisfying expenditures you lay out for your project car.
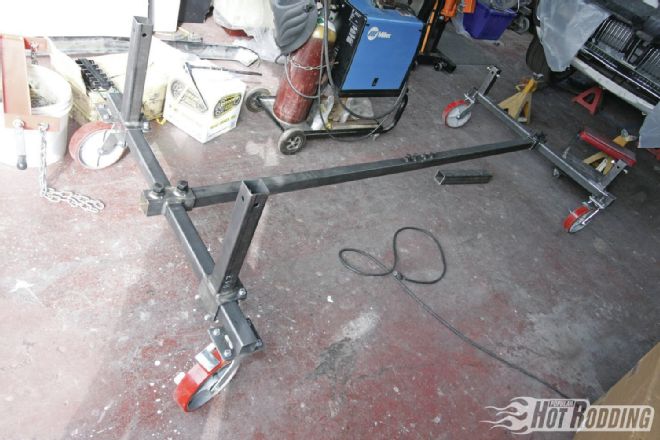 1. You can roll or drive your project right into a blaster, but the preferred way to bring a vehicle in (especially if you want to get the undercarriage clean) is on a body dolly such as this affordable Auto Twirler from Summit Racing. It’s designed specifically to fit Mustangs and similar unibody FoMoCo products like a Cougar and made our transition so much easier.
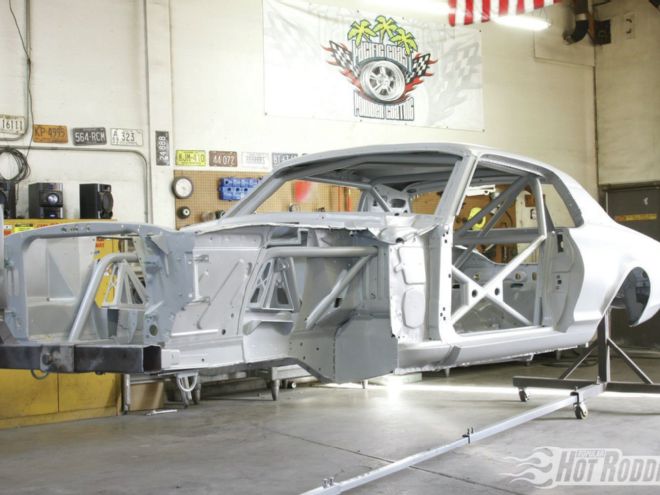
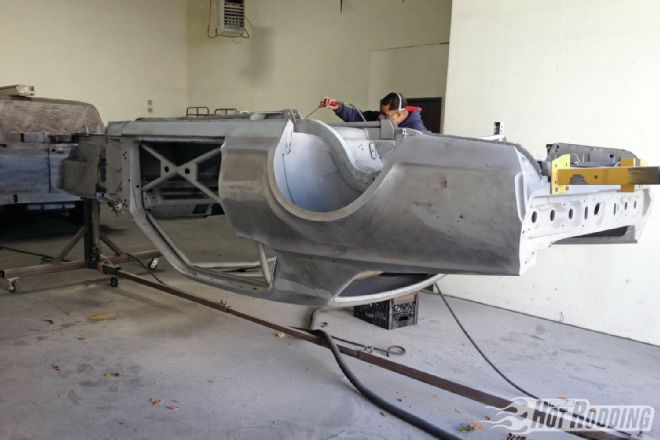
 2. Here’s the 1967 Cougar fully stripped down to a shell atop the Auto Twirler, ready for Garcia and his crew. Bringing a car in like this not only allows PCPC to be more thorough, it also assures that we won’t get blasting media in places we don’t want it, like bushings and Heim joints. If you don’t have a trailer, PCPC offers vehicle pick up with their flatbed truck within a two-hour radius.
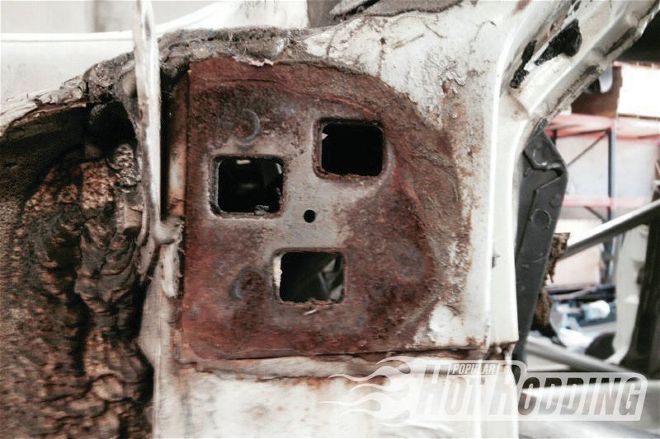 6. Speaking of hidden corrosion, most vintage cars are not painted behind parts such as door hinges, so rust can be lurking. We only had a little surface rust, but we’ve seen holes in this area before. Also, note that Garcia pinned the hinge so that it can be returned to its original position after blasting. We really appreciate that attention to detail.
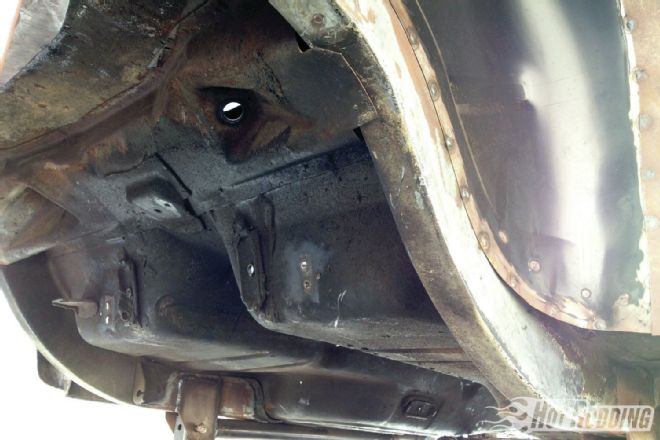 3. Forty-seven years of road grime, oil leaks, and other crud combined with factory undercoating and a bit of surface rust makes for a pretty grimy undercarriage. You could spend days getting filthy with scrapers, chemicals, and abrasives trying to remove this stuff by hand, but we promise you’ll hate life and it’s not worth it.
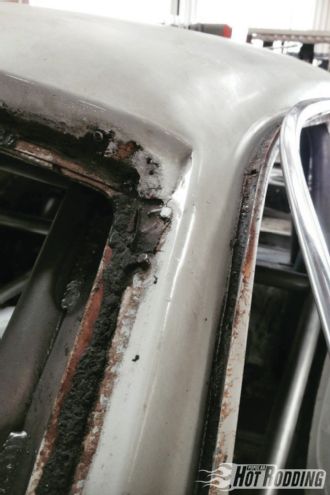 7. Windshields and driprails will be loaded with body caulk and sealant, both of which can be hiding rust underneath, so we’ll be going to bare steel here to find out. Garcia also has the magic touch to remove the driprail molding without destroying it, something we lack.
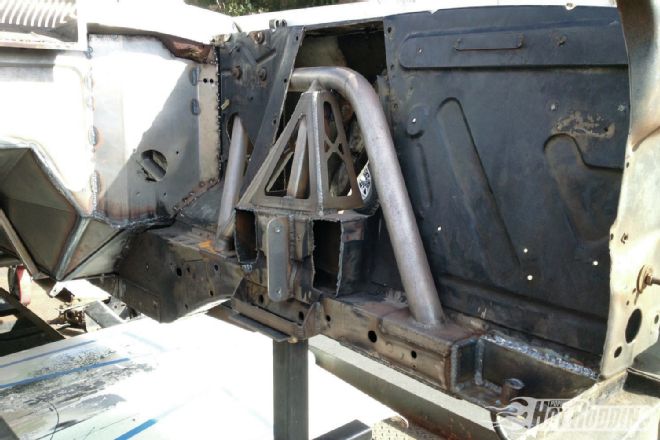 4. The inside of our engine bay isn’t too crusty, but we have a lot of complex shapes and varying surface conditions. It’s totally doable by hand, but what would take many hours to perfect will be done better in minutes by blasting.
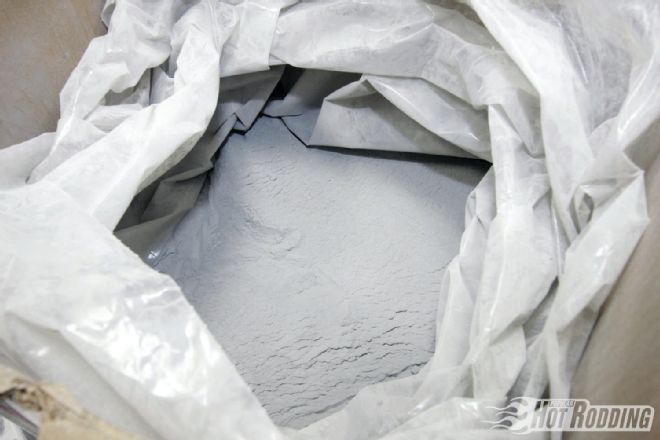
 8. For paint stripping, PCPC will be using nonabrasive plastic bead, which is essentially crushed buttons. This stuff will remove paint, but it will not build heat and will be kind to the body panels. Walnut shells are also sometimes employed for this stage, though not for our project.
 5. The Max Effort Cougar is fairly rust free (or so we thought), but the trunk panels are pretty deteriorated. We know there is cutting to be done here, but we want to blast away all the rust first and figure out exactly how much we need to replace. That brings up another excellent point: Blasting gets down into the pits created by corrosion while hand-sanding will simply go right over the top.
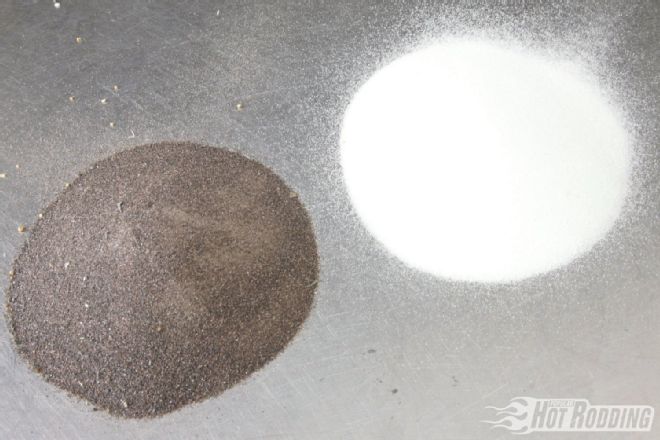 9. In areas that need more aggressive material, such as the chassis, interior, and rusted spots, PCPC will use aluminum oxide to blast away the crud. Glass beads are also sometimes employed for this, or for imparting a particular clean cast look to aluminum parts.
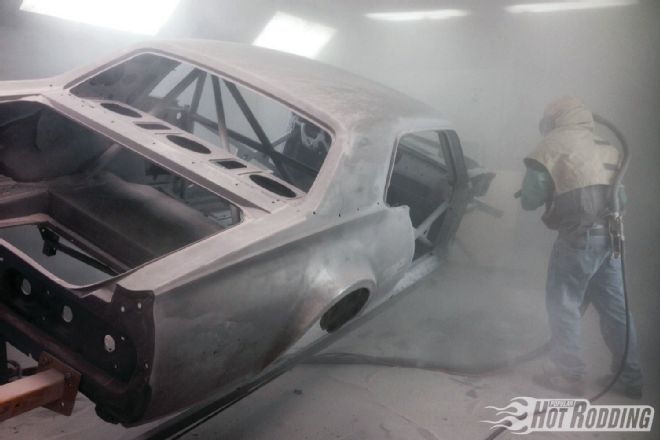 10. Inside the blasting booth is no man’s land without full respiration equipment—you don’t want to breathe this stuff! Also note that Max Effort has been transferred over to a rotisserie so the PCPC crew can spin it to get all sides and angles. This eliminates the possibility of difficult areas getting missed.
11. It’s not just point and shoot, there’s a great deal of skill involved with correctly blasting a car. An inexperienced blaster can completely destroy sheetmetal by not carefully managing the heat and pressure created by the media. The operator needs to balance psi, cfm, standoff distance, blast angle, and nozzle size to the media, material to be blasted, and its condition, all while keeping the nozzle moving constantly to ensure that he is getting the most out of each pass.
10. Inside the blasting booth is no man’s land without full respiration equipment—you don’t want to breathe this stuff! Also note that Max Effort has been transferred over to a rotisserie so the PCPC crew can spin it to get all sides and angles. This eliminates the possibility of difficult areas getting missed.
11. It’s not just point and shoot, there’s a great deal of skill involved with correctly blasting a car. An inexperienced blaster can completely destroy sheetmetal by not carefully managing the heat and pressure created by the media. The operator needs to balance psi, cfm, standoff distance, blast angle, and nozzle size to the media, material to be blasted, and its condition, all while keeping the nozzle moving constantly to ensure that he is getting the most out of each pass.
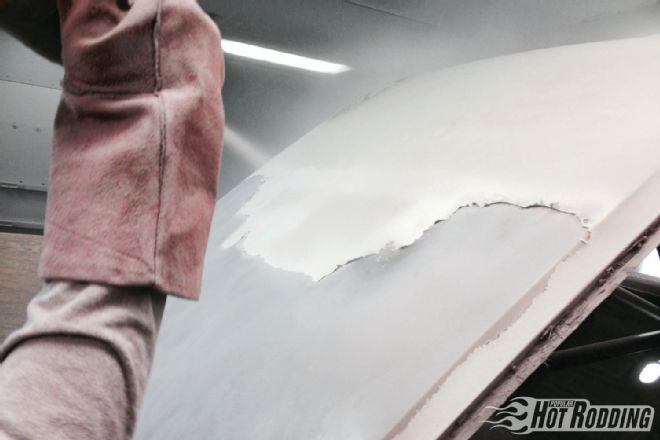
 12. Note that even after getting down to bare metal, you can still see all of the sanding and grinding marks from installing the flares. The surface of the sheetmetal is left unaltered, revealing even the lightest past bodywork. This truly gives the full story on a car’s bodywork.
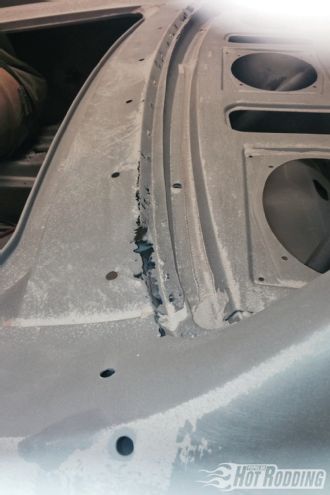 13. If there’s one negative aspect to blasting a car, it’s that it reveals the truth. We didn’t have many bad surprises, like some unfortunate customers, but we did discover more rust than expected in the trunk filler panel. We’re not intimidated though; watch for the correct ways to do this kind of patchwork in an upcoming paint and body story.
 14. Another great reason to bring a stripped car: It makes evacuating the media so much easier and more thorough since the rotisserie allows PCPC to rotate the chassis for vacuuming and blowout.
 15. We can’t just leave Max in bare metal; that’s just asking for flash rust. While simply applying a sealing coat is an option, the really trick option is to go ahead and have it epoxy primed immediately. PCPC doesn’t spray their epoxy; it’s powdercoat. Opting for this will make the paint and body process much easier as well.
 16. After being moved into a different booth, the epoxy powder is blown all over the chassis. Thanks to blasting, we’ll have a perfectly prepared surface for paintwork all over the car.
 17. With Max fully coated, it moves over to PCPC’s monster 10x10x25, million-BTU oven. It’s one of the largest in SoCal. Once the temp inside reaches 375 degrees F, the powder is cured for 20 minutes.
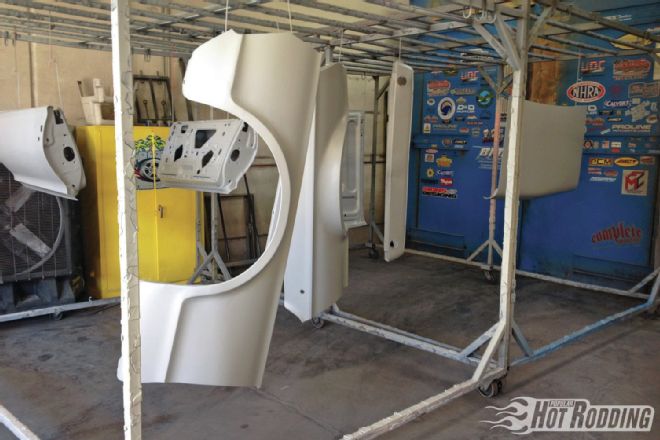 18. Max’s fenders, doors, and other detachable parts were hung separately and cooked in a smaller oven while the chassis was in the large one in the background. Doing it this way ensures we have a uniform coating of epoxy inside and out.
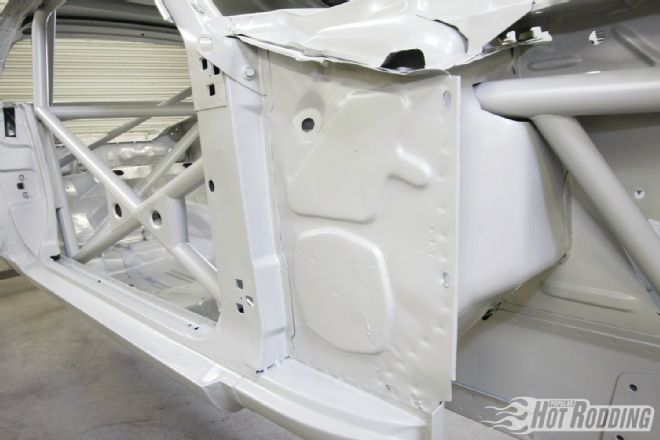
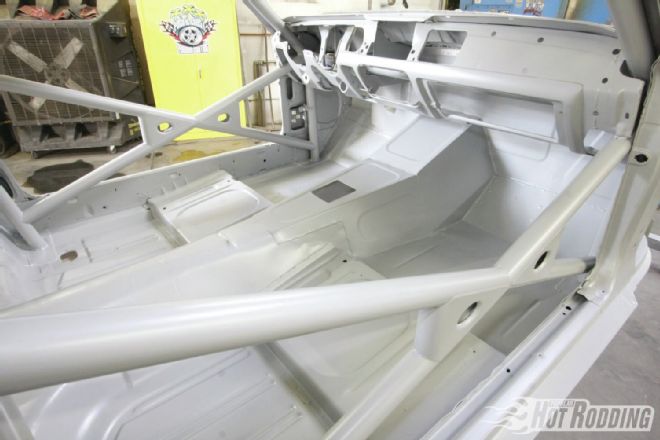 19. Once out of the oven, we’re greeted by a gorgeously uniform light gray coat inside and out. Notice all the body sealer is gone as well. It’s a totally clean slate.
20. Speaking of body sealant, PCPC removed it from the cowl area for us as well. This is a worthwhile option since this is an area known to harbor hidden rust once that sealant dries and cracks.
19. Once out of the oven, we’re greeted by a gorgeously uniform light gray coat inside and out. Notice all the body sealer is gone as well. It’s a totally clean slate.
20. Speaking of body sealant, PCPC removed it from the cowl area for us as well. This is a worthwhile option since this is an area known to harbor hidden rust once that sealant dries and cracks.
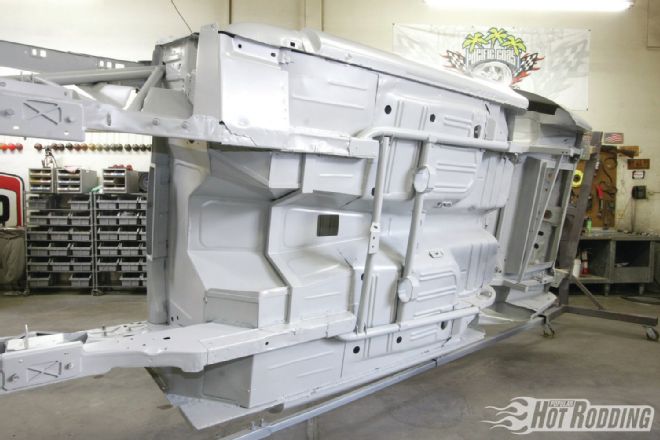 21. Look at that clean undercarriage! Man, we wish we would’ve worked on something this nice the whole time! Take our word for it, save the time, money, and heartache. Get your project car blasted right up front.