In our previous installment (Nov. 2013 to be exact) we illustrated the process by which to hand-construct a custom hood from aluminum sheet at Fabian Valdez's Vintage Hammer Garage. As promised, albeit an issue later than anticipated, here's the follow-up exercise: adorning said bonnet with period-style louvers.
Now, while the last procedure is by all means something your average hot rodder could/should perform with even the simplest of hand tools and moderate skill set, this unfortunately does not fall under that category...well, not exactly. First off, the art of louver punching is pretty much just that—an art, something requiring skillful hands and a trained eye. Secondly, the practice requires the proper tooling. Sure, hobbyist louver presses are available, and work well within their limitations. However, for a true vintage louver, the right press equipped with the right dies is important.
Fortunately, Valdez possesses all of the above requirements, and as such, will demonstrate putting his acquired know-how to work for the following how-to, despite it being more of a "see how it's done" exercise than anything else!
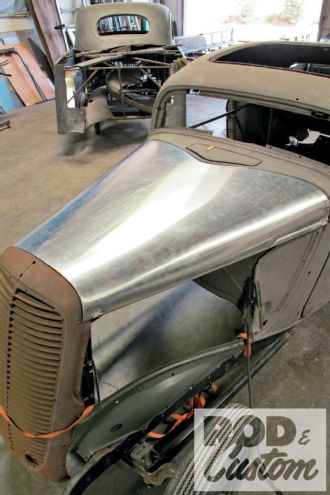 1. If memory serves, you’ll recall the custom aluminum hood we followed the hand-fabbing of back in our Nov. ’13 issue. Fit, finished, and secured appropriately with deadstock Dzus fasteners, the hood’s now ready for its next course: louvering.
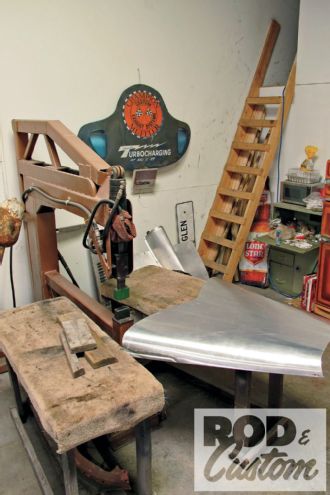
 2. Vintage Hammer Garage’s Fabian Valdez acquired his louver installation techniques, as they were, the old-fashioned way: self-taught trial and error. His tool in which he applies this portion of his trade is an old-world hydraulic press specifically built by an old louver master, Larry Braga, in the ’70s.
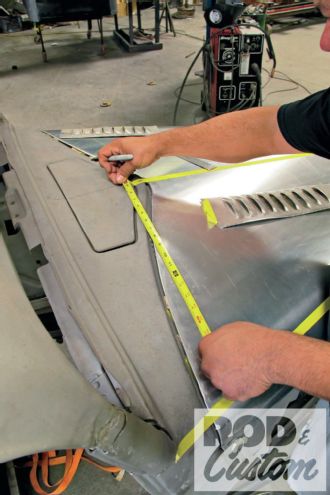
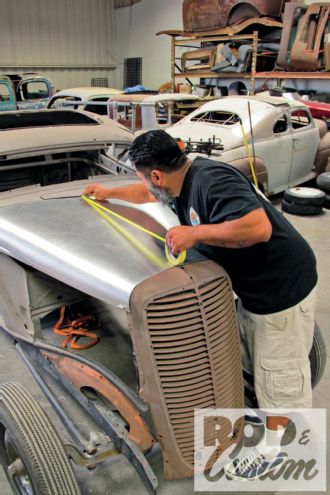 3. After visually plotting out his louver layout as shown in the previous shot, Fabian continues by accurately dividing his hood in equal segments based on the shape of not only the hood, but the entire vehicle itself. It’s not simply laying down tape, however.
 4. Louvers are visually tricky—to install as well as to look at. No car is flat, therefore, no row of louvers is a basic, straight, even row of louvers.
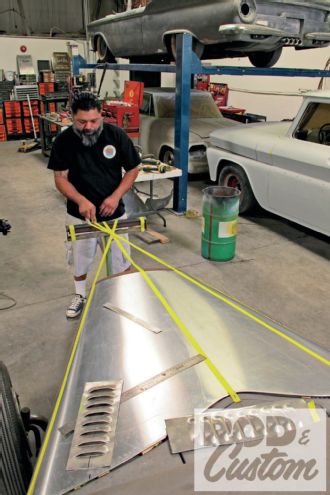
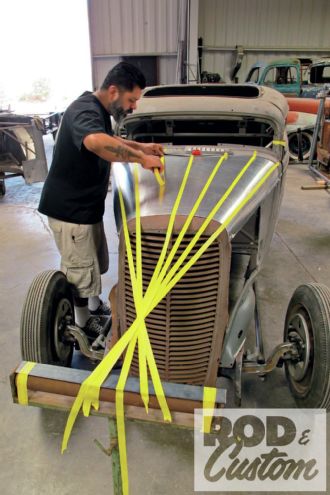
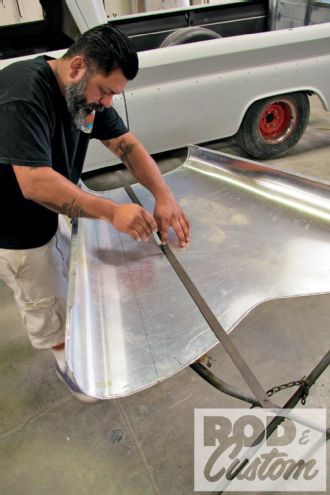
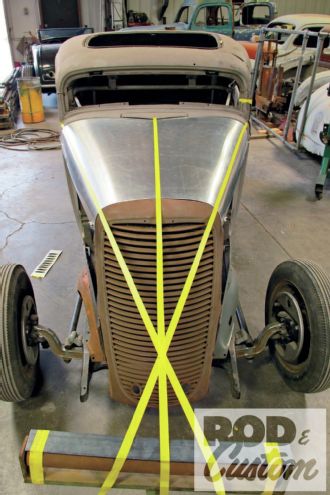 5. It’s all about perspective. If the perspective’s off, the entire layout’s for naught. Using the natural horizon lines on the ’34, Valdez visualizes the louvers flowing with and lays tape accordingly.
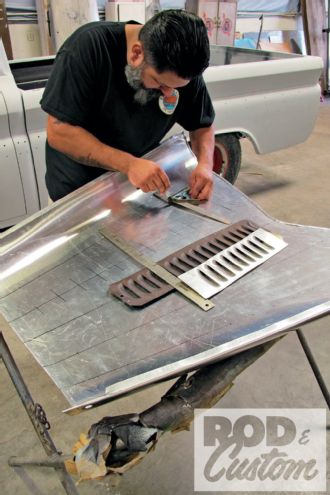
 6. With the hood sectioned into thirds to start with, Valdez uses pre-louvered “templates” to plot and mark the rows for the 3-inch louvers.
 7. Admittedly, the prep work consumes the vast majority of time—for the entire job.
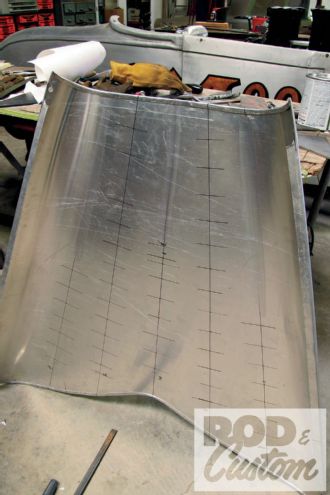
 8. Once Valdez has created his Sharpie marker floorpan on the top side, more taping ensues.
 9. Since the louvers are pressed from the bottom, the pattern they follow must be transferred.
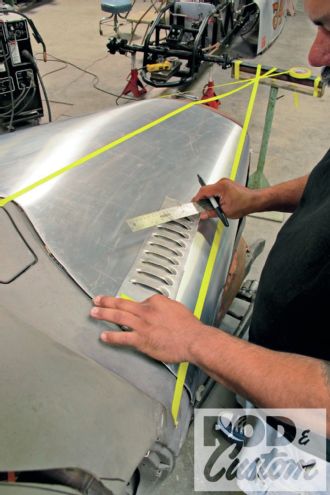
 10. The center of each row is marked at (and over) the edge of the hood on each end. Reason for centering rather than perimeter outlines: it’s easier to control accuracy when punching.
 11. The dots are connected via straightedge, as shown.
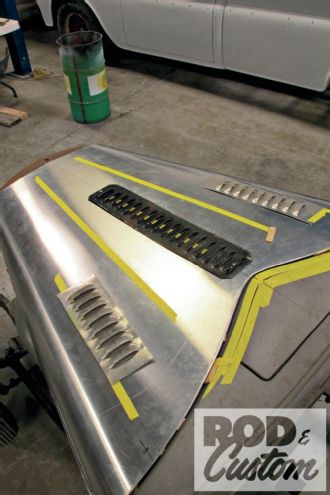
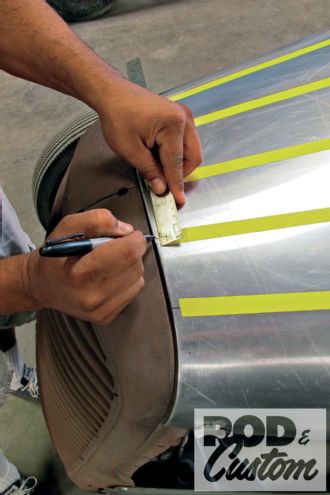
 12. Between the sample panels, straightedge, and bevel protractor, Valdez plots out each individual louver for the five “uneven” rows he’ll be adorning with rearward-facing mini vents (aka, louvers!).
13. Valdez continues to plot each louver.
12. Between the sample panels, straightedge, and bevel protractor, Valdez plots out each individual louver for the five “uneven” rows he’ll be adorning with rearward-facing mini vents (aka, louvers!).
13. Valdez continues to plot each louver.
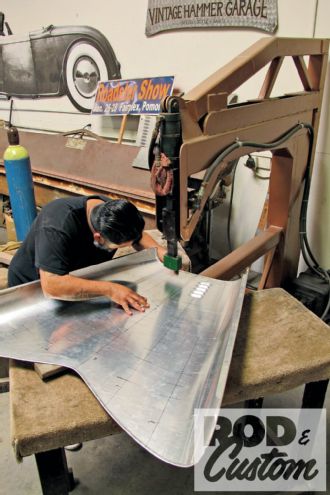
 14. Ready and, for all intents and purposes, willing for its time in the hydraulic press, the hood’s clean-cut appearance will soon—very soon—be a thing of the past.
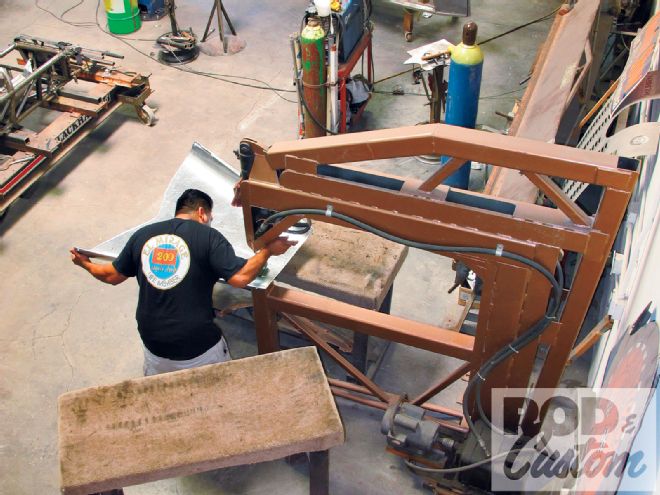
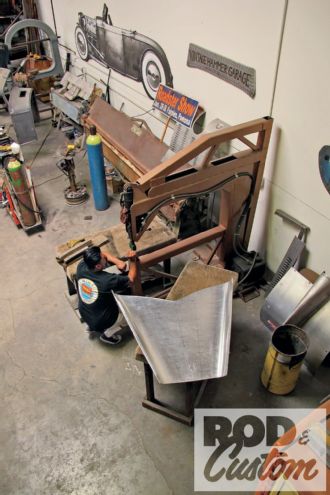 15. With the hood waiting patiently in the wings, Valdez readies his vintage louver puncher. The massive press, handed down from an old-world louver artisan, is clearly not basic hot rodder garage fodder, though according to its current caretaker, a necessary means to properly do the task at hand.
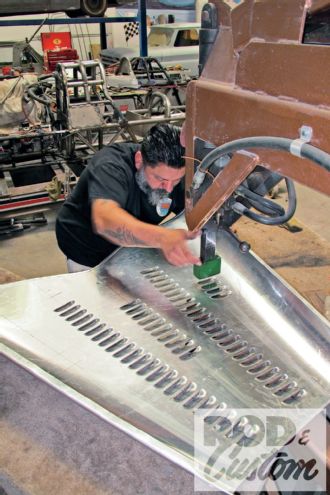
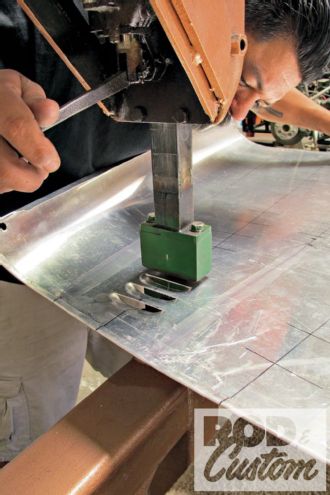 16. Note that both male and female dies have been center-marked—this allows Valdez to keep an eye on his holes from both ends.
 17. In the event that one is punched a bit off center (due to earthquake, power outage, and so on), the margins between each louver allow them to be slowly walked back in line, with no one but the puncher the wiser.
 18. Louvers are punched evenly in short rows from side to side, not top to bottom.
 19. This is done in an effort to maintain overall congruity—i.e. louver harmony—as well as avoid damaging any existing louvers in the process.
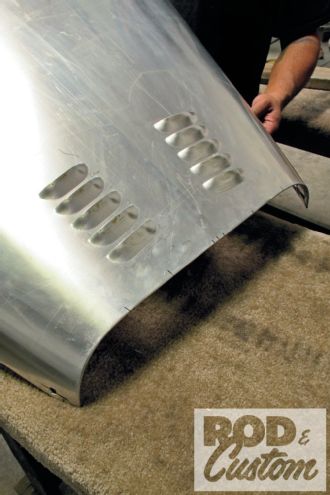
 20. Nearing the homestretch, in all, the actual adding of louvers took approximately a quarter of the entire job, if that.
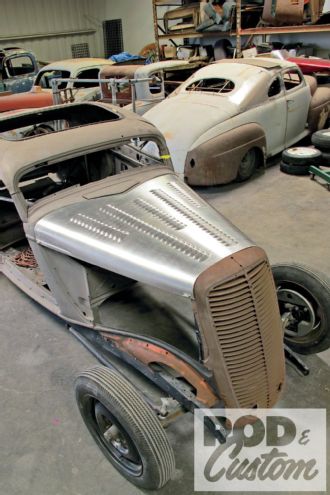 21. Job done … and quite well at that. The addition of louvers, in the particular layout chosen, add even more land speed influence to an already “salt-flattened” ’34 coupe.