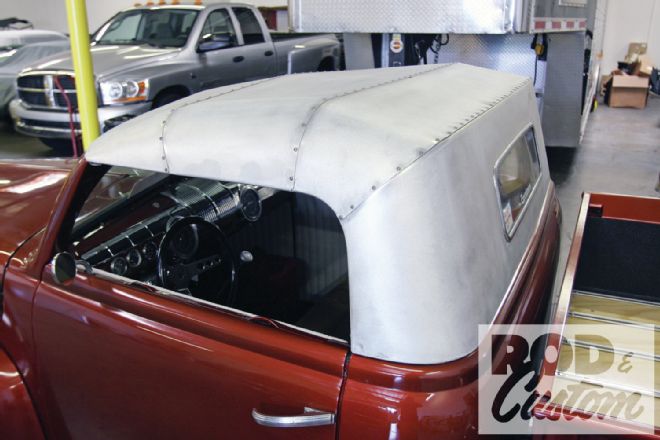
It's hard to believe, but my 1946 sedan-turned-roadster pickup is almost finished. I mean actually finished, painted, upholstered, and lift-off hardtop roof finally covered. It's been a long time since I had a finished car! That removable roof had been the final piece of the puzzle (OK the seat upholstery is the actual final piece, but that's in the works as I write this), as I'd been driving the truck around with the roof in bare aluminum for 2 1/2 years.
It had always been the plan from the start to get it padded and covered, to resemble a folding roof, hence the use of top bows and flat sections between them, as a genuine early folding roof has no compound curves. But I never seemed to get around to it. The truck was on the road, the roof did its job, and all my money for over a year was ploughed into my Bonneville race car.
However, I figured its time had come, so during our discussions with Luis Loyola at Loyola Auto Interiors regarding the Tribute T interior, we arranged for him to tackle my roof once we got the T back. I couldn't have hoped for a better result, with the outside covered in high-density foam, then Mercedes cloth, and the inside treated to a foam-backed headliner, but keeping the top bows visible. It looks for all the world to a casual observer as if it would fold, yet is solid, and still easily removable via a few bolts.
 1. It’s been a while, but we showed you how I made the roof from 3/4-inch aluminum tubing skinned with 14-gauge aluminum sheet back in March 2011. The skin was screwed to the tubing and welded around the perimeter.
 2. The roof was prepped first using an 80-grit disc on a DA sander followed by a Scotch-Brite and degreaser. Note the screw heads have been ground down so as not to be visible through the canvas and foam padding.
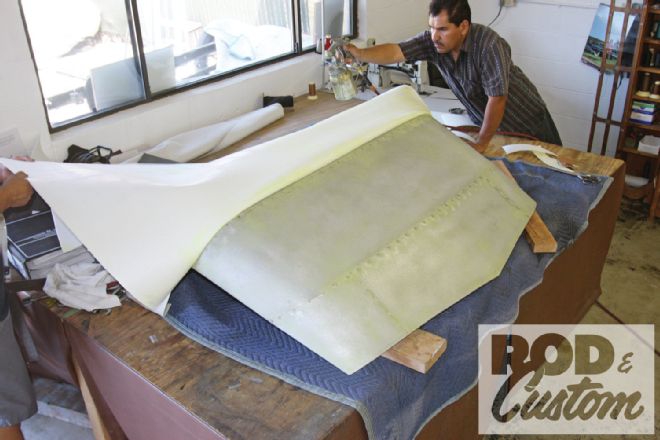
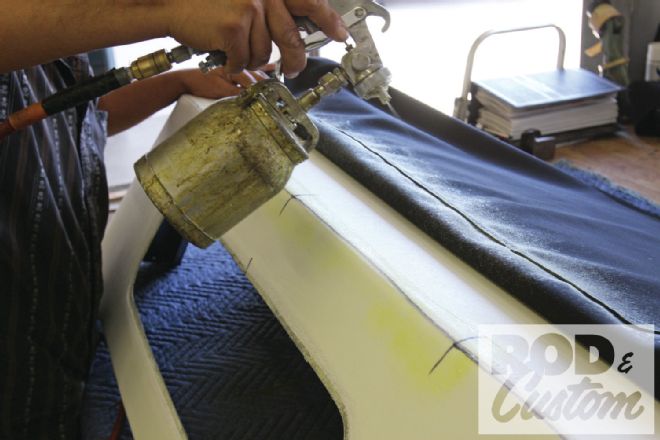
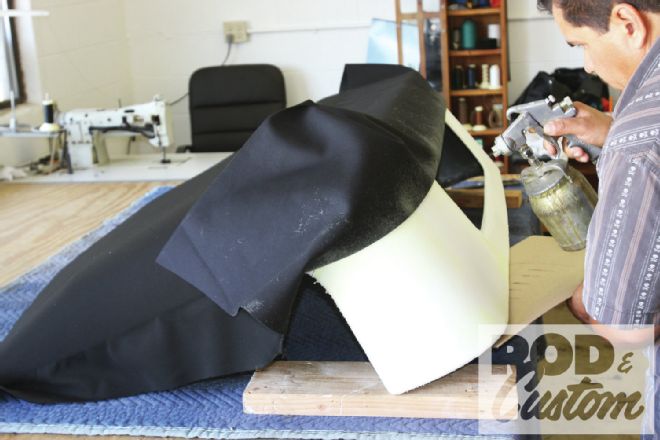
 3. High-density 1/4-inch foam was trimmed to size, then scuffed using 600-grit sandpaper to provide a prep, before Jose applied industrial contact adhesive to both the foam and the aluminum on the rear two sections of the roof.
 4. The foam was glued in place, trimmed oversize around the lower edge, cut around the window opening, and the overlap trimmed to fit along the ends of the rearmost “bow”.
 5. Though the screws were ground down, their heads are still visible along the rearmost bow, but we’ll deal with that later on.
 6. Contact adhesive was next applied to the front two roof sections and the foam, and allowed to tack off …
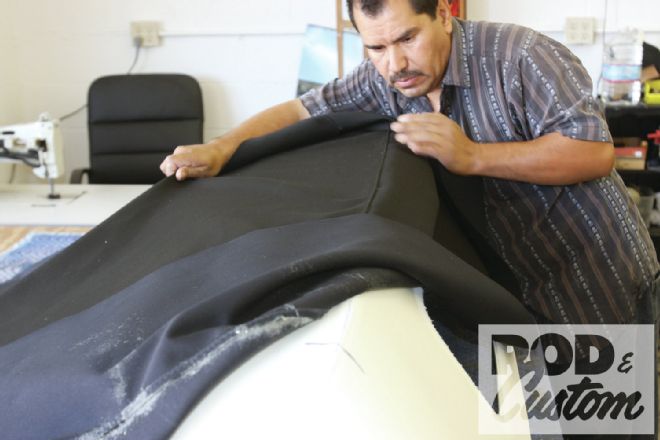
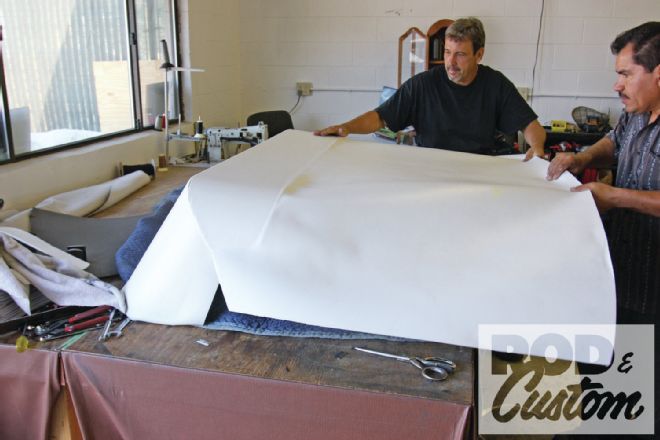 7. … before Jose and Luis Loyola carefully pulled and stretched the top section into place, avoiding wrinkles.
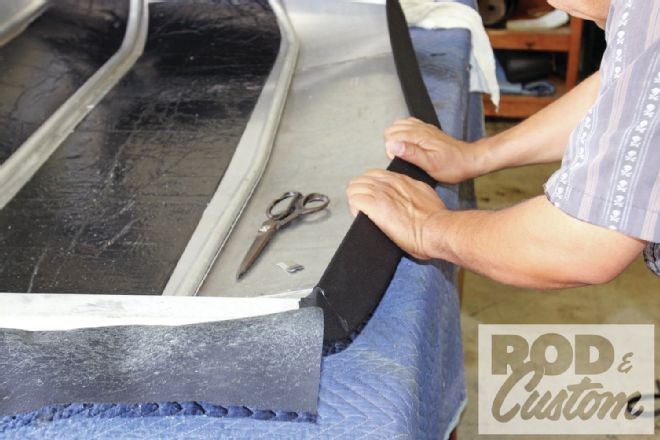
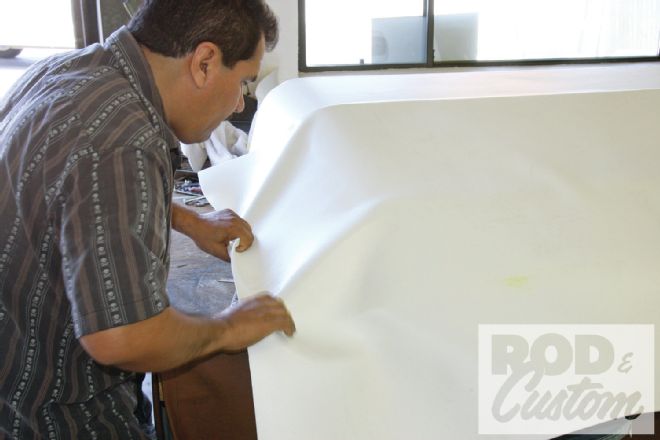 8. The sides were then worked into position, again avoiding wrinkles.
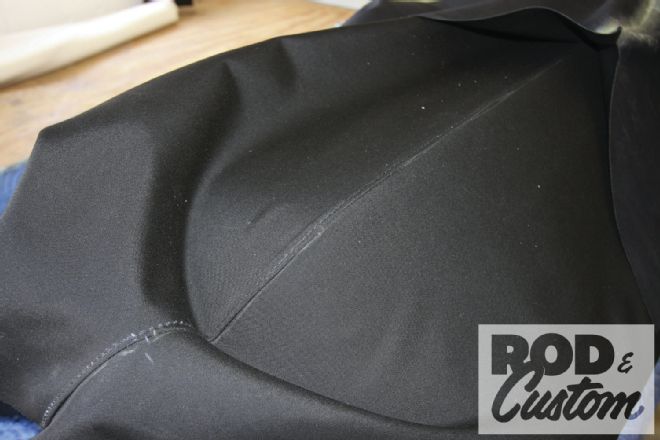
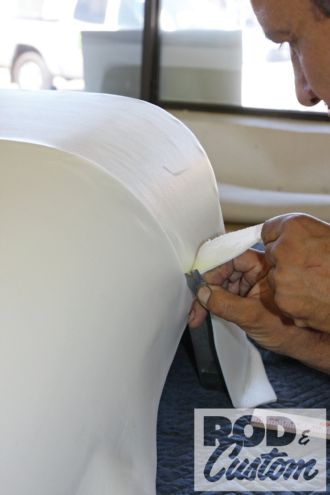 9. Once more, the overlapping foam was trimmed along the ends of the bows, where they curve down to the window aperture.
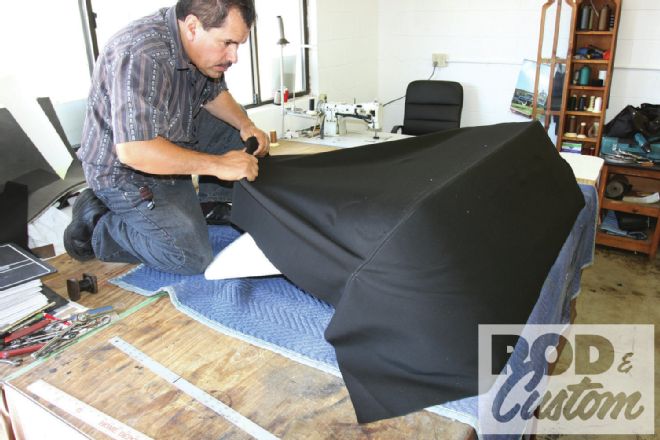
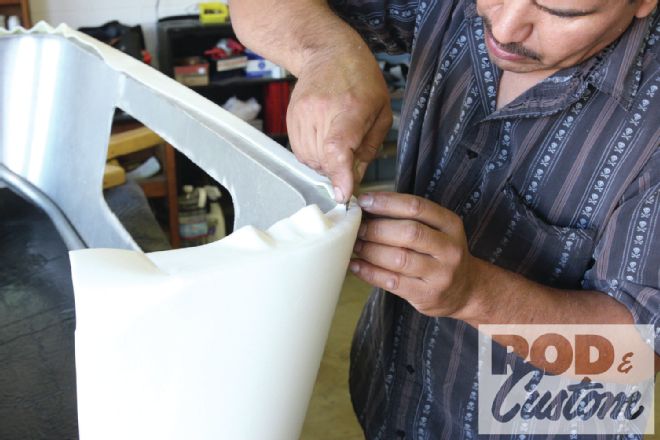 10. With more glue applied, the foam was pulled over the rear lower edge of the roof, then trimmed 1/2 inch from the edge.
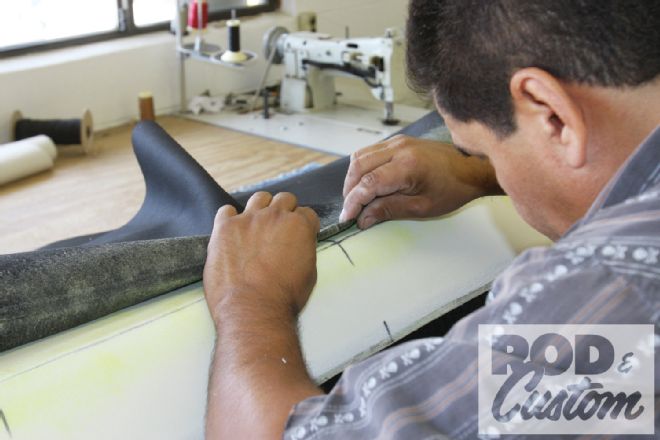
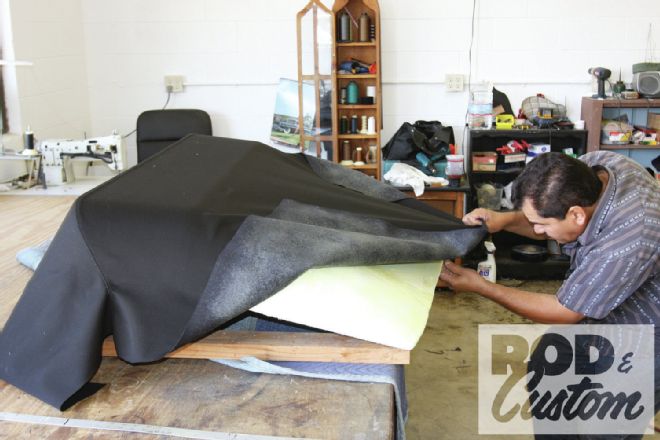
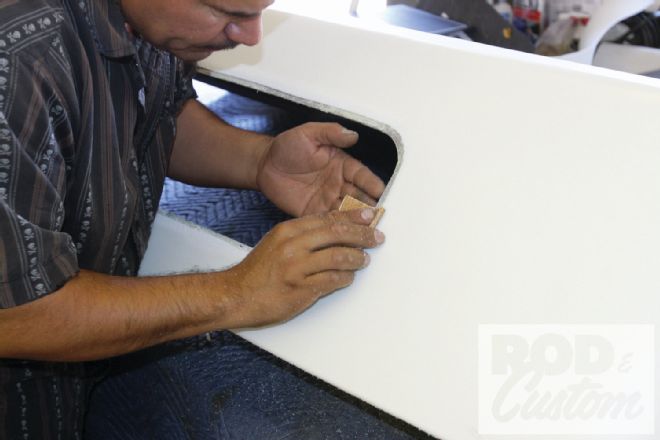 11. The foam was trimmed away from the edge of the window aperture by the thickness of the window frame, as the latter wasn’t designed to mount through the combined depth of aluminum, cloth, and foam. The edge of the foam was sanded with 60-grit paper for a smooth transition.
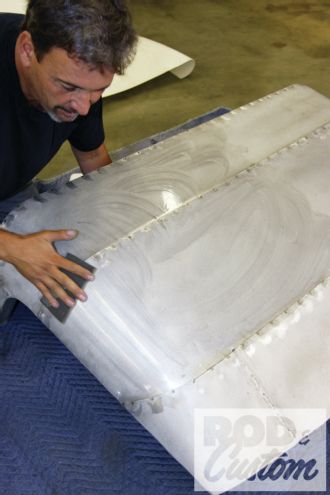
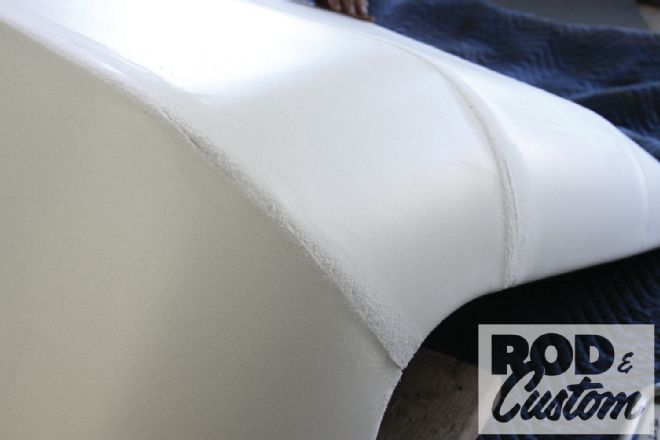 12. As noted in caption 6, the screw heads, though reduced, still showed through the foam. Such high-density foam was used as it is sandable. Here it has been sanded at the joint at each bow, the screw heads now invisible.
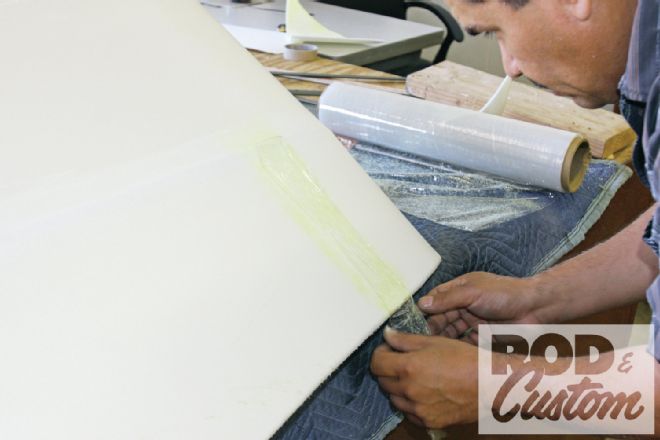 13. To smooth the sanded areas (the area above the joints in the front section of the aluminum roof skin are shown here), Jose glued sections of cling wrap over them.
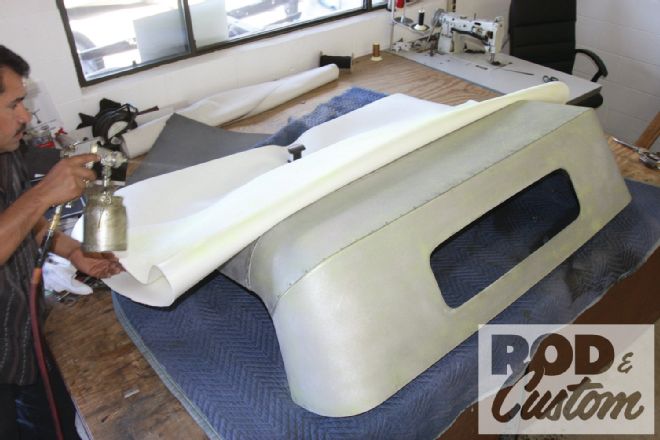
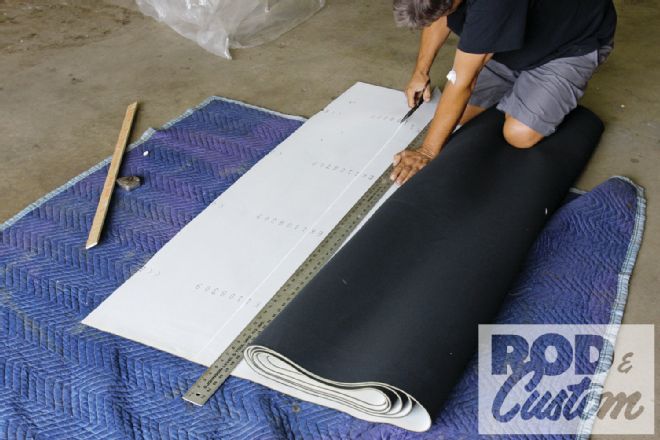
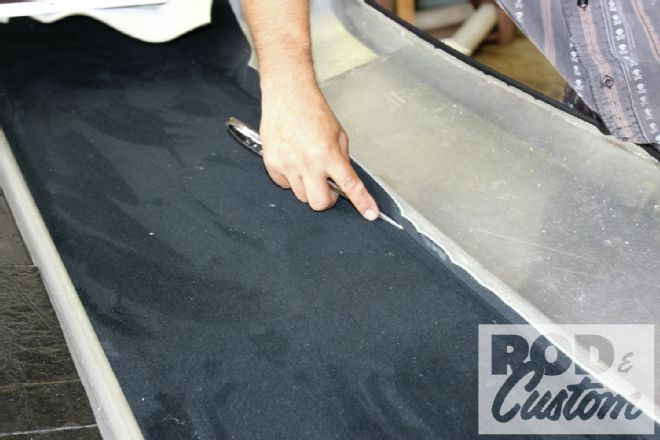
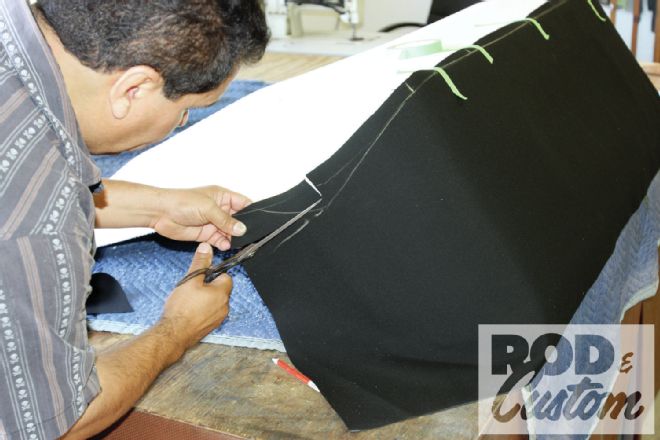 14. Black Mercedes convertible top cloth was trimmed to size and taped in place on the rear of the roof, the joint at the rearmost bow marked and cut to shape.
 15. The same was done with the larger section of cloth that covered the remainder of the roof.
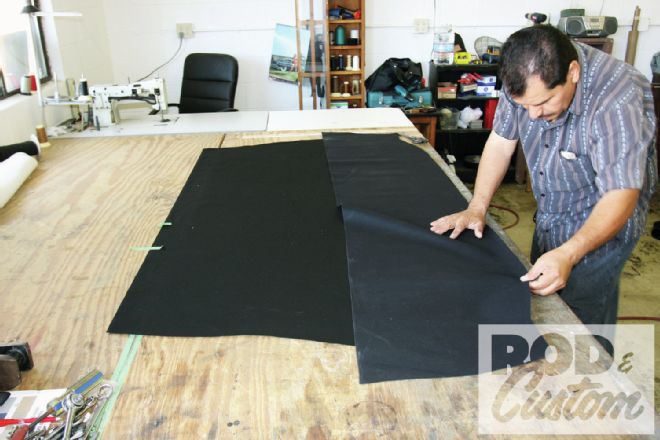 16. The two pieces were then laid one on top of the other as shown …
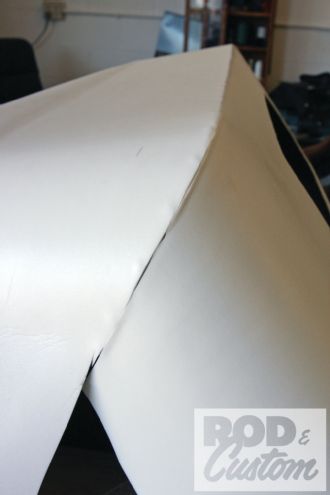
 17. … stapled together at the edge, and marked along the intended stitch line.
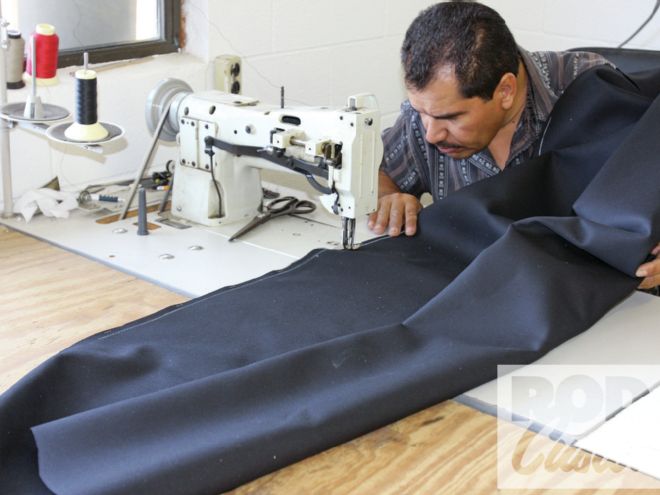
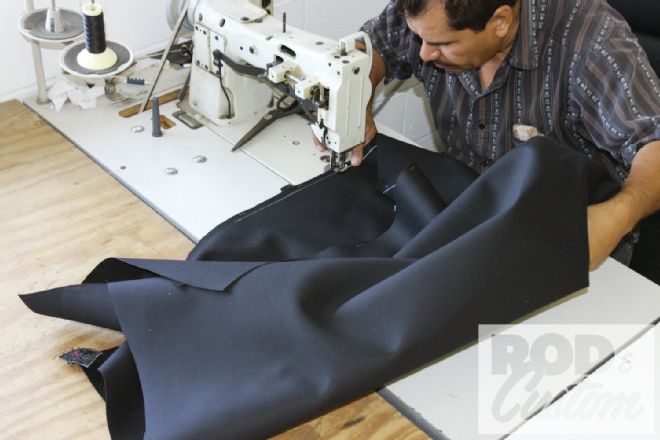 18. With the cloth "inside-out" the first line of stitching was undertaken.
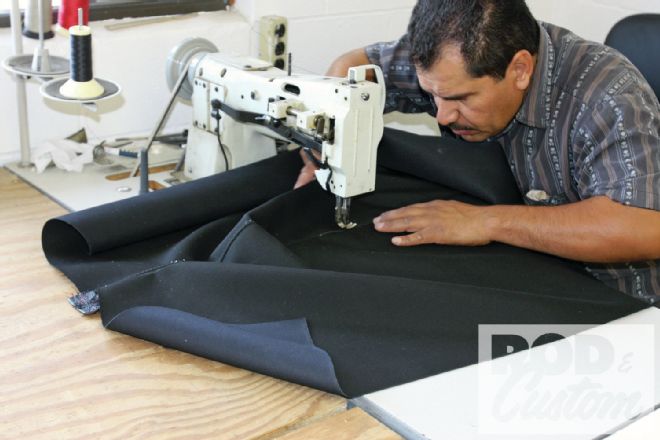 19. With the first part of the seam sewn, the excess was trimmed slightly, losing the staple holes, before the cloth was turned over and the top stitch sewn.
 20. The backside of the seam was glued to the cloth before Jose applied adhesive to both the cloth and the center of the foam along the rearmost bow.
 21. The cloth had been marked with a centerline prior to stitching, which was now lined up with the centerline marked on the foam.
 22. Jose now stretched the cloth into position, aligning the seam with the bow.
 23. Next, the corners of the bow were tackled in a similar manner.
 24. Then the top of the rear section above the window was glued and stretched.
 25. Obviously adhesive was applied between each of these steps, but we’ll just show the order in which the cloth was fitted. Here Jose is stretching the cloth over the section of roof between the rear and center bows.
 26. Note whichever section he’s working on, Jose starts at the center and works his way to the edges.
 27. The curved sections are the hardest to pull the cloth over without getting creases. Experience helps here!
 28. The lower part of the rear is the last section to be covered.
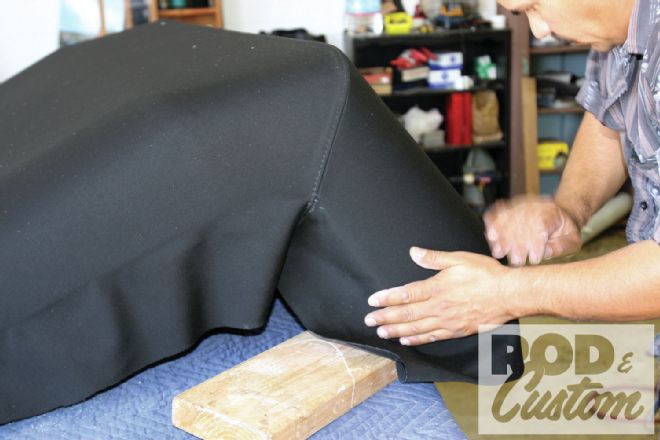 29. Again Jose works from the center to the outside corners.
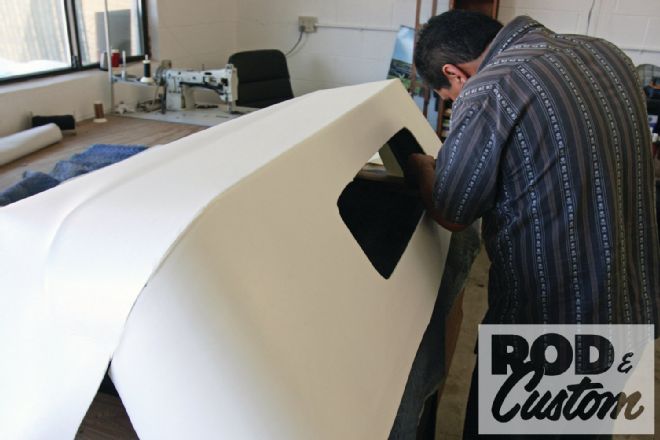
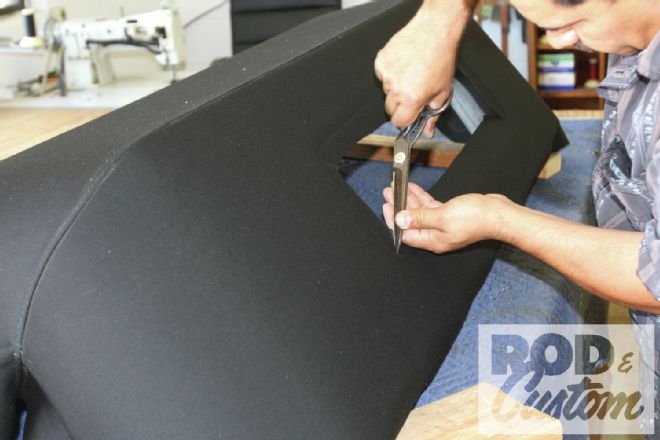 30. The rear window is cut out, leaving a couple of inches of material around the edges.
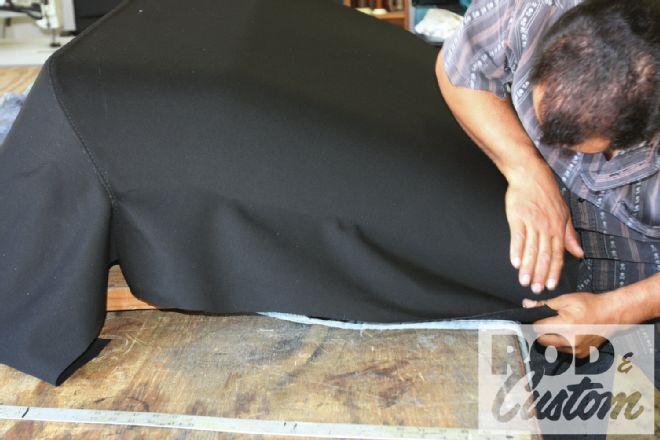
 31. The roof was turned upside-down in order to glue and stretch the cloth over the edges. Note the length of card, preventing adhesive overspray.
 32. Jose trimmed the cloth so there was enough material to fold over the windshield header and back again on the inside.
 33. Moving back to the rear window now, the roof was upside-down, the cloth was folded over the aperture, then trimmed 1/2 inch from the edge.
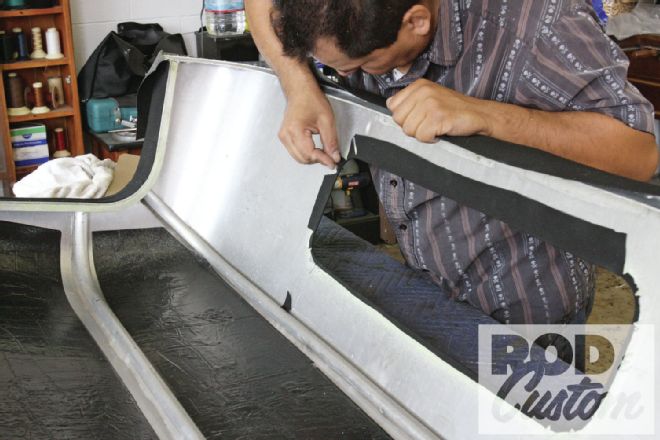
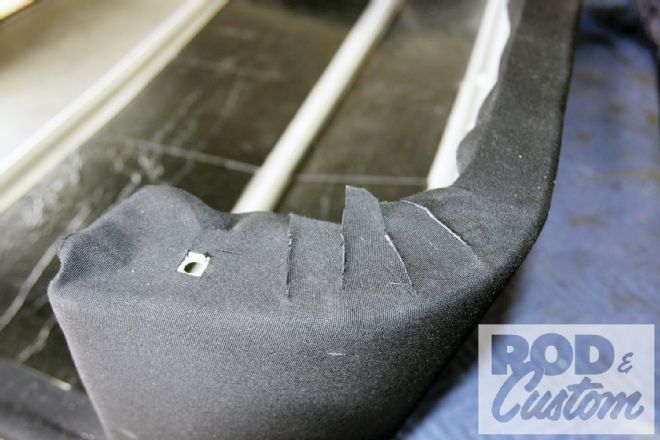 34. This shows the return lip that bolts to the rear of the cab bodywork, partway through trimming. Again the cloth was folded over, then inside, but the corner had to be pie-cut to prevent creases, and the cloth trimmed for access to the mounting hole.
 35. While Jose was finishing off the return edges of the roof, Loyola measured, marked, and cut sections of foam-backed headliner material to fit between the bows.
 36. After applying adhesive to both aluminum and the backing foam, the blunt end of a pair of scissors was used to push the headliner under the bows, prior to trimming off the excess.
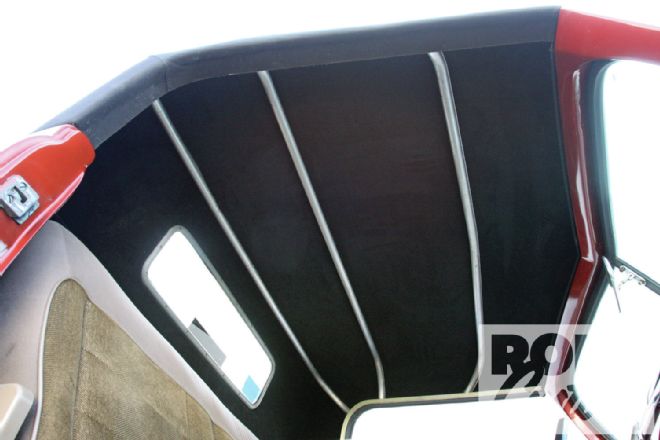 37. Here’s the inside of the finished roof. I specifically asked for the bows to be left visible, again to give the illusion of a folding roof.
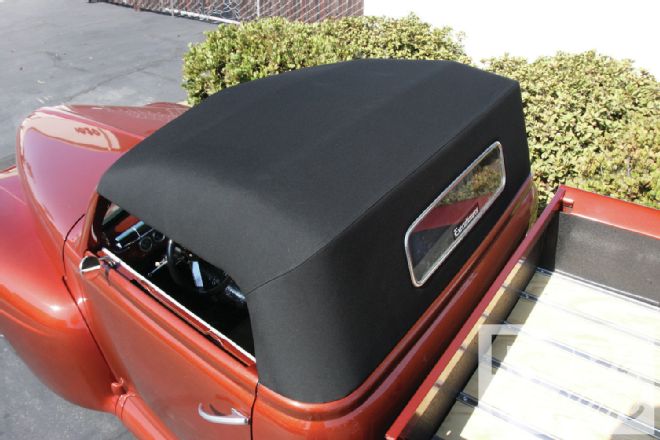 38. I’m exceptionally pleased with the result, as it really does look like it could be folded down, rather than lifted off, thanks to the efforts of the guys at Loyola Auto Interiors.