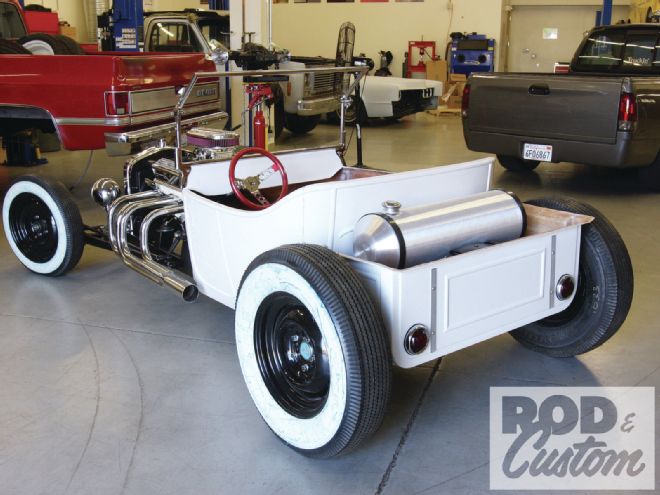
Looking at the pictures hereabouts, it would appear we jumped a long way since last month, doesn’t it? Mounting the body to a chassis can make it seem that way, and can be a huge morale booster when tackling a project. What we’ve actually done in the intervening weeks is mount the body and bed, gas tank and radiator, and install the windshield, lights, and engine dress-up items. However, this part of the build has involved a certain amount of fabrication, drilling and tapping holes, and cutting fiberglass. Now that we’ve stopped itching, we can write about it!
As supplied by Speedway, the body has six small holes in the floor that align with the top of the chassis ’rails. These were used to mark the chassis, which we then drilled for rubber well nuts. With the body mounted, we trimmed the sides of the pickup bed to clear the suspension and rearend (the Tribute T isn’t designed to have a pickup bed) and bolted the bed to the tub, then fabricated mounts to bolt the rear of the bed to the frame. With the windshield mounted, and the ’50 Pontiac rear lights fitted, all we need to do before the body gets prepped for paint is cut the holes in the dash for the gauges.
We deliberately powdercoated the chassis at the very beginning of this project, to show that the T could be built without having to do any welding, so everything we attach to the chassis has to be drilled and tapped. As the framerails are relatively thin, we opted to employ fine threads wherever we had to tap, so the gas tank, radiator and grille shell, and headlights are all secured using 5/16-24 bolts.
It may look like a car at this point, but we still have paint, upholstery, and wiring to come. We are, however, still on schedule, and next month should see it in color. See ya then!
 1 The rear of the chassis was drilled and tapped for 5/16-24 threads, to accept bolts mounting the gas tank straps.
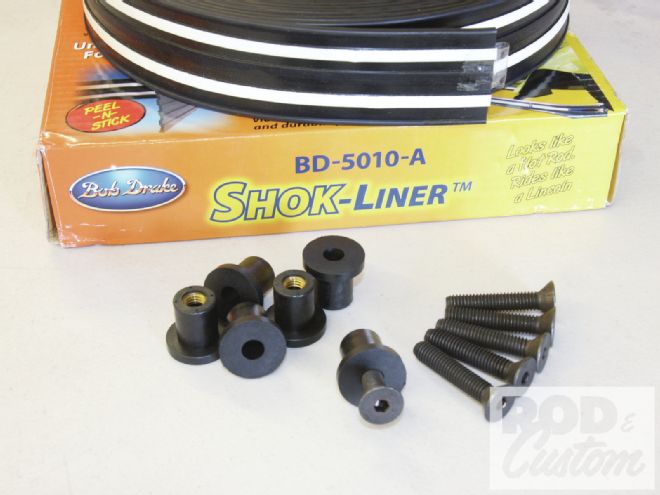 2 Speedway Motors supplied a roll of Bob Drake–sourced Shok-Liner, to insulate the body from the chassis, as well as six rubber well nuts to mount the body. When the bolts are tightened, the well nuts expand inside the chassis and secure the body.
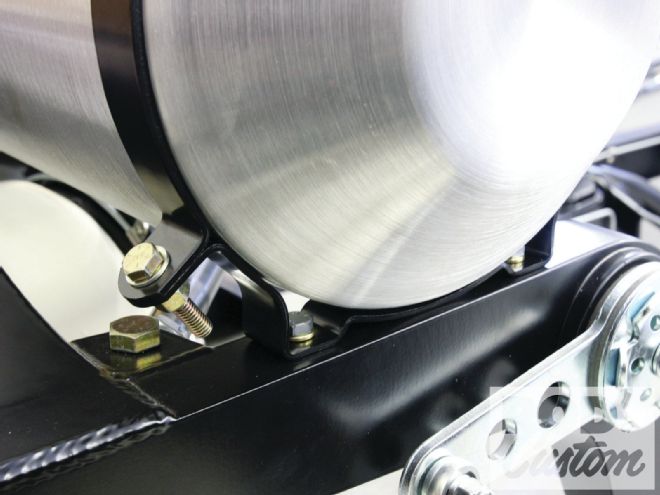
 3 Two 1x3/16-inch steel straps were fabricated, drilled, and countersunk to accept the well nut bolts supplied. The guide holes in the floor were enlarged to accept the bolts, 3/4-inch holes drilled in the top of the framerails, and the well nuts installed. The steel straps spread the load better than six large washers could.
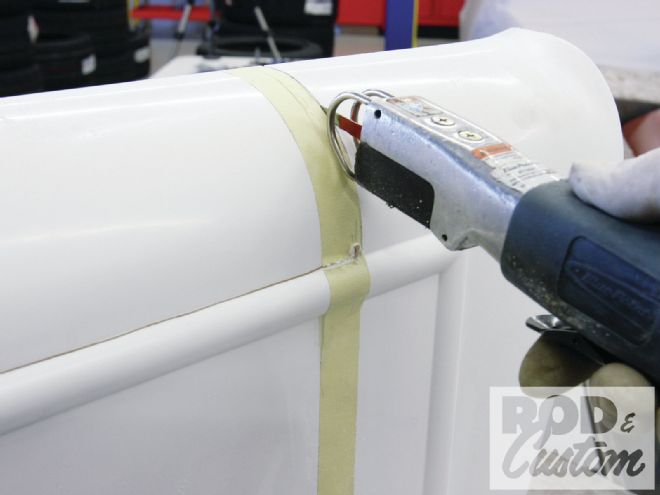
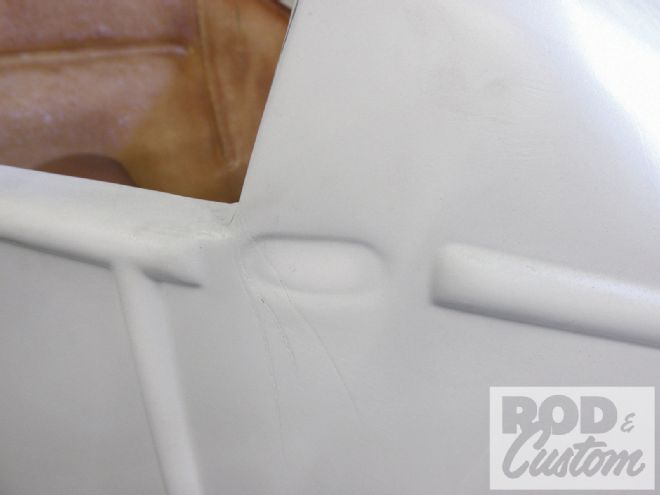 4 This recess on the side of the cowl denotes where to drill the body to accept the lugs on the rear of the windshield posts.
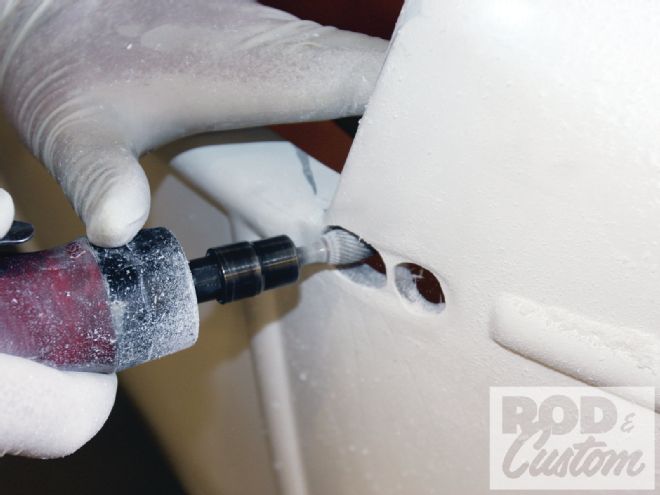 5 A die-grinder was used to open out the holes after drilling as the lugs are tapered. Note the use of gloves to combat the itching caused by fiberglass dust.
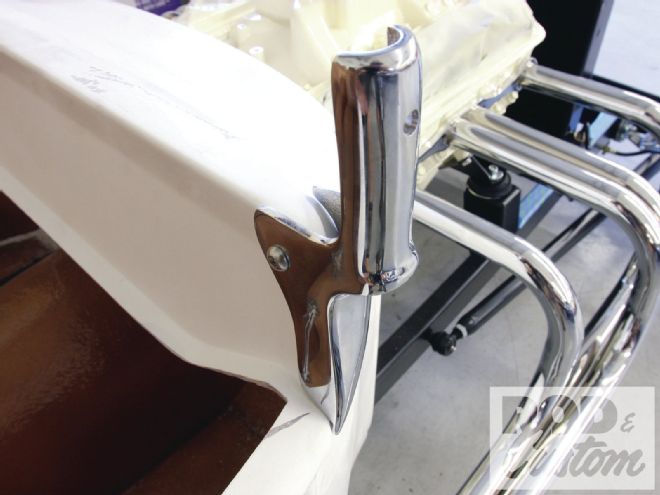
 6 After a few trial fits, the windshield posts mount flush with the body.
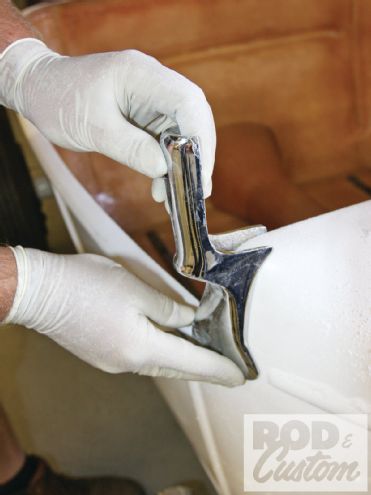
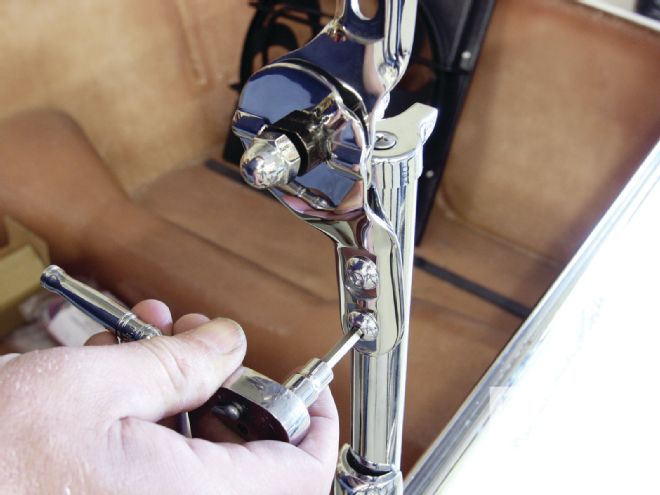
 7 As well as nuts and a steel reinforcing plate behind the lugs on the lower section of the posts, a stainless Allen-headed bolt secures the post through the dash.
 8 The Speedway windshield frame consists of a chromed steel frame with aluminum slugs that slide inside it. These are tapped for all necessary hardware. Also shown is a frame cap, which retains the glass in the channel and bolts to the top of the slug.
 9 We opted for the two-piece windshield. The upper and lower parts of the frame are identical, joined by a two-position hinge in this case. The Allen bolts locate through the frame into the aluminum slug.
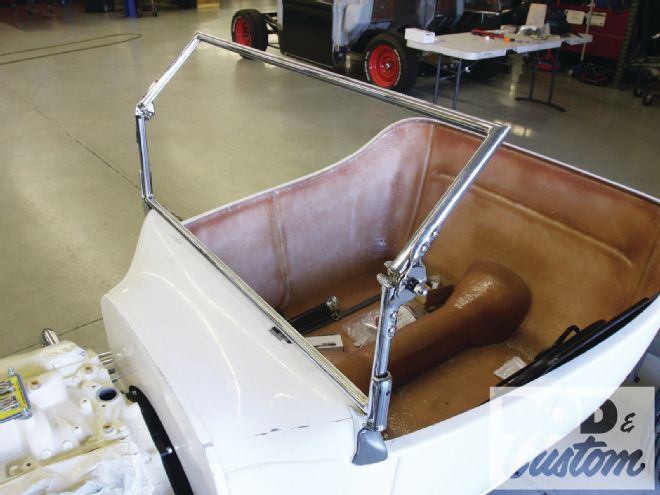 10 The finished frame, with the hinge set in its angled position. Now for glass.
 11 Though the Tribute T kit isn’t intended to use a pickup bed, we wanted to fit one. This meant trimming the sides around the rearend and suspension. The bed is upside down in this shot.
 12 Looking down into the now-fitted bed, you can see how much we had to clearance the side panels for suspension travel. The curved forward edge of the bed will only locate perfectly in one place on the body tub.
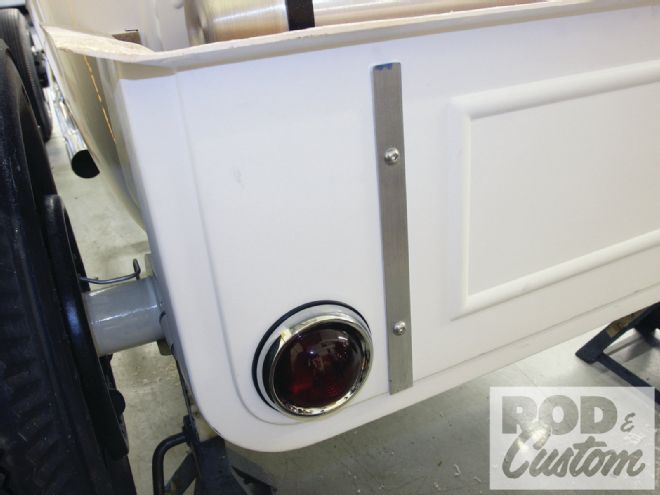 13 There are a couple things going on here. First we mounted a pair of ’50 Pontiac taillights low in the corners of the “tailgate” where their edge matched the radius of the bed corner. Secondly, we fabricated a couple of fake hinges from 1-inch aluminum strap (these will likely be replaced by polished stainless straps), which do double duty of both improving the appearance of the rear …
 14 … and providing support for the bolt that mounts the bed to these fabricated brackets attached to the chassis. These will support the bed when the inevitable happens and someone decides to sit on the bed cover!
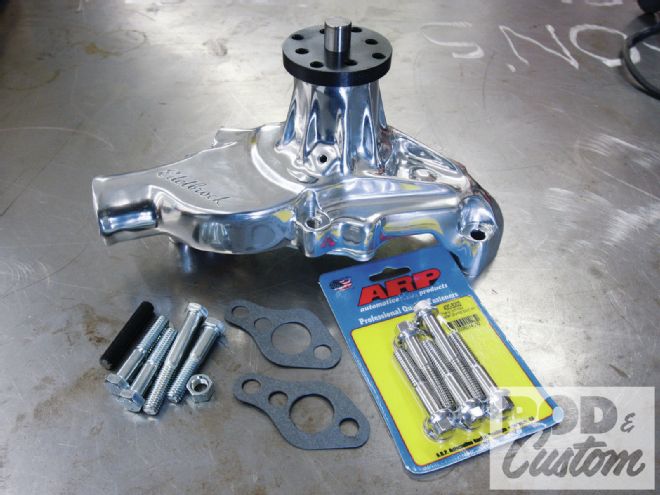 15 We used ARP bolts for much of the engine ancillary components, including when installing the Edelbrock polished aluminum water pump.
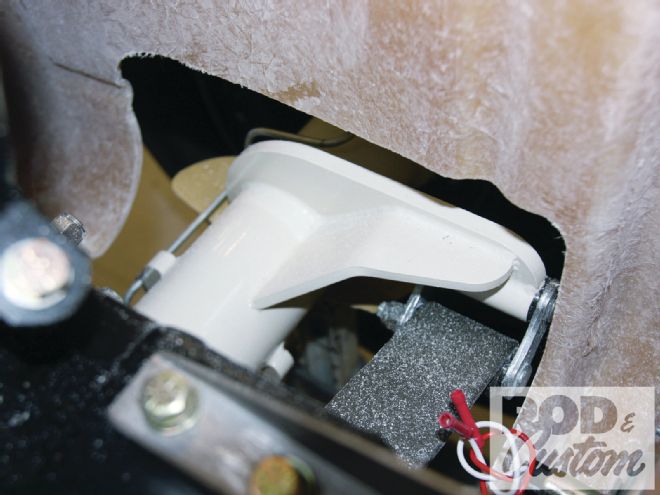
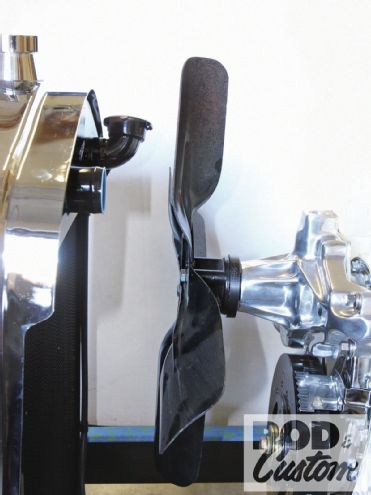 16 Our first real problem of the build came when we fitted a regular steel fan. Not only did the blades tower above the radiator top tank, but they would also slice through the top hose!
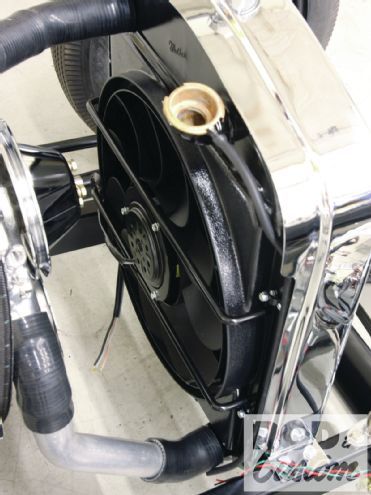
17 Left: Rethinking the fan situation, we ordered an electric fan from Vintage Air. The perfect width for the Walker radiator, it just required slight trimming of the top and bottom of the shroud.
16 Our first real problem of the build came when we fitted a regular steel fan. Not only did the blades tower above the radiator top tank, but they would also slice through the top hose!
17 Left: Rethinking the fan situation, we ordered an electric fan from Vintage Air. The perfect width for the Walker radiator, it just required slight trimming of the top and bottom of the shroud.
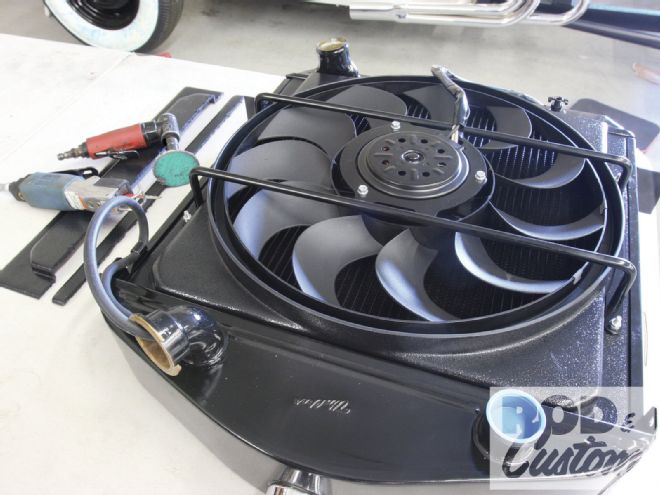 18 A few minutes work with an air saw and the shroud fit perfectly. The edges even fit behind the side plates of the radiator.
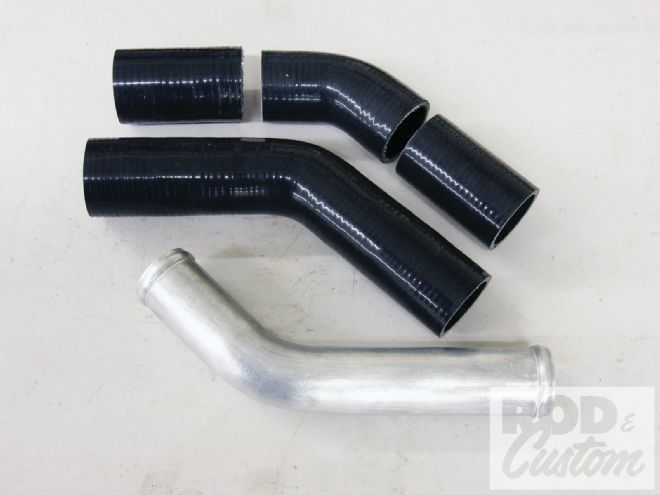 19 Speedway supplied a number of 45- and 90-degree silicone rubber hoses, plus a 45-degree aluminum tube for the lower hose and a straight tube for the upper. From this we fabricated our radiator hoses. We used a pair of 45s for each, trimmed to length.
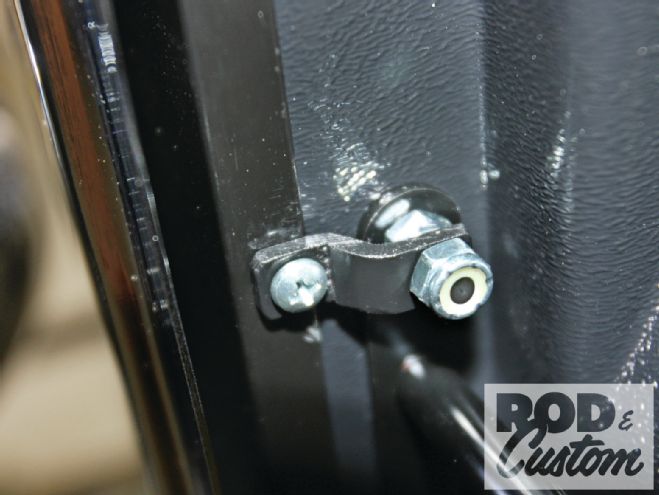
 20 With the radiator hoses in place, we knew where our radiator would mount, so we drilled and tapped the chassis to suit, before drilling the radiator tab slightly larger for bolt clearance.
 21 We fabricated these steel tabs to secure the fan shroud to the radiator side plates, using the bolts that attach the fan bracket to the shroud.
 22 The radiator, hoses, fan, and grille shell, all mounted to the chassis, awaiting a radiator cap and hose clamps.
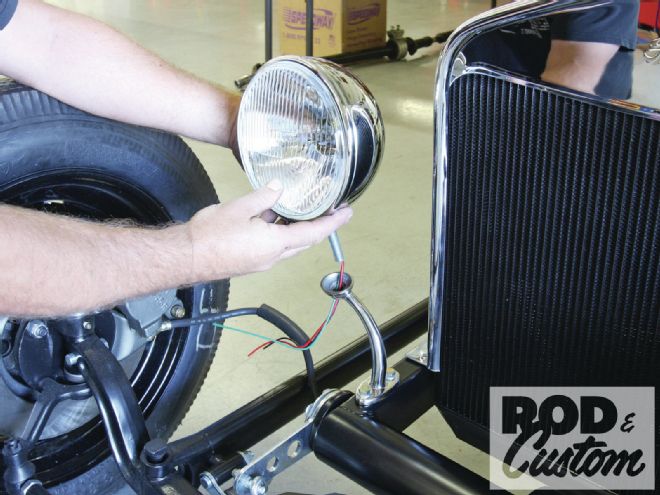 23 The King Bee headlights and Mr. Roadster brackets were mounted next, again tapping the chassis to accept 5/16-24 bolts.
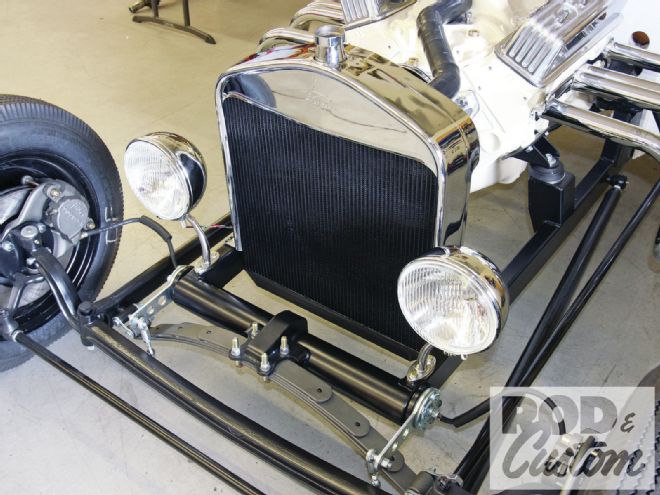 24 The completed front end, awaiting final wiring.
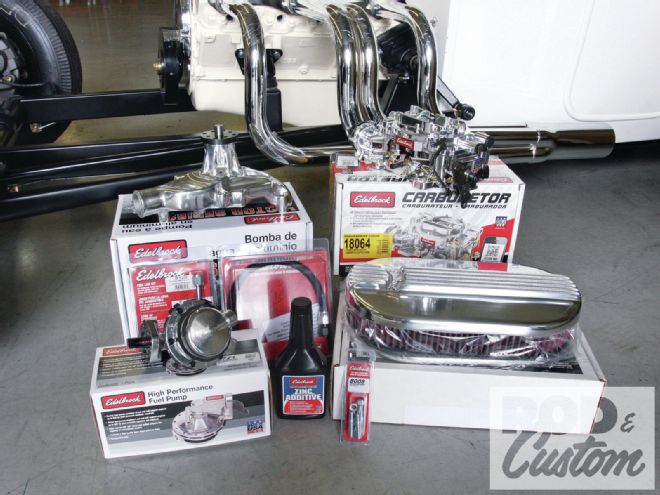 25 Edelbrock supplied the water pump, carburetor, fuel pump, finned air cleaner, and valve covers as we’ll as the necessary fuel lines.
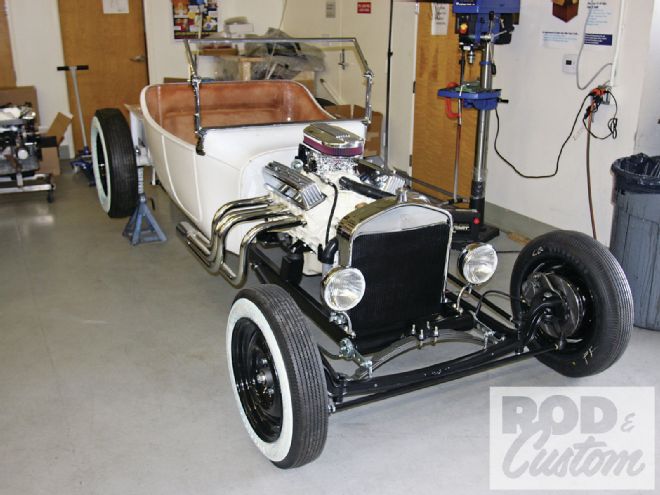 26 Finally looking like a complete car, with the engine dress-up parts installed, we’re still on schedule.