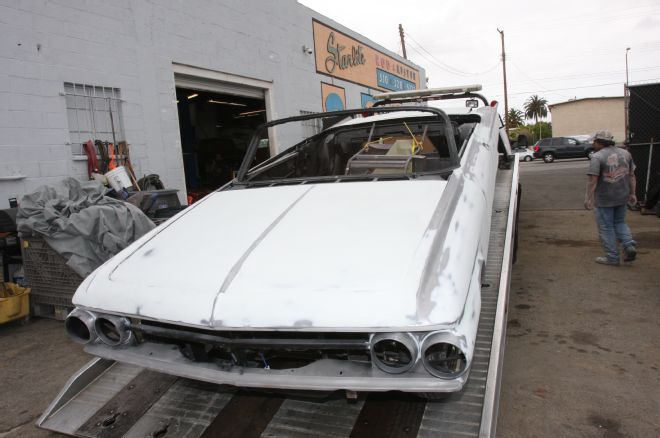
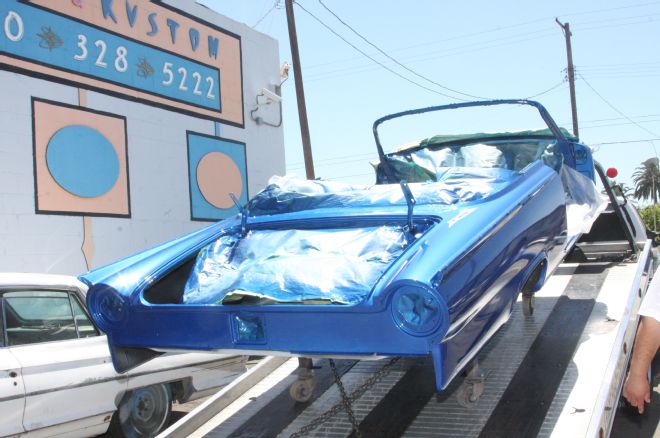
Body and paint. Words to strike fear into almost every hot rodder. Either it means weeks of backbreaking work or a large bill! If you never realized just what goes into a top-notch paintjob, you'll find the following of interest. Following all the fabrication on our Sunliner at Hollywood Hot Rods, Starlite Rod & Kustom was tasked with getting the body arrow straight and laying on the color, Blue Flame (code SZ) selected from Ford's 2011 palette. Actually that should read "colors" as Sterling Gray (code UJ) from the same source was used for the back panel inlay and detailing.
PPG's waterborne Envirobase system was used for the topcoats and surfacer, matched with the company's epoxy primer for a solid foundation. 3M provided all the body filler, sandpaper, and consumables. The ideal base for any bodywork is bare metal, so the body was separated from the frame and sent to AFCO for media blasting prior to any work. The same company handled the powdercoating on the chassis at this time.
Now, follow along as the Starlite crew straighten, paint, and polish the Sunliner.

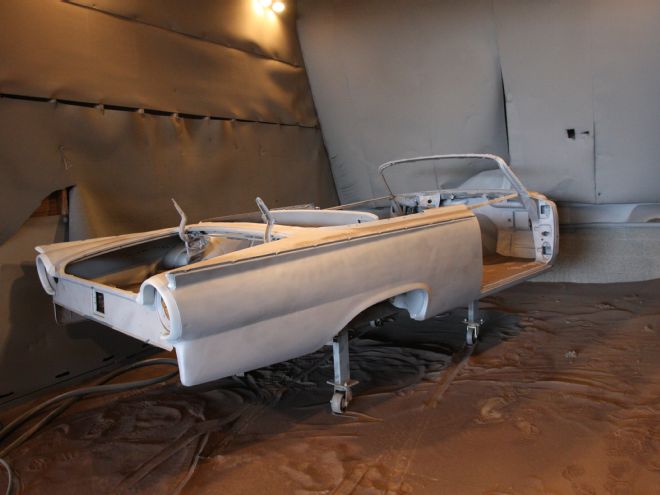
1 The modified body, doors, hood, trunklid, dash, and garnish moldings were trucked over to AFCO in Gardena, CA, where Javier media-blasted everything, inside and out, top and bottom.
2 Note the door apertures had been braced prior to the body being removed from the frame. Once blasted and cleaned of debris, the guys at AFCO sprayed the inside and underside in matte black epoxy.
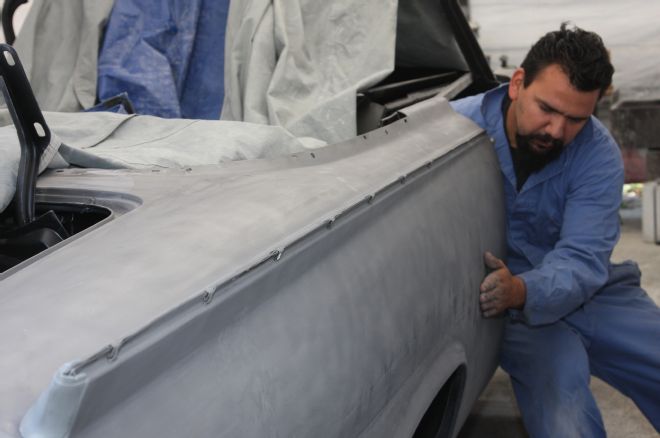
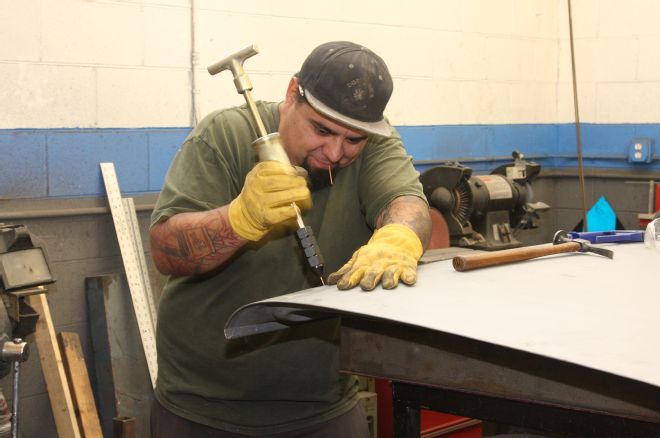
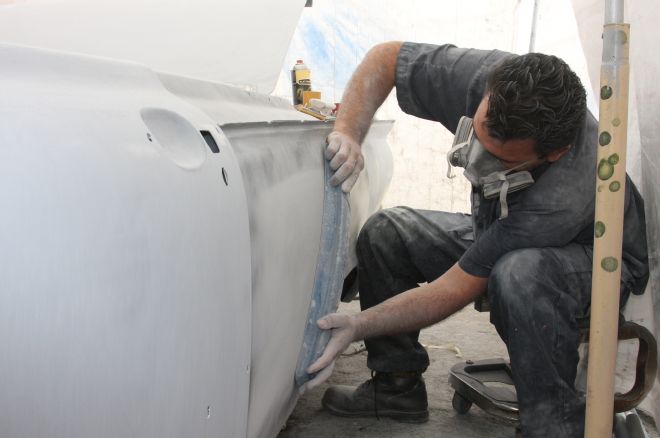
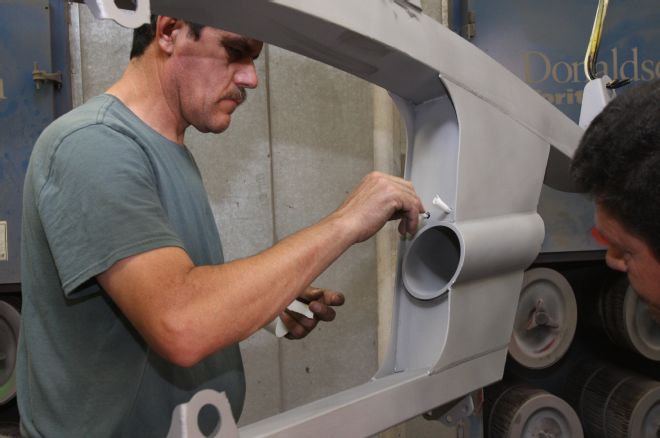
3 While Hollywood Hot Rods had made numerous modifications to the body, there were some dings and accident damage to be taken care of as well. With the car back at Starlite, Jose concentrated on the driver side, here feeling the surface after heat shrinking and cooling the metal. A straight edge (or in this case a bubble level) was used to check progress.
4 The damage on the passenger side extended through the whole quarter-panel. Julio started by using a long block with 80-grit to determine where the high spots were.
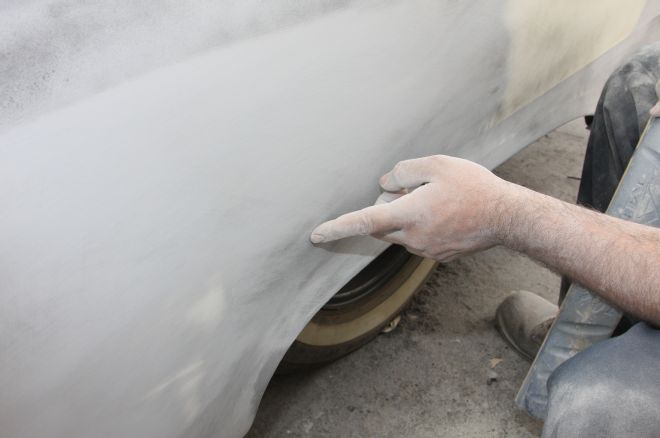
5 One of a bodyman's greatest tools are his hands; here Julio feels the high and low spots using his palm, not just his fingers.
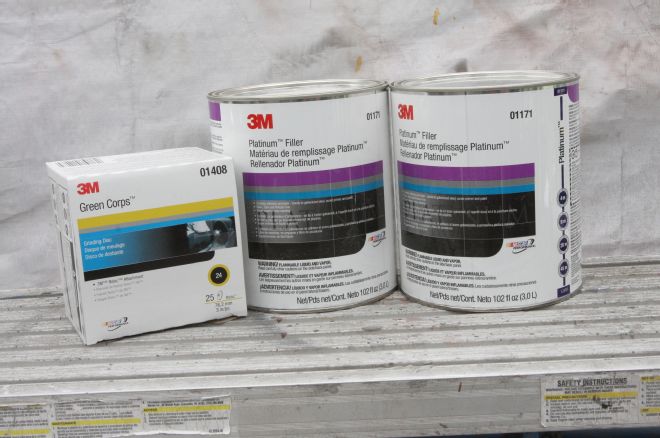
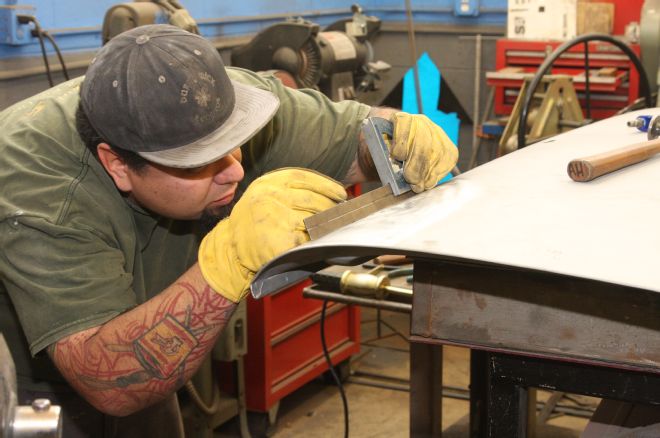
6 3M Platinum body filler was used throughout the job, along with 3M Green Corps Roloc grinding discs and sandpaper rolls.
7 With a spread of filler over the entire panel after any necessary hammer and dolly work, Julio again used the longboard to block-sand the filler.
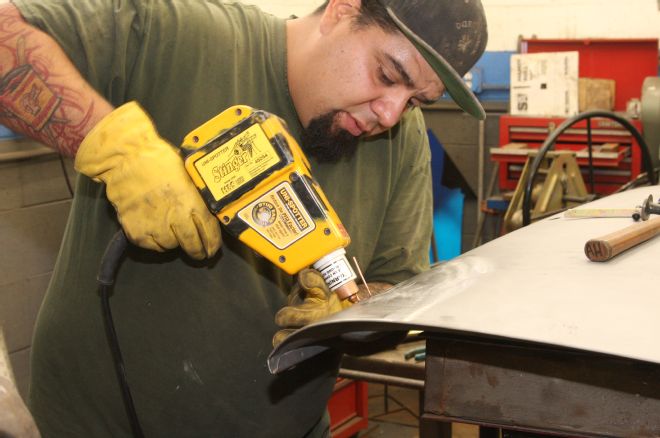
8 Alex worked on the doors, here using an electric stud gun to pull out an inaccessible dent. This tool heats a metal stud, essentially welding it to the doorskin.
9 Once the studs are in place, a slide hammer was used on the stud to pull the panel back into shape.
10 Again, a straightedge was used to help determine progress.
11 With the body back on the frame, the front clip, hood and trunklid were all bolted back in place to ensure correct alignment and to make modifications as necessary.
12 Once their alignment and fit was determined to be perfect, the doors were removed again and placed on stands to make bodywork easier.

13 The bubble level came out once again to check the lower edge of the trunklid for straightness.
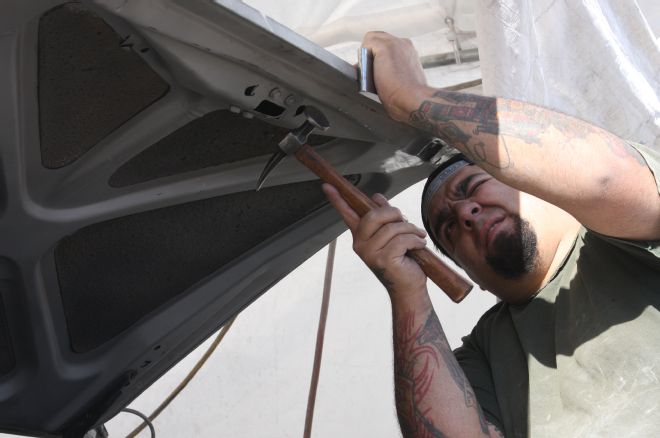
14 Alex used a hammer and dolly to perfectly straighten the lip of the trunklid.
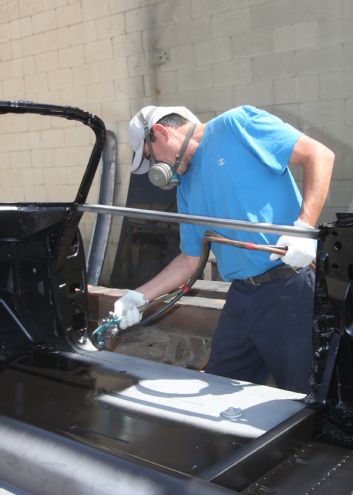
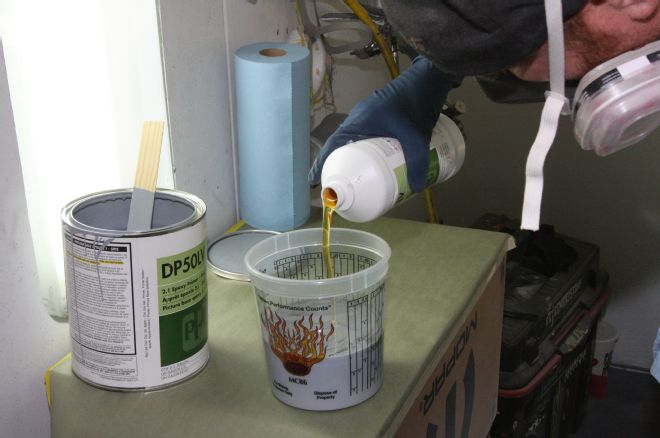
15 For primer and paint, Starlite Rod & Kustom rents a local paint booth, which though it costs a little in time and transport, sure beats battling with the complexities of legally installing one, especially in Southern California where it's virtually impossible!
16 The interior was masked using plastic sheeting. Note the wheelhousings and rocker panels are masked down to the floor to prevent overspray getting under the car and onto the frame and running gear.
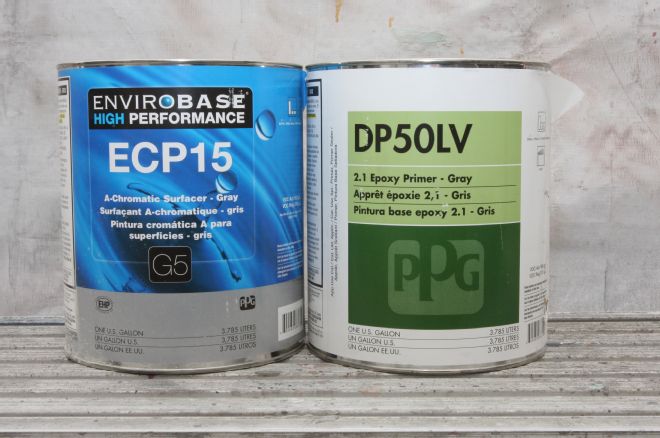
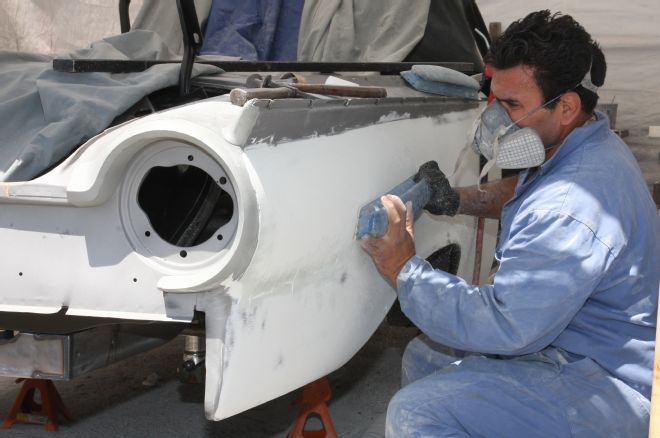
17 PPG DP50LV epoxy primer was used to prime the whole car. The Envirobase surfacer was used at a later stage, before the final color coats.

18 The DP401LV is the hardener for the epoxy primer, while the D8767 is the reducer, or thinner.
19 The primer was mixed as per PPG's instructions; 2:1:1, which breaks down as two parts primer, one part hardener and one part reducer.

20 Here's why paint should always be mixed in a cap and not in the gun (quite apart from the fact modern gravity-fed guns have the cup on top, making it hard to properly mix the components); once mixed, it should always be poured into the gun through a strainer, eliminating lumps or debris from blocking the gun.
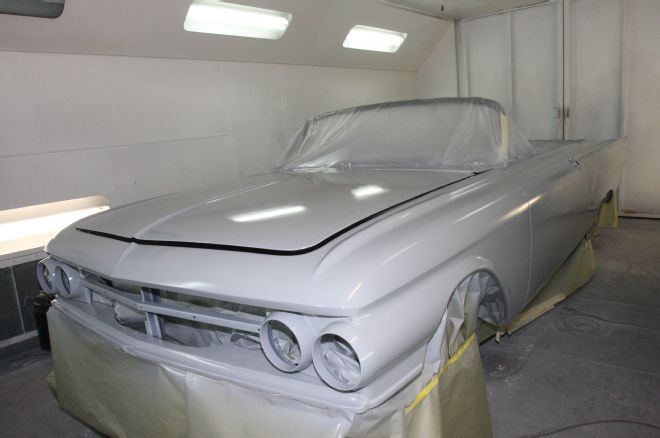
21 One of the quickest steps in the whole process makes the biggest difference! With the entire body in primer, it suddenly starts to look like progress is being made.
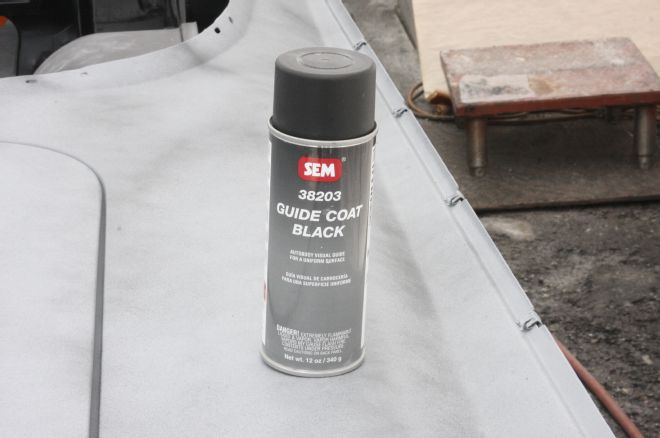
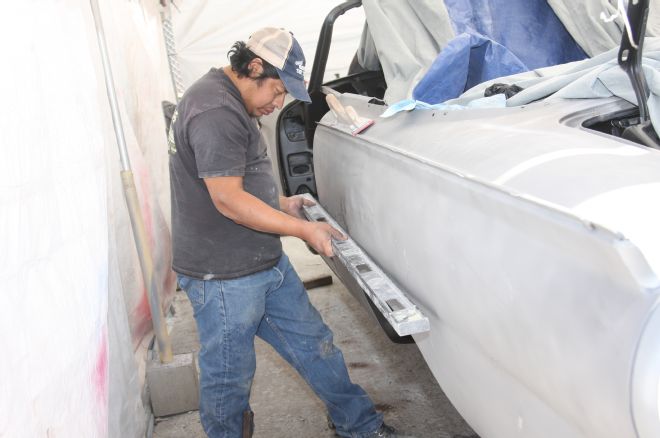
22 Back at Starlite, a guidecoat was applied over the whole body before block sanding the primer began.
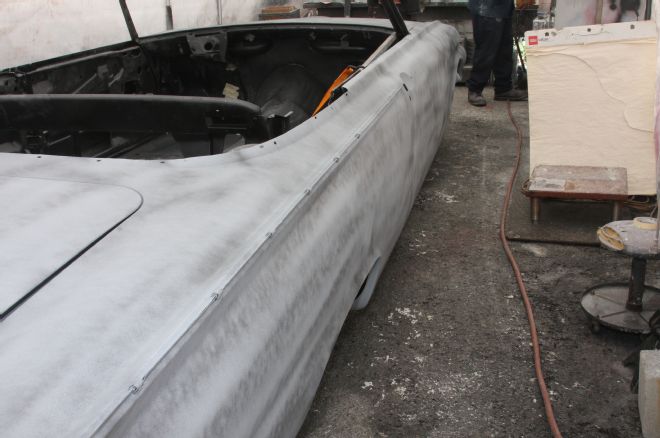
23 Guidecoat was applied between each sanding stage.
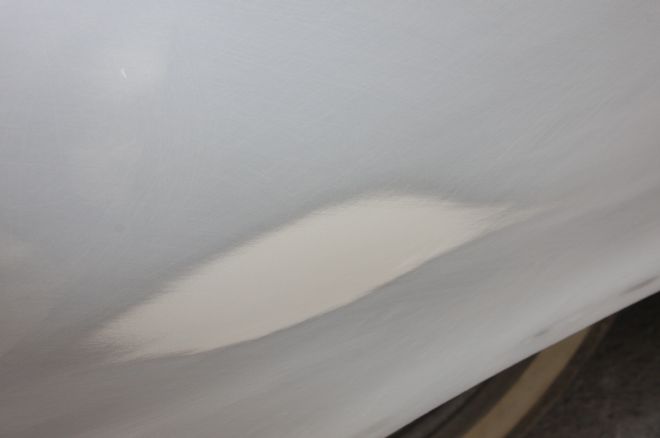
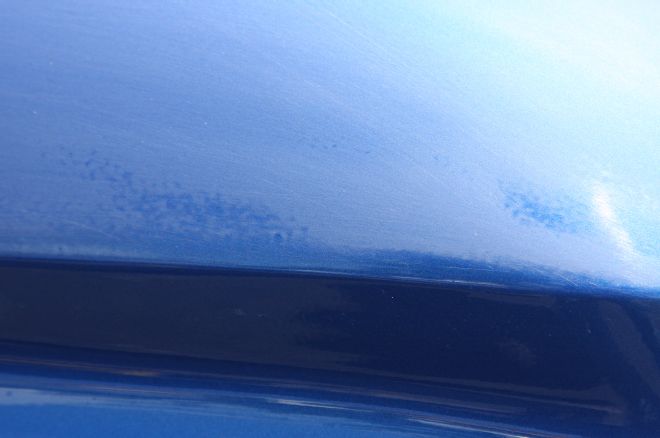
24 The entire car was blocked with 150-grit, then 220, then 320. After that, a powder guidecoat was applied and the car wet-sanded with 600-grit.
25 A flexible long block was used to sand the body. Not only does this follow gentle curves, such as front to rear of a quarter-panel, but also tighter curves, such as vertically.
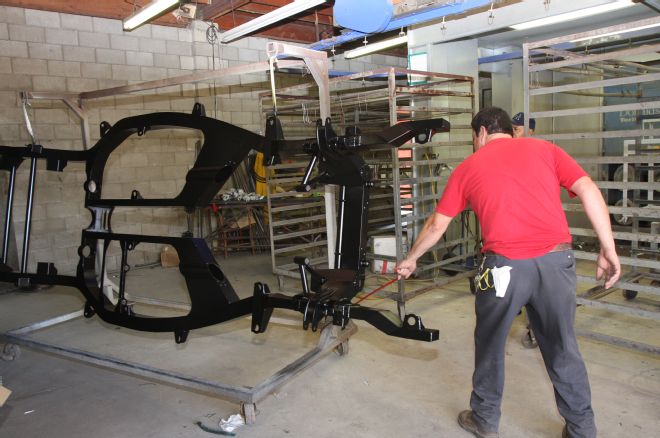
26 Notice that although the primer has been sanded through to the filler on the left, guidecoat is still visible in a couple of areas immediately to the right (indicated); these are low spots.
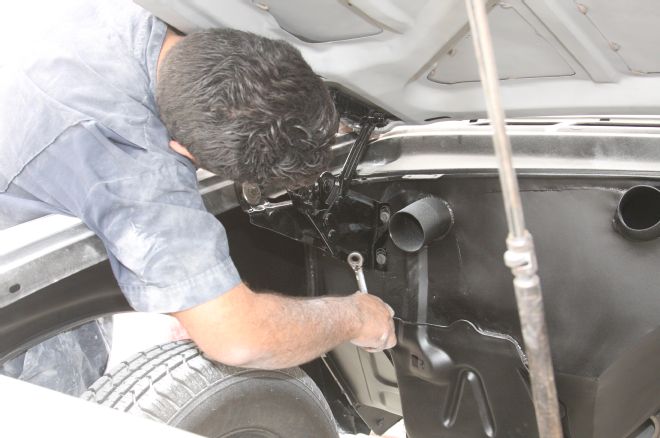
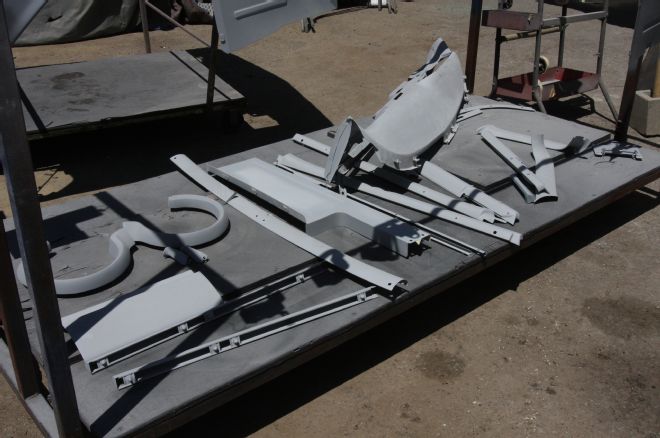
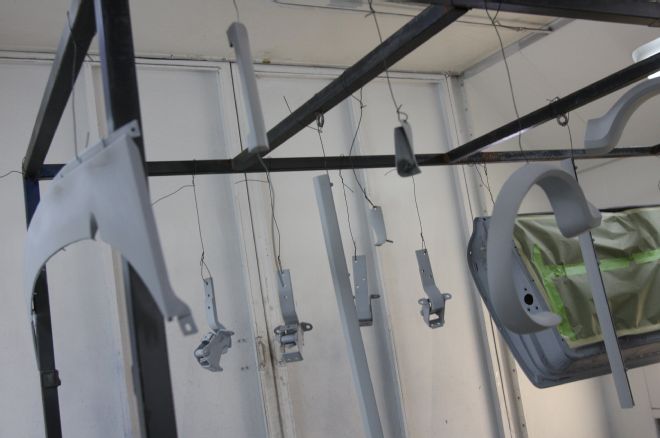
27 No matter how well the car is blocked at the filler stage, there will almost always be "rub throughs" or low spots that require a little more filler. Filler can be applied over epoxy primer. The rub throughs will be spot-primed and blocked again prior to paint.
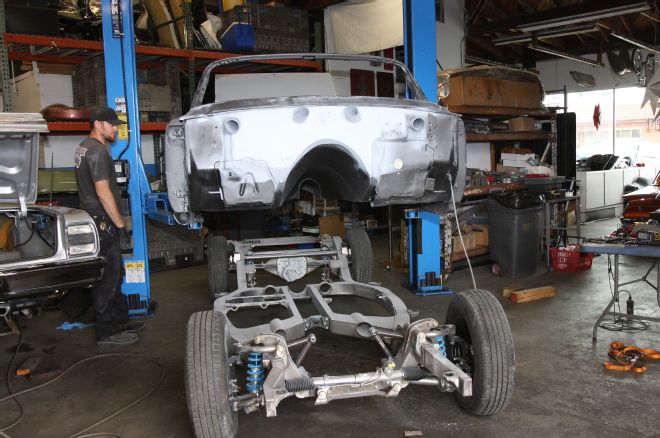
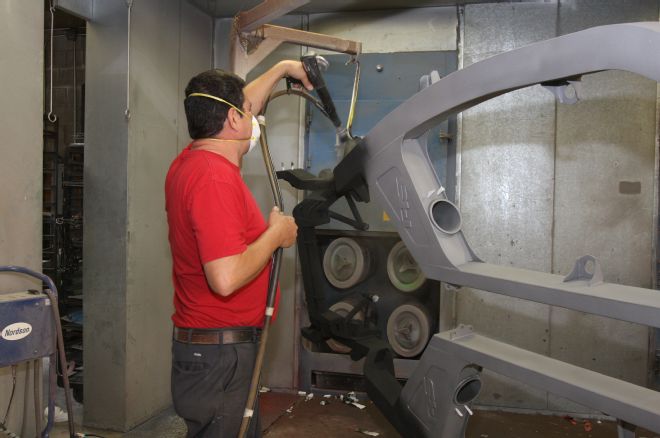
28 Once again the car was disassembled. A two-post lift makes removing the body from the chassis relatively simple. The front clip came off in one piece and was bolted to a dolly, as was the bodyshell.
29 There's more to prepping and painting a car than just the body, doors, trunk, and hood. Here are just some of the parts that can take as long as the main body to prep.
30 With the body ready for spot priming and then off to the spray booth, the chassis was stripped to a bare frame and delivered to AFCO for powdercoating. Here all threaded holes are masked.
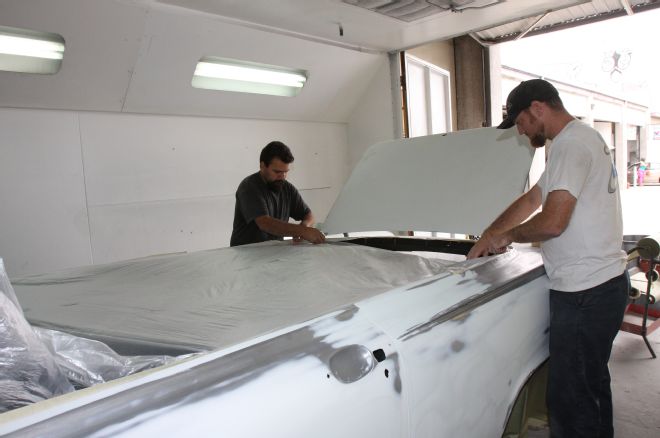
31 Powdercoat is an odd thing to watch being applied if you're used to paint. It goes on with a matte finish ...
32 ...but comes out the oven smooth and shiny, or satin if that's the finish you specified.
33 The cowl, doors, and assorted parts and pieces were hung from a rack in the spray booth, to be painted at the same time as the bodyshell. Are you getting an idea of how long a quality paintjob takes yet?
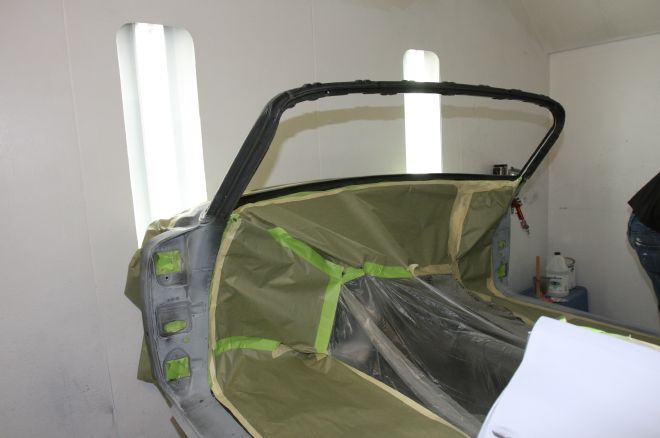
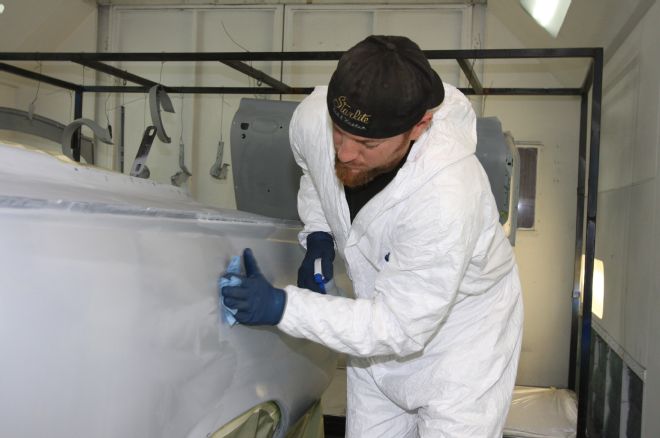
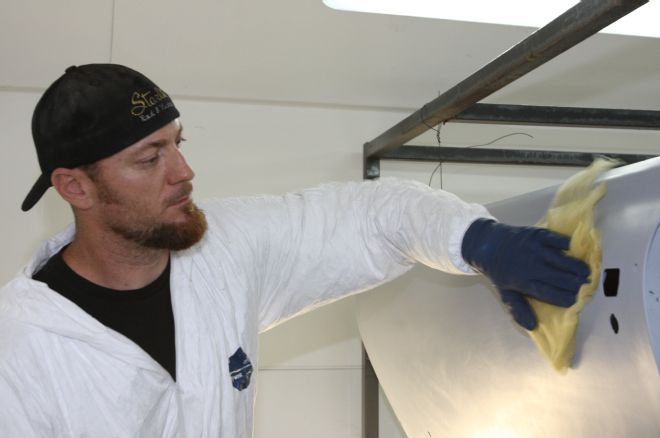
34 A little more critical than the primer stage, paper was used to mask around the edges of the interior. Dried basecoat has a tendency to flake off plastic when the clearcoat is being applied. Not ideal.
35 Intended for use with waterborne paints, Jack likes to use this fan-style blower when prepping panels, as it disperses and debris more gently and way better than a regular blowgun.
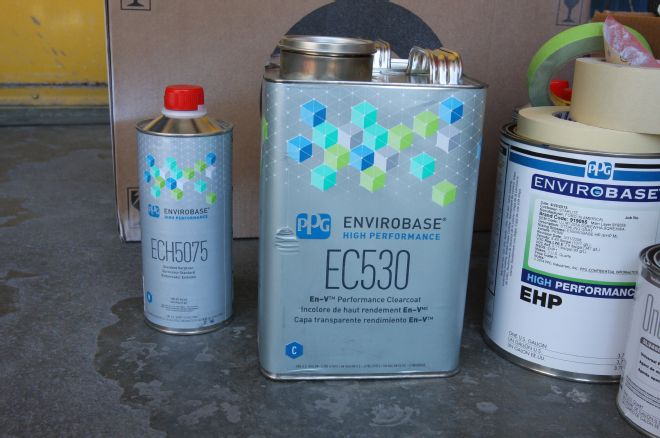
36 Using a lint-free cloth, everything to be painted was wiped down with a pre-paint prep solution to remove any dirt or greasy residue. Even bare hands can leave a residue.
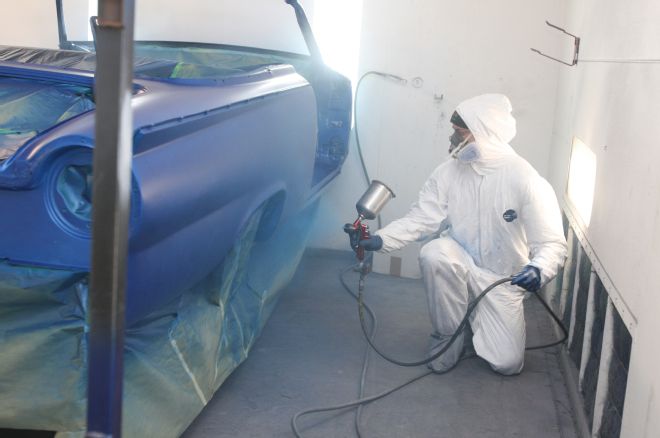
37 Finally, everything was wiped over with a tack rag to remove any remaining particles or dust.
38 The PPG Envirobase basecoat and clearcoat. Envirobase is a waterborne product. Ford colors from 2011 chosen for both the main body and the engine bay and rear panel accent. They are Blue Flame (code SZ) and Sterling Gray (code UJ).
39 Correctly suited, booted, and with respirator, gloves, and eye protection, Jack sprayed the sealer, followed wet-on-wet by the basecoat and clearcoat.
40 With the clearcoat applied and cured, the body and associated panels were returned to Starlite's premises.
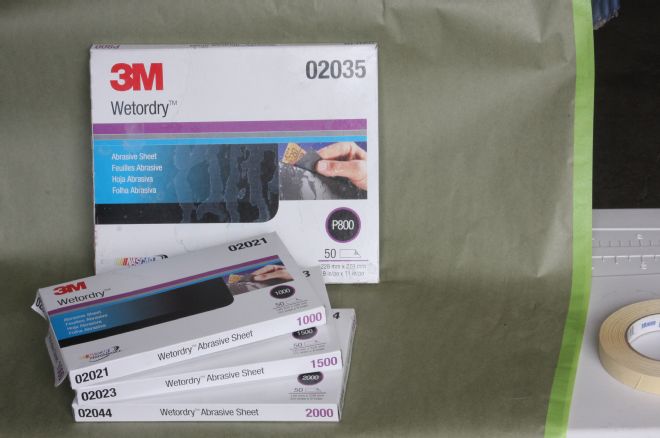
41 3M Wetordry paper was used to color sand the Sunliner, starting with 800-grit and working through 1,000, 1,500, and 2,000 grit.
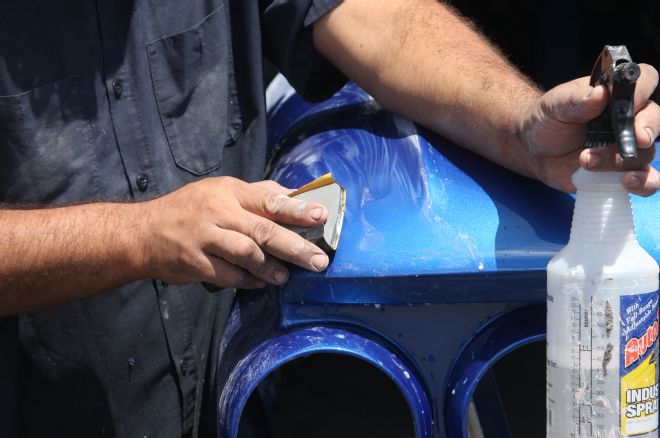
42 Using a flexible block and 800-grit Wetordry, and a spray bottle of water for lubrication, the long, tedious task of color sanding began.
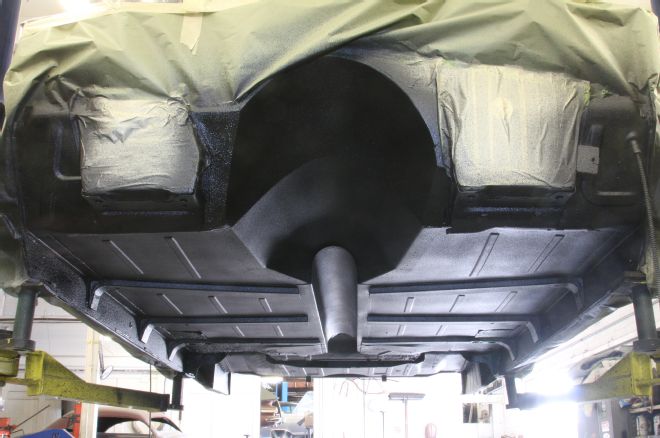
43 The reason for color sanding is to remove the "orange peel" effect on the surface of the clearcoat (or color, depending on the type of paint used). Working through increasingly finer grades of paper eliminates the scratches caused by the initial 800 grit, which conversely is able to "cut back" the orange peel, unlike the finer grades.
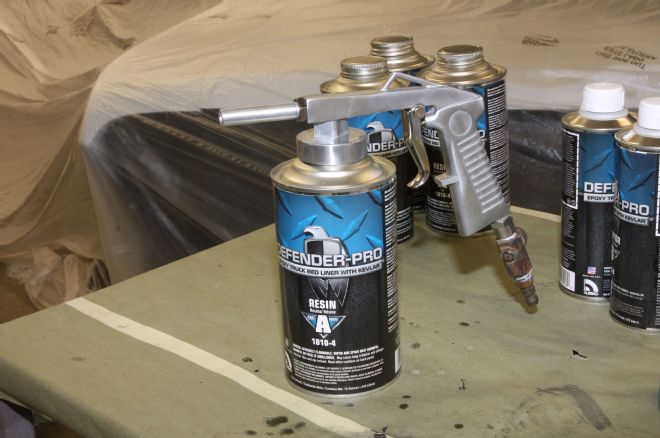
44 Regularly rinsing the surface with clean water and drying it enabled Julio to see any areas requiring more work.
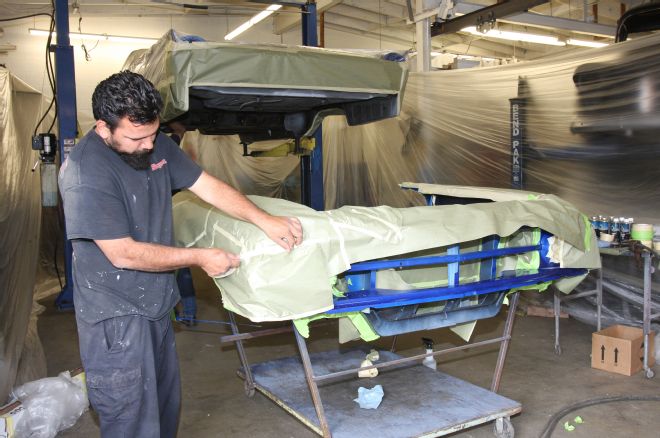
45 After color sanding and before polishing commences is a perfect time to apply underseal, schutz, or underbody color, as all spraying is now complete, and any cleanup won't affect the final finish. Note how everything, including the shop, is masked!
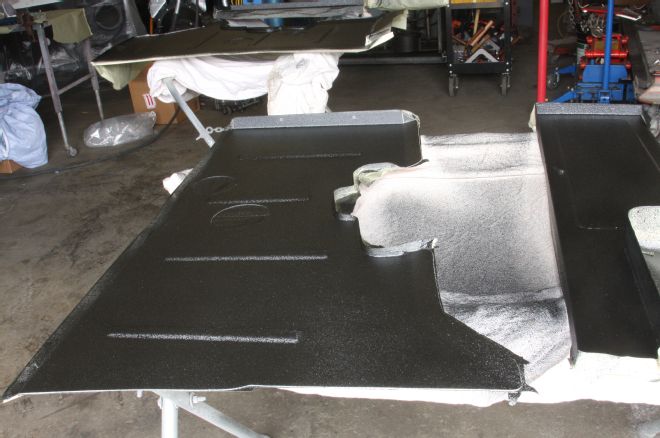
46 Eastwood sells Defender-Pro bedliner, a two-part system that was supplied with an applicator gun. This was chosen to cover the underside of the car and the underside of the front inner fenders.
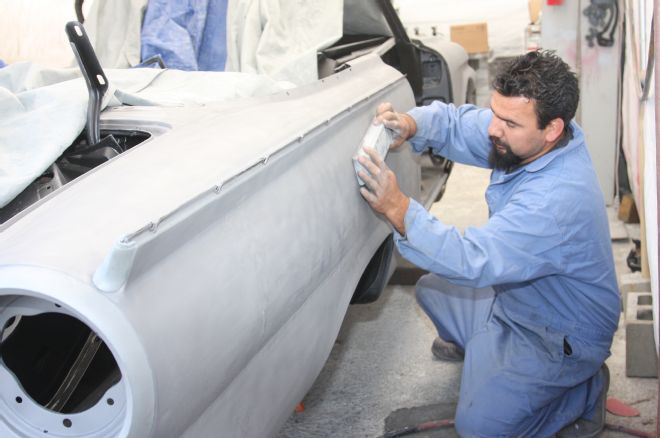
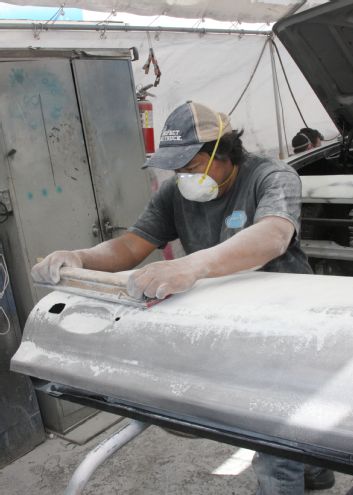
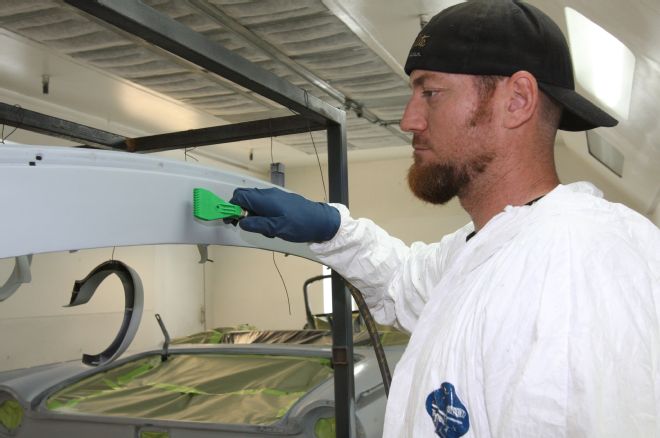
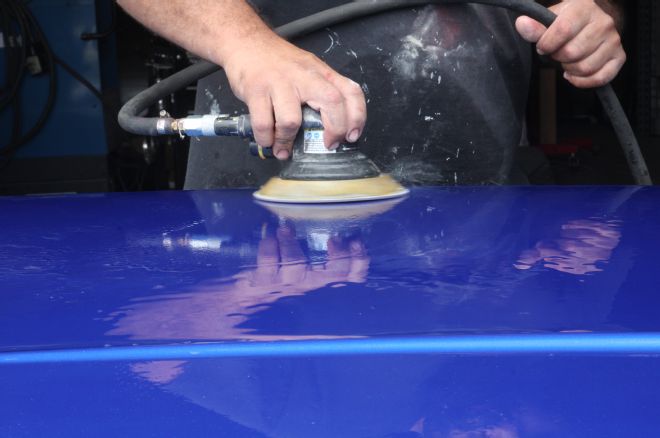
47 The inner fenders, carefully masked as the topside was painted in Sterling Gray.
48 The underside, sprayed with bedliner. Not only does it protect from stoneschips and water ingress, but provides a "finished" appearance to the underside and wheelhousings.
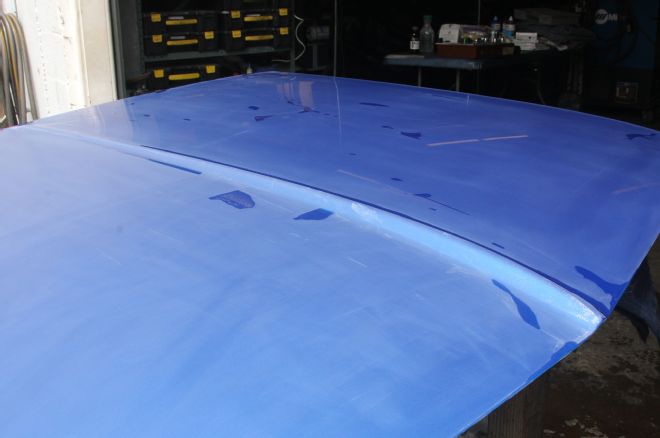
49 Before we get on to polishing, we should mention that the large flat areas, such as the hood and trunk, were additionally color-sanded using this 3,000-grit foam disc on a DA sander.
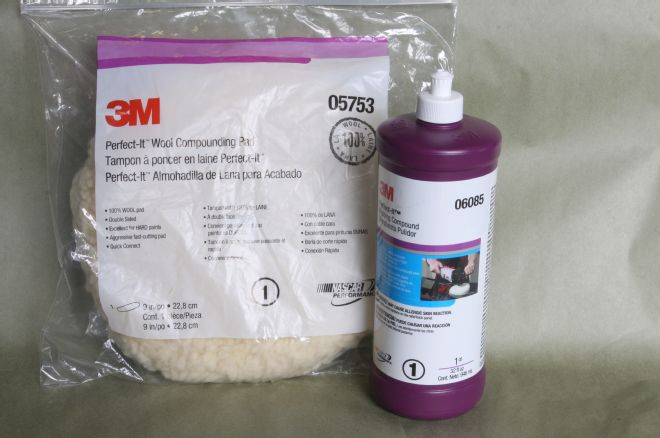
50 Keeping the surface wet, the 3,000-grit disc provides an imperfection-free surface to polish.
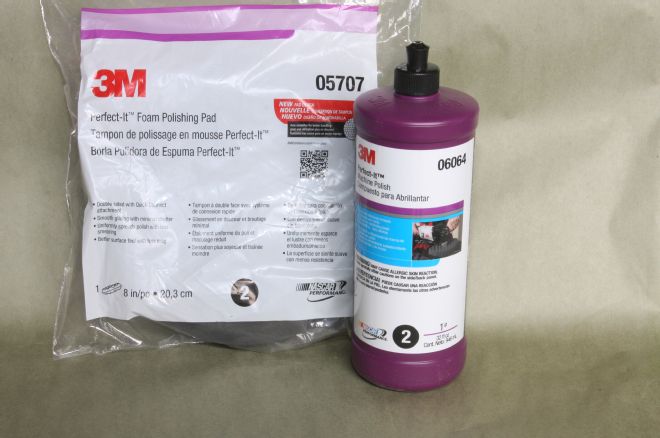
51 The hood, prepped and ready to bring to a shine!
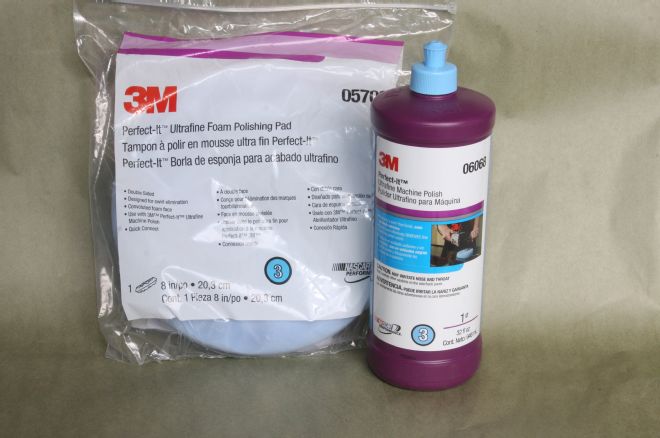
52 The three steps of polishing start with Rubbing Compound and a wool pad. Each step uses a progressively finer abrasive.
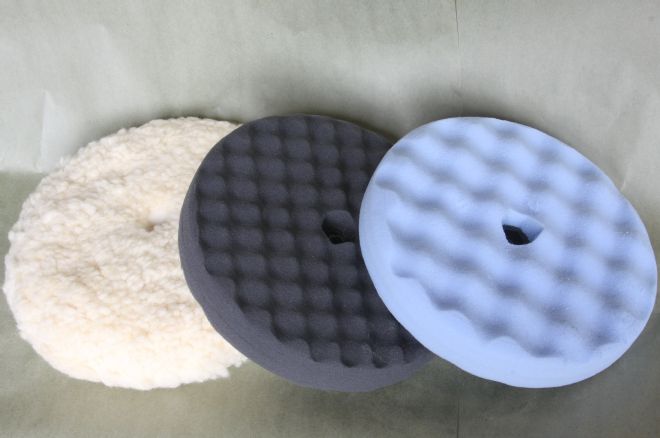
53 This is followed by Machine Polish and a foam pad.
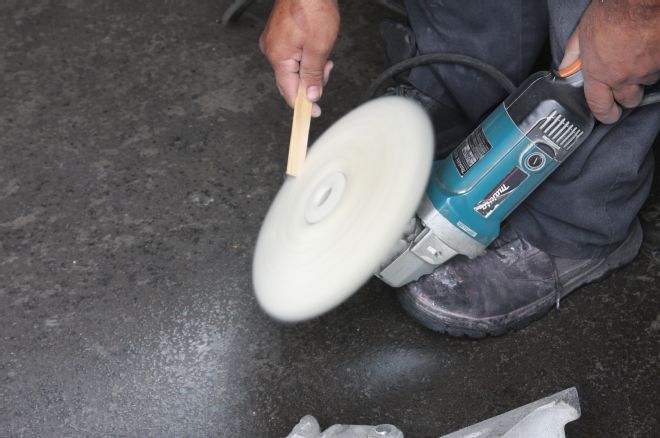
54 Finally an Ultra-Fine Machine Polish and dedicated foam pad are used.
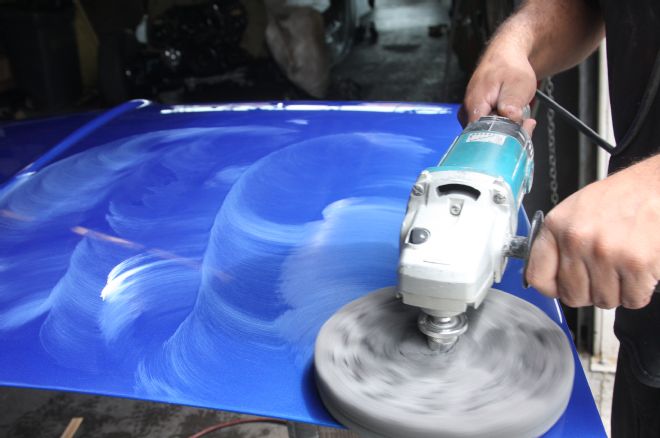
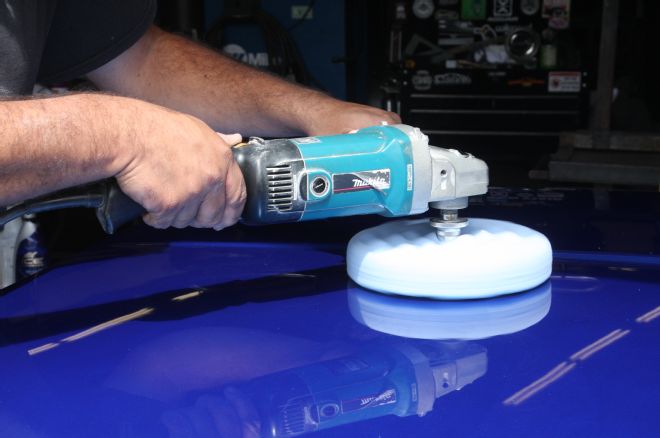
55 These are the three pads used, in order from left to right.
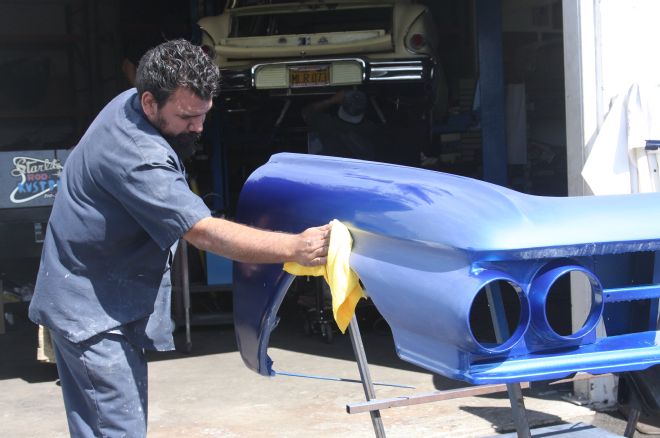
56 A wooden paint mixing stick is used to clean the old compound buildup from the wool pad. This is repeated often throughout the job.
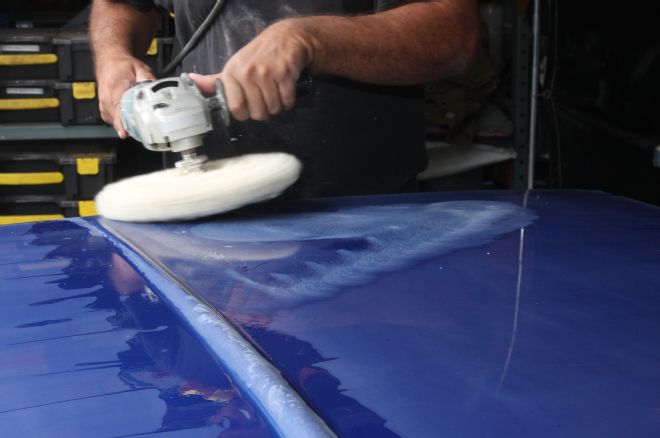
57 Note the polishing "mop"—not a grinder that spins too fast—is used at an angle, to prevent it digging into the paint. Also, be mindful of edges and raised sections, such as the center bead on this hood. The Starlite guys are experienced, but you may want to run masking tape along edges and beads to prevent burning through the paint.
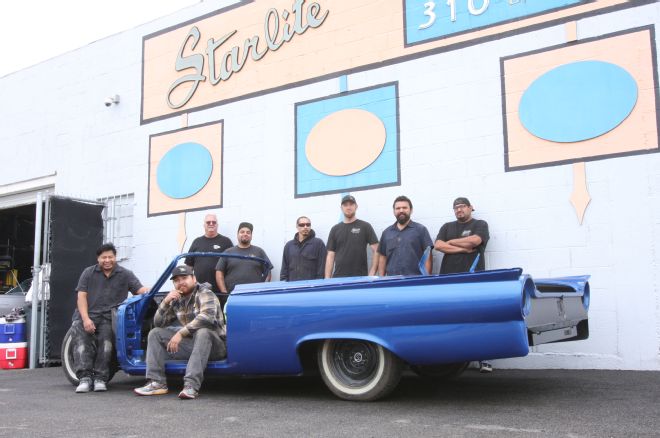
58 The compound does the majority of the work to bring the shine out, then the second step with Machine Polish (once all compound residue is removed) removes minute scratches and swirls.
59 Finally, the Ultra-Fine Polish really brings out the shine. Check the reflection of the mop in the paint!
60 The Starlite Rod & Kustom crew, finally able to relax after an intensive effort to get the Sunliner ready for final assembly.