Twenty years ago, finding replacement parts for a job like this was half the work. These days, companies such as Dynacorn and Summit Racing offer complete catalogs of almost any part or tool for the common muscle-car–era vehicle. For this ’67 Firebird, all of the body replacement parts were found in the Dynacorn catalog, including the full floorpan used in this installation.
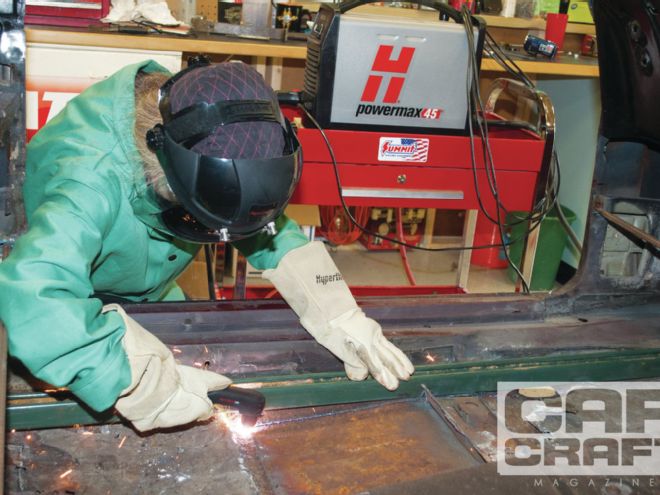
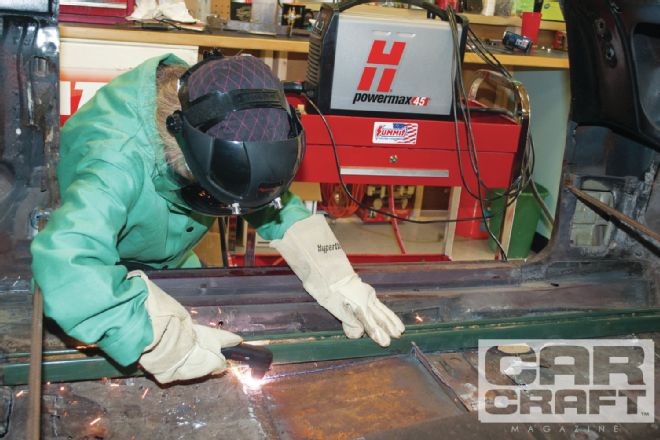
Equipment technology has also improved and become affordable for the average backyard wrench. Portable plasma-cutting systems, such as Hypertherm’s Powermax45, TIG-, and MIG-welding machines make the job much easier, even for the average enthusiast.
This is to be a full restoration, so the motor, transmission, hood, front bumper, inner and outer fenders, and rear-end were already removed. The front subframe comes off with four bolts. Two are accessed midway down on each side of the firewall, located inside two square cutouts. The other two are located under the front seats. To do this job, Dynacorn recommends removing the front subframe, and it’s easier to do that with the axle out. Most car projects have a few unexpected twists, and this one was no exception. There were a few times we had to step back and re-evaluate. This is usually a two- to three-day job, depending on how many problems arise. One more hint, take photos at the start of each step of the process. That way, if there are any doubts or questions about how something should fit, it’s easy to refer back and see how it looked before it was cut apart.
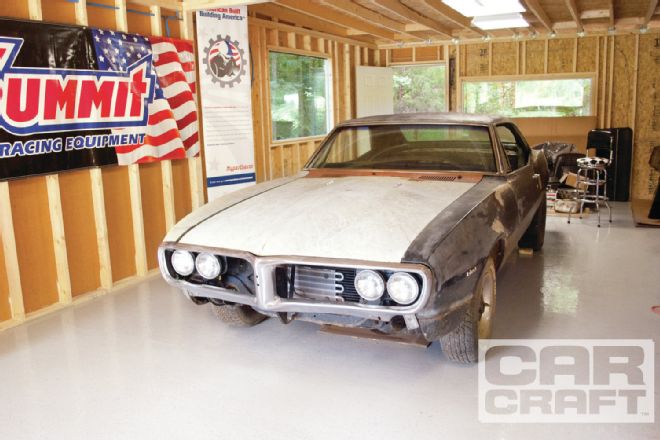 We did all of the work in this basic shop. There is no lift, limited equipment, and a good deal of backyard technology. It proves you don’t need a huge, fancy shop to get professional results.
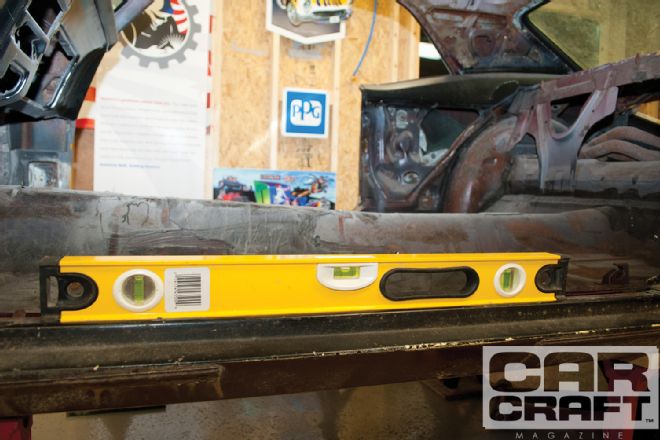
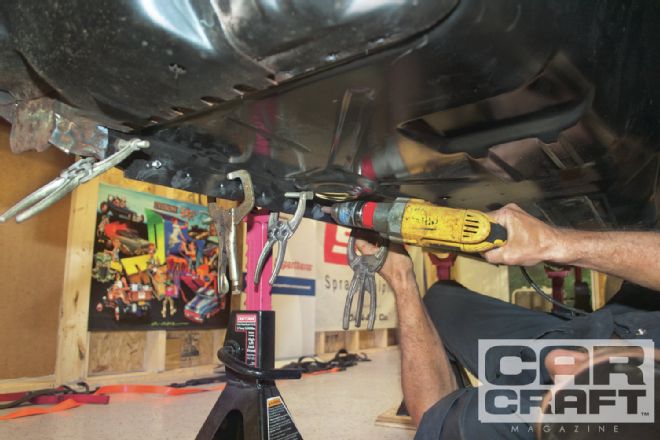
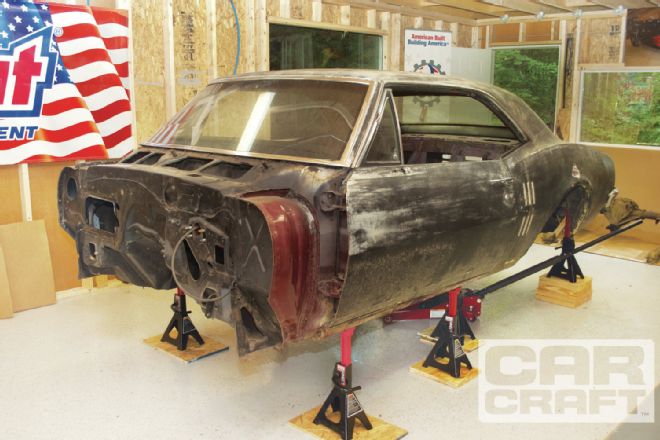 The car was supported by eight Craftsmen Professional 3-ton jackstands: two in front of the rocker panels, 14 inches back from the firewall; two at the rear of the rockers near the backseat area drain plugs; then four more at the front and back of the rear framerails. It’s critical to support the car at the correct locations to maintain the car’s structure. Much of this job was done while under the car, so the more room the better. In this photo, the rockers were 20 inches from the ground.
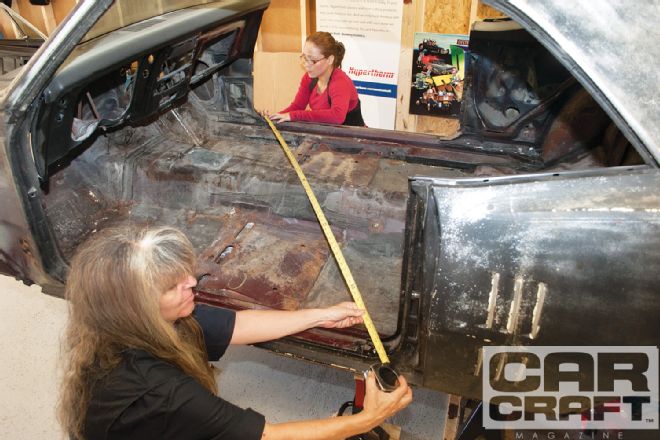
 This is the diagram we used for the measurements. There are a total of 15.
 Rebar was used to retain the structure of the body. It was cut to size and then tack-welded across the body just before and behind the door opening.
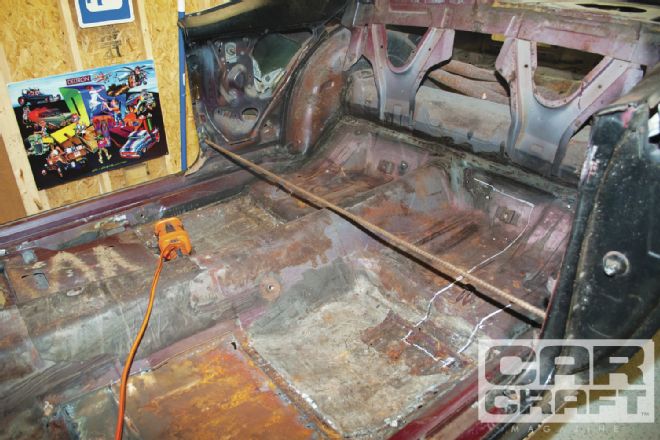 The Firebird had a lot of ancient fiberglass filler in the old floorpan. Any filler or seam sealer over any metal seam had to be removed and each area thoroughly cleaned to prevent weld contamination. The center of the floorpan was rough-cut with Hypertherm’s Powermax45 plasma-cutting system, leaving plenty of room between the cut and the edges of the floorpan. Under the car, we used the plasma system to create small reference holes around the rear framerails. A reference chalk line was drawn to show exactly where to cut.
 To remove the floorpan, we used a 36x40-inch piece of plywood, placed on a Summit Racing Low Profile floor jack, and rolled it under the car. It was jacked up to the level of the floorpan. After the floor was cut, the jack was lowered and the old floorpan rolled out under the front of the body.
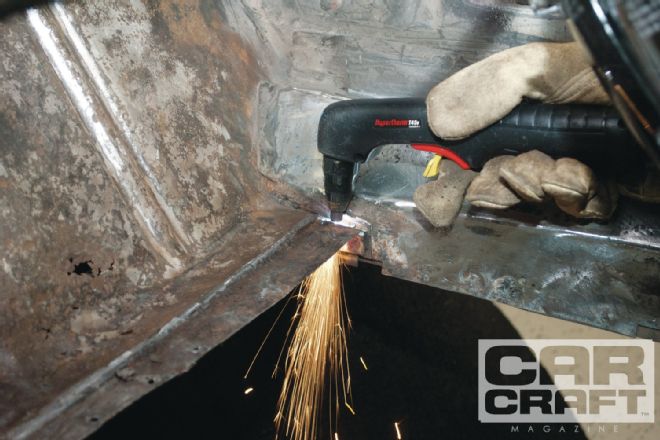
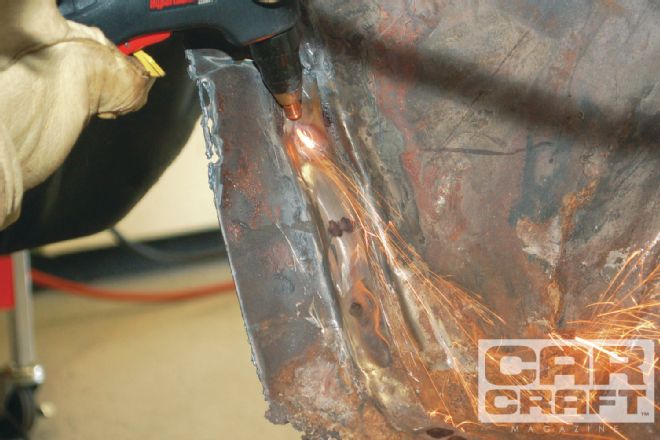 We used the plasma system to remove the spot welds along the rockers and a grinder to remove them along the tops of the rear framerails. It takes a lot of practice with plasma to successfully use this cutting method. It’s recommended to practice on the old floorpan and get comfortable with the Gouge setting before trying it on the car. Sometimes, it’s easy to forget or not see exactly where the spot welds are, so first find them and mark them with a black marker. Be cautious and watch closely as the metal is removed. We held the plasma torch at a sharp angle to the surface to remove only the top layer of metal over the spot welds.
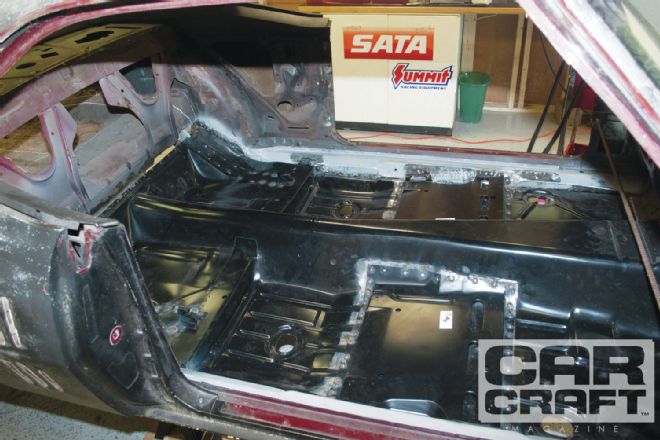
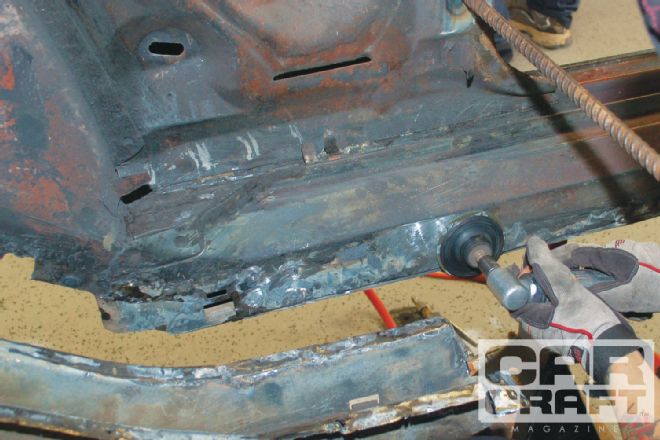 We cleaned and prepped the rockers, framerail mounting points, and transmission and firewall tunnel. This is a good time to repair problems like rusted framerails, bad rockers, and issues brewing in the trunk or quarters. We used a hammer and dolly to flatten any kinks out of the firewall and rocker edges.
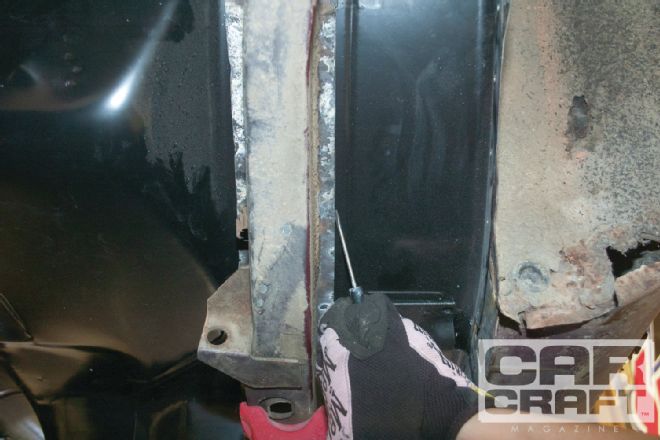
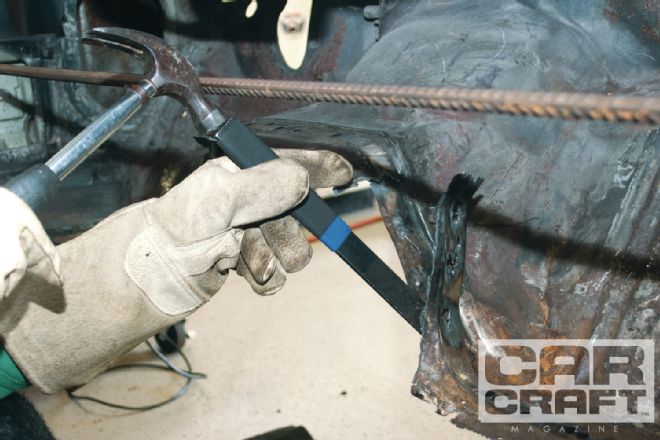 A Steck Seam Buster chisel was perfect for removing the ribbon of spot-weld material. We’d burn away some of the top layer then hammer the Seam Buster into the space between the first and second layers of metal. If it ran into some attached ribbon, we’d either burn or grind away a little more metal and try again. The Seam Buster came in handy for other steps of this project, like helping to maneuver the new floor into place.
 In order for the new floorpan to fit perfectly, the corners where the firewall, the floorpan, and the rocker meet had to be notched about 1 inch. The plasma was used for this, but a cut-off wheel could also work well. Another adjustment involved the four sets of two upward-facing tabs on the sides of the new pan. They needed to be bent inward a little, since they stuck out past the edge of each side. They would be bent or hammered back into position after the pan was installed.
 The new Dynacorn floorpan was balanced on plywood and rolled under the car. This is definitely a two- or three-person job. The trick is to lift the back end up high, about 10 inches higher than where the floorpan would normally sit. Then, come forward with the pan and set it into place on the bottom edge of the firewall. It should drop down perfectly at the rear along the seam of the trunk floor. Check the fit. Make sure there are no big gaps between the rockers and the pan. There may be a little fine-tuning that will need to be done along the bottom of the firewall, since that area can be a little rough. Our floor fit well. But our car’s body was not perfect, and there were a few places that we had to work it into place, including a few firm thumps in the corner of the passenger firewall edge. The one issue we did run across involved the rear support we had welded in. We put it too low because it got in the way when raising the rear of the pan. We welded in another support 9 inches above it and then plasma-c
 Check the fit of the new floor under the car, seeing how flush the pan is sitting on the framerails. Is it firmly up against the forward-facing tabs at the ends of the rails? Our pan didn’t sit flat. We put some weight on that area, and that was enough to settle the pan flush against the rails. Next, a line was scribed around each rail and the floorpan was removed from the car. We drilled 5⁄16-inch holes, 3 inches apart and 3⁄8-inch inboard and around the entire parameter of the new floor. The holes were ground with a right-angle sander, removing any burrs that would interfere with the floor’s fit.
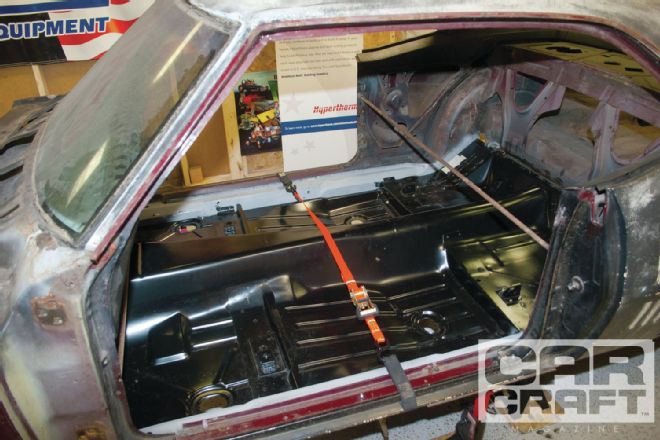
The new floor was brought in for hopefully the last time and pushed, pulled, and manipulated into place. At this point, all of the measurements taken earlier were checked again. If the side to side has opened up, cinch straps can be run around the rockers. Only one of our measurements was off enough, about 1⁄8-inch, so we drew the rockers closer together—using a strap at that point. Some vehicles will require three straps across the rockers at all three of the measuring points.
Check the fit of the new floor under the car, seeing how flush the pan is sitting on the framerails. Is it firmly up against the forward-facing tabs at the ends of the rails? Our pan didn’t sit flat. We put some weight on that area, and that was enough to settle the pan flush against the rails. Next, a line was scribed around each rail and the floorpan was removed from the car. We drilled 5⁄16-inch holes, 3 inches apart and 3⁄8-inch inboard and around the entire parameter of the new floor. The holes were ground with a right-angle sander, removing any burrs that would interfere with the floor’s fit.
The new floor was brought in for hopefully the last time and pushed, pulled, and manipulated into place. At this point, all of the measurements taken earlier were checked again. If the side to side has opened up, cinch straps can be run around the rockers. Only one of our measurements was off enough, about 1⁄8-inch, so we drew the rockers closer together—using a strap at that point. Some vehicles will require three straps across the rockers at all three of the measuring points.
 We clamped the floor to the rockers, the firewall, the inner wheelhouses, the rear framerails, and the trunk pan using welding clamps. We ran Tek sheetmetal screws in every third hole. Any bumpy metal along the seams was straightened with a ball-peen hammer and a dolly, as we worked our way around the edges.
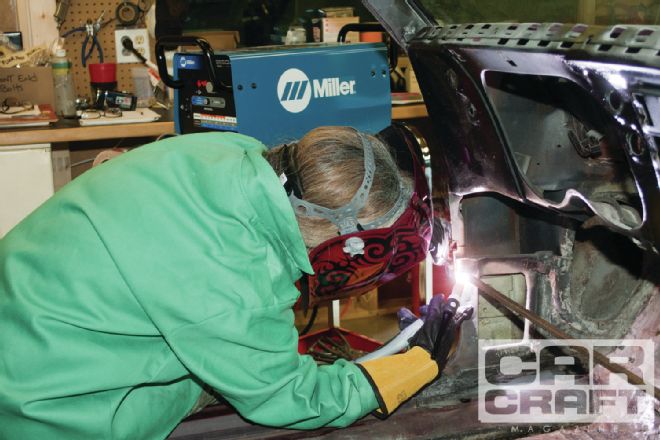
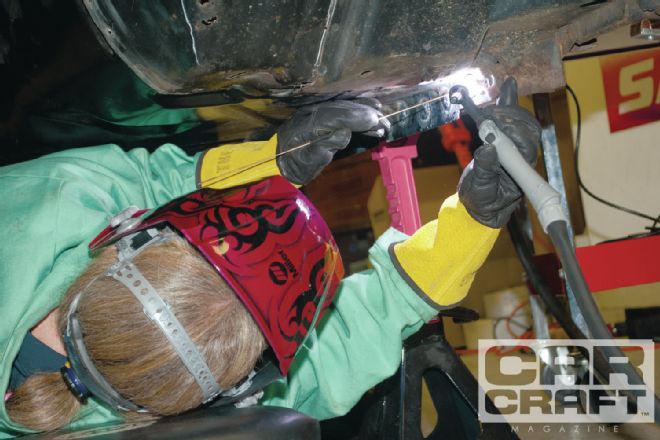 The next step was to get under the car and weld. It was here where we ran into our biggest challenge. For some reason, the rockers were resistant to welding. A white residue formed next to the weld, signifying that the rockers were galvanized steel. Galvanized steel is very difficult to weld, and the fumes are deadly. Most Firebird/Camaro convertibles have galvanized rockers, but only a few of the coupes have them. There’s no real way to tell unless you weld on the rocker. Every bit of the galvanized coating had to be ground off the weld points of the rockers. That meant the floor had to come out again. Wear a respirator whenever dealing with galvanized coatings! After an hour of grinding, the floor was back in place. A Miller Diversion 180 TIG welder was used to plug-weld the holes. We used about 90 amps to get great penetration from the floor to the rockers. It’s best to start from the middle of the car and work your way forward and back, side to side, removing Tek screws as you go, until all the holes on t
 The upward facing tabs on the top of the floorpan were knocked back into place and welded. Keep a ball-peen hammer close by while welding. A trick for getting metal to look neat and flush against the surface, immediately after welding a spot is to give the metal a few taps with the hammer. The warm metal will stay in place and sit neat and flush against the surface.
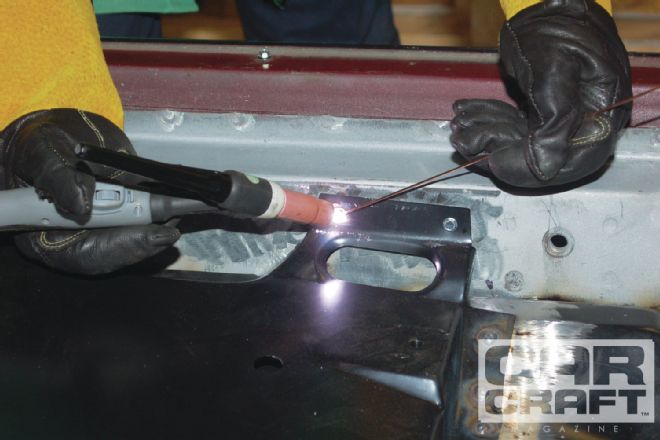 The last step was to install the two Dynacorn front-seat platforms. These went in easily since there was only one place that they would sit flush. They fit perfectly into place, snug up against the cross brace that runs from side to side on the floorpan. These were also drilled and plug-welded into place.
As the trunk floor was the next item to be replaced, that seam was left open, and we removed 2 inches of trunk-floor metal from the framerail tops when the floorpan spot welds were removed. After the trunk floor was replaced, that seam was welded. POR15, a rust preventative, was brushed on the bare metal areas and a bead of Evercoat Maxim Self Leveling Seam Sealer was run along the seams. Make sure to install the drain-hole plugs correctly. They shouldn’t look like an upside-down top hat.
The last step was to install the two Dynacorn front-seat platforms. These went in easily since there was only one place that they would sit flush. They fit perfectly into place, snug up against the cross brace that runs from side to side on the floorpan. These were also drilled and plug-welded into place.
As the trunk floor was the next item to be replaced, that seam was left open, and we removed 2 inches of trunk-floor metal from the framerail tops when the floorpan spot welds were removed. After the trunk floor was replaced, that seam was welded. POR15, a rust preventative, was brushed on the bare metal areas and a bead of Evercoat Maxim Self Leveling Seam Sealer was run along the seams. Make sure to install the drain-hole plugs correctly. They shouldn’t look like an upside-down top hat.
Description Source P/N Price Full Floorpan Dynacorn 1046A 399.95 Seat Platform Driver Dynacorn 1052A 59.95 Seat Platform Pass Dynacorn 1052B 59.95 2 Floor Hole Covers Classic Performance 1047F 2.99 each Tek Screws Amazon No.8X5/8 6.99 POR15 Rust Prevent POR15 No.45 31.15 Control Flow Seam Sealer Evercoat 6023 $29.39