Hey, check out that truck. How did they get it to sit so low with wide tires and stock rear fenders? Proper planning, that’s how. With that planning comes the properly sized rearend width, installation of wheelwells in the bedsides and properly measured for wheel backspacing. To start with, you need to know what you want to run for a wheel and tire width. Are the wheels you want 8-, 10-, or 12-inches wide? I have always run a 10-inch wide wheel in the back and an 8-inch wide one in the front.
Tire size is the next consideration. Normally on a 10-inch wheel the tire ends up right around 12-inches wide at its sidewall bulge.
The rearend width I have found to work well in the ’53-56 Ford F-100s and the ’55-59 Chevy is 55 inches overall. This means you’ll need a rearend housing that measures 50 inches. The axle flanges will stick out the extra 2½ inches on each side to make up the other 5 inches. This is not a set-in-stone measurement either. If 56 inches works better in your situation, no problem; it will only change the backspacing by ½ inch.
The usual clearance between the inner fender lip and the bedside is about 11-12 inches for Fords and Chevys. These 2¼-inch wheelwells will open you up to the 14-inch range. You’ll want to leave at least ¾ inch (an inch is better) between the widest part of the tire and the fender lip and wheelwell.
Having the narrower rearend will allow you to run a wheel with its center around the center of the rim. A 10-inch rear wheel will have around 5 inches of backspacing. This will give the wheel a deep look. This will also allow you to run a 12-inch wide tire within the 14-inch clearance.
When it comes to which type of wheelwell to run it depends on what kind of look you want. I have used and loved the spun-looking 2¼-inch wheelwell from Dan Carpenter for years. They are easy to install, look great, and also come in a 4-inch version. C10 Chevy truck’s square, boxey-shaped wheelwells could work also. No Limit Engineering offers some fiberglass wheelwells. There are plenty of others I can’t think of off the top of my head along with years of trucks in the wrecking yards that might yield a pair to your liking.
Attaching the wheelwells is another consideration. Some could be screwed in with nice 10⁄32 stainless button heads or the usual route is to weld them in. We all know the problems welding can cause and the time involved. There has to be an easier way. Then it hit me one morning – why not glue them in with a structural adhesive like the new cars use? We tried it at Bobco, it worked, and we have been doing them this way for a few years.
The adhesives available now are pretty incredible. If you properly apply this stuff and bond two pieces of sheetmetal together, you will destroy the metal trying to separate them. This stuff is forever. It’s a two-part epoxy adhesive that is dispensed with a caulking-style gun. Since it is a two part, there are two cylinders and the gun has two rams. The special tube you attach to the cylinders to apply the adhesive is a special mixing tube. As the adhesive is working its way out of the tube, it passes back and forth through the tube and each part mixes together.
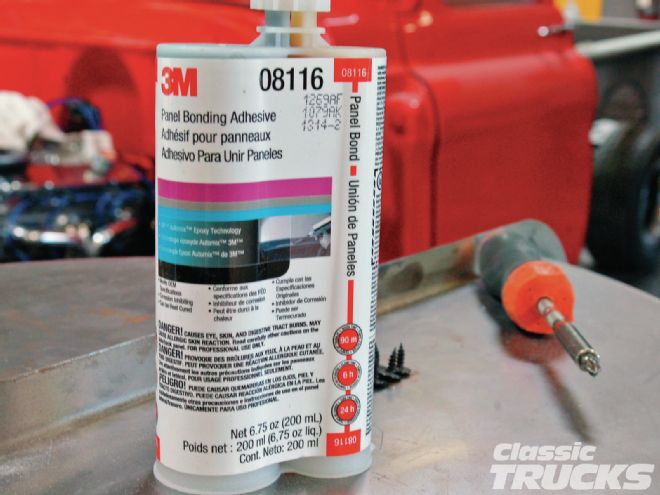
Specifically the type and brand we’re using here is 3M Panel Bonding Adhesive (part number 08116). (The manual applicator gun needed is part number 08117.) It was designed to bond non-structural steel, aluminum, SMC, and FRP body panels. It is used in the replacement of automotive doorskins, quarter panels, box sides, van sides, roofs, and other outer body sheetmetal. This particular adhesive gives you a working time of 90 minutes. It will be set up so you can unclamp it in six hours and it’s fully cured in 24.
I went over the bedsides and the wheelwells with a sander to rough up the metal a bit. Then applied a 1⁄8-inch bead of adhesive to the wheelwell flange. Since I have 90 minutes of working time, I put the adhesive on both wheelwells then installed them into the bedsides with small 1⁄8-inch sheetmetal screws. When the adhesive set, I removed the screws. The small holes will get filled in the bodywork stage.
Follow along and see how I put the same wheelwells into both a 1956 Ford F-100 and a 1955 Chevy bed. The Ford bed was done at Bobco’s in Lake Elsinore, California, and the Chevy bed was done at a new little hot rod shop in Lake Elsinore called Z Best Hot Rods.
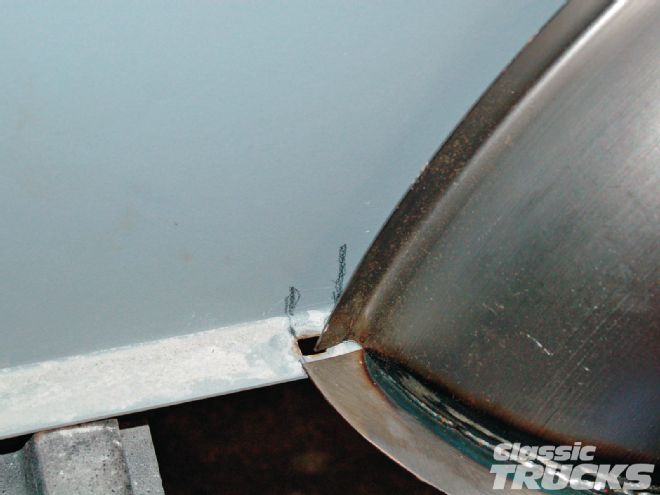 01 On the ’53-56 Ford pickup bed, the wheelwell’s front flange edge will take out the hole for the front bed crossmember.
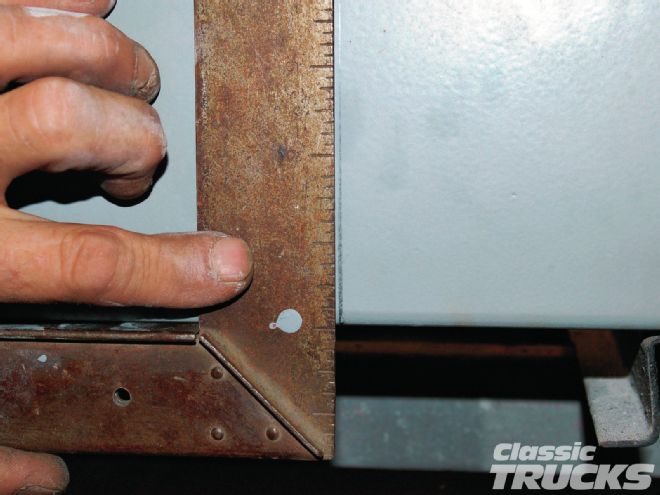 02 With a square I transfer the line for the edge of the wheelwell to the outside of the bedside.
 03 Just like the Chevys, I clamp or hold the well in place against the bedside and reach my hand up between the bedside and the well with my short pencil and mark the top of the wheelwell.
 04 With plasma cutter set about medium, just follow the radius line. On the inside of the bed the flange will also have to be cut.
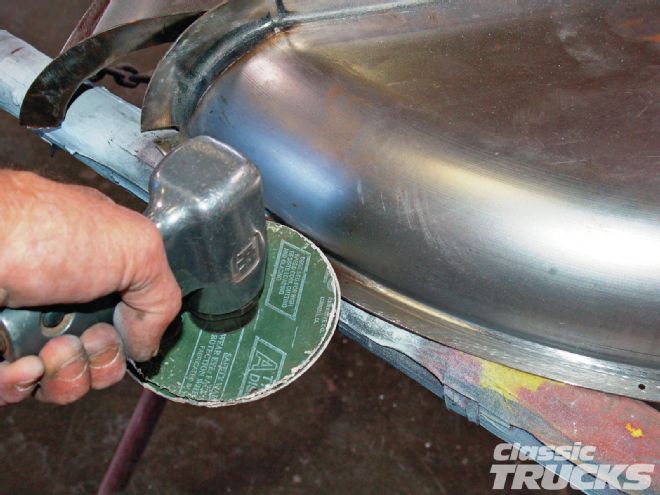
 05 After getting the opening close with a hard stone grinder, I finish up with the sander.
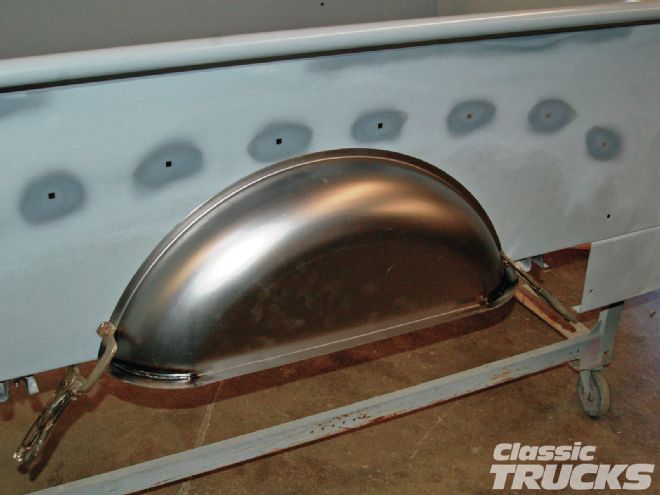
 06 With a couple of C-clamps holding it in place I can check the fit.
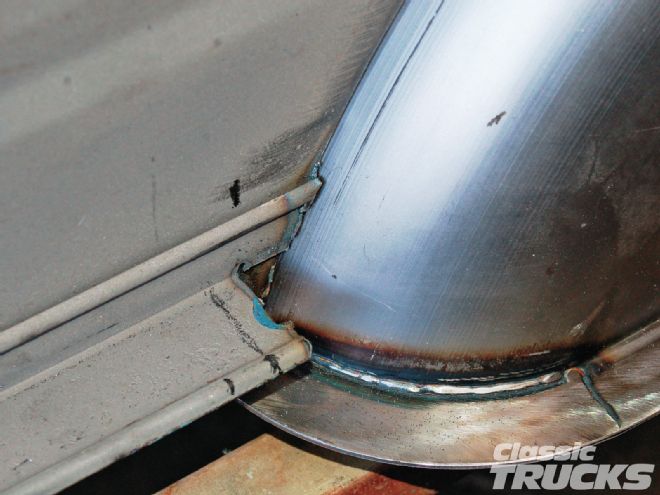
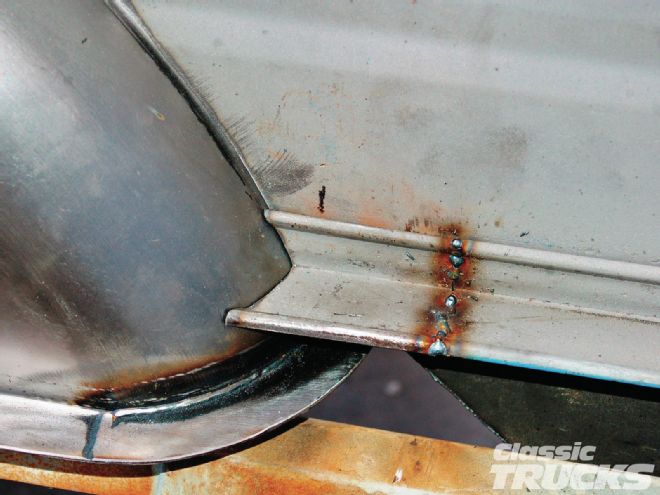
 07 Here the flanges will meet up and I will put a small weld here at the two flanges. This truck will have a raised bed floor so the floor of the bed will actually be mounted above this flange on its own structure. That’s why I went ahead and matched up these flanges. The truck will be low with big tires so I wanted the wheelwell up as high on the bedside as possible. The flanges being attached will add some strength back to the side.
08 As with the Chevys, I drilled 1⁄8-inch holes for five sheetmetal screws to hold the wells in place while the bonding adhesive sets.
07 Here the flanges will meet up and I will put a small weld here at the two flanges. This truck will have a raised bed floor so the floor of the bed will actually be mounted above this flange on its own structure. That’s why I went ahead and matched up these flanges. The truck will be low with big tires so I wanted the wheelwell up as high on the bedside as possible. The flanges being attached will add some strength back to the side.
08 As with the Chevys, I drilled 1⁄8-inch holes for five sheetmetal screws to hold the wells in place while the bonding adhesive sets.
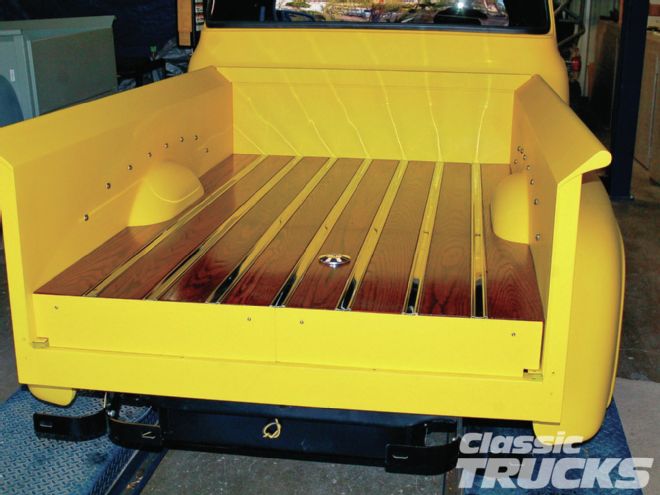
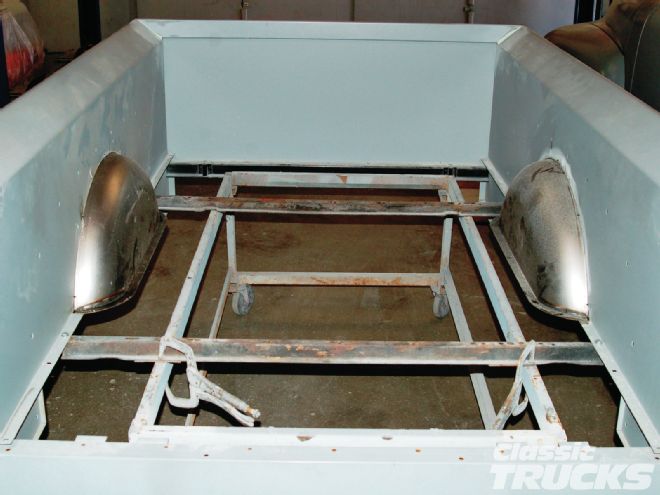 09 They look great when installed in either bed, Ford or Chevy. Dan also offers these wheelwells in a 4-inch deep version. You can refer to the lead image to see the finished product installed in the Ford F-100 bed. As you may notice, the F-100 bed floor has been raised for additional rearend housing clearance.
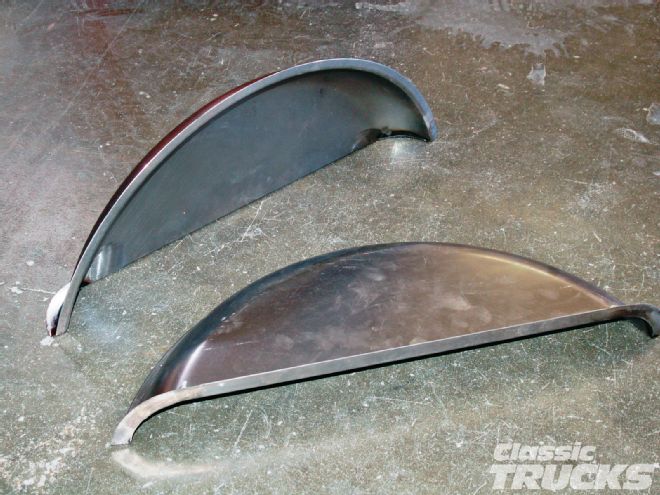 10 These are Dan Carpenter’s 21⁄4-inch wheelwells. He actually makes these for the classic Ford truck crowd since his business is making and selling the Ford beds and related pieces. These are really easy to install and fit well. The smooth contour of the wheelwell itself blends right into the bedside. He also offers a 4-inch deep version.
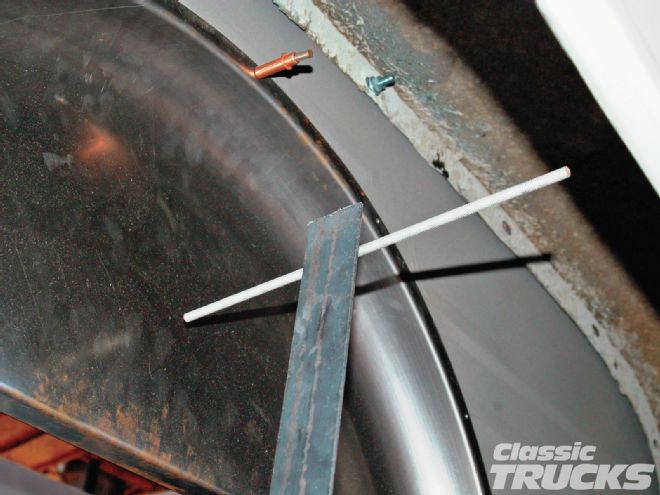
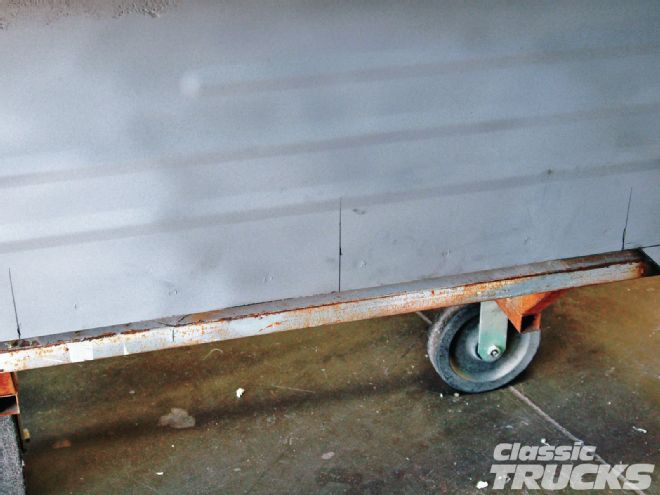 11 Since the bed was on a rolling cart and not the chassis, I found the centerline of the rearend by measuring from the front bed mount hole in the frame to the center of an axle tube (361⁄2 inches). Then I measured from the front bed mount hole in the crossbrace attached to the bed and back 361⁄2 inches for my centerline on the bedside. The outer two marks are my width limits for the wheelwell.
 12 To make the cutout mark for these wheelwells, hold them up in place where you want them height-wise. I usually keep the bottom flange of the wheelwell 3⁄4 inch below the edge pieces the bed wood fits under. If you keep the flange down it will be under the bed wood. If you put the flange up with the stock edge flange that will work well too, except the wood will have to be specially routed to fit. Not hard, just creating extra steps. If you are planning on raising the bed floor for more rearend clearance anyway then it doesn’t matter.
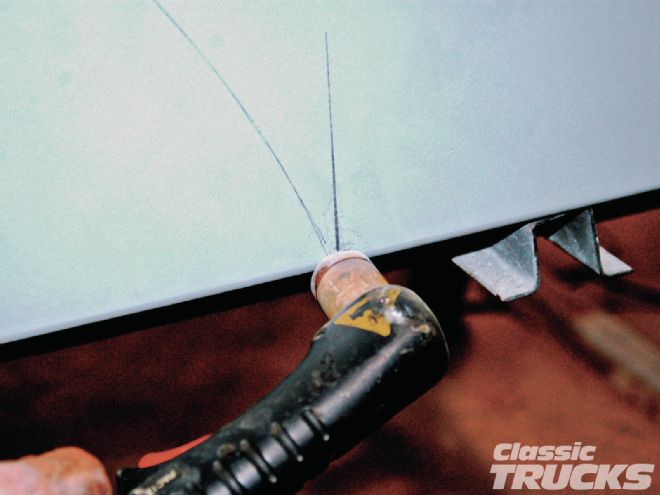
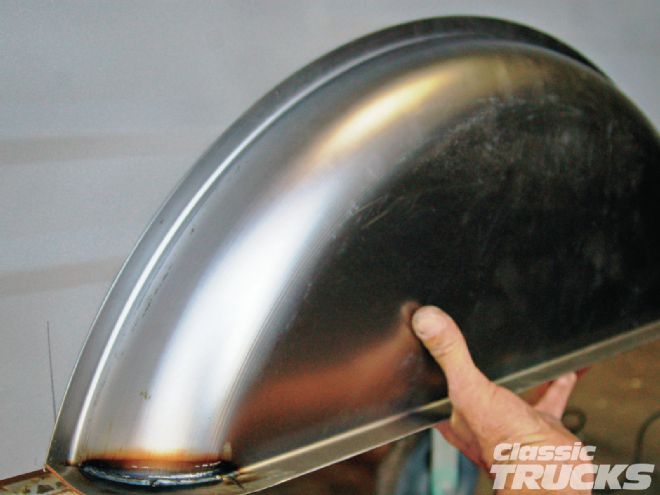
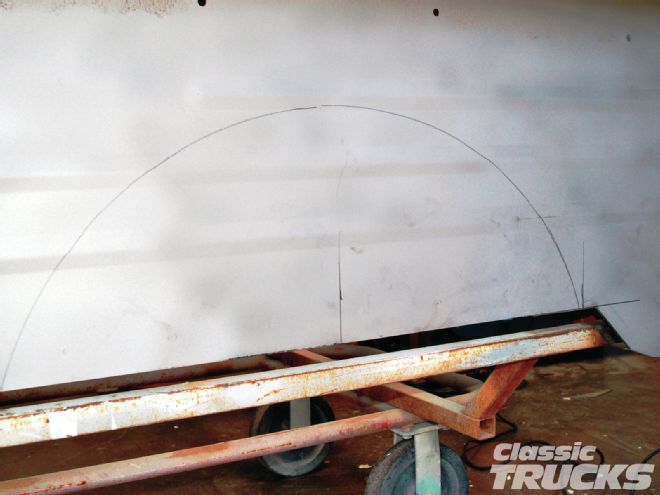 13 When I get it positioned where I want it to go, I use a real short pencil, about 1-11⁄2 inches long, between my first two fingers to make the marks. You need to stick your hand up between the wheelwell and the bedside and let the pencil follow the very top of the inside of the well and the bedside. This will get you real close for a first fit.
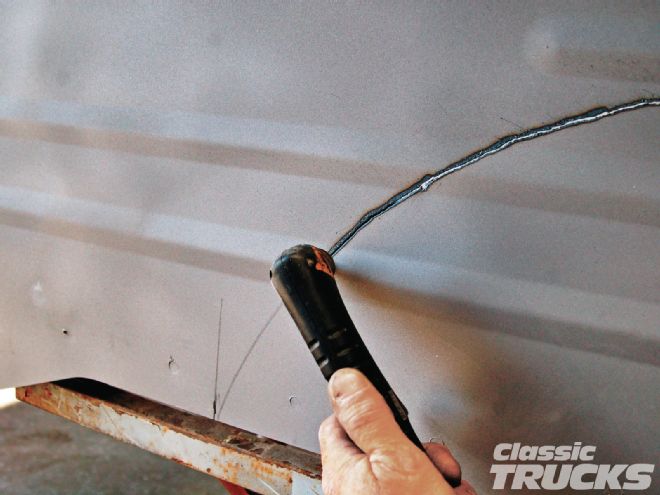 14 I carefully cut on the pencil line with the plasma cutter and then the panel comes right out.
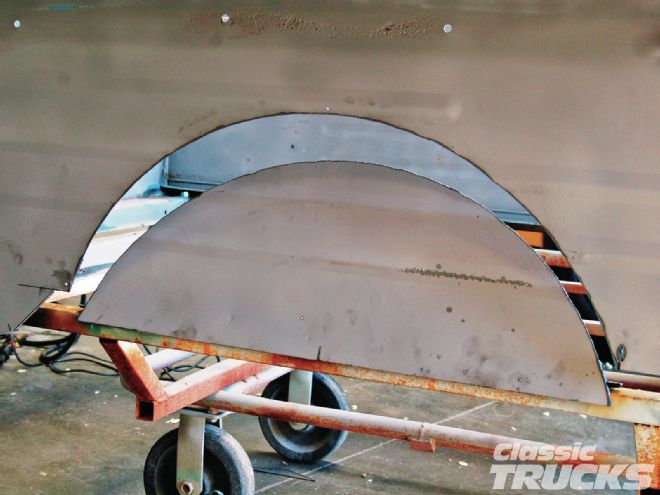 15 After a quick dress-up with my hard stone grinder I can try my first fit.
 16 I wasn’t too concerned about trying to trim these inner flanges to fit while also fitting the wheelwell. I’ll come back and make some fill pieces from the extra rail I will have and dress those spots right up.
 17 Here I’m cleaning up the edges for the final fit and put some Clecos to hold it in place.
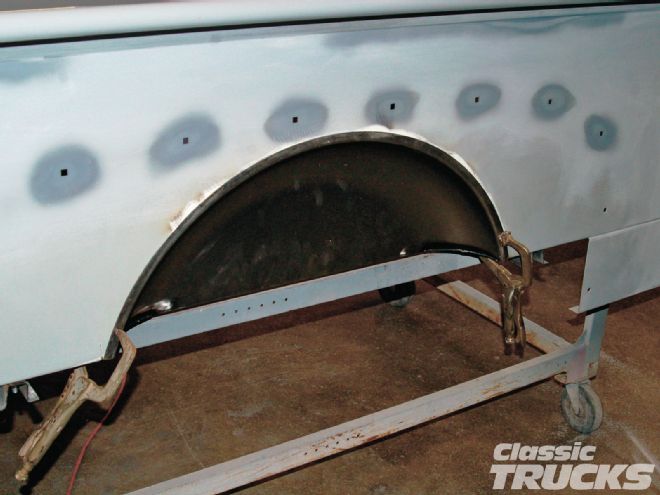
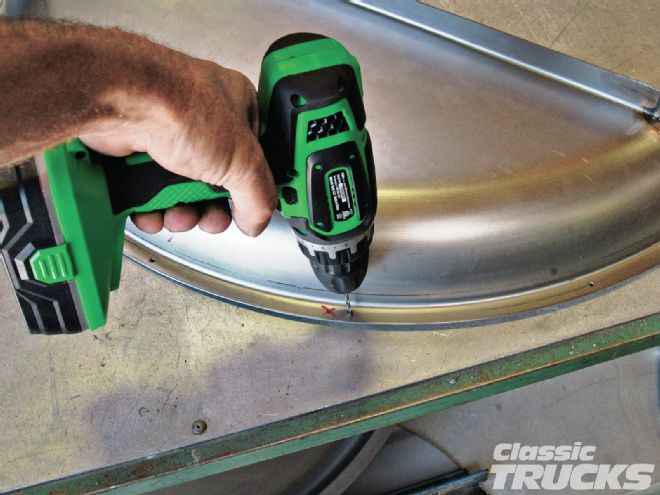 18 I drill five 1⁄8-inch holes for the Clecos in the wheelwell first, then position it in my opening, mark and drill the holes. Do the top one first and it will hold the wheelwell while you do the rest.
 19 To fix the side flanges where they got cut from the wheelwell install, I drilled out the spot welds on a piece from one of the sides I cut out. With this extra piece of rail I’ll make fill pieces that will blend right into the wheelwell.
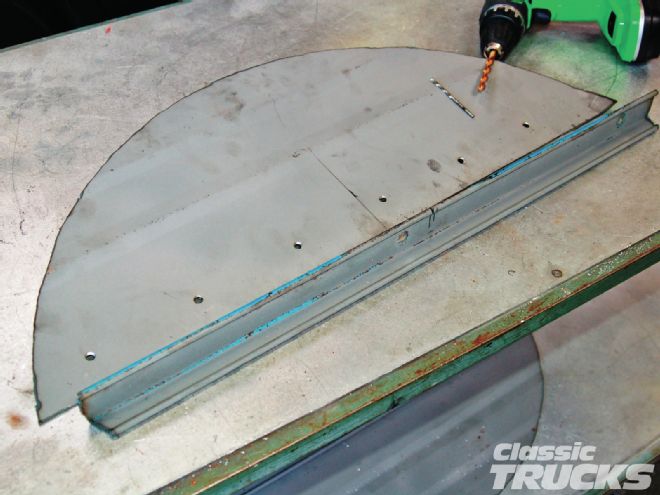
 20 I always start by cutting out a cardstock template of the shape I needed first, then transferred that to the edge rail piece and cut those out on the bandsaw. Some grinding and shaping and they fit perfectly.
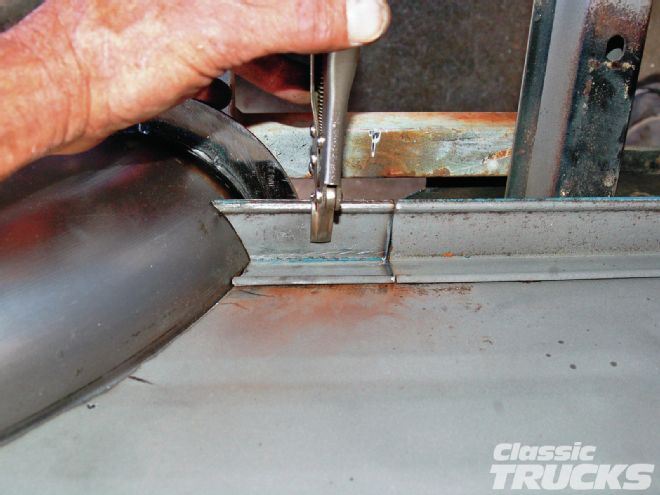
 21 Using the MIG welder, I positioned and welded in all four needed pieces. They will not get welded to the wheelwell.
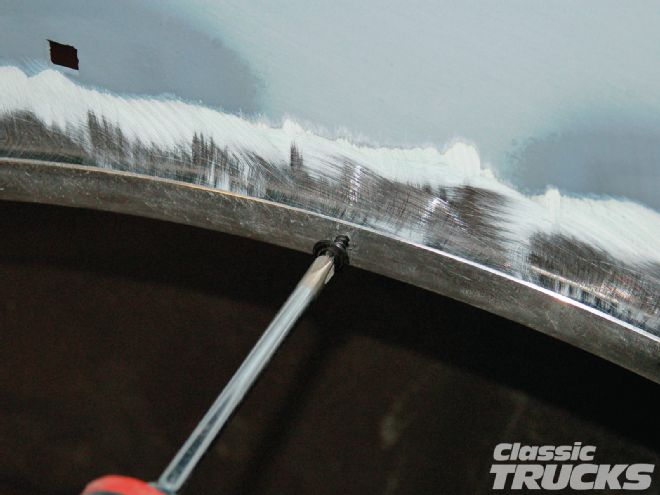
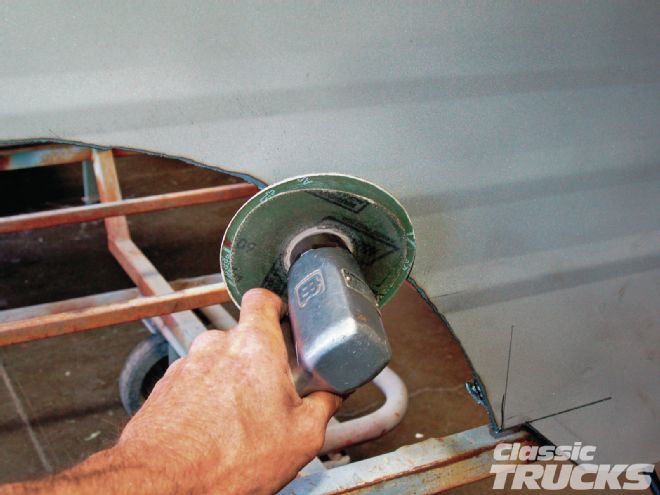
 22 After I got them welded in I used a hard stone grinder and dressed up the welds. If you wanted to switch to one of the chrome or polished edge rail kits available, you could use these as your templates to cut the new ones perfect the first time.
23 Final check before attaching the wheelwells to the bedside. Everything looks good so the next step is to bond these babies in with a structural adhesive that is used for bonding new car panels together. It works great, doesn’t warp the bedside from heat, and is pretty easy to work with.
22 After I got them welded in I used a hard stone grinder and dressed up the welds. If you wanted to switch to one of the chrome or polished edge rail kits available, you could use these as your templates to cut the new ones perfect the first time.
23 Final check before attaching the wheelwells to the bedside. Everything looks good so the next step is to bond these babies in with a structural adhesive that is used for bonding new car panels together. It works great, doesn’t warp the bedside from heat, and is pretty easy to work with.
 24 Before we bonded the wheelwells in, we put the bed on the chassis just to be sure the wheelwells were in the right spot and figure out some backspacing for Pat’s new wheels.
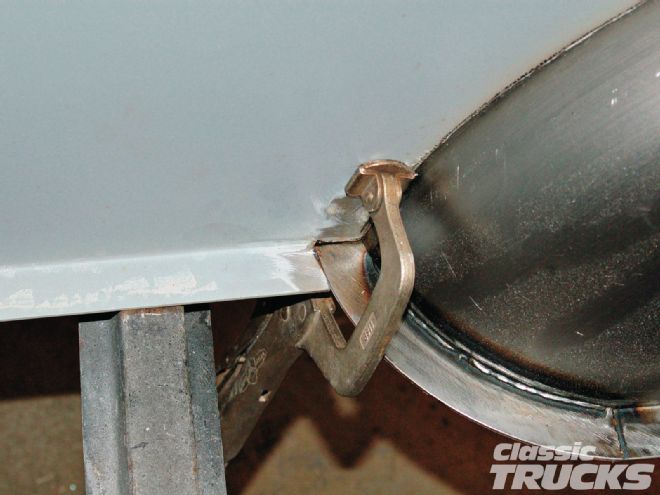
 25 These wheelwells have been a favorite of mine for years because of their looks and how easy they are to install.
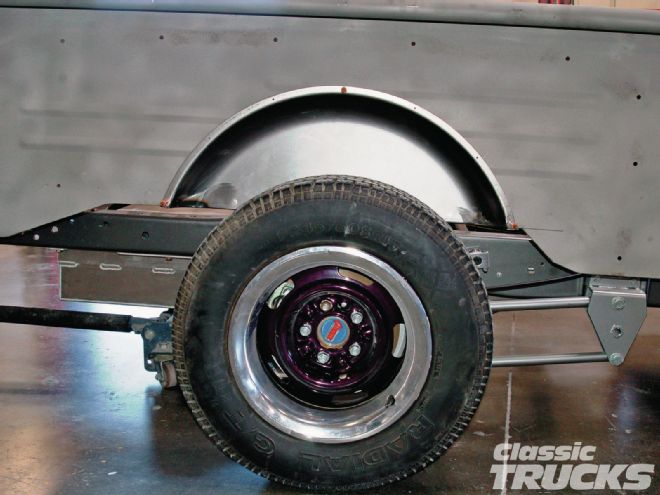
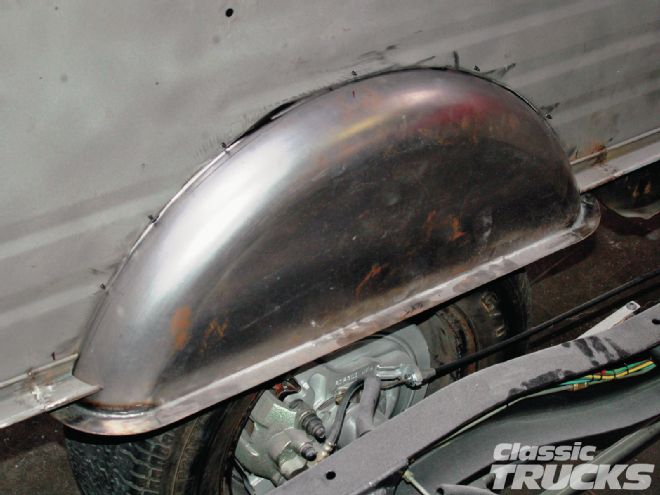
 26 I jacked up the rear of the truck, removed the roller wheels and bolted the fenders on both sides with a few bolts to hold them in place. You really should check both sides, you never know if a fender lip is sucked in or something weird wants to wait and find you later.
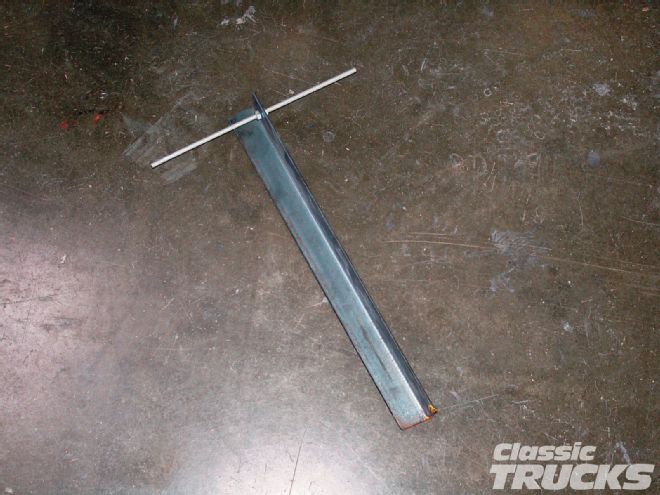 27 This is my inexpensive wheel backspace finder tool. Pat knows he wants to run a 10-inch-wide wheel in the rear and a tire that is around 12 inches in total width.
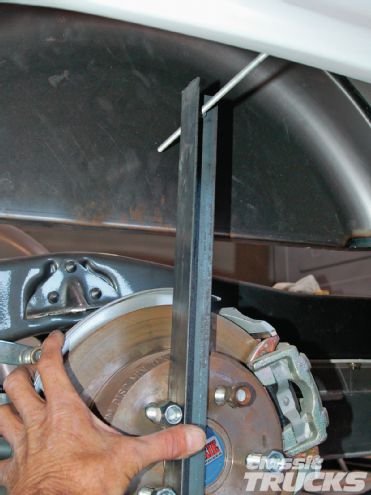
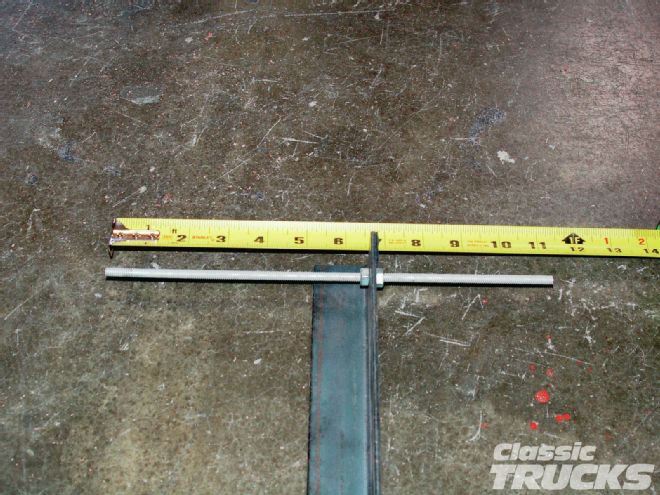
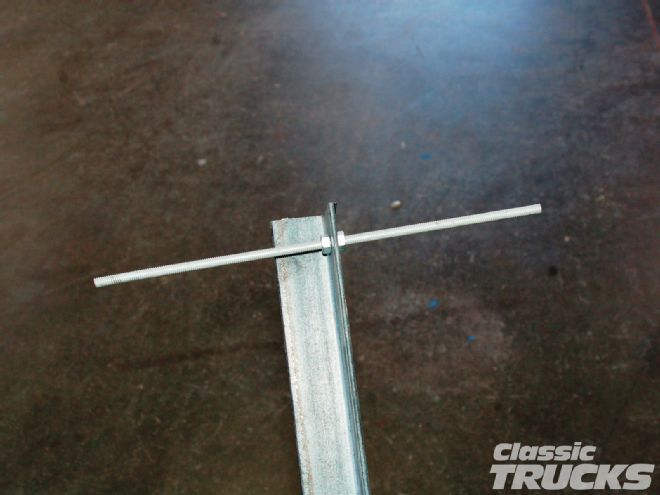 28 This piece of 1-inch angle is about 18 inches long with a 1⁄4-inch hole drilled at the top, centered. Since I want a 10-inch wheel I cut some 1⁄4-inch thread 11 inches long and mount it on the angle with a couple of nuts to lock it in place. I usually start with the all thread about centered.
29 Put the face of the angle flat on the drum/rotor and raise the all thread up to where there might be interference. Adjust the all thread to give you close to the same measurement at the inside of the wheelwell and the fender lip.
28 This piece of 1-inch angle is about 18 inches long with a 1⁄4-inch hole drilled at the top, centered. Since I want a 10-inch wheel I cut some 1⁄4-inch thread 11 inches long and mount it on the angle with a couple of nuts to lock it in place. I usually start with the all thread about centered.
29 Put the face of the angle flat on the drum/rotor and raise the all thread up to where there might be interference. Adjust the all thread to give you close to the same measurement at the inside of the wheelwell and the fender lip.
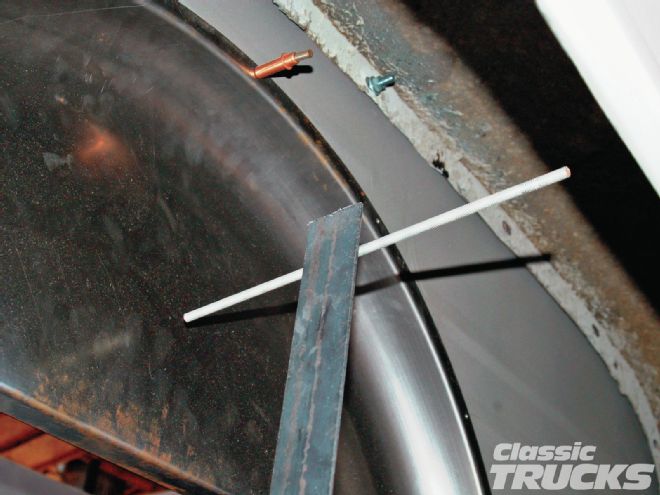 30 When you have the all thread centered within the wheelwell and around 1-11⁄4 inch on each side of the all thread that is where you want the face of your new wheel. Tighten the nuts to hold the all thread in place and remove tool.
 31 Now by measuring the placement of the all thread in relation to the one face of the angle iron that was up against the drum/rotor, I’ll have the backspacing measurement needed for his new wheels.
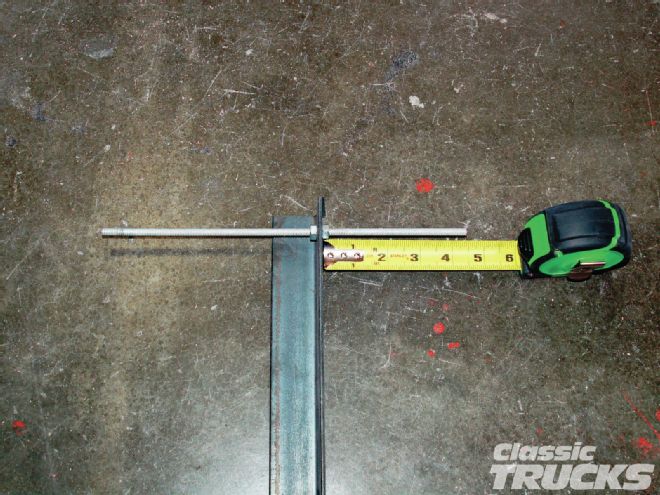 32 For the 10-inch-wide wheel, you really measure 11 inches. Looks like Pat needs a 41⁄2-inch backspace on his 10-inch wheel. That will give the 20-inch wheel a real bitchin’ look!
33 Now that the backspacing is done, I pull the fenders back off and start getting ready to bond-in the wheelwells. First I used the sander to rough up the wheelwell flange and also the bedside where the two will make contact.
32 For the 10-inch-wide wheel, you really measure 11 inches. Looks like Pat needs a 41⁄2-inch backspace on his 10-inch wheel. That will give the 20-inch wheel a real bitchin’ look!
33 Now that the backspacing is done, I pull the fenders back off and start getting ready to bond-in the wheelwells. First I used the sander to rough up the wheelwell flange and also the bedside where the two will make contact.
 34 Here’s our 21-century welding kit. Not really, but this adhesive bonds so well you will have thought it was welded. It is a two-part epoxy adhesive that mixes in the special applicator tube. Space-age stuff. The small sheetmetal screws will hold the wheelwell in place until the adhesive sets.
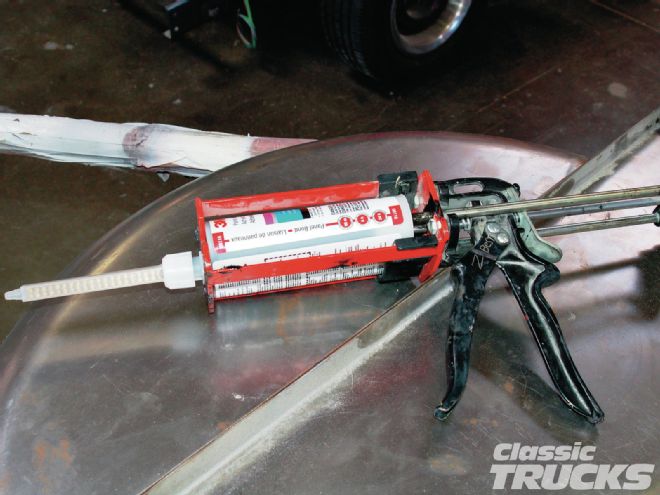 35 It does require a special applicator gun with the twin-ram system. The paint store could sell you one or maybe that bodyman friend of yours will let you borrow his.
 36 Squeeze the trigger and go. I laid down a 1⁄8-inch bead per the instructions. You might also want to wear gloves when working with this stuff. It won’t hurt you; it just doesn’t like to come off. Set the wheelwell in place and install the screws. I started at the top, and then I did the bottom ends and then the rest. I cleaned up the excess adhesive now while it was still pliable. The next stage is some bodywork and a coat of red paint. You can see just how neat these wheelwells are. They have a nice smooth flow to them and would look good in any bedside that needed them.