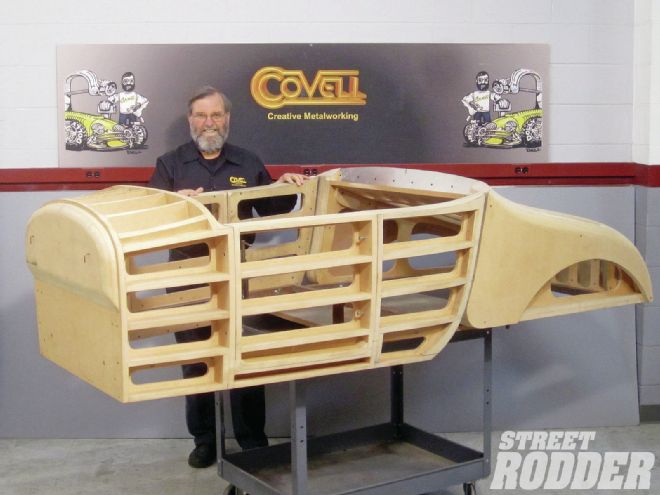
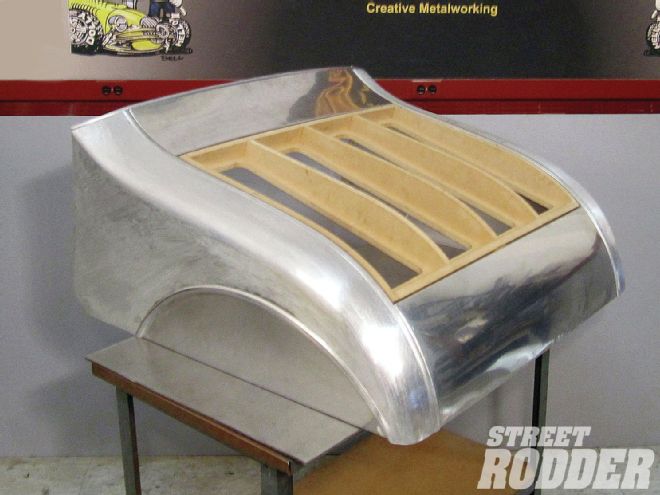
 This is the buck for a ’27 Ford roadster body that was made in the last installment. This time, I’ll show you how to make the turtle deck.
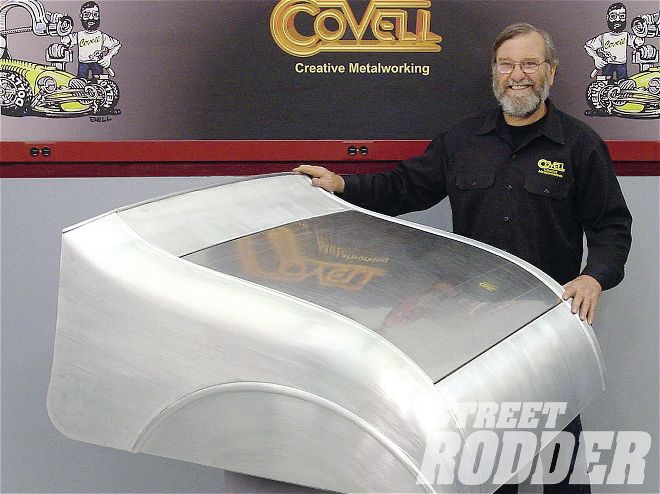
In the last installment, I built a wooden buck to help make a ’27 Ford roadster body. This time, I’ll make the rear section of the body, the turtle deck.
As a recap, the primary purpose of a buck is to provide a target to aim for while shaping the sheetmetal panels. Some areas of this buck have been reinforced so the metal can be hammered directly against it. As you’ll see, this will be very helpful for some of the details, like the flanges on the edges of the panels, and the radiused top edge of the turtle deck sides.
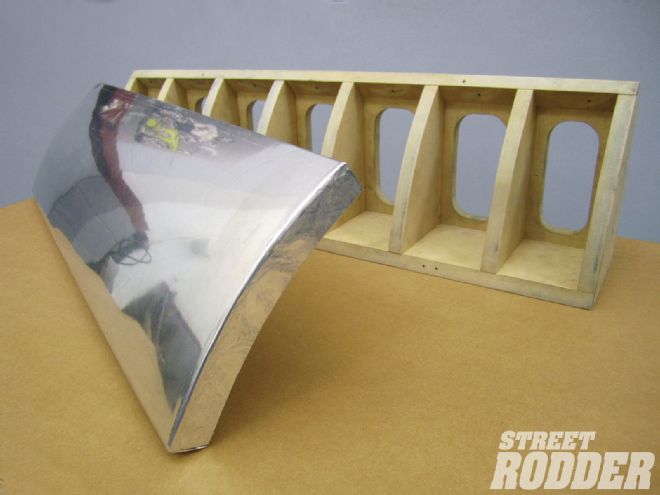
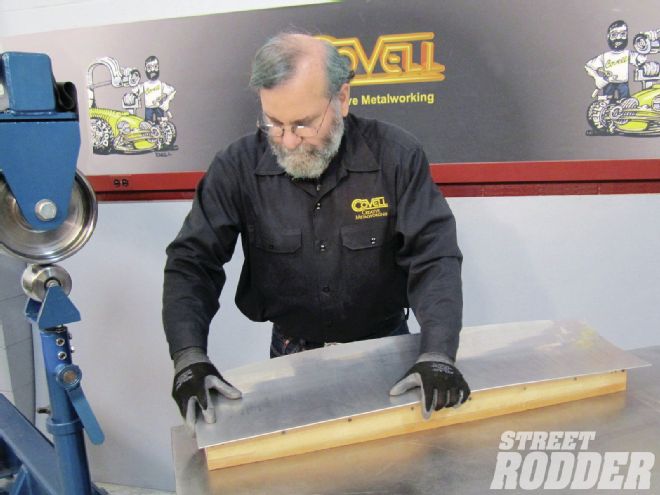
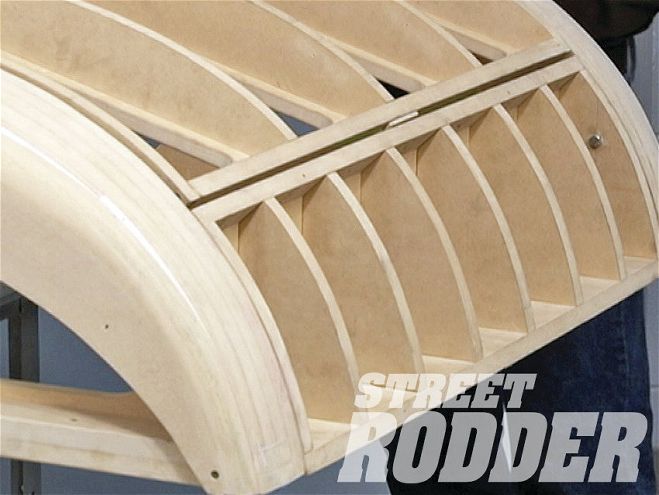 The first panel I’ll make is the one below the decklid. This portion of the buck is removable, and it has all the necessary contours and edge profiles.
I started with the easiest panel; the one below the decklid. This panel has a 1-1/4-inch flange on all sides, so I started by cutting a piece of metal about 3 inches oversize to allow for the flanges, plus a little extra material. The alloy I’m using is 3003 H-14 aluminum, 0.062 thickness (1/16 inch). This is a popular choice for jobs like this, since it’s a nice, easy-to-form material that’s ideal for welding.
The first tool I used was an English wheel, which is a great tool for shaping low-crown panels. This job could be done with a pneumatic planishing hammer, but an English wheel makes it fast and easy, and once you’ve mastered the proper tracking patterns with the machine, it’s not too difficult to get a nice, uniform crown on the entire panel.
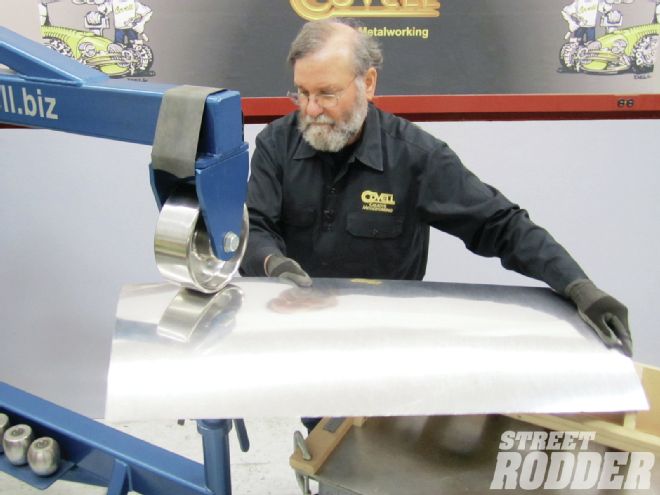 A piece of 0.063-inch 3003 H-14 aluminum is cut slightly oversize, and an English wheel is used to put the proper amount of doming into the panel.
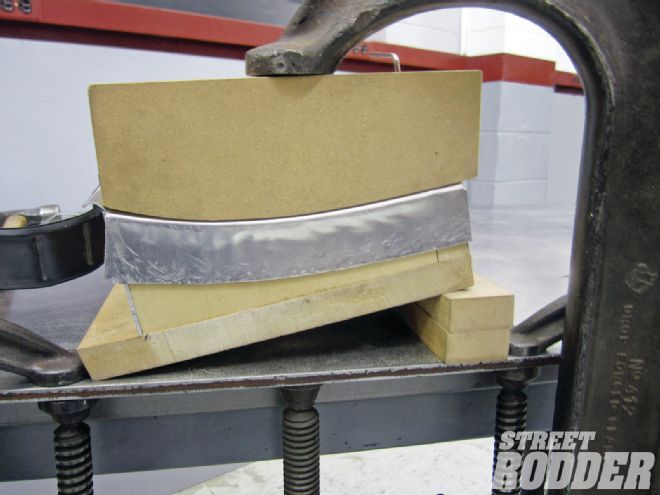
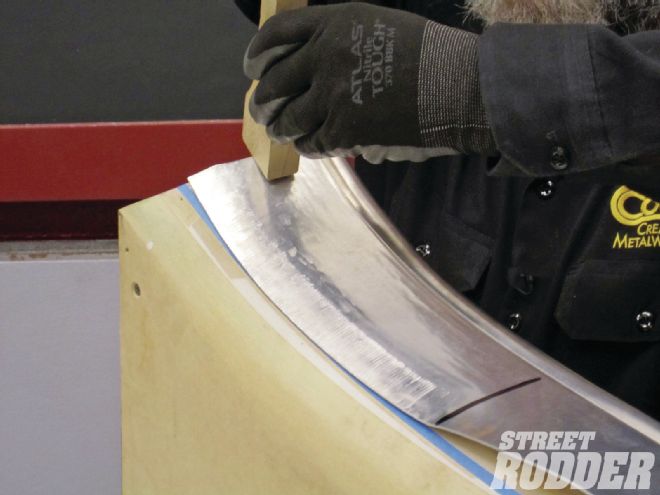
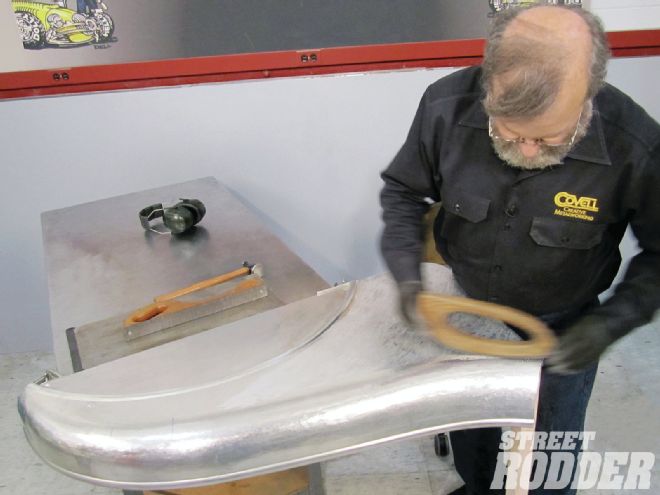
Once the panel was properly shaped, the edge work was next. I formed the flanges on this piece by hammering the metal right against the hammerform. To do a proper job of this, clamping blocks were made. These keep the metal next to the flange from changing shape, and they prevent the clamps from leaving marks on the metal. I annealed the edges with an oxy-acetylene torch to ease the forming of the flanges.
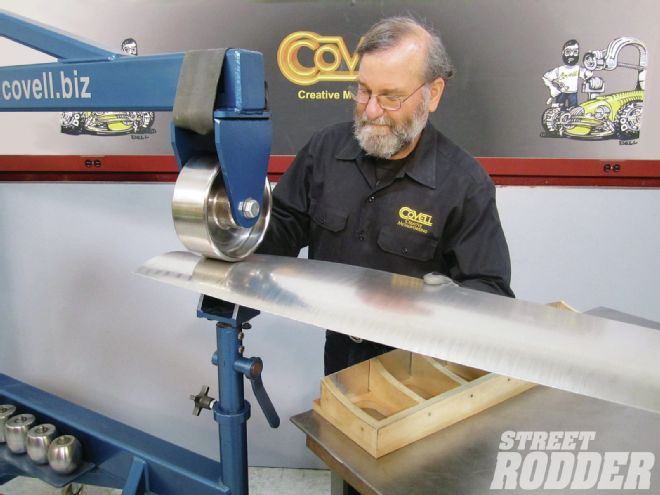
Next, I tackled the panel above the decklid, the “tulip” panel. This one is a bit smaller than the first, but more difficult to form since it has a reverse curve; it’s convex side-to-side, but concave front-to-back. Again, I did the shaping with an English wheel, but the procedure for making a reverse curve is different—most of the work is done by stretching the edges. I wheeled this panel very carefully, working out any problem areas as I went. It’s difficult to correct the shape of a reverse curve if it gets too far out of whack.
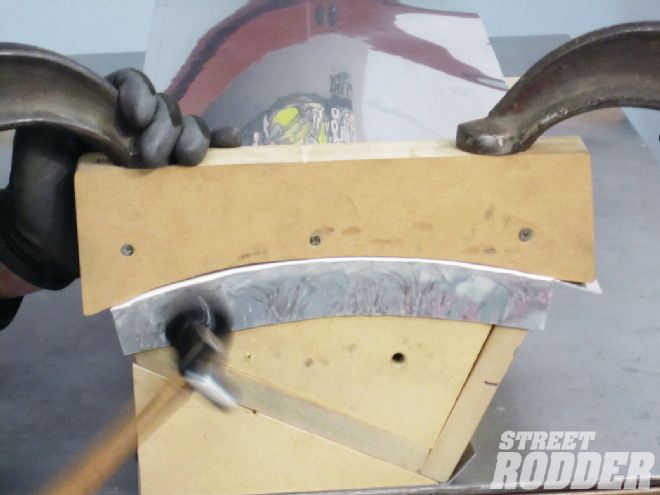 Once the panel has the proper contours, the flanges are formed by hammering them against the buck. Note that a clamping block is used.
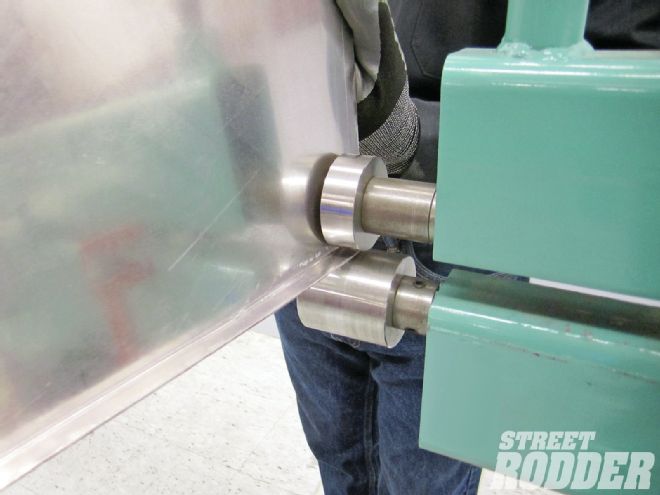
After the panel was shaped, it was trimmed to size, and I put a 5/16-inch bead on the front edge. The stock T doesn’t have this detail, but I want to have a bead running all around the cockpit opening on my car. I used my electric drive Lazze beading machine for this, but a manual machine would work, too. Next, the flanges on the other three edges of the panel were formed by hammering against the buck, just like the lower panel.
The turtle deck sides were next, and these are complex parts to make. They are dead flat on the sides, but they have a graduated-radius curve on the top edge. In addition, each panel has a straight bead on the inner edge, a curved bead around the wheelwell opening, plus flanged edges, and a recess for the wheelwell.
The straight top edge is the only one that could be bent on a sheetmetal brake. The reflections on the panel show how smoothly it was shaped.
The “tulip” panel above the decklid is next. This panel has a reverse curve, so a special tracking technique is used with the English wheel, stretching the edges.
The panel is checked against the buck repeatedly, and the shape is adjusted until it fits accurately.
A beading machine is used on the front edge of the panel. The original panel did not have this bead, but I’m extending this feature all around the cockpit opening.
Now the panel is marked against the buck, so the edges can be trimmed for flanging. This panel will have a 1-1/4-inch flange on three sides.
The flanges are formed by hammering against the buck. It’s essential to use a clamping block to keep the edge smooth, and to eliminate marking from the clamps.
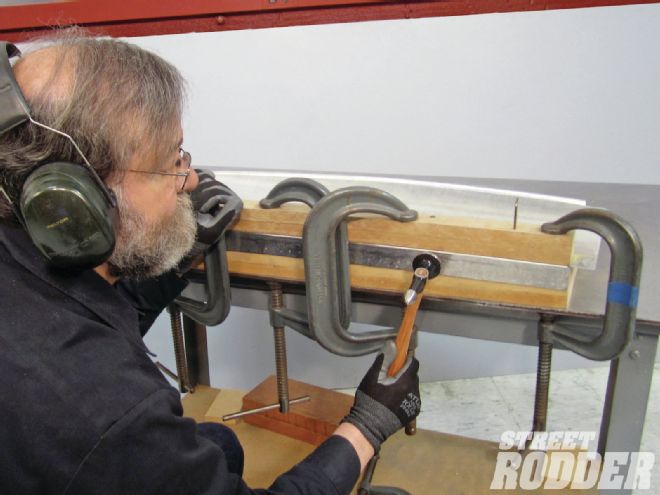
Here’s the end flange after hammering. It’s 90 percent smooth at this point, and a little hammer and dolly work and sanding will finish it off.
Here’s the panel with all of the edgework completed.

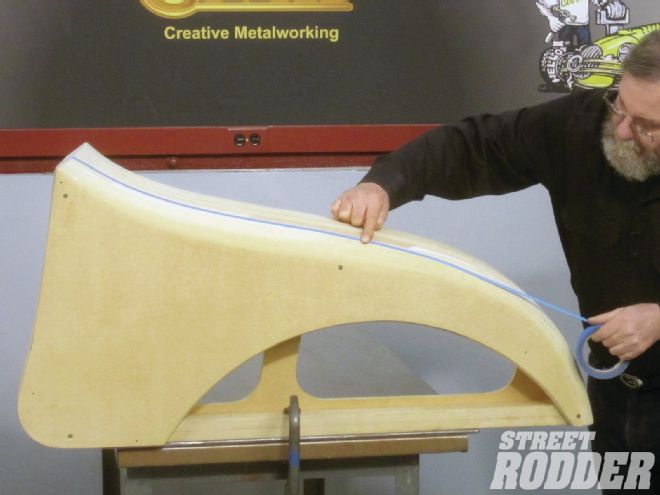
The side panel will be made from three pieces; the top, side, and wheelwell. Here I’m using tape to plot the break between the top and side panel.
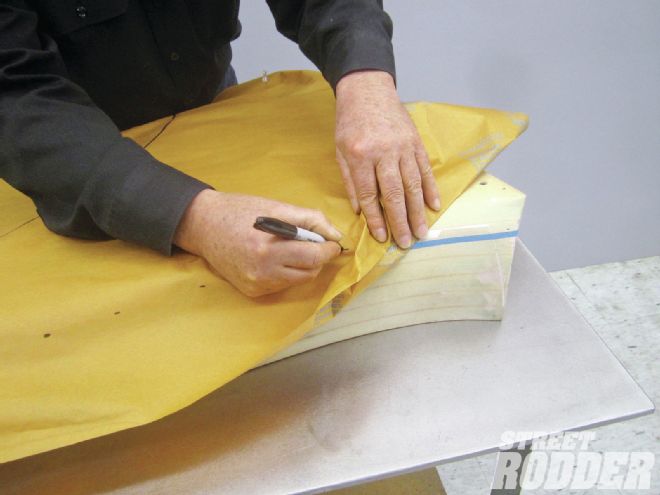
Paper is used to make a pattern for the aluminum side panel. I can feel the tape line through the paper, and I’m using a pen to mark the paper for trimming.
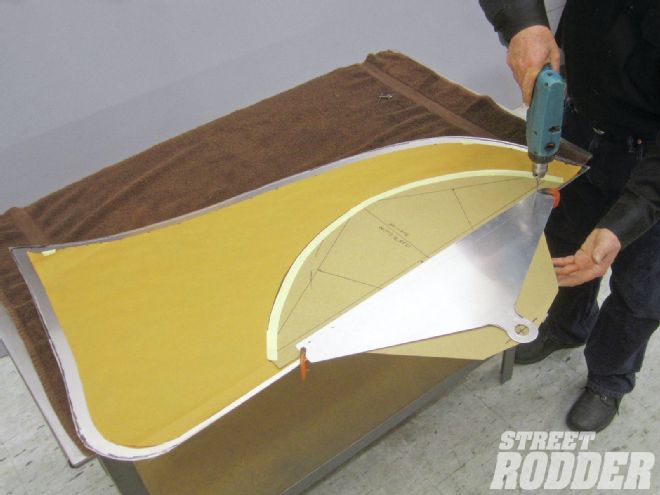
A layout is done for the wheelwell. I’m temporarily attaching a center pivot here to ensure the bead around the wheelwell opening is made precisely.
This is a Dake Universal machine, fitted with beading dies. This is a great way to form a bead in a large, awkward panel like this. Note the support table under the work.
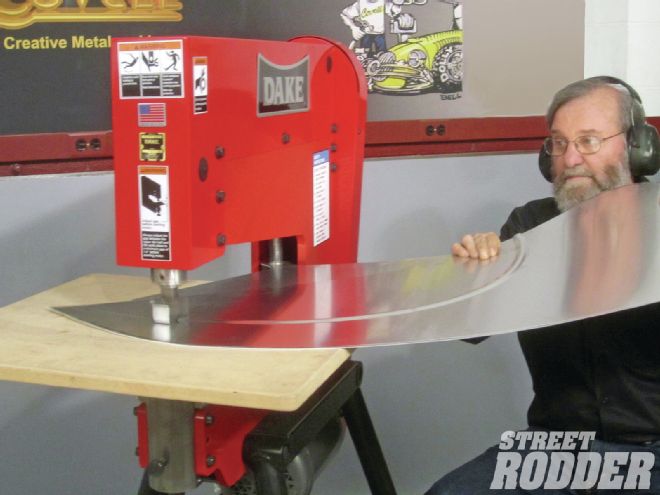
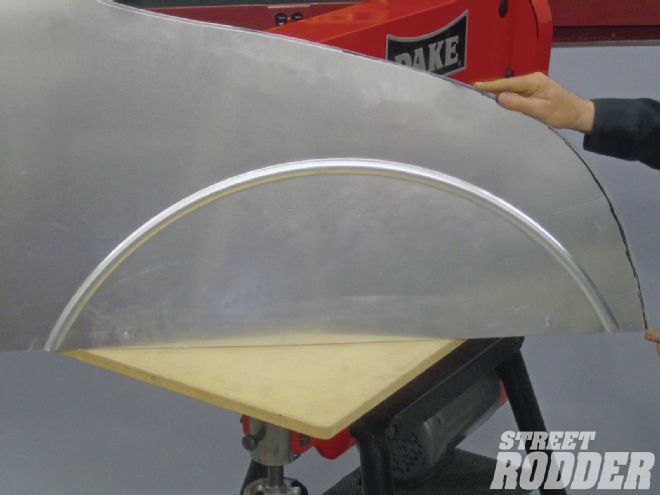
Here’s the finished bead on the turtle deck side panel. Using a center pivot eliminated any guesswork for this crucial detail.
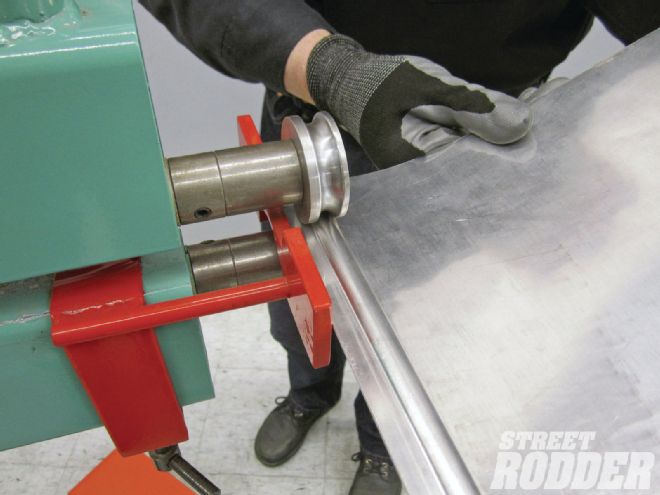
The beading dies in the Dake machine were modified to work on a flanged panel. Here I’m forming the bead on the top panel.
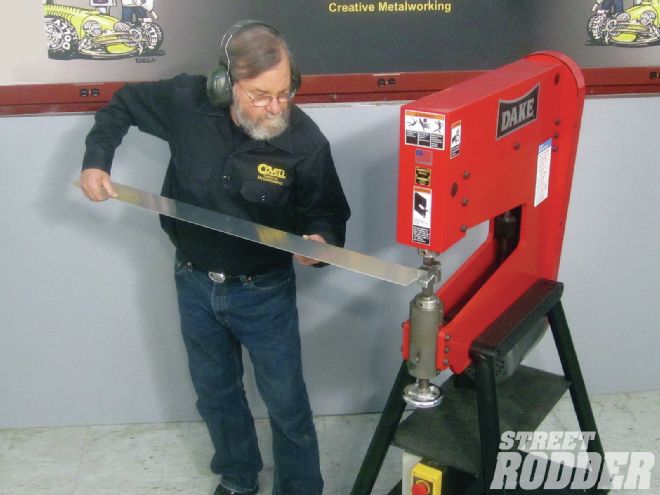
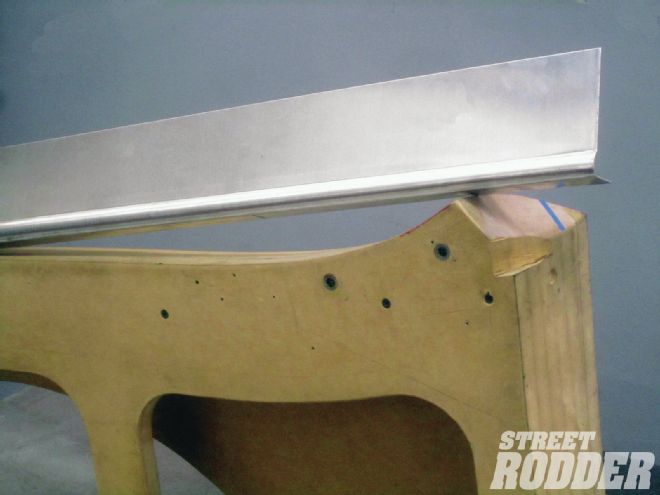
Here you can see the bead formed right at the edge of the flange. Next, I’ll use a shrinker and stretcher to contour the panel to match the profile of the buck.
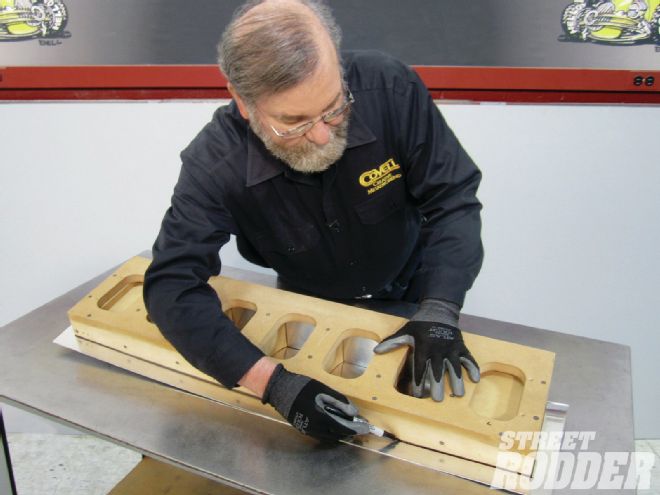
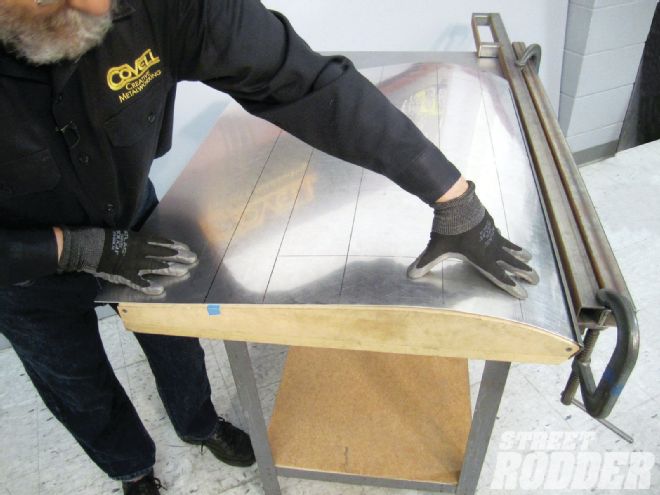
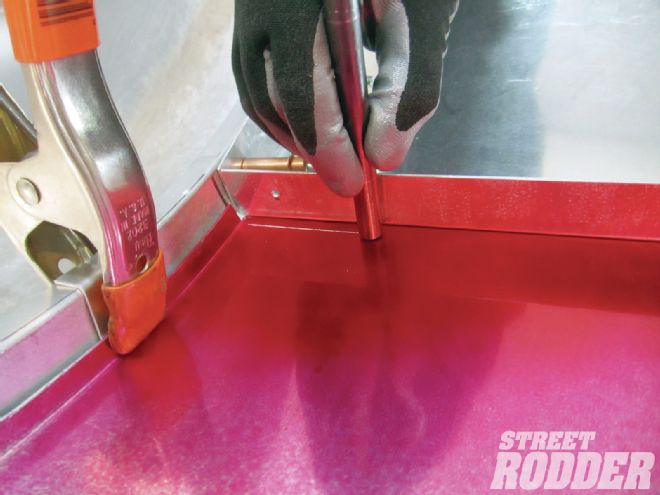
After the edge is properly contoured, it is temporarily fastened to the buck with screws. I’m using a caulking tool here to work the metal down tightly against the buck.
After blanking the side panels out, I was ready to form the beads for the wheelwell openings. I recently got a Dake “Universal” machine, similar to a Pullmax, and I thought this would be an ideal way to form this important detail. I used shop-built dies to make the bead, and rather than free-handing the curve, I decided to guide the panel from a center pivot, ensuring the radius of the bead would be absolutely true. After finding the center of the wheelwell, I screwed a temporary fixture plate to the panel. This plate has a 1-inch hole in it, which I positioned at the center of the wheelwell radius. The Dake machine has an adjustable guide that this plate can slip over. I also made a table for the machine to hold the panel level as it is guided through the dies. The bead was done in two passes, and the results were outstanding!
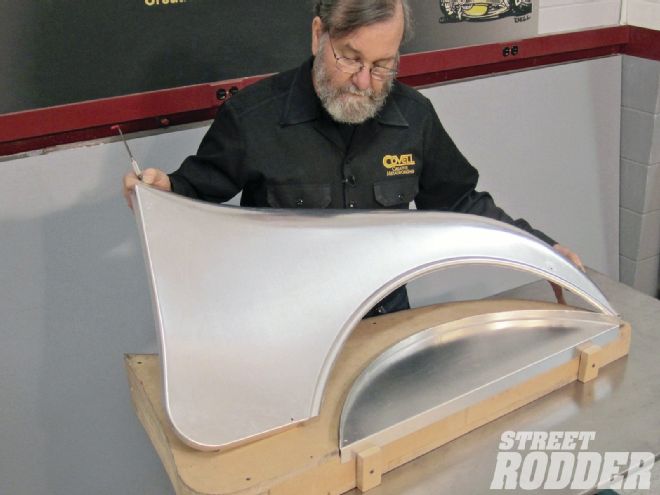
 Here’s the finished top panel. A little additional shrinking and stretching was required on the edge to get a snug fit.
The top panels were next. I bent a 1-inch flange on pieces of metal 42 inches long. These flanges fit against the inner edge of the buck, so the flanged edges on the cross panels will meet them. The beading dies were modified to fit over the flange on these panels, and I ran each of them through the machine, producing a nice, crisp bead.
Next, I used a stretcher and shrinker, like the Eastwood, to contour these panels to fit the buck. Once they fit perfectly, I annealed the outer edge of the panels, and then I used drywall screws to hold the inner flanges securely against the buck. I used a wooden caulking tool to start working the panel down tightly against the curved top edge of the buck. A short time later, with some use of a stretcher, a shrinker, and a body hammer, I had a nearly perfect fit.
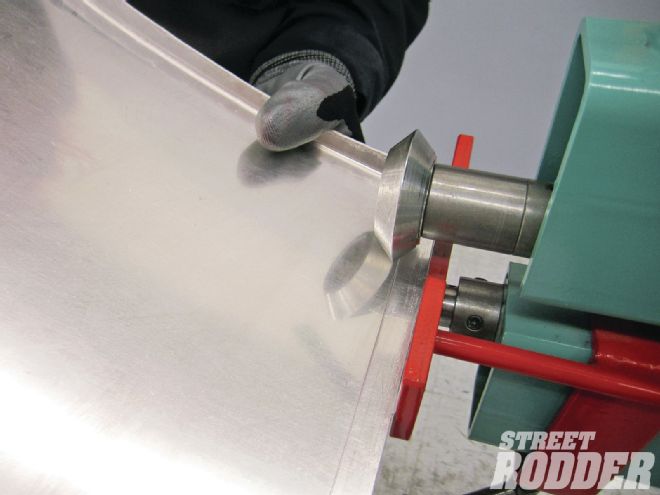
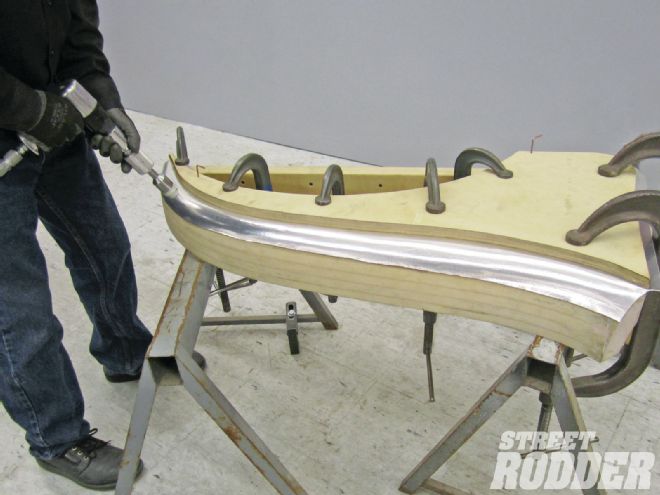 The side panel is formed next. I’m using a rivet gun with tooling from TM Technologies to quickly form the metal tightly against the buck.
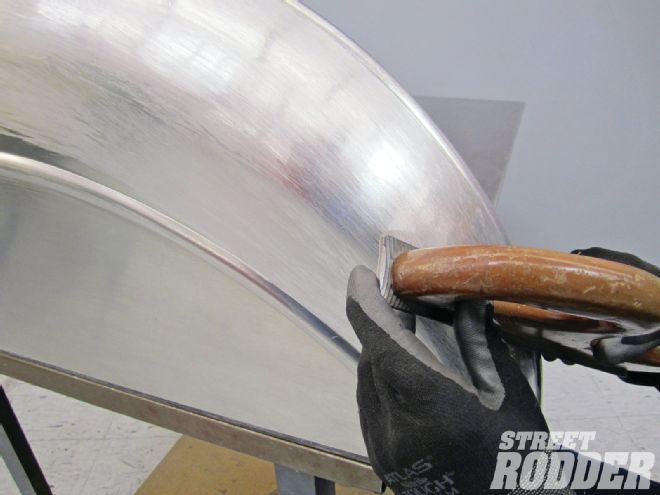
I recently borrowed a riveting gun from a friend, equipped with special plastic-tipped tooling from TM Technologies. I decided to use this to roll the edge of the turtle deck side over the hammerform, and it did a fantastic job. It’s much faster and smoother than hand hammering.
I used this same tool to form the edge of the wheelwell panel, working over another hammerform, and then I cut the side panel out to fit the wheelwell, and welded them together using a Miller TIG welder. This edge weld was a little tricky to clean up, but after about an hour’s work with some sanders and files, the first side was completed.
 The wheelwell is formed as a separate piece, and flanged by using another hammerform. Here I’ve trimmed the side panel to fit the wheelwell.
Next, I joined the side piece to the top piece. They were tack-welded first, and then the joint was worked with a hammer and dolly to fine-tune the alignment. Once everything was fitting just-so, I TIG-welded the joint. I got a little distortion from the welds on these long seams, so I did some heat shrinking in the center of the panel to eliminate the “oil-can” that developed. After straightening the panel, I metal-finished everything, and the reflections from the newly filed surface showed just how true and consistent all the contours were.
With the turtle deck sides finished, I joined them to the cross pieces, and set the buck for the decklid into place to check the fit. With everything looking good so far, I used the English wheel to shape the skin for the decklid, checking the fit against the buck periodically.
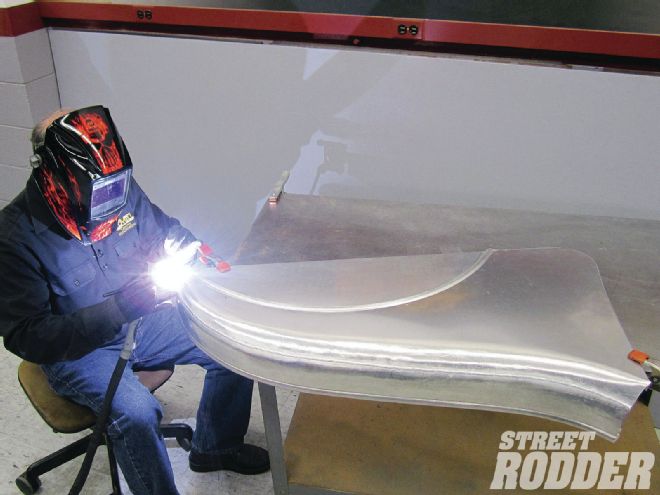 I’m TIG welding the panels together with a Miller machine, using 1/16-inch-diameter 1100 alloy filler rod.
After the panel was properly shaped, I was ready to flange the edges. The top edge was straight, so I made that flange on a sheetmetal brake. To ensure the sides of the decklid matched the opening perfectly, I scribed the location of the flanges from the inside with a transfer punch.
I decided to form the last three flanges in a way I hadn’t tried before; using a beading machine with a “tipping” (peaked) die on top, and a skateboard wheel on the bottom. This tooling makes a gentle but precise crease on the edge of the metal, and leaves a crisp line at the base of the flange. Next, with flat dies installed, I ran the panel through the machine freehand several times, sharpening the angle of the flange with each pass. As long as I kept the edge of the crease precisely aligned with the die, this worked very well, and my few minor wobbles were easily corrected with some careful hammer and dolly work.
 After welding, the bead was sanded flush on the outside, and worked with a hammer and dolly to flatten the inside. I’m nearing the end of the metal finishing here.
After flanging, the decklid was tried into place, and with some small adjustments, the fit was excellent. Look closely at the photos that accompany this article; they should clarify many of the details. Stay tuned for the next segment.
Ron Covell has made a DVD to accompany this article, showing every step in much more detail. A broad range of techniques are demonstrated, and Ron’s ongoing commentary, coupled with the great close-up photography, will take the mystery out of this complicated project. You can order from Covell Creative Metalworking online at www.covell.biz, or call (800) 747-4631.
A convex file is needed in the reverse-curve area near the front of the panel. Now you can get a good idea of how nicely the panel has been smoothed out.
The side panels are fitted to the cross panels, and the buck for the decklid is checked for fit. Everything looks great, so I’ll start wheeling the decklid skin.
The shaping on the decklid is about two-thirds completed at this point, and I’m checking it against the buck to see where to make the final adjustments.
The last step is forming the subtle reverse curve at the front of the decklid. The panel is placed upside-down in the English wheel for this operation.

The edges are being run through a beading machine in preparation for flanging. I’m using a tipping die on the top, and a urethane skateboard wheel on the bottom.

Next, flat dies are placed in the machine, and the panel is run through several times with upward pressure, bringing the angle of the flange up to 90 degrees.
The lower flange is marked last. I’ve clamped the panel into place, and sprayed Dykem on the surface to highlight the line left by the 7/16-inch-diameter transfer punch.
After trimming the panel 1/2 inch from the line, it is carefully tracked on the scribed line, using the tipping die and the urethane bottom wheel.
With the flanging completed, the decklid is tested for fit. After a few small adjustments, you can see that it fits great, and the contours match perfectly.