Thinking back over the past few years, something has occurred to me. I have written stories on chopping tops, frenching headlights, pancaking hoods, shaving door handles and so on. Really what it boils down to is I have covered stories from beginning sheetmetal work to about as advanced as it gets. Yet, somehow through all of that I skipped attaining an AA degree. What I’m getting at is, never once have I covered the fundamentals of metalwork. (As I think more about this, this issue is probably directly linked to my short-lived team sports go-around. I was ready to rock and skip all that fundamental practice. Coaches and I didn’t see eye to eye!)
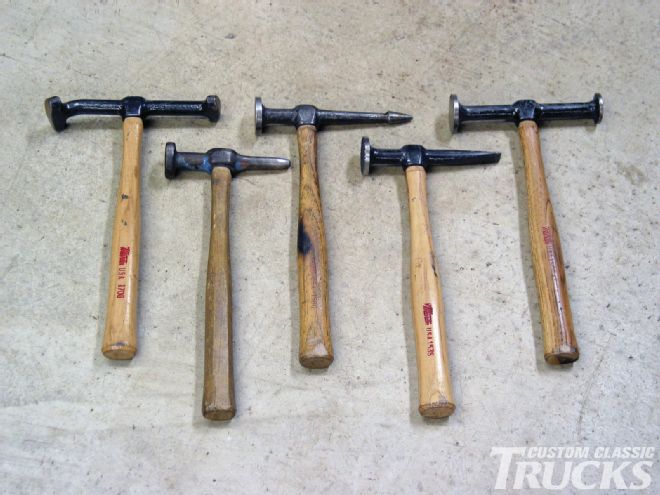
 Here’s an assortment of various hammers. As you can see, each has a different shape and head than the others. At some point in time every hammer will be used, but I find myself using my basic pick hammer (seen dead middle) 90 percent of the time. The Eastwood Company offers a great selection of Martin hammers, as shown, which are excellent all-around hammers, but costly as well. For those more budget-minded, Eastwood offers a set of private labeled hammers with fiberglass handles that I have found to be more than complimentary.
Now before we get involved in our fundamentals of sheetmetal, one thing needs to be made clear: philosophies, techniques, practices, and methods don’t equal skill. If there’s one thing about sheetmetal, it’s the fact that “on the job training” can’t be substituted. In words and pictures, and even theory, it all looks so simple, but it’s quite the contrary. With that disclaimer out of the way, we’re about to delve into the basic fundamentals of metalworking.
Like opinions, each person has their own style of metalworking; therefore what you’re gonna get here is mine! The way I was taught to try and understand metalwork is that a piece of sheetmetal is nothing but thousands of little metal balls (let’s call them BB’s for the sake of the story) molecularly strung together as one big sheet.
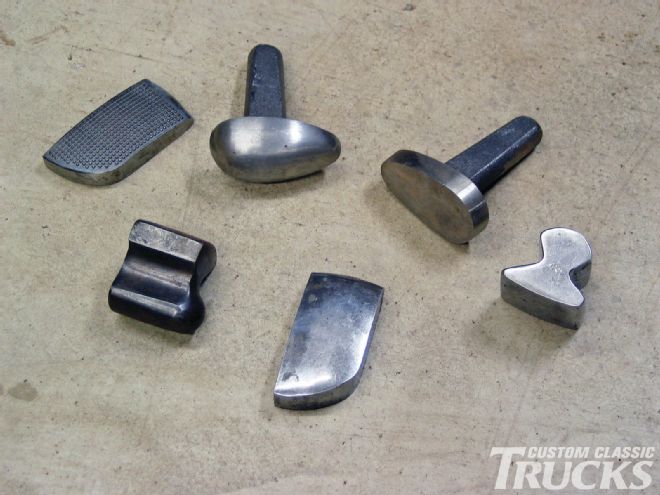 Where there’s a hammer, there’s a dolly, and as you see they too come in various forms. Again, Martin is always a good choice, but the Eastwood dollies are a good, affordable alternative.
Now imagine that you took a hammer and smashed the corner of your sheet. What just happened? Essentially you took a bunch of small BB’s and flattened them. True to most things, every action has a reaction. By smashing the BB’s they have been flattened and their circumferences have increased, which in turn pushed themselves farther apart from one another. One smashed BB won’t do much, but smash 25 BB’s and place them together, and your surface area has increased from the size of a quarter to a 50-cent piece.
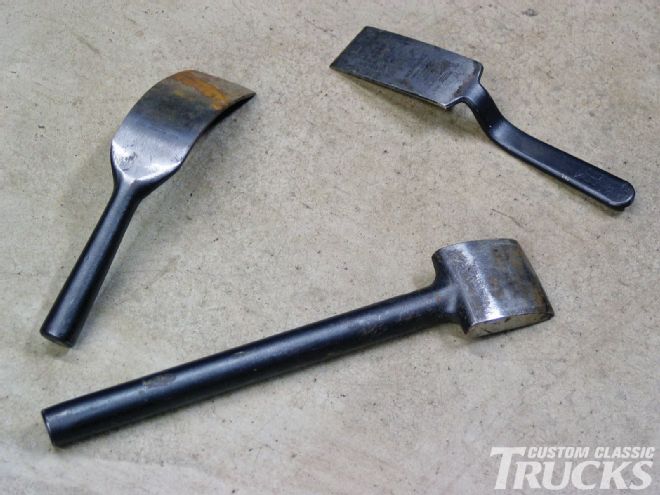 Here’s a look at body tools known as spoons. Spoons are ideal for situations where hammers and/or dollies can’t fit or reach. A spoon can take the place of either the hammer or dolly when in a tight spot. Because situations vary as well, spoons come in various configurations.
In metalworking this action is called stretching. And any time sheetmetal is dented or dinged the molecular structure has been disturbed and the area has stretched. Luckily metal is highly malleable, meaning it can alter shape, which is why it stretches instead of breaks. However, there is a point where metal retains no more elasticity, and that is the point in which it will tear. Because of those properties, just about any piece of sheetmetal that hasn’t been altered past its point of elasticity can be worked to regain its original composition. Restoring a stretched piece of metal is carried out through its polar opposite—shrinking.
What is shrinking? Let’s go back to that blow we hit in our panel mentioned previously. The low point of the dent is where the most stretching has occurred, which means those BB’s are at their flattest. Like before, every action has a reaction. Take an earthquake for instance. The fault moves at the epicenter, and then sends out a wave of reactions in a 360-degree motion—the same goes for our dent. As the metal stretched at its epicenter (its low point), it sent out a 360-degree wave. As the area stretched, it pushed more and more metal outward, and once it hit the ring around the dent, it collided with the rest of the metal and smashed up like an accordion. All of these BB’s have now crammed into one another at the point of impact to create a shrunken area.
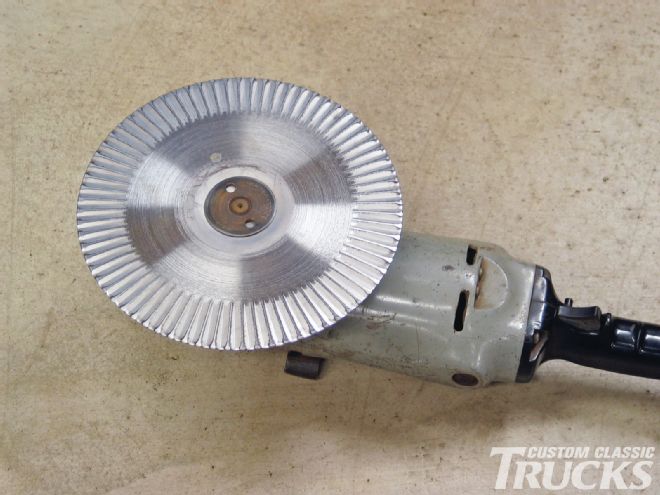 Here’s a look at a shrinking disc. This one is of the pie-cut variety. Like a grinding disc, it is placed at the end of a basic handheld grinder. These too can be picked up at Eastwood.
Because the area has obtained so much more material, there is nowhere for it to go but up. Think about your old Hot Wheels days. Pretend you have just lined up 10 cars, placed a hand at each end of the train, and are pushing toward one another. If you remember correctly, eventually the cars in the middle would begin to lift off the ground. The more pressure you brought, the higher the cars lifted, and again eventually you went too far and the cars went crashing about.
Shrunken metal is the same way—it can only shrink so much before it begins to bulge outward. That’s why oftentimes when you feel a dent, the outer ring actually protrudes from the surface because the metal has simultaneously shrunk (created a protruding ring) and stretched (creating a dent). A good way to remember things, is typically when dents are concave they stretched, and when they are convex they are a shrunk.
In a nutshell, that’s metal. All forms of metalworking are based on the premise of either shrinking or stretching to restore or alter a piece of sheetmetal’s composition. The real key to mastering the craft of metalwork is identifying what areas are shrunk and stretched, and at that point deciphering what method will correct the area. As there are plenty of ways (and even more tools!) to accomplish this feat, we’re going to keep things at the very basics and stick to the methods of hand tools.
 By using the tip of an oxyacetylene torch, and then immediately cooling the area with water, one can shrink a severely stretched piece of sheetmetal. Again this approach is something only one can attain though practice; therefore you should practice on a junk fender to see how the sheetmetal reacts.
Hammer and Dolly
The beginning of every metalworker’s career begins and ends with the hammer and dolly. The ironic thing about the hammer and dolly is the correlation to the work they perform. It is a complete oxymoron to the simplicity of the tools. By all accounts, the tools are as simple as it gets—one is a hammer with a face, and the other a small handheld anvil. However, mastering the two to work as one is one of the most complex tasks in the book.
Let’s begin with hammers. For starters, they come in all shapes and sizes. Each has a different purpose, but in reality most metalworkers will stick to two or three basic hammers. Only in select occasions will an oddity of a hammer be employed. When looking upon body hammers under a keen eye, one would notice that the faces are actually convex and the diameters vary slightly.
 Here is a close-up look at the hammer on dolly approach. Notice how the dolly is directly under the high spot, and how the hammer will fall atop the dolly to correct the dent.
Body hammers usually have a face diameter that ranges somewhere between 1¼-2 inches. Depending on the user’s preference, consistently a 1½-15⁄8-inch hammer is a good all-purpose body hammer. The next hurdle to overcome is determining the curvature of the hammer’s face. A general all-purpose body hammer with a low-crown has a radius somewhere around the 20-inch mark. This crown on the face is great for all-purpose hammer work as it gives the user a larger striking area for consistent and gradual blows.
Some hammers can have a radius of up to 2 inches! Hammers of the medium and high-crown variety are used to get inside curvaceous cavities, where only the high point of the crown will make contact with the sheetmetal for very precise blows. When it comes to bodywork, a flat-faced hammer is very rarely used. Hammers like your ordinary ball peen or claw have a flat face, and unless you hit the metal 100-percent flat, the leading edge of the face will leave a smiley face. Hence the reason why those styles of hammers aren’t used for bodywork!
The last thing to remember in terms of hammers is quality. A good quality hammer with high-grade steel will make all the difference. You want to make sure the hammer is harder than the sheetmetal because you want the hammer to shape the material, not for the hammer to be shaped! (Same goes for dollies.)
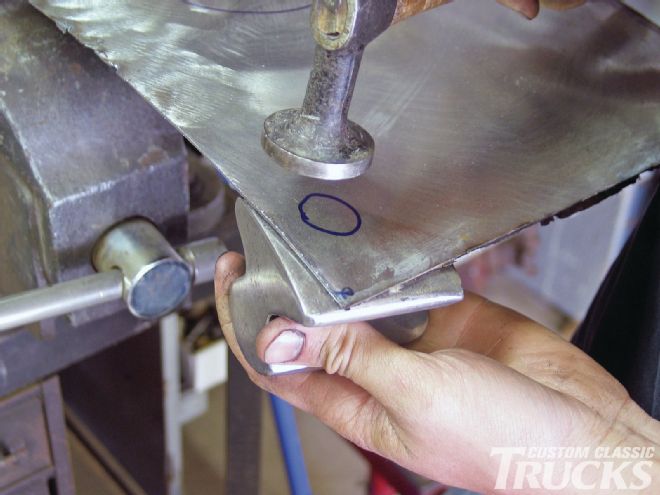
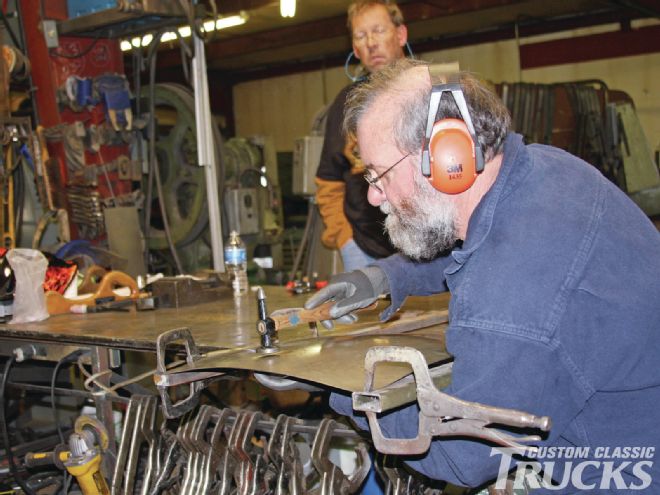
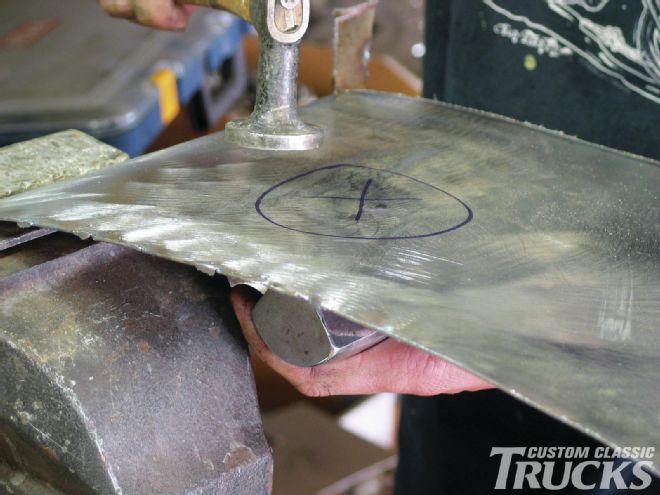 If you look close, you will notice the circle around the dent. With the dolly placed at the lowest point of the dent (marked with an “X”) I will hammer around the circle to raise the dent in this hammer off dolly approach. My blows will always remain within an inch of the dolly; if not you’ll lose the energy of the blow and defeat the purpose.
Cheap sets of hammers and dollies are OK for initial practice, but that’s about it. As you continue to use them you’ll notice the hammers and dollies won’t stay true to their original form. They will begin to distort, which means you’re not getting the most out of your tools. Even worse than that is the fact that they will nick and scratch, and when sandwiching sheetmetal between a nicked hammer and dolly, the metal will instantly become dyed with that shape, a big no-no.
When it comes to dollies, things are in line with hammers. Dollies come in various shapes, sizes, and weights. Again though, you’ll find that most stick to a few of their favorite dollies, such as a heel dolly, egg, or a loaf. One thing to keep in mind about dollies is a good-weighted dolly is key. A quality dolly for general use will weigh somewhere around 2-3 pounds, which is right on the money.
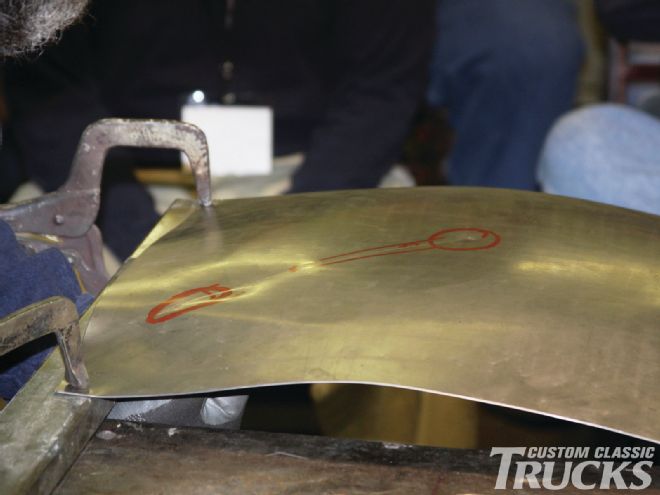
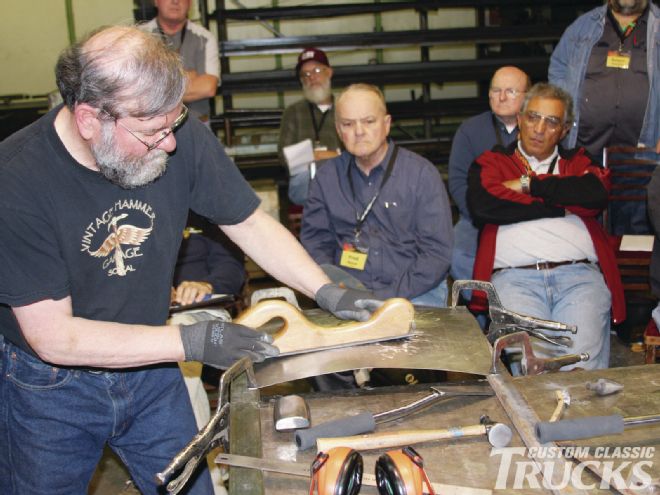
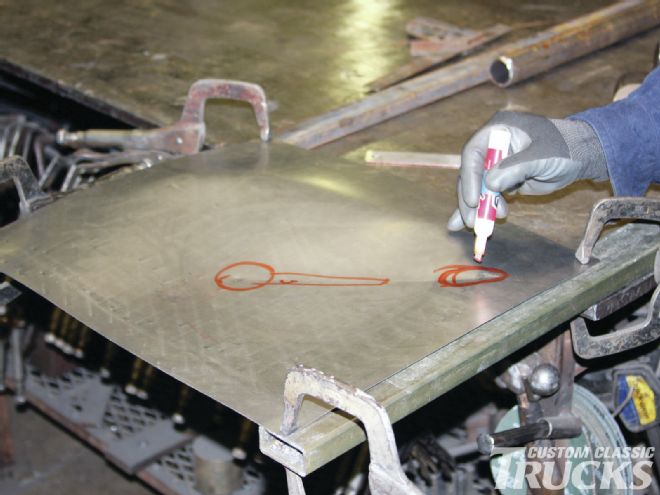 A few months back I attended a Ron Covell beginning/advanced sheetmetal weekend class. One of the things Ron discusses is basic hammer and dolly work, and removing dents; here is the process. Ron whacked this piece of metal with a pipe. The red circle at the marker is the first point of contact, whereas the rest of the highlighted area is what ensued after that initial contact. When working a large dent you want to work backwards, meaning first correct the last affected area.
The dolly’s weight needs to be able to carry the inertia of the hammer blows in order to move the metal. Lightweight dollies just won’t do the job. However, the most important fact to dolly work is to always use a dolly that is as closely shaped to the surface you’re working on as possible. Hammering a rounded piece of sheetmetal onto a square dolly will only create the shape of the dolly in the work area. Unless you’re after some avant-garde piece of artwork I don’t think that’s the look you’re after!
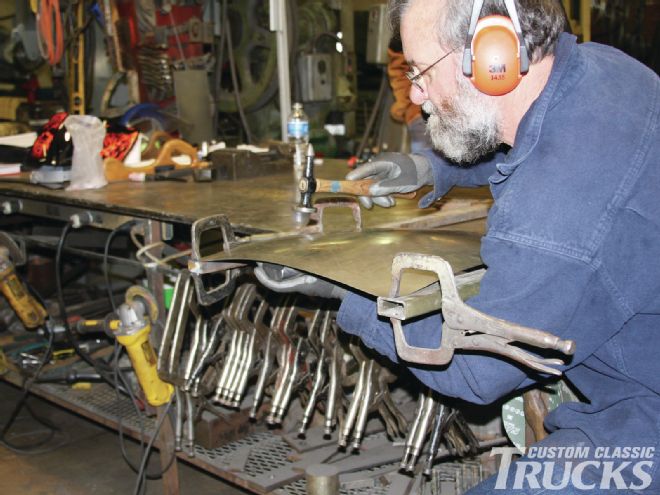
 By looking in the middle you see how much of the dent was removed by just using your hands and pushing up on the dent. Now all that remains is the initial point of impact and the last point of impact. Both will require hammer and dolly work. On a side note, a dolly can be used to knock out a large impacted area as well, when hands just won’t work.
Hammer On Dolly
There are two key techniques to using a hammer and dolly, and the first is what is referred to as “hammer on dolly.” This technique is just like it sounds. By placing the aptly shaped dolly behind a convex dent or shrunken dent and pushing up on the dent with force, you can hammer down on the dent to form the surface of the sheetmetal to the shape of the dolly. One common misconception is the fact that folks think powerful raps on the metal, such as when hammering nails, is the key to metalwork. However, it’s the opposite. You want to use consecutive light and balanced blows to the surface. This way you can gauge your progress.
Another reason, and this is where metalwork gets tricky, is if you just started hammering on the dent with full force you would slowly raise the dent higher because of the severe stretching! When hammering on dolly you’re stretching the metal, therefore you want to take a slow methodical approach to fixing dents. You’ve got to find the right balance, which is where practice comes into play.
 By using both the hammer on and hammer off techniques, Ron then massages the affected area.
When things no longer become visually damaged it’s crucial to run your bare hand over the damaged area and judge your next blow. (By the way, you always wanna strip any paint or filler when working out dents.) For me, I like to look away from the panel from time to time to gauge my progress when running my hand over a worked area. That way I am truly feeling my progress so my eyes aren’t playing any tricks. By combining these three skills with practice and precision you will master the “hammer on dolly” approach.
Hammer Off Dolly
The second technique is called “hammer off dolly.” As the name implies, in this technique the dolly is never hit with the hammer. When trying to remove a concave dent, or stretched dent, if one was to hammer on dolly all they would do is slowly stretch the metal more and more, causing a larger crater. What needs to be done is the dent needs to be raised. Therefore, the dolly is placed on the bottom side of the dent’s epicenter, and then the hammer is worked around the perimeter of the dent no more than 1 inch away from the dolly. As the perimeter is struck by light hammer blows the energy is transferred to the dolly and the dent is slowly raised up. As the shrunken metal is pushed down it shrinks and raises the stretched metal.
Heat Shrinking
Another fundamental of sheetmetal work is the practice of heat shrinking. Sometimes dents are so stretched, either from the initial blunt force or over-working, that no matter how much hammer and dolly work is carried out the metal will not shrink. A visual way to tell is if you see no dents or creases, but the area is bulging out and not flowing with the panel, or if the infamous oil can effect is present. Your only option at this point is to shrink the panel via heat.
 Notice the placement of each dolly in the pictures.
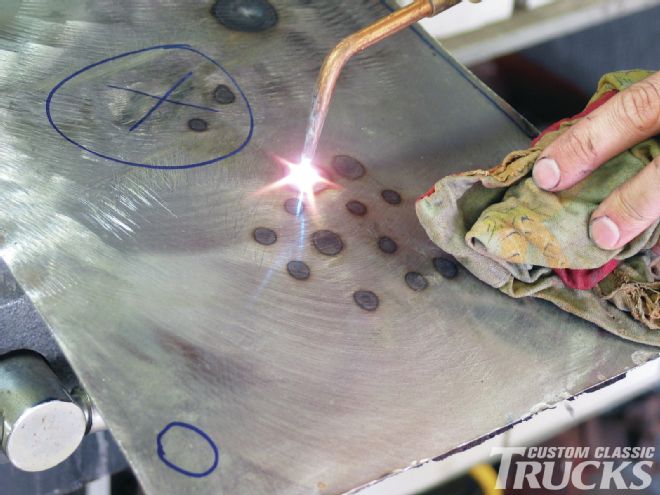
The most commonly used technique is an oxyacetylene torch. By heating up a small section, roughly the size of a dime, and then immediately cooling the area with a wet rag the molecules in the metal will retract and slowly shrink the area. Some prefer to just “blue” the area with a torch, while others feel the directly heated area should “glow red,” but not molten. As for me, over the years I’ve found that the required amount of heat depends on the area in question. For instance, you ain’t gonna see me heat a red center smack dab in the middle of a hood or roof—you’ll open a serious can of worms! When heating a stretched area I’ll generally begin heating the perimeter and work my way in as necessary.
Some metalworkers even discourage the use of water to cool the area claiming it hardens the metal. They propose lightly tapping the heated area with soft raps of a hammer to shrink the heated area. Again, through the years I feel both methods have their time and place. (Refer back to my phrase that on-the-job training can’t be substituted!)
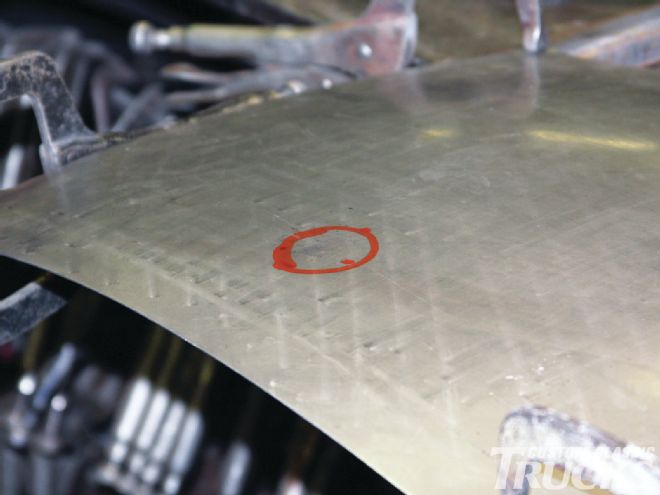 After some methodical planning, and lots of hammer and dolly work, Ron has just about removed all of the dents. The largest affected area that remains is what is left of the red circle.
In times where a stretched area can’t be accessed, but the dent needs to be shrunken out, a torch can be used as well. Never directly heat the center of the dent, as you will only create more of a dent. Instead, begin at the outer perimeter of the dent and rapidly circle your way into the dent. Once hot, immediately cool the area with a rag. It may take a few tries, but eventually you’ll shrink some, if not all, of the dent out and make it more manageable for filler. For those of you who live in colder climates, this method is what most commonly cures hail damage!
 When metal-finishing Ron will use his hand as a gauge and a metal file. By running the file over the area he can see what high and low spots are left. From there he’ll employ the proper technique. Another good skill to acquire is using the pick end of a pick hammer to lightly tap up fine low spots, and then filing them clean.
Like I said before, every person has their own way of doing things, and some even disagree with the torch method altogether. Instead, they prefer to use what is known as a shrinking disc. The disc is a smooth flat metal disc, or sometimes with a pie-cut edge, that is mounted on a grinder and then ran over the stretched area. (Again though, it’s followed by the cooling of a wet rag.) The non-grit surface doesn’t remove metal; therefore five, 10, or even 20 passes can be made. Beyond that, it heats the surface of the metal only a fraction of what an oxyacetylene torch will, which gives the user a more precise approach.
In Conclusion
At the end of the day, metalworking is quite simple in theory. Metal shrinks, stretches, and can be moved and mended quite easily. At the same time, this simple-minded thinking will cause you to pull your hair out. It’s a skill that all can acquire through trial and lots of error! In the following pictures we’ll highlight the key points of each theory, and then remove a dent using our various methods.
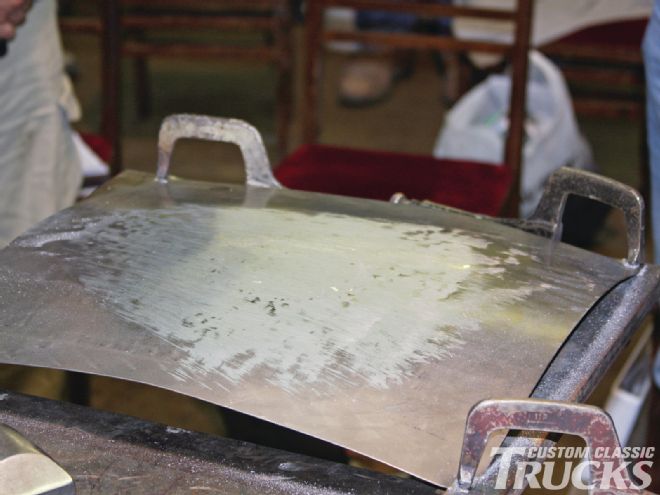 Just about finished. There are only a few visible spots left (dull spots denote the affected areas) that Ron needs to work. As you can see, time, patience, and lots of practice makes perfect.
Ron Covell Classes
For those of you who may still feel the need to further delve into sheetmetal work before you turn loose on a project of your own, there are several great options. As I mentioned in the captions, I attended a Ron Covell weekend session of basic and advanced concepts of sheetmetal working. For those outta the know, Ron is one of the premier metal men around, and has been honing his craft for over 40 years now.
With skills and projects ranging from an aluminum-bodied dragster, motorcycles, street rods, and even several AMBR-winning cars, Ron is skilled in all walks of metal. Luckily for folks who aren’t as inclined in the ways of metal, Ron saw a need to offer workshops to help keep the craft of metalworking alive. Since 1993 Ron has been giving tutorials on all sorts of metalworking all over the globe.
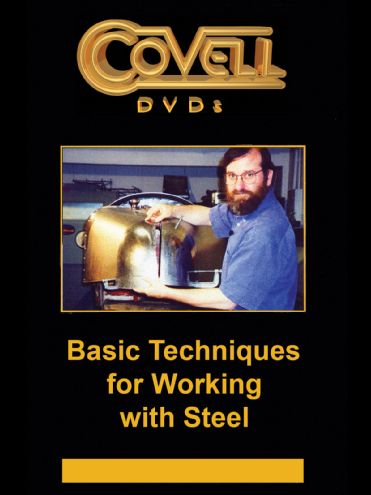
In the classes I attended we covered all of the basics as described, yet with a hands-on demonstration factor to it, and then delved into working the English wheel, bead roller, shrinker/stretcher, and more. From the novice to the professional, the class is sure to offer something to all. Even better is for those who can’t make his classes he offers a full range of instructional DVDs that can be ordered to your door, and two of them concentrate on beginning and advanced sheetmetal work.
If you’re unclear, or wanna brush up, I would highly recommend either option to help further your skills in the wicked ways of metal. For a full list available DVDs, workshop, and even metalworking equipment, visit www.covell.biz or give him a call at (800) 747-4631.