Buying a running hot rod truck is a great way to enjoy the hobby while you improve on the truck. After purchasing any truck the desire to “make it your own” is overwhelming, but the first thing we did after purchasing our 1940 Ford pickup was give it a thorough safety inspection, which turned up several items that needed our immediate attention. After the brake line issues and exhaust problems were addressed, we enjoyed driving the truck for a while but then the itch to change things just had to be scratched.
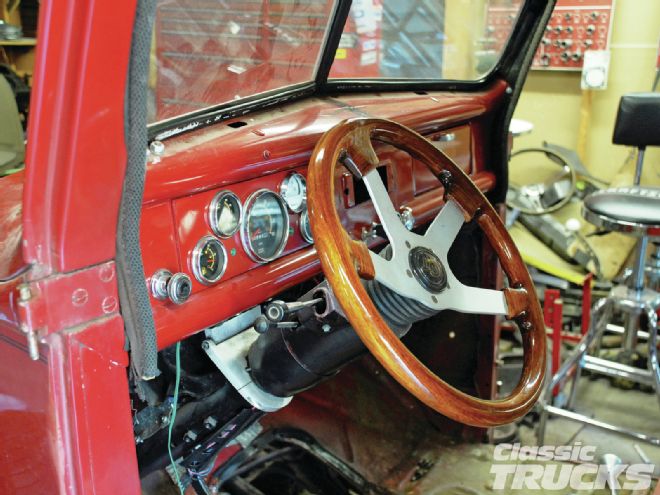 A rather bulky mid-’80s GM steering column, a cluttered dashboard and extra holes in the dash convinced us it was time for a serious makeover
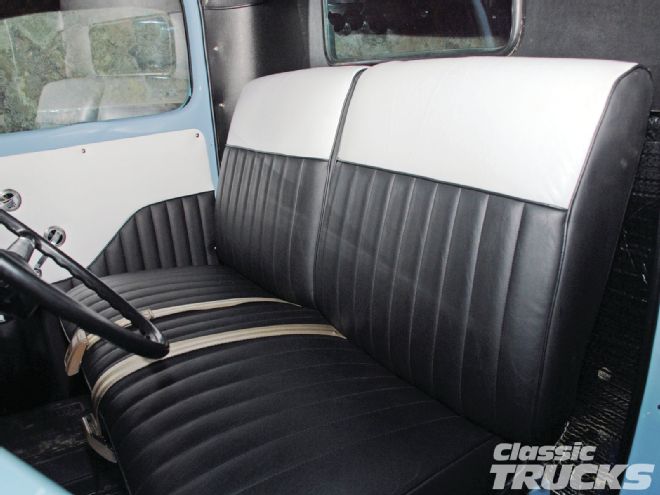
Actually, after cleaning up the suspension, brakes and motor we did a complete repaint. By the time it was over we had changed virtually everything on the truck. One of our projects along the way was improving the interior of the truck. When purchased, the truck had a serviceable interior of black velour in a traditional rolled-and-pleated design. Sporting at least one strange stain and a cigarette burn from owners past, we wanted to go with a more traditional vinyl and leather treatment. The truck also had a mid-’80s GM tilt column that looked too big for the interior and finally the gauge cluster was filled with ’80s-style Stewart-Warner gauges. Yeah, it was time for a cabin makeover.
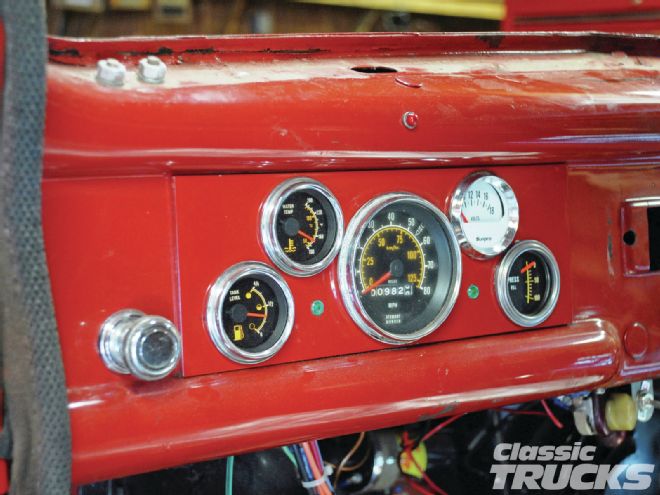 The 30-year-old S&W gauges with the dual KM and MPH dials were not our favorite of all time. They had to go.
The cab makeover would be in the style of a mid-’60s hot rod truck. The products used would all be in keeping with that era. One lucky find was an original gauge cluster from a 1941 Ford 1-ton truck. The gauge panel fit our opening perfectly and honestly I think the original gauge cluster looks better than trying to crowd five gauges into the stock opening. Of course the gauge cluster was just the beginning; it was in need of a complete reconditioning.
After a conversation with the team at Classic Instruments we decided to send the gauge panel their way for a complete refurbishing. Classic Instruments doesn’t repair the old gauges or convert them to 12-volt, rather they put all new instrument movements behind the refurbished panel using stock style gauge pointers and graphics. The results are stunning, a great-looking gauge panel that appears original but has all new gauges and senders for modern-day accuracy. We had them add turn signal and high beam indicators to the panel too.
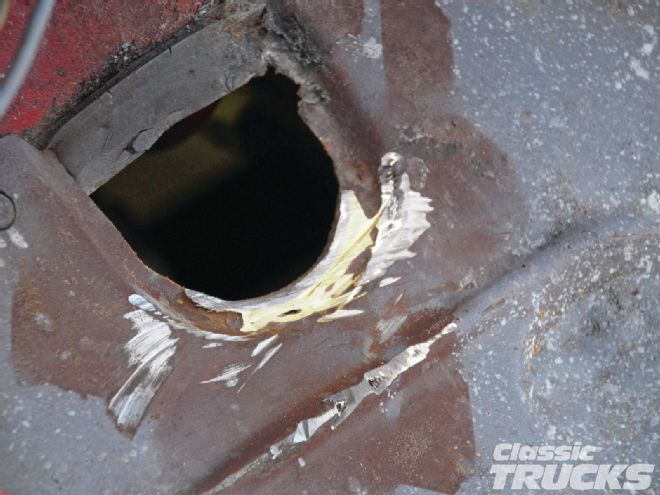
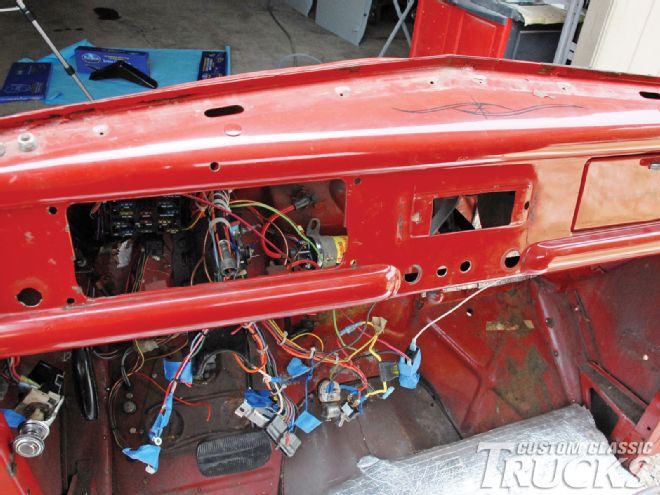 We tagged all the wires as we disconnected them, and with the dash empty, it was time for some grinding and welding.
With the gauge problem resolved we welded up a former radio hole in the dashboard and the dashboard was complete. The inside windshield moldings were painted, much like Henry had planned in 1940. But if you were building a hot rod truck in the ’60s chrome was the only way to go for inside garnish moldings, so the windshield moldings were sent off for chrome plating.
During our suspension work we replaced the old Vega steering box with a brand-new unit and then coupled it to a Borgeson Universal Economy Series steering column. The polished stainless steel column and associated dash and floor mounts provide the perfect look for our vintage interior. The column is small and the chrome-like finish is perfect for a ’60s hot rod truck. We topped the column with a reproduction 1940 Ford steering wheel from LimeWorks and called on Ron Francis Wiring for a chrome-plated “Signal-stat” style turn signal unit. The clamp-on unit shares space on the column with the Moon tachometer we purchased from Honest Charley Speed Shop.
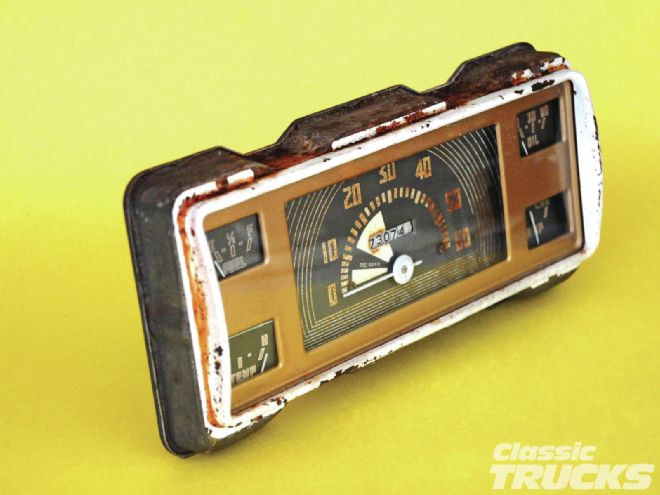 We got lucky and found this 1941 Ford truck insert out of a 11⁄2-ton truck. The unit needed complete refurbishing, but the important parts were all there.
Changing from the GM tilt column to the Borgeson Economy Series column meant we would have to relocate and rewire the ignition key. We sourced a new ignition key from Ron Francis Wiring and with help from their tech staff had the wire colors converted from the base of the column to the new switch. The new switch is now mounted in the dashboard to the left of the steering column.
The door panels were sent off for upholstery using white leather and black Ultraleather in a traditional pattern. Before installing the door panels we installed new latches and window regulators from Bob Drake Reproductions. When it came time for inside door handles we wanted to dress the truck up a bit, but still keep the early Ford flavor. To that end we ordered a set of 1940 Ford Deluxe passenger-car handles and bezels for the doors. The art-deco detail lines add the perfect finishing touch to the doors.
 In preparation for the final mounting of the steering column, we removed the old mounting tab from the floorboard.
The seat was reupholstered in a traditional 4-inch pleated design. A white top panel on the seat brightens things up. We installed our own wind lacing and hard headliner from LeBaron Bonney. This fiberboard headliner fits well, and while we would’ve loved to do a photo how-to on the install, it was so clumsy that is was a matter of two people in a small cab pushing the panel into place, marking and doing some slight trimming and then installing the piece for the last time.
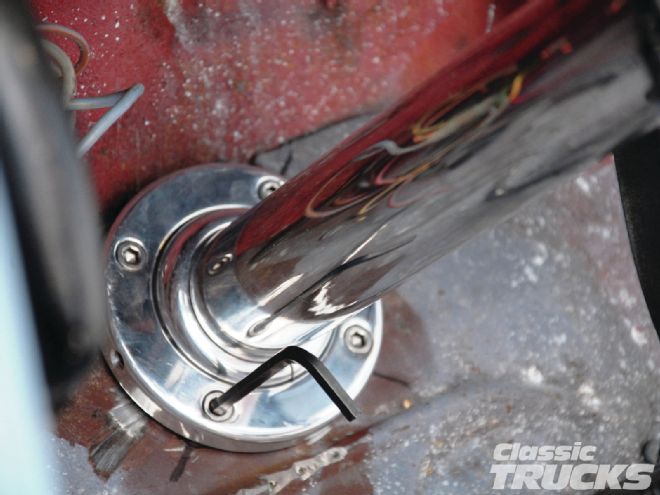 The Borgeson floor plate securely holds the steering column in place and the built-in swivel allows it to be flush with our floorboard.
Since our truck didn’t have a rearview mirror we purchased a Model-A rearview mirror, and after removing the mirror from the bracket we put the bracket in a sheetmetal brake and bent the appropriate angle on the plate. Three carefully drilled holes and the modified Model-A unit was mounted to the truck.
Finally we turned our attention to restoring the old heater in the truck. The heater was in the truck when we purchased it and we had no idea who manufactured the unit until we stripped off several layers of paint. As it turns out it the heater is an old Chrysler unit. We stripped it to bare metal, repaired the defroster flap, filled a couple of dents and holes and painted the heater black with a gold fan shroud to match our gauges. But we wanted to somehow make the heater look like it belonged in the truck and that trick turned out to be the addition of a 1947 Ford horn button we purchased from Dennis Carpenter Reproductions. Three very carefully drilled holes allowed the stainless ring to be clipped to the front panel and voilà–an almost genuine Ford heater.
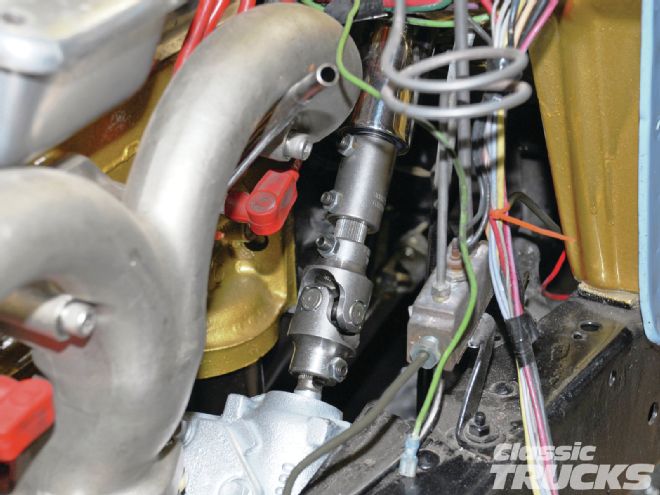 After arriving at the proper location of the steering wheel, we cut the Borgeson shafts to the proper length and made our connection to the new Vega steering box.
The finishing touch came in the form of a reproduction decal for inside the glove box door. This is a minor detail that adds that certain something when you open the glovebox. Reproduction decals are available for virtually every truck from Jim Osborn Reproductions.
We are real pleased with our series of interior modifications and the blend of parts keeps the vintage theme alive while providing modern steering, seating comfort and accurate gauges. CT