Last month we left off finishing the structural support of this ’55 Chevy’s chopped top. If you remember, this chop isn’t like most chops. Reason being is the side glass, rear glass, A- and B-pillars and the doorjambs are being left intact. How’s that you ask? Because this chop is coming from the cap of the roof skin and the front side of the A-pillar. For those with that, “Sure, but it’s not going to be chopped much,” glare; wrong again. This truck is getting four inches removed from the front and a 1¼-inch out back. Sounds impossible, but you’ll soon see the outcome doesn’t lie. With things finished up on bringing the roof lines down and re-creating a sound structure, the skin can now be placed back up on top and we can get this chop finished.
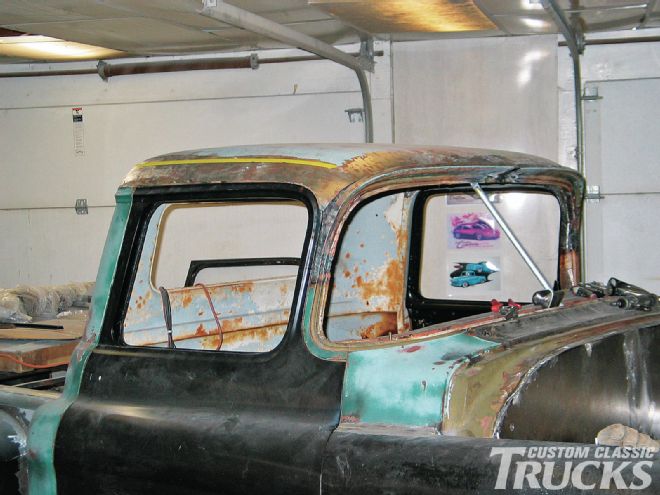
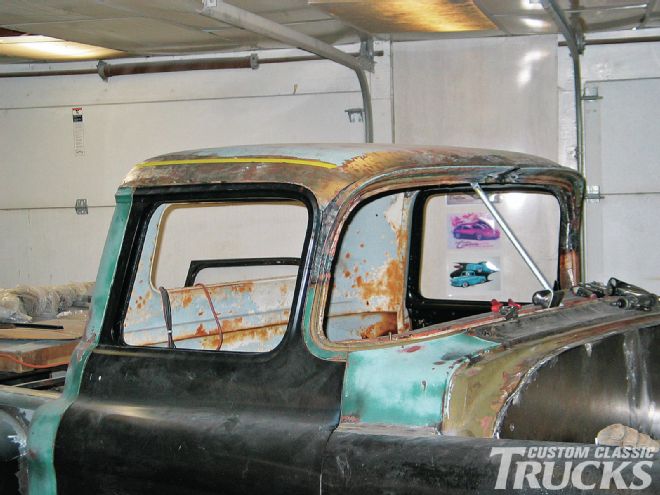
 We left off last month buttoning up the posts of the chop. This month I’ll finish up the chop by fitting the cap. Here’s a look at things with the cap just sitting back in place with the newly lowered windshield line. To create more of chopped and streamlined look, I’m going to remove some of the meat from the cap’s skin as well.
As mentioned last month, when chopping a top, the roof area is going to increase, which means somehow the metal has to be expanded up top. Usually, splitting the roof in half at some point and reshaping various corners is the only way to accommodate the increased square footage. However, being that I have only cut a chunk from the front side of the A-pillars, and nothing else, the real estate up top hasn’t expanded all that much. Still, there is a small gap that needs to be filled, but I have decided to remove the overhang above the windshield. By doing this, I’ve now got plenty of sheetmetal and no filler will have to be inserted. For those a bit confused, let’s break it down. When the A-pillar was cut, the roof line was lowered up front, which called for more square footage up top. However, by removing the overhang, the front of the roof is being pushed back flush with the top of the windshield. With that simple act of moving the line back, I have essentially inserted a filler piece. Actually, it will do more than just delete the need for filler, it will leave me with plenty of sheetmetal. In fact, I’ll end up trimming the roof skin to fit!
Besides the ease of the chop, there are other reasons I’ve decided to get rid of the overhang. Number one, it will give the roof line a clean, flowing transition from glass to metal. For cross-country truckers there’s no shame in rockin’ the sun visor. They’re practical, functional, and all around just suited for the road. But on classic trucks that are made to sit and look good? As Tom Jackson would say, “C’mon man!” Second, by removing the overhang, I can also kill a few inches from the overall roof height and bring things down to a respectable level. It doesn’t seem like there’s a whole lot of meat right there, but as you’ll see, the roof line will be drastically changed. And last, by removing the overhang, I can create a nice rake to the roof. To me, the top of these trucks look like a batting helmet atop a baseball player. It’s just an oversized robust bubble up top that seems out of place. Besides the fact there is too much metal up top, another problem is the truck’s roof doesn’t have that flowing aerodynamic look that was so prevalent in the ’50s. Yet by bringing the nose of the roof down, it gives the truck a look like it’s moving when it’s just sitting still. In the end, chopping the top this way doesn’t just lower the lid, it actually redefines the lines of the truck and gives it a whole new persona.
All that may sound like a lot of work, but once more it’s just a matter of trimming to fit. In order to get the top down a bit more, an inch will be hacked off along the rear rim of the skin. From there, the rear of the skin gets tacked in position and the front is trimmed and sucked down into place. Because the front corners are being so drastically reshaped, a small filler gets inserted where the corner of the overhang is removed, but that’s small potatoes at this point! From start to finish I’d estimate a total of roughly 30 hours to chop the whole top! Then once things are all buttoned up, only a windshield will have to be cut and fit. All in all, this chop is the perfect way for any of you looking to up your game to the next level without having to go full bore. Let’s dig into rounding this chop out. CCT