In the last issue (August 2011) we stopped by the Rodcrafters Shop in Welcome, North Carolina, to follow along as Larry Shoaf chopped the top on John Kocsis’ 1951 Ford sedan. In that issue we braced the body, marked the cut lines, and removed the roof. We managed to get the roof back on the car and the A-pillars welded back together, along with expanding the windshield opening 1 inch before we ran out of time and space. Raising the top of the windshield opening 1-inch visually “un-chopped” the front view just a bit, but the side profile still benefits from the full 5-inch chop, and the windshield and side windows are about the same size. Now we’ll finish the job, starting at repositioning the rear window.
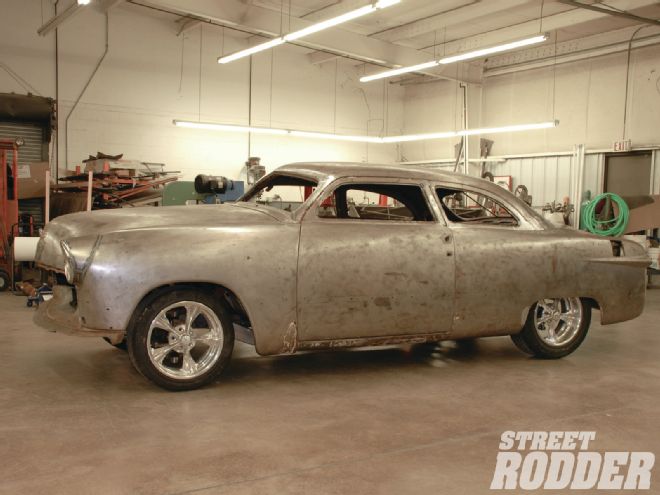
 Dropping the top 5 inches on a ’51 Ford will take you from a stodgy sedan to a sinister cruiser in a couple of weeks.
At the rear of the car Shoaf cut through the package shelf braces and around the bottom of the rear window between the window and the decklid. This would allow the rear window to move ahead and tilt forward on an angle to meet the roof skin. Since the rear window was moving forward, the package shelf braces work perfectly for clamping the window in place.
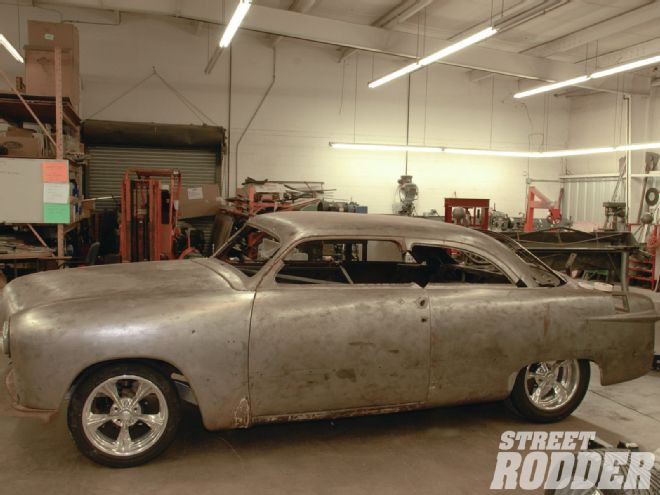 When we left off last month (August 2011) we had cut the top and had the A-pillars re-attached. We opened up the windshield area by raising the upper opening 1 inch.
Even with the window clamped in place the gap between the top of the window and the roof was almost 2 inches, and while it appeared to be a large gap, four carefully measured slices in the roof skin brought the top and the window together. A simple board was to support the inner roof. This held the center of the roof in place and prevented sagging. The panels were then cut and clamped until they aligned. The window panel was slipped under the roof skin as the window panel still held the stock contour, ensuring the roof would flow like an original.
With the window and roof aligned there was a 4-inch void to fill between the bottom of the window and the existing panel in front of the decklid. Once again this looked like a huge void, and before any sheetmetal was cut Shoaf filled it with a poster board template to be sure it would look OK. Interestingly enough, when the void was filled it didn’t look large at all; actually the added panel gave the car a very pleasant roofline, the added space between the window and decklid made the car look a bit more coupe-like. Pleased with the look, 18-gauge sheetmetal filler panels were fabricated and tack-welded in place.
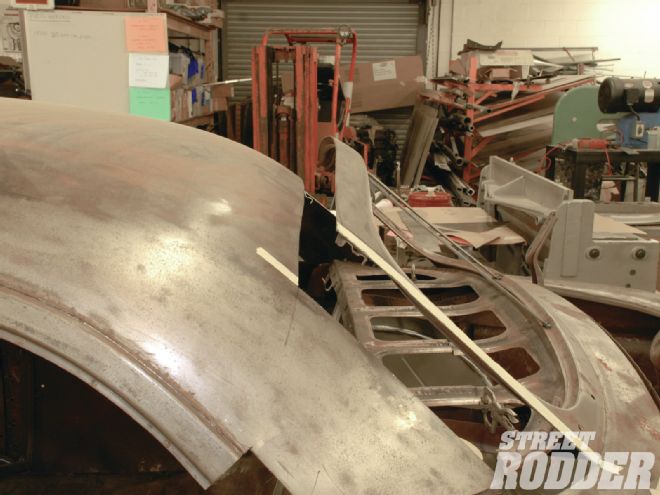 As you can see the rear window must be moved forward and leaned forward too. This may look like an insurmountable gap, but fear not, it will all work out.
The rear corners of the quarter windows were cut out and the corner pieces removed earlier were reshaped to fit the new rear window. With the new quarter window shape completed, the panels on either side of the rear window were contoured down to meet the quarter-panels.
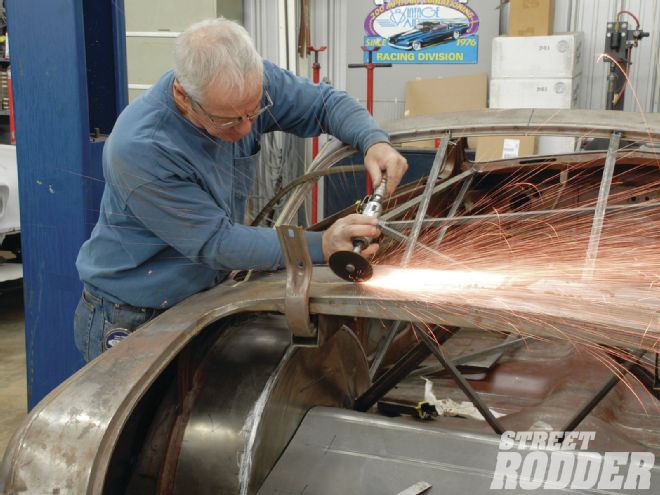 Next the long stretch of sheetmetal between the decklid and the window was sliced with a cut-off wheel. Work slowly and follow a straight line, it will make forming the filler panel easier.
Finally the B-pillars were reunited with the front of the quarter window, taking care to have a pleasing radius in each corner and that both sides of the car were exactly the same. Completing the fabrication was attaching the door tops to match the new slanted pillar and align up front with the modified A-pillar. A small filler panel in front of the top front corner of the quarter window finished the B-pillar transformation.
Chopping a ’50s car is a tremendous amount of work, and watching someone with an equally tremendous amount of talent like Larry Shoaf really makes it look easy. But don’t be deceived; this is a serious modification that takes a lot of thought and know-how. But having said that, if you work slowly and carefully and never allow any fit to be called “close enough” you can still chop a top at home with fairly minimal equipment. Basically a MIG welder, cut-off wheels, clamps, and basic measuring tools and a box load of patience is all that’s required to chop a top. Making all cuts in exactly the same location side to side and front to rear goes a long way to keeping things aligned and having several sets of helping hands is imperative for fitting the top to the car. Follow along with the photos and you just might be willing to tackle the job in your home shop. Regardless of whether you chop the top at home or have it done by a professional shop, it will definitely give your shoebox Ford a whole new attitude.
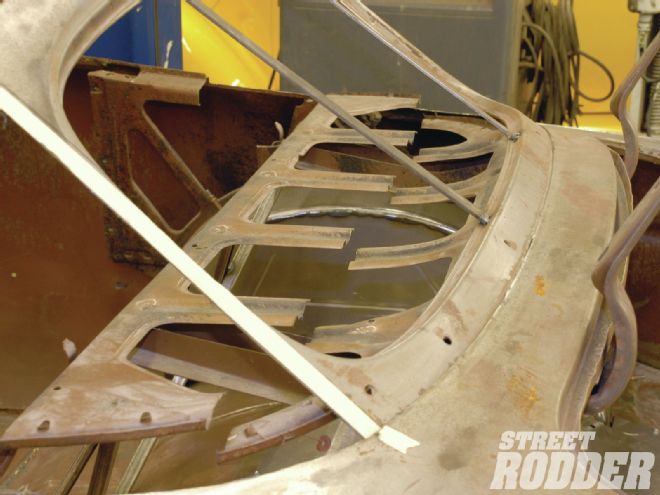 The first step was to cut through the package shelf bracing. This will allow the window to move forward and provide a perfect clamping area.