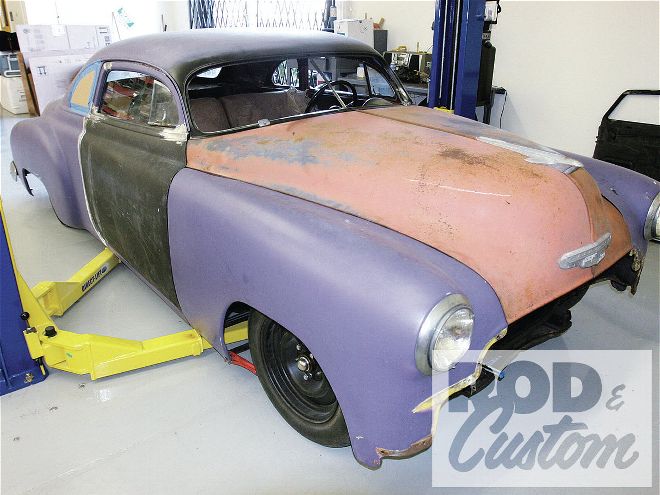
One of the seemingly little details that separates a really great-looking car from an average one is good panel fit, with uniform gaps between every panel. It’s a job that takes an inordinate amount of time and should be undertaken before any body or paintwork is tackled, as there’ll undoubtedly be some cutting and welding involved. This is especially true with an older car that isn’t using all its original panels. Modern cars will invariably have panel gaps of 1/8 to 3/16 inch, while those on cars such as our project ’49 Chevy will often be a little wider, at 3/16 to 1/4 inch.
If you want to bring those gaps up to modern specs, be prepared to add material to the edges of doors, fenders, and hoods, usually by welding lengths of welding rod or fabricated sheetmetal strips to the edges. We didn’t want to go that far, but did want uniform gaps throughout the vehicle. As we’d replaced the doors and hood on the ’49, we had to start our panel alignment from scratch, and there’s a definite order in which this has to be done, and I always start with aligning that gapwhich isn’t adjustable.
 Here’s where we started, fitting the rubber lacing that screws in place across the top of the cowl. These support the hood at the correct height to align with the cowl. All rubbers were sourced from Chevs of the 40’s.
On a car like our ’49, that non-adjustable gap is between the hood and cowl, meaning the first panel to be installed should be the hood. On a vehicle that has a removable cowl panel between the hood and windshield, the procedure is different. In that instance we’d usually start by installing the doors and working forward to align the fenders and hood.
So, on the ’49, the hood went on first, and then was aligned on the hinges to be central, as well as vertically and front-to-rear to align with the cowl. We sourced a complete set of rubber components from Chevs of the 40’s to replace the worn-out originals, including the cowl seals and all the small rubber bumpers that help align the hood to the cowl and fenders. While the panels can be aligned without these, using them at this stage ensures everything will line up during final assembly after paint. You don’t want to be making adjustments at that stage!
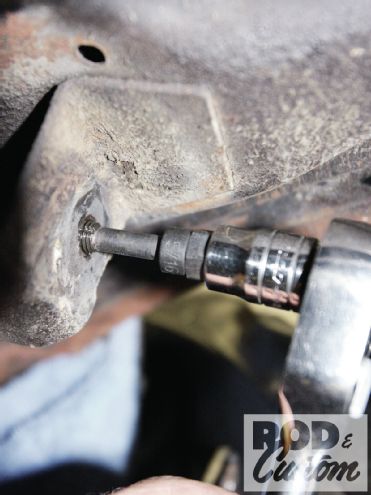
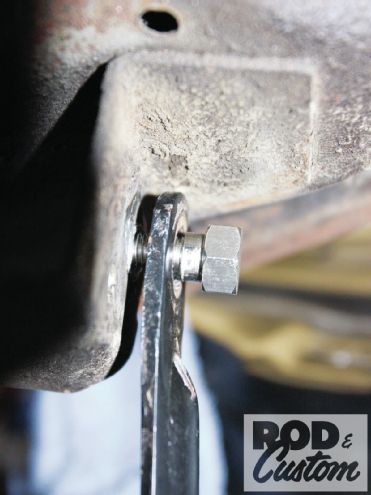
Our front fenders, inner fenders, and radiator core support have been bolted together as a single unit since we replaced the driver side inner, repaired the other, and painted them. This assembly was installed next, without all the under-fender stone guards at this stage, as it made access to the door hinge bolts easier. On the Chevy, the fenders bolt to the cowl at the upper rear corner, bolt to brackets coming off the chassis at the lower rear, and the radiator core support bolts to a crossmember at the front of the chassis. Spacers between this crossmember and the core support provide vertical adjustment, which in turn aligns the panel gaps between the fenders and doors.
 We’ll have all the panels blasted before we tackle the bodywork, but elected to align them first. We chased the threads in the hood with a thread restorer before bolting it to the hinges.
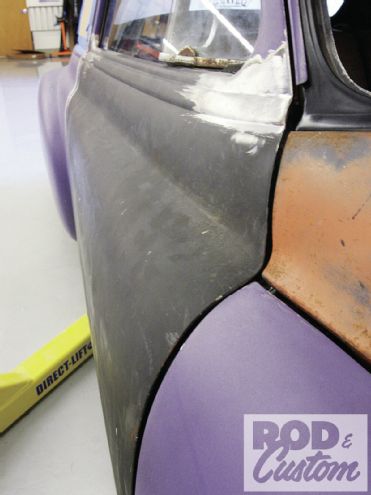
With the fenders aligned to provide even gaps along both sides of the hood, once again aided by the small rubber bumpers along each side of the ladder, it was time to hang the doors. By adjusting the door hinges, front-to-rear and in-and-out alignment was possible, until we were happy with the door-to-fender and door-to-rocker panel gaps. What wasn’t so great was the door-to-rear quarter gap. There simply wasn’t one. The door shut OK, but we didn’t even have a 1/32-inch gap!
Whether this was caused by the discrepancies between sizes of the replacement panels we’d fitted and the originals, we’re not sure, but this is exactly why panel alignment should be started at the cowl. If we’d fitted the doors first, then the fenders, we’d have had a 1/2-inch gap between the cowl and hood. Sure, we could have added material to the rear of the hood, but then the inner fenders, and likely the outer fenders wouldn’t have aligned with their mounting holes. We had two options to solve the door gap issue: grind the rear edge off the doorskin and inner frame and re-weld it, or cut the quarter-panel and move the door shut rearward. We elected for the latter, as it offered less opportunity for panel warpage and an easier repair.
 Chevs of the 40’s also supplied new stainless steel hood hinge bolts. These are vehicle-specific, and have a shoulder allowing them to locate in the hinge and be tightened, yet still allow the hinge to pivot. Yes, we’ll use washers on final assembly!
Aligning all the panels on any project is a time-consuming process, but take your time and you’ll be rewarded with a sharp-looking car in the end. Bear in mind two things: it’s only metal and can be cut and moved around to fit perfectly (unless it’s ’glass!) and never be tempted to use body filler to close up a gap. Plastic filler will crack or even fall out eventually. Get everything perfectly gapped before applying filler!