Nothing infuses life into a stock body better than some well thought out restyling. A perfectly executed chop not only adds edginess to your car’s personality, it also forever changes its overall look and attitude. Regardless of whether you decide on a mild chop or one that gives your car a hammered to death look, one commonly overlooked facet of the job revolves around how to finish off the inside.

All you need to do is take a close look around when you are walking through an event and you’ll see many chopped cars with nicely completed exteriors. Take a peek inside and many times you’ll notice the lack of garnish moldings around the inside of the doors and window openings. Many times it was because the bodies when purchased never included the moldings and locating originals is akin to finding a diamond in a pile of rocks. Other times it’s because it always seemed like a lot of work to re-proportion them to fit their newfound openings, something they were never intended to fit.
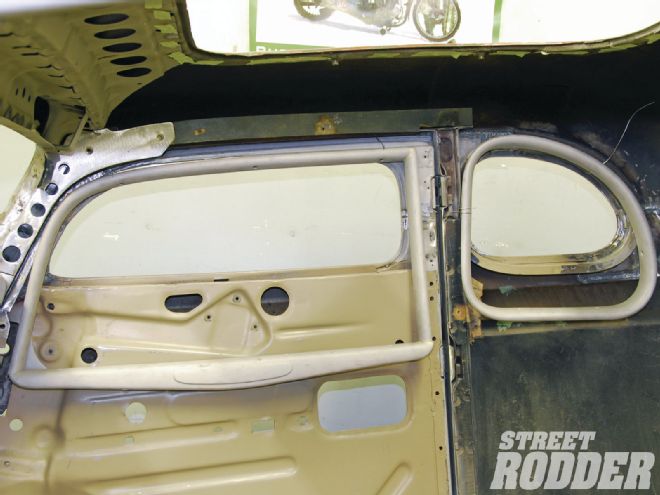 After the 6-inch chop on Dick DeLuna’s ’34 Ford five-window coupe, the garnish moldings were hung inside to illustrate the fabrication needed to make them fit.
In either case, thanks to the Internet, locating replacements is a lot easier than in the past, especially with manufacturers like Brookville Roadster and Steve’s Auto Restoration now offering steel reproductions for 1932 and 1934 Ford three-window coupes and Waddington Street Rods offering them for Model A pickups. On a recent visit to Rolling Bones Hot Rod Shop in Greenfield Center, New York, we came across Dick DeLuna’s freshly chopped ’34 Ford coupe ready to have its garnish moldings reworked to fit their reconfigured window openings.
Before getting started, Keith Cornell of Rolling Bones media blasted the gennie garnish moldings to uncover any potential issues. Once blown clean, he proceeded to hang the moldings inside the car to get a look at the amount of reworking required to make them fit. To begin, a measurement of the stock molding B-pillar height indicated it was 13 inches from outside to inside. A measurement of the chopped window opening at the B-pillar was 7 inches, confirming the 6-inch chop.
 To get started, the factory gusset located at the bottom section of the A-pillar was marked for removal.
Cornell then proceeded by first removing the A-pillar molding gusset by peeling it back with a hammer and slim chisel, then removing the balance with a pair of side cutters. He followed by grinding the area clean to eliminate the factory spot welds with an air-driven grinder topped with a 40-grit disc. Next he measured 1 inch up from the garnish molding base on each end and marked it with masking tape. Using a 4-inch cutoff wheel, he separated the garnish molding from its base and followed by removing the remaining 1-inch stubs at each base.
With the base of the garnish molding anchored in a bench vise, he began the process of reshaping the openings on each end to accurately allow each upright to slide back into place while using a combination flat and half-round hand file. This is one of the more time-consuming areas to rework as it takes time to finesse the opening configurations requiring the upright to be set in place numerous times before it’s perfect. With the openings reshaped, he lowered the uprights into the base one final time to ensure the contours were well matched.
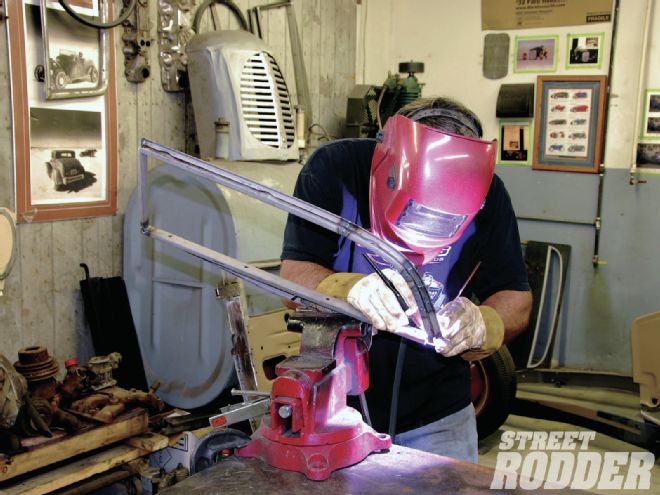
At this time it’s a good idea to locate the base mounting holes in the door to be sure they are still in alignment. To complete this step Cornell did some final trimming to the base on each end to allow it to settle into place using a combination file and cutoff wheel. One of the easiest cuts to make was that of the B-pillar upright, a straight section, which was trimmed to allow for final adjustment. With the door off the car, the molding base was secured and the rear upright was slid into place, allowing Cornell to visualize the re-contour the A-pillar would require. It would take a series of relief cuts to allow the pillar to follow the updated shape. Once the cutting points were marked, each one was individually cut and carefully moved into position to follow the flow of the pillar. This was done while the door was laid flat on a foam pad while on a workbench face up. A hacksaw and cutoff wheel were used to make the individual incisions. After each one was established it was tacked in place until the final one was completed. With the graceful flow established and all proportions dialed in, Cornell set the unit in a bench vise and finished the TIG welding to make the piece rock solid. He then ground down the welds and finessed the vintage steel to perfection.
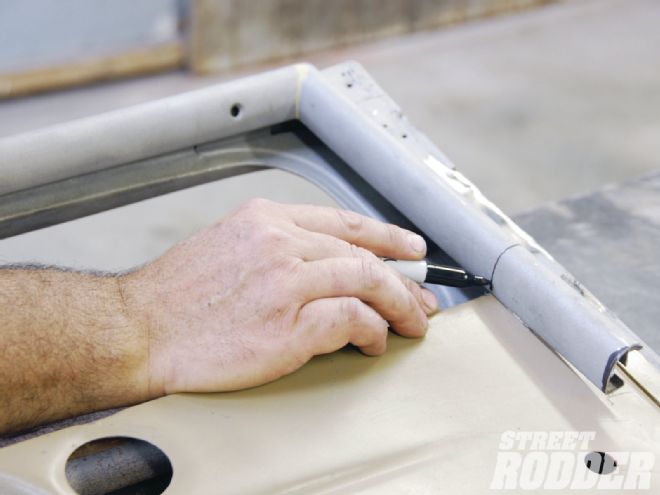 The upper garnish is laid in place and measured for the trim to the B-pillar. Note this straight section should only require some minimal final trimming to fit.
Moving rearward, the quarter window garnish molding required Cornell to first make a cardboard template of the inside body opening to establish the shape he needed to follow. Since this molding retains a fixed section of glass, accommodations to support the glass needed to be taken into consideration. To tackle this, a black marker was used from the outside to trace the window opening, allowing for 1/4 inch outside the marked line for the rubber window molding. With the cardboard trimmed, the pattern was then transferred to a rigid piece of Masonite and wrapped with a section of 1/4-inch rubber window molding secured by masking tape. This was then test-fitted into the window opening to confirm the final fit since the Masonite would also act as the template for the new glass to be cut.
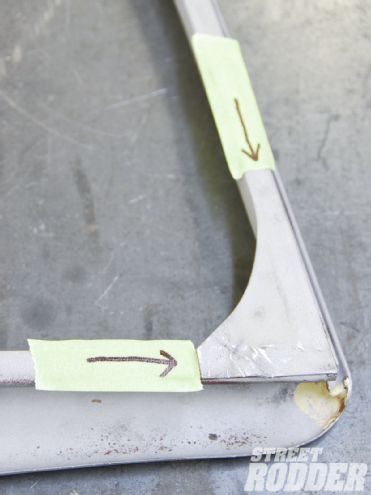
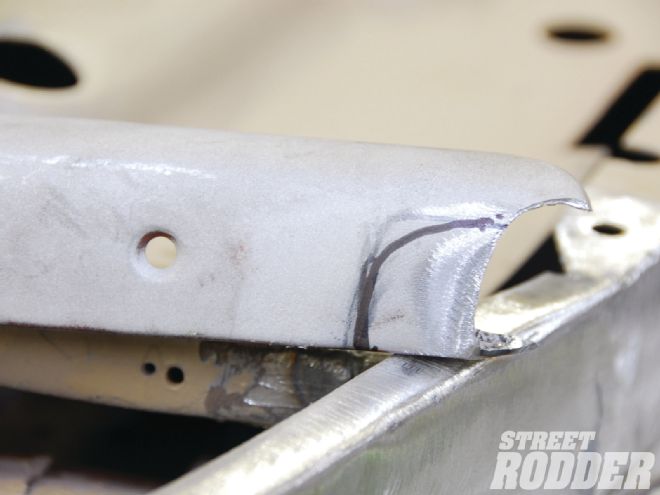 To be able to screw the garnish molding base into place, it needed to be trimmed at both ends. Here you can see the marked area (above) and the final trimmed and filed area (right).
To prepare the molding for its series of cuts, the Masonite pattern was placed on a workbench with the garnish moldings’ front lower corner matched to the template. Note that 1/8 inch of rubber molding should be visible on both sides throughout the reconstruction. Using the original factory bottom seam as a starting point, Cornell marked this area as well as one halfway up the front side of the template. Using a cutoff wheel, he made two incisions to create the first separation. He then slid the template upward into the upper front corner of the molding and slid the cut piece up to form the new bottom contour. The excess of the front vertical section was then marked and trimmed off with a cutoff wheel. Cornell then clamped the two front sections together and established the new front face of the molding. With that completed, the rear descending corner of the molding was marked and trimmed where it began to separate from the template. This section was then slid upward to adjoin the front bottom section, allowing its outer corner to arc its excess away from the rear corner. This excess area was marked and trimmed leaving a small bottom rear corner section in need of final attention. To allow Cornell to complete the subtle lower curve, a number of relief cuts were made with a hacksaw and cutoff wheel one at a time so he could persuade the vintage steel to its newfound home. Once everything was completed, the molding was TIG-tacked in place, checked for alignment within the body structure, and then secured in a bench vise to receive its final welding. The unit was then treated to an abundance of hand filing to bring a sleek smoothness to the welds. Upon re-installation, the reworked garnish molding looked so good you would have thought Henry himself had offered them as a factory option.
 To be able to screw the garnish molding base into place, it needed to be trimmed at both ends. Here you can see the marked area (above) and the final trimmed and filed area (right).