
You know of Factory Five Racing (FFR) as the creator of you-assemble-them roadsters (don't call them Cobras-Shelby gets really territorial), Daytona coupes, and the GTM supercar, but its new car is a whole other ball of wax.
FFR owner Dave Smith had always sworn he'd never create a street rod kit, since he hated the way the typical rod rode and handled. But when his director of R&D, Jim Schenck, came to him with a new idea for one, it was obvious what needed to be done. Schenck designed a tube-chassis car that handled like a son of a gun and wore a '33 Ford suit. In Smith's words, "Today, most guys get their parts from a variety of sources-say a frame here, a body there, a front end, and so on. Jim pitched me on the idea of using the FFR product template on the hot rod-not a donor car, but rather a complete kit with all-new parts save for running gear."
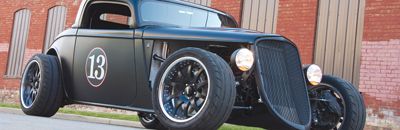
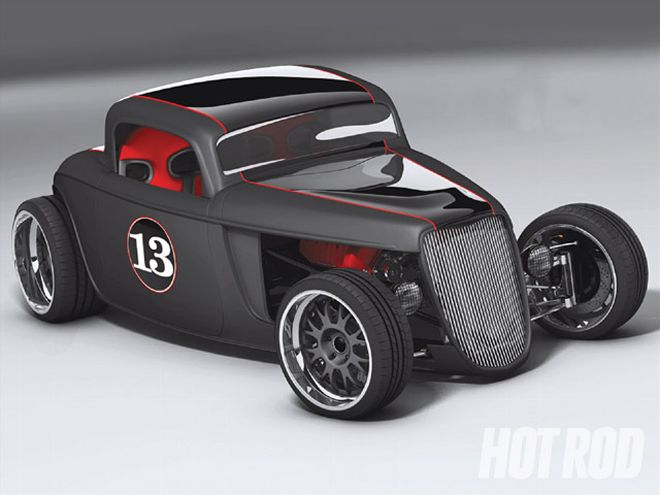 We had Kris Horton design the paint scheme of the car to look as tough as possible.
The Hot Rod kit costs $19,990 and comes with everything except an engine, a transmission, a rearend, wheels, tires, a battery, a fuel pump, and paint. And, of course, you have to assemble it. The option list includes a removable roof, a few different styles of fenders, and upgrades for suspension, brakes, and some other stuff. The frame is set up for a small-block or modular Ford, but with a little fabrication, you could probably stick anything under the hood. Factory Five estimates just under $40,000 to build a complete car, and that sounds about right. Obviously, the more you can do yourself (like paint and engine building), the more affordable it gets.
We got all excited about the concept of a cool street rod that actually handles and then got really giddy when we heard the specs on the car. A completed car weighs right around 2,100 pounds (without driver), so with any kind of power under the hood, this thing should really haul the mail. And doing it on a road course is just that much cooler.
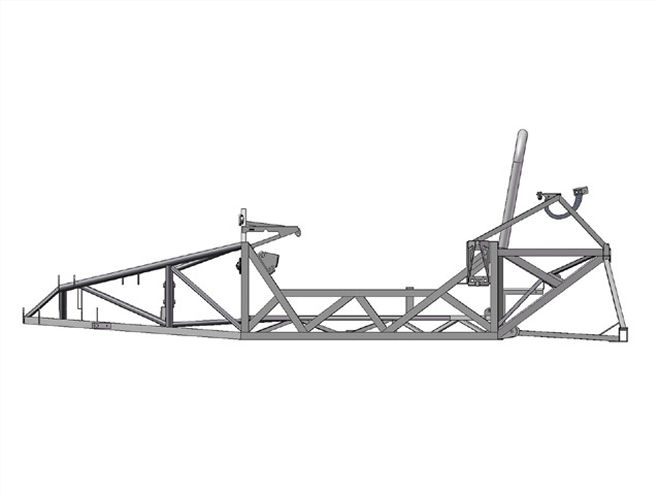 Factory Five designed the chassis in the computer using CAD/CAM. It's a combination of round and square tubing and is very stiff.
We wanted to build one, and thankfully Factory Five agreed and shipped a kit to LK Motorsports in Hermosa Beach, California. On top of that, the company put the word out to good customers and fellow FFR fans on its message board, and we made a five-day party out of the assembly. You'll read about that next month, though. This month we're covering the bodywork and paint, which was finished prior to the buildup.
Our goal for the buildup was to do the whole thing in a week, but obviously the body and paint work take a lot longer than that, so a month or so before the build began, we sent the body parts off to Jeff "Batman" Miller at J. Miller Customs to do his paint and body magic. Miller's job was fairly straightforward: trim the as-delivered Factory Five body panels to fit, prep their surfaces for paint, and spray them in our two-tone gloss and matte-black paint scheme.
While the '33 body kit was a new experience for Miller, prepping Factory Five bodies was not. His bread and butter is working Factory Five Mk 3 roadster bodies into objects of desire. As the Mk 3 roadsters and the '33 coupe share the same fiberglass construction, the techniques needed to get the '33 body up and running were old hat to Miller.
 The rear suspension uses a four-link, but there is an optional three-link as well. We plan on driving our car hard at some open-track events, so we opted for the three-link. You can also see the side-exit exhaust. As you'll read about next month, we had LK Motorspors convert our car to a rear-exit exhaust.
Those techniques are similar for any fiberglass body: checking fits, knocking off the mold line joints, filling the inevitable pinholes, and then prepping all surfaces for paint. On this job, a hood bulge was added to clear the engine we were originally going to use (a blown Ford DOHC mod motor-we ended up using a tried and true Ford Racing 347), but the part we're presenting here is what the average customer does when building a Factory Five '33 coupe-or an Mk 3, for that matter.
If this prep work seems excessive, it isn't. Miller reports the Factory Five fiberglass work is quality stuff, and it's definitely superior to most. Panel alignments are good with only the occasional shift, and the fiberglass quality is high. Doors, lids, and hoods fit with minimal trimming, and the rest is simply surface preparation.
To put numbers to it, Miller says the Factory Five roadsters take about 90 hours of body shop work for prep and paint. Other brands more typically consume 130 hours. Those are roadster numbers; prepping the '33 coupe seems about the same but might take slightly longer because it has more body panels. This is especially true if choosing the optional roof panel and fenders.
Factory Five councils that $4,500 is a typical paint job tariff on its cars; toss in half that much for body prep and the numbers add up to a realistic $7,000 to $9,000 if you farm out body preparation and paintwork for a quality job. Most people do, as they don't have the tools, experience, or place for bodywork and the results are so, well, public.
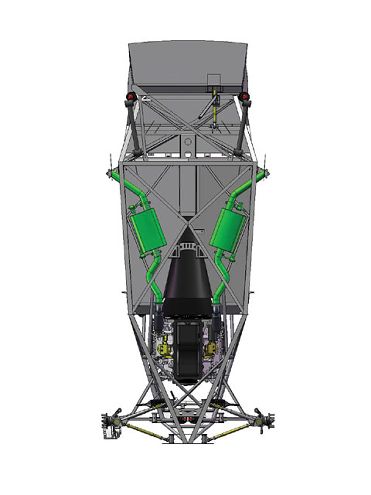
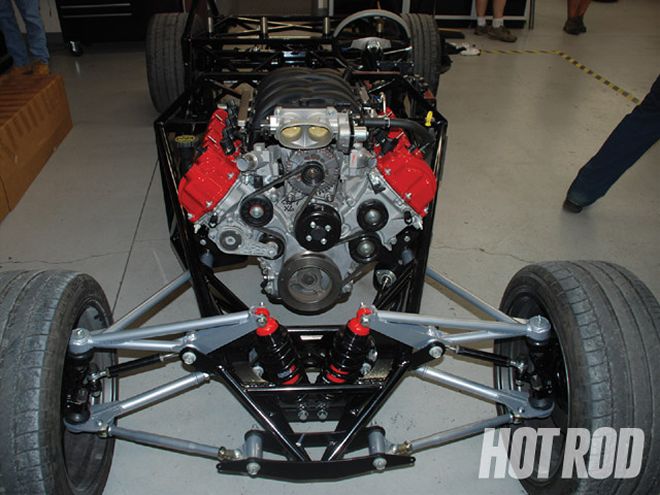 The front suspension uses unequal-length control arms actuating inboard Koni coilovers mounted right behind the radiator.
On the other hand, the work is more tedious than brain straining, and fine results can be obtained by dedicated first timers. If education and craftsmanship are why you're building a kit, then tackling the bodywork makes sense.
Our job was typical and complicated only by the custom hood bulge and two-tone paint. Factory Five supplied the hood bulge to Miller, who 'glassed it into the stock hood using a bit of eyeball engineering to get it placed just so. This was done by cutting a hole in the hood sufficient for the bulge to fit into, then 'glassing the two together. Miller laid out the cut so the seam would be easiest to work with, about 3/4 inch out from the bulge proper. Another fitment job was a simple reworking of the trunk lid hinge brackets for more clearance. Other than that, only the most minor of edge filing was needed to perfect the fit of the various doors, lid, and hood.
The rest, as we said, is about 80 hours of sanding and painting as detailed in the photos. But once finished, the results are nothing less than transformational. Now that it looks so good, we can't wait to get the body onto the chassis. Come back for that story next month.