 Sporting loads of new attitude, the rest of the body now needs a full panel replacement since the ravages of time have not been kind to it.
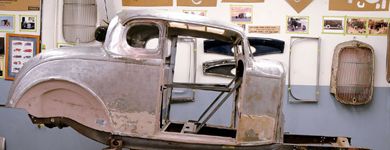
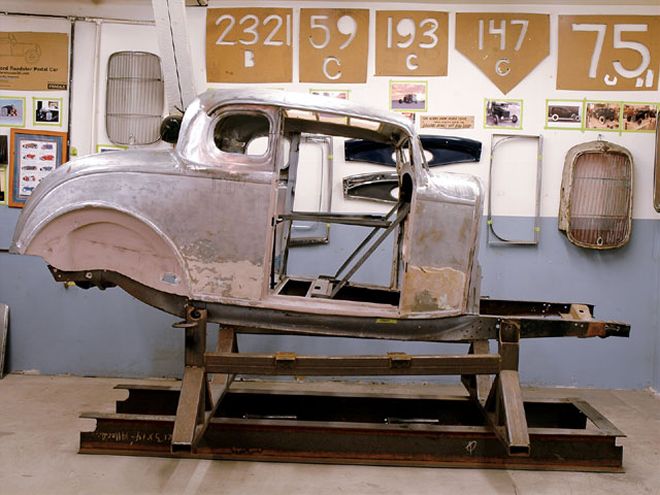
Unless you're one of the fortunate few who happen to stumble across that once-in-a-lifetime barn find, getting a Deuce back into shape after years of hard running must be approached in a textbook-type fashion. The restoration process needs to be addressed from the front to the rear once the project gets underway to ensure a full recovery is made to its body, chassis, and drivetrain before being doused with a final coating of vibe to complete it.
Of course, along the way, instilling just enough attitude and style into the mix is something the individual builder brings to the table, making each car a unique fingerprint. When we last left off at the Rolling Bones Hot Rod Shop in Greenfield Center, New York, George Poteet's wicked five-window had just undergone the knife, receiving a wicked chop that set it apart from the rest. Moving forward with the build, the crew found that the coupe's weathered body was in need of some major body panel replacement to inject some new life into its soul. Keith Cornell and team members Ken Schmidt and Chris Chabre decided it was best to commence the panel replacement starting at the front of the car and gradually working their way to the back.
 With the body fully braced while secured to the framerails, it's time to remove the cowl panel in preparation for its new skin from Brookville Roadster Inc.
After carefully inspecting the weathered cowl sides, which had seen their share of body filler and repairs over the years, a call was made to Brookville Roadster in Brookville, Ohio, to order a pair of the company's Deuce roadster full-length cowl panels. Although these are bolt-in units, Keith could trim them to fit the coupe, allowing for the use of full panel sides to keep everything fresh as opposed to merely using the much smaller patch panels.
To prepare the new cowl side for installation, Keith began by measuring and removing the bolt-in supports from the top of the panel. The cowl panel is also set up for two door hinges on its doorjamb, whereas the roadster's doors are mounted differently. Close evaluation of the coupe's existing doorjamb proved that it was in good shape, so Keith trimmed off the jamb area on the new panel. With the initial trimming complete, it was time to remove the firewall and get the markers and measuring tapes out to prepare the coupe for surgery.
Measure twice, cut once-it's a good idea to have everything dialed in before you take the cutting wheel to the steel, and it's a pledge Keith lives by. For this installation, Keith opted to remove the original panel just below the body side reveal line to make the transition with the new steel virtually seamless. Once the cowl hoop was removed, Keith proceeded with even more measuring. Now he could match up the replacement panel directly to the body, ensuring all the reveal lines matched up perfectly. With the aid of machinist's dye, he scribed perfectly visible lines to make his cuts. Once the original panel was removed, Keith and Ken spent just enough time finessing both the body and new panel with numerous types of files to ensure a perfect fit before commencing any welding. A hip tip from Keith: While the area is wide open, it's a perfect time to take a wire wheel and clean up the inner structure and subrail area to give it a good protective coating of Rustoleum before it all gets sealed up with the new panel.
With everything ready to go, the panel was then bolted in at the chassis and clamped to the body as Keith began tacking the panel on while checking to make sure the fit was right on. At this time, it's a good idea to reinstall the firewall back into place to be sure that it too lines up while also adding extra strength. Once all the final welding was complete, Keith used a grinder to smooth out and finish the welds, followed by completely dressing the new steel with a 50-grit sanding disc. The final product is one that is virtually seamless, giving the Deuce a facelift that will continue to work its way down the body as we move along on how to reskin a Deuce.