So much of muscle car restoration is about the hunt. Finding the right car brings the thrill of having bagged elusive prey. Discovering just the right team of professionals, buddies, and new friends brings fellowship into the process. Though simpler today with the advent of quality aftermarket equipment, parts acquisition has traditionally required a conglomeration of hunting trips to swap meets, specialty sources, and national events. In that mix, the restorer has often resorted to the old standby, the parts car.
Our fearless MaliBeater owner, Brad Van Hemert (“Shifty MaliBeater,” June ’13), stumbled across a “driven hard and put away wet” ’67 Chevelle SS roller with no motor or trans. But to our surprise it still sported its original 12-bolt rear—a huge find! Seeking a budget approach to building the MaliBeater, we had resigned ourselves to rebuilding the stock 10-bolt rear. However, that concession was especially troubling in light of our vision of recreating an L79 car, which to the best of my knowledge would have come from the factory with a 12-bolt. Installing a proper 12-bolt scavenged from an SS car would help complete the L79 upgrade.
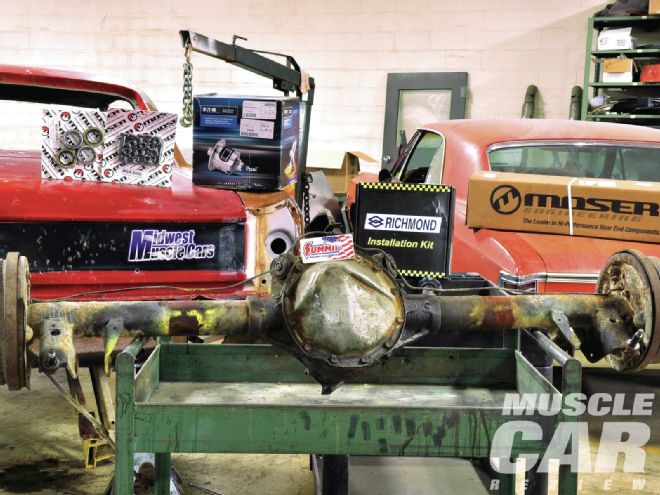
A visit to Summit Racing Equipment’s website scored all the parts necessary to rebuild our tired 12-bolt: a brand new Eaton Posi unit, Moser 30-spline axles, a Moser C-clip eliminator kit, Moser half-inch wheel studs, and a 4.10 Richmond Gear and installation kit. Summit had the parts at Midwest Muscle Cars within a couple of days, and we went to work. I yanked the 12-bolt out of the Chevelle’s carcass and spent about three hours pressure-washing and degreasing the grungy rear. Checking the numbers, it seems that the rear was indeed original to the car. My mechanical genius buddy Mark Webster was summoned to Midwest Muscle Cars, where he swiftly and adeptly tore the rear apart and effortlessly installed the new hardware so that the MaliBeater 12-bolt was ready for war.
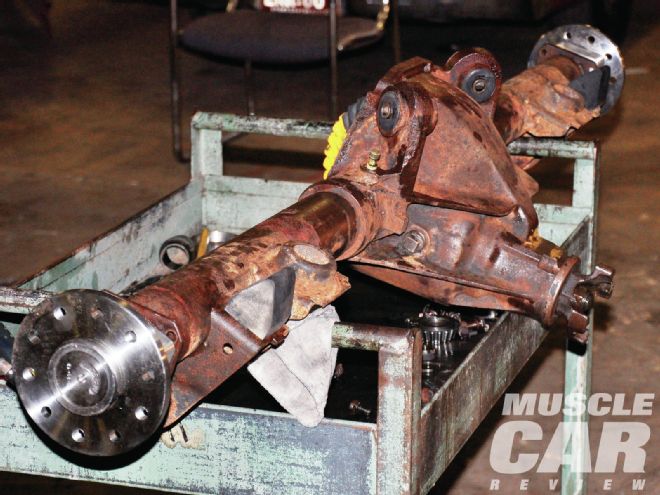
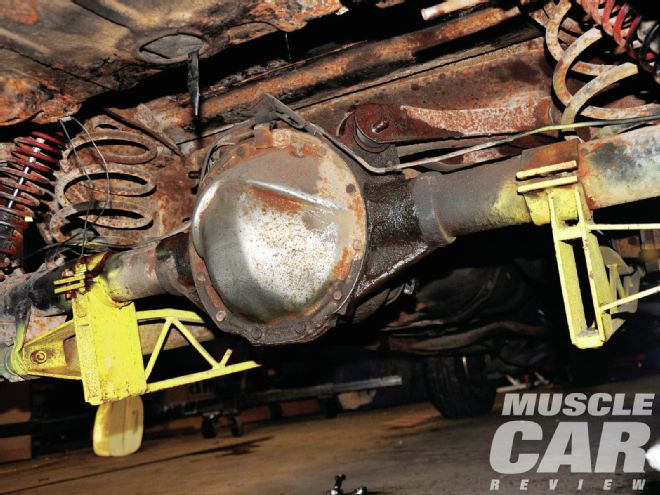 1] The donor Chevelle SS was equipped with its original 12-bolt rear, fitted with coilover shocks and ladder bars. After a floor jack was placed under the rear centersection, the ladder bars, brake lines, emergency brake cables, upper control arms, shocks, and finally lower control arms were removed. Once the rear was free, it was placed on our work cart for the rebuild.
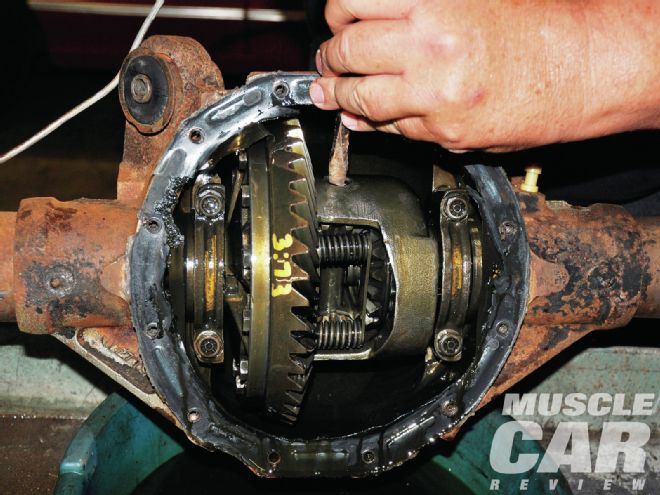
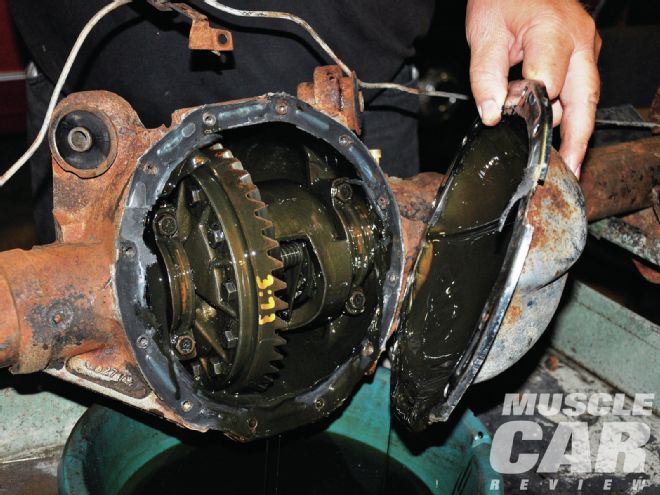 2] Mark Webster took control of the 12-bolt rebuild. He has literally done more than a hundred of these rears and clearly knew what he was doing. The chrome rear differential cover was removed, immediately revealing a Posi unit and yellow marking on the ring gear indicating a 3.73 ratio.
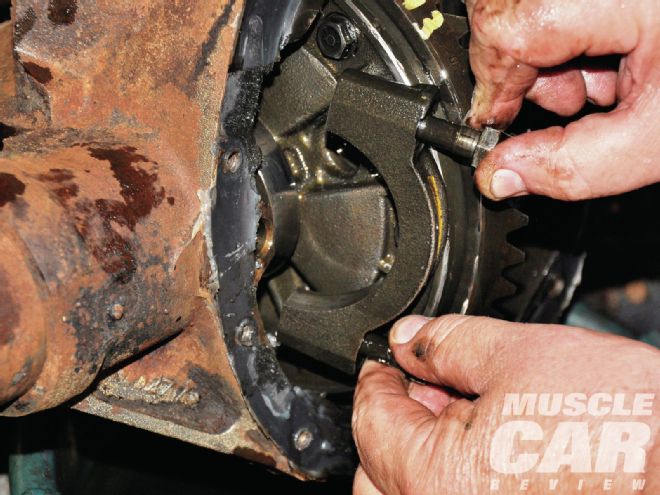
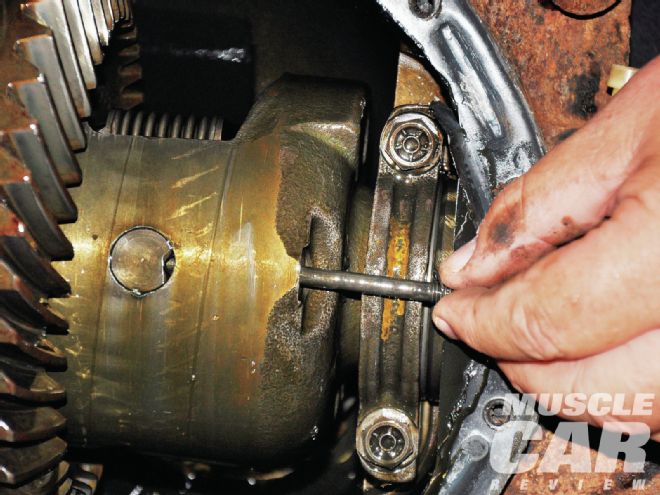 3] Webster removed the center pin retaining bolt to free the center pin in the old Posi unit.
 4] This particular 12-bolt had seen some abuse. Webster explained that many times the center pin will drop out as soon as the retaining bolt is removed. However, wheelhop and hard launches had distorted this center pin, making it more difficult to remove.
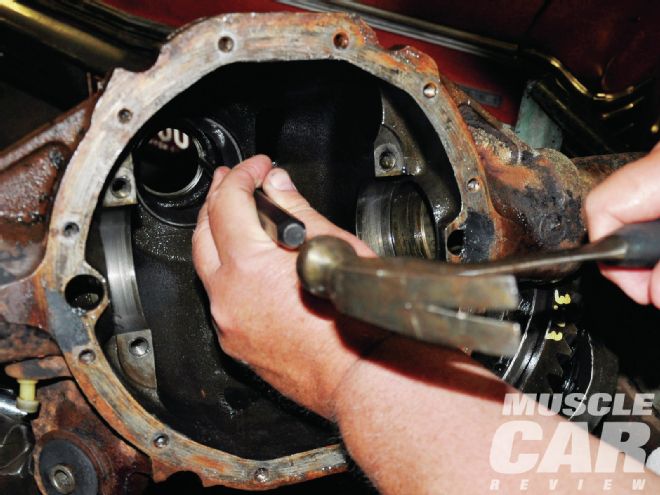
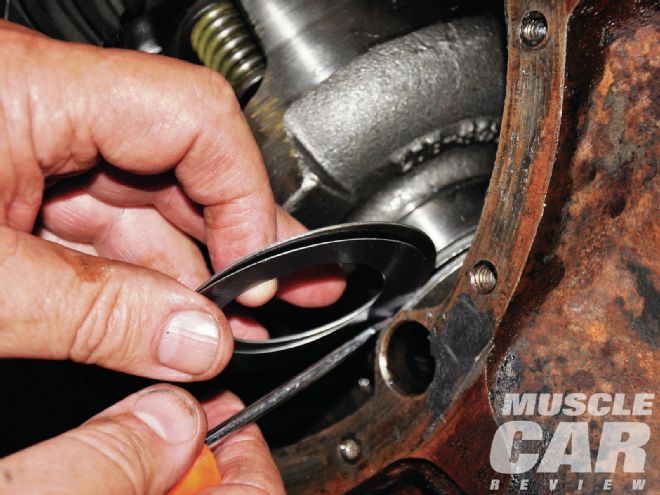
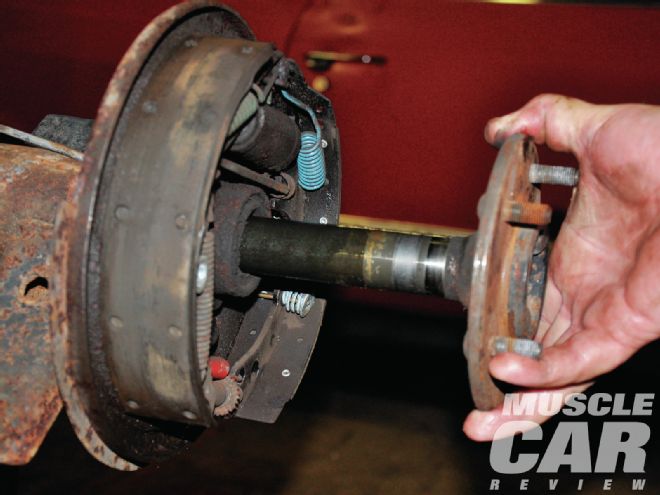 5] With the center pin removed, Webster pushed the axles in slightly, causing the axle retention C-clips to drop into the housing. He fished the C-clips out of the housing, then slid the axles out.
 6] The centersection main caps are stamped for identification so they can be returned to their original location upon reassembly. The main cap bolts were then loosened and removed.
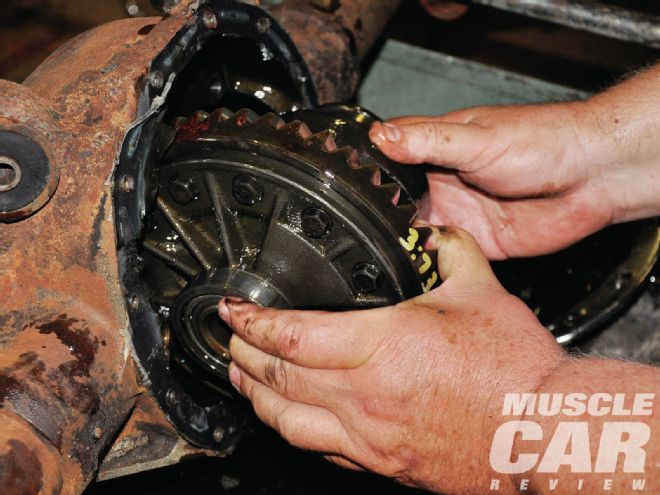 7] The old Posi unit and ring gear could now come out. The adjustment spacers also dropped out at this time.
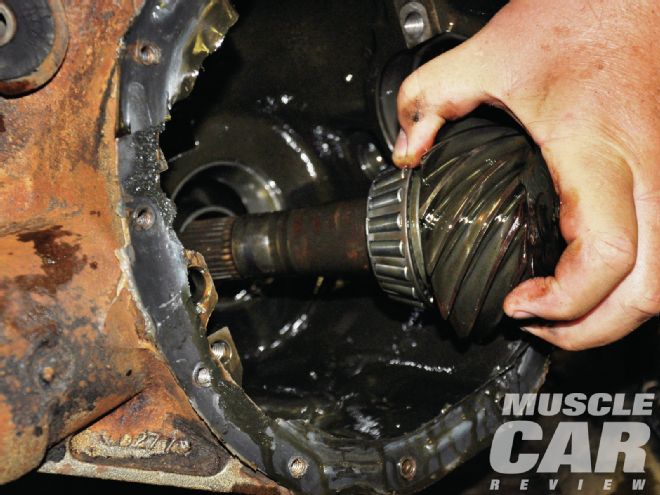 8] Mark used an impact wrench to remove the pinion nut. Once it was off, the pinion gear could be removed. Depending on wear, the pinion might need to be tapped a few times with a suitable hammer.
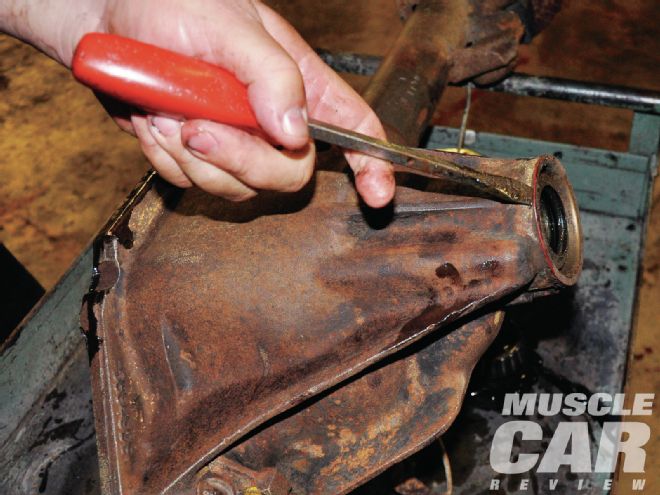 9] Removing the old pinion seal and bearings was easily done with a screwdriver and a hammer.
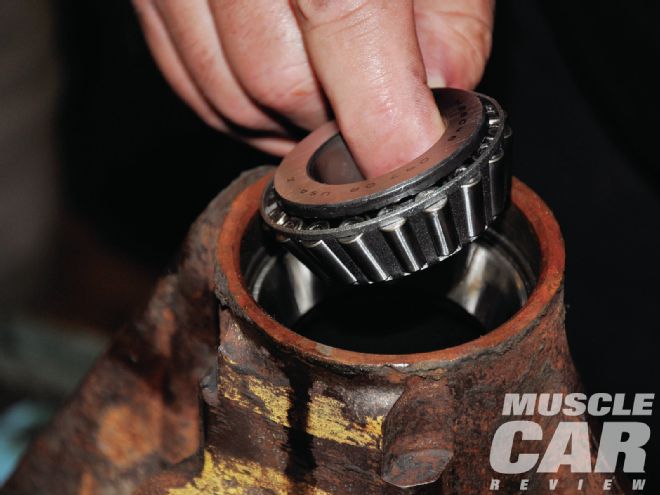
 10] The old bearing races were driven out with a large punch. The new races will provide the optimum setting for the new bearings.
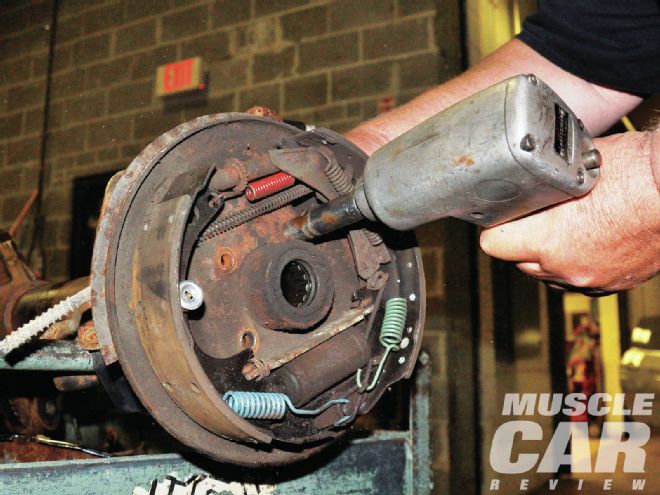 11] The backing plates were removed to access the housing ends. An impact wrench was especially helpful for taking them off.
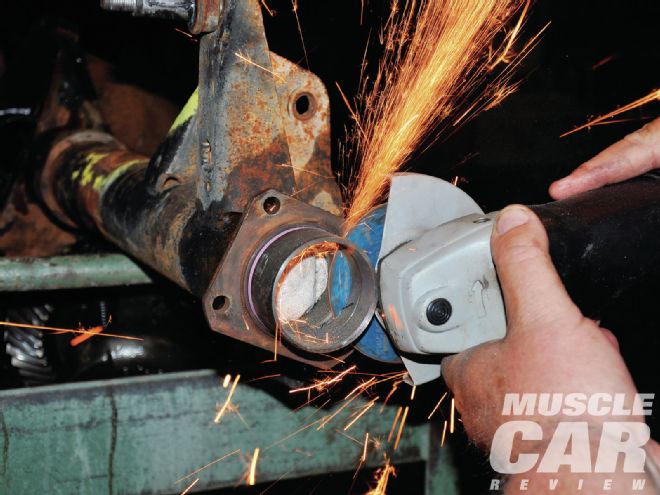 12] A drag racing buddy once had a C-clip failure on his drag car, where the rear wheel actually traveled outside the fenderwell lip. For that reason I advocate a C-clip eliminator kit on any 12-bolt rear. Installing the Moser C-clip eliminator kit calls for the housing ends to be cut off flush to the backing plate bracket.
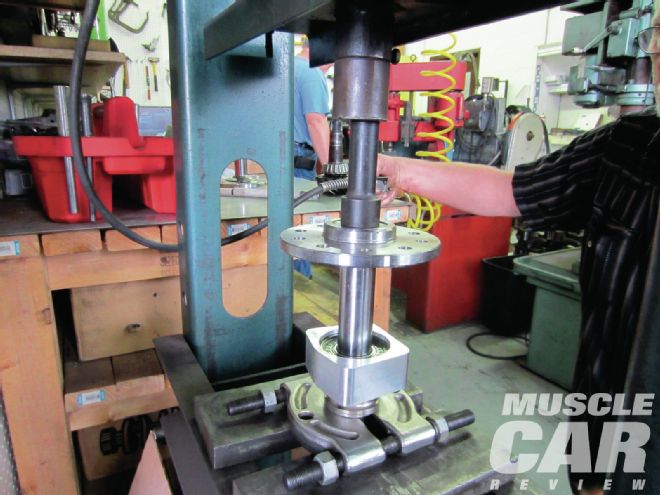 13] The new 30-spline Moser axles are seen here with the Moser C-clip eliminator being pressed on by Steve Coil at Coil Racing Engines in McHenry, Illinois.
 14] Coil also pressed the carrier bearings on the new Eaton Posi unit.
 15] Webster installed the new pinion bearing races from the Richmond Gear installation kit using a hammer and the old races to drive them into position. A bink sound indicates that they are properly installed. Webster treated the bearings to a healthy dose of gear oil prior to installation.
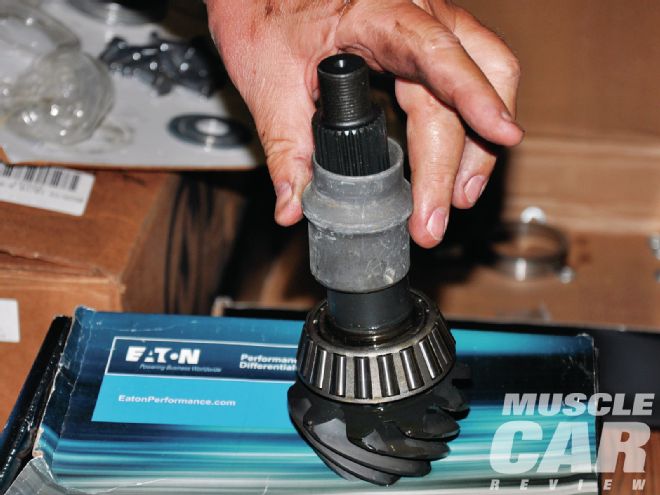 16] The pinion gear had also been pressed on at Coil Racing Engines. The new crush collar was placed on the pinion gear prior to installation, and Webster again used an impact wrench to install the pinion nut. Pinion shims that were originally in the rear were reused to be checked later for proper pinion depth.
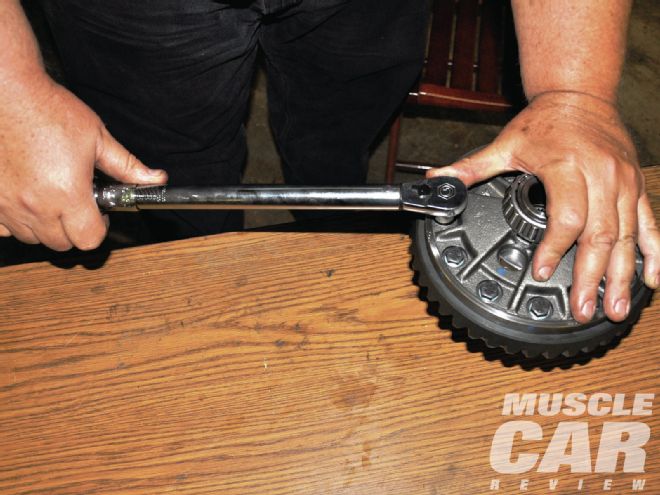 17] Next, the ring gear was bolted to the Eaton Posi unit. Webster first placed four bolts at the 12, 3, 6, and 9 o’clock positions, then snugged the bolts in order to bring the ring gear up to the Posi case. He used no thread-locking compound at this point, as it could create a gap between the ring gear and Posi unit. He removed the four bolts, leaving the ring gear tight to the Posi. Only then were the bolts treated to Loctite Red and torqued to 45 lb-ft.
 18] Webster spent considerable time experimenting with the carrier bearing shims in order to set the ring-and-pinion backlash. Richmond Gear specs call for backlash of 0.007 to 0.009 inch.
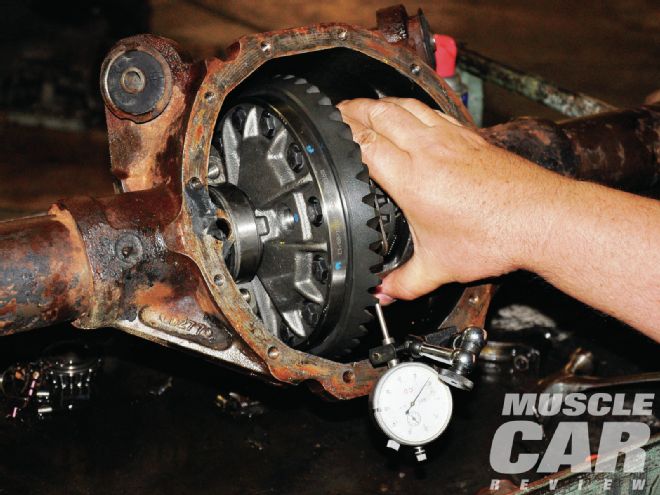 19] A variety of carrier bearing shims are supplied in the Richmond Gear installation kit to produce the recommended backlash. Mark’s experience with setting up rearends enabled him to estimate the proper backlash by feel, rocking the unit back and forth until it felt right. A dial indicator measured his backlash at 0.008 inch, precisely in the middle of Richmond Gear’s recommended specs.
 20] Webster liberally lubricated all the bearing surfaces with gear oil prior to installation. He installed the carrier bearing caps and torqued them to 85 ft-lb.
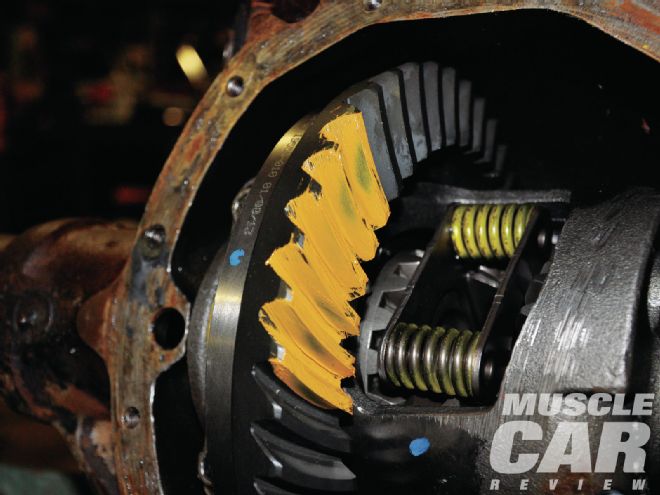
21] Spinning the ring gear after applying some marking compound shows how the ring-and-pinion gears are meshing. The smudged area in the center shows that the pinion is meshing perfectly with the ring gear on the first try. Nice job! If the mark is on the inside or outside of the ring gear, shims must be either added or subtracted to change pinion depth.
20] Webster liberally lubricated all the bearing surfaces with gear oil prior to installation. He installed the carrier bearing caps and torqued them to 85 ft-lb.
21] Spinning the ring gear after applying some marking compound shows how the ring-and-pinion gears are meshing. The smudged area in the center shows that the pinion is meshing perfectly with the ring gear on the first try. Nice job! If the mark is on the inside or outside of the ring gear, shims must be either added or subtracted to change pinion depth.
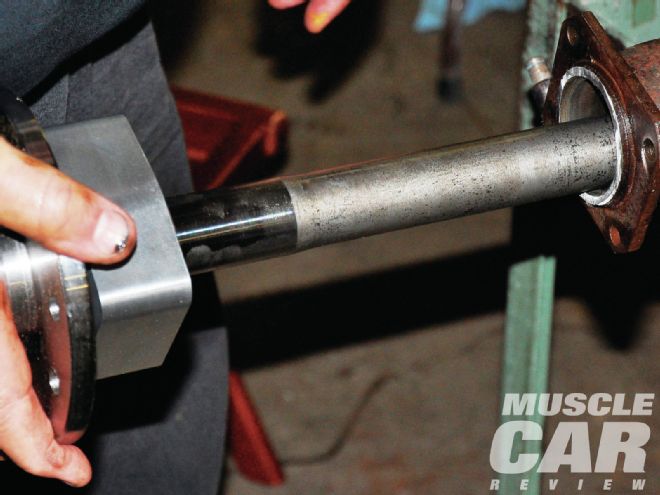 22] The Moser C-clip housings that had been pressed on the new Moser axles were installed in the rearend housing to see if the C-clip buttons on the ends of the axles needed to be cut off. Webster determined that, as per Moser’s instructions, they did need to be cut.
 23] After cutting off the C-clip buttons with an abrasive saw, Webster installed the axles again and found them to be ready for final tightening to the backing plates. Since our mission is to make this car look like it was yanked out of some guy’s garage after years of hibernation, I resisted the temptation to paint the rearend. The junk chrome differential cover was left off, as a massive eBay hunt began for a vintage Cal Custom finned aluminum differential cover. Three were available, one was nice and dirty. Backing plates with all new brakes and a suspension rebuild are next for the MaliBeater.
SOURCES
Coil Racing Engines
815/363-6950