
With our new Coker American Classics installed on the stock wheels of our ’51, we could finally push it in and out of the shop. That is, as long as we didn’t have to turn. It was high time to connect the steering wheel to the Chassis Engineering steering rack.
The hurdle that we faced was that we really were attached to our factory steering column. Something about the looks, the feel, and the classic turn signal lever just work for us. We really thought it was going to be a hassle to retain it (which is maybe why we put it off for a while) but then we discovered a solution from Classic Performance Products.
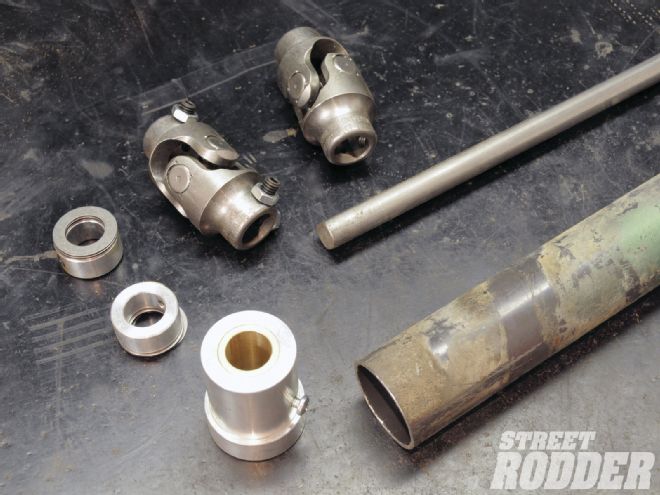
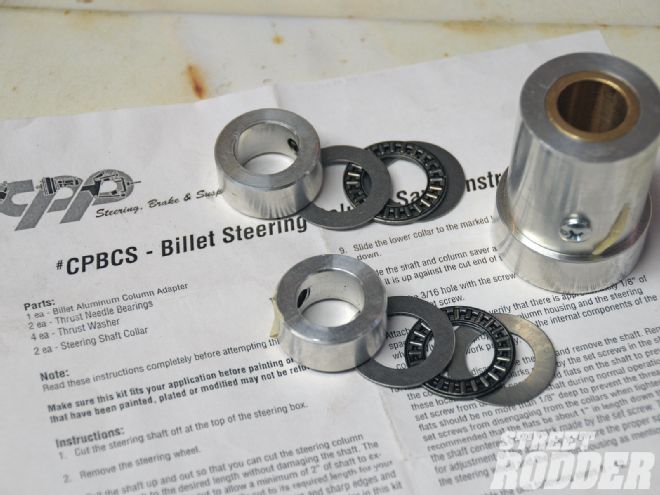
Classic Performance specializes in steering, brakes, and suspension solutions and their little Billet Column Saver is just one example item of how to solve a major issue for stock columns. The column saver kit consists of a billet adapter that fits snuggly inside the column and is held in position by two collars that secure to the factory shaft. A pair of thrust needle bearings provides smooth steering effort and long life. The kit is simple to install with a little measuring, test-fitting, and one cut to the column and shaft.
We started by putting the seat in our ’51 and took the opportunity to reposition the steering wheel and column where it was going to be most comfortable while cruising. The stock steering wheel needs to be pulled in order to remove the shaft from the column and assemble the saver. We measured two or three times before we finally cut and assembled the shaft into the column.
With the column mounted in the car we set about joining the steering rack to the OE shaft. A call was put into Borgeson, the authority on steering U-joints and technology. We purchased a 36-inch-long piece of DD 3/4-inch shaft to use along with three U-joints. One of these joints would be a DD-to-round that would end up being welded to the stock steering shaft. The second connected to the 26-spline drive of the rack while the third U-joint was used since a single solid shaft wouldn’t clear the chassis and exhaust manifold.
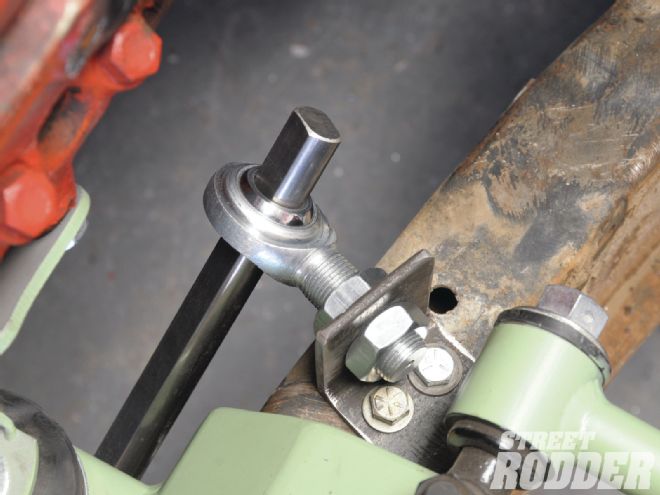
Borgeson states that each side of the U-joint can tolerate up to a 35-degree angle, but we were far from needing that much angle. We tried to keep things as straight as possible from the rack up, while avoiding the manifold and chassis. We fabbed a support bracket out of scrap angle iron where we fit the 3/4-inch rod end. This bracket will be welded to the frame when complete.
Overall, the steering was completed for under $400 and feels smooth and secure. Next on the list is to fire up the engine and test the driveline before installing the front sheetmetal.
What do you do when you want to retain your stock column, but incorporate a late-model steering rack? Classic Performance Products can help you with their Billet Column Saver.
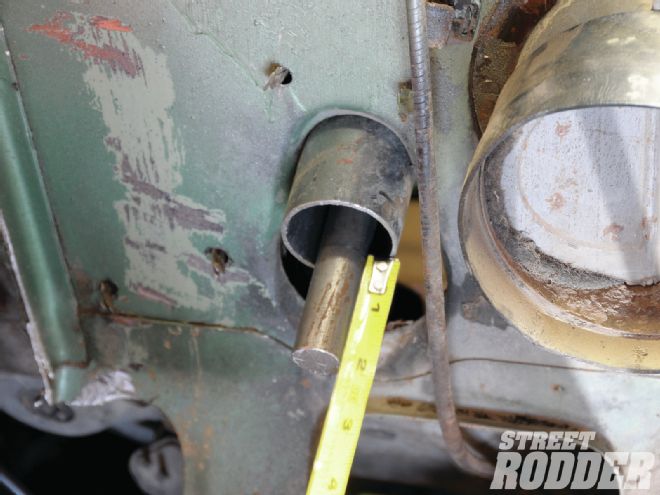
We had already lopped off the steering shaft and gearbox to install the Chassis Engineering front end so we were a couple steps ahead. With the seat in the car, we positioned the steering column where it was most comfortable, then cut the column and the shaft. The shaft needs to stick out at least 2 inches past the column sleeve.
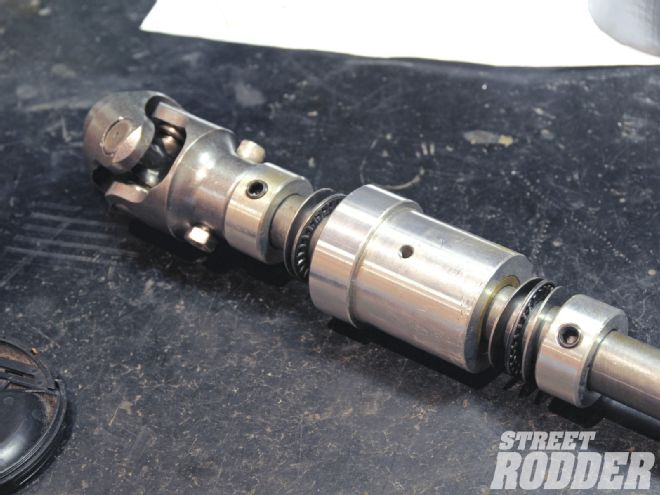
This shows the order of the components prior to assembly. It all makes sense seeing it laid out prior to assembly but what you’re seeing from the top of the shaft to the U-joint is a locking collar, a thrust washer, needle bearing, another thrust washer, the column adapter followed by another thrust-needle-thrust, and locking shaft collar.
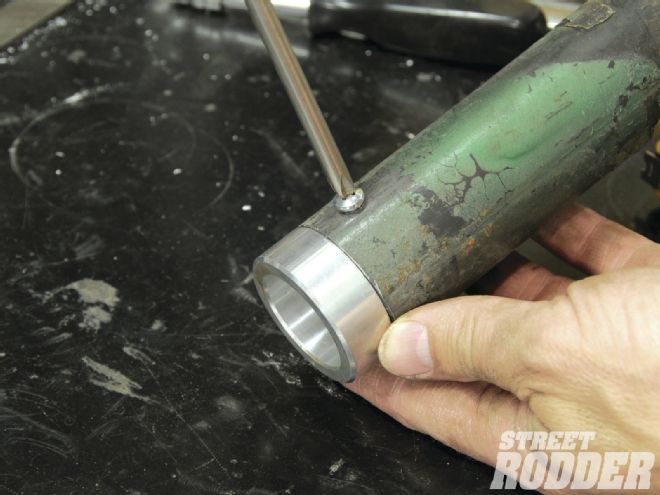
With the shaft cut to the final length, we moved to the column base and drilled a 3/16-inch hole 1 inch from the end of the column. This will lock the adapter in place, so try to position the hole on the bottom of the column. Here we’re test-fitting the adapter and locking screw.
To determine the location for the top shaft collar, the entire shaft will need to be pre-assembled. With the shaft back in the column, mark the location of the billet column adapter. Once removed, you can assemble the parts based on the marking. During our test-fit we temporarily connected the U-joint and steering shaft as well.
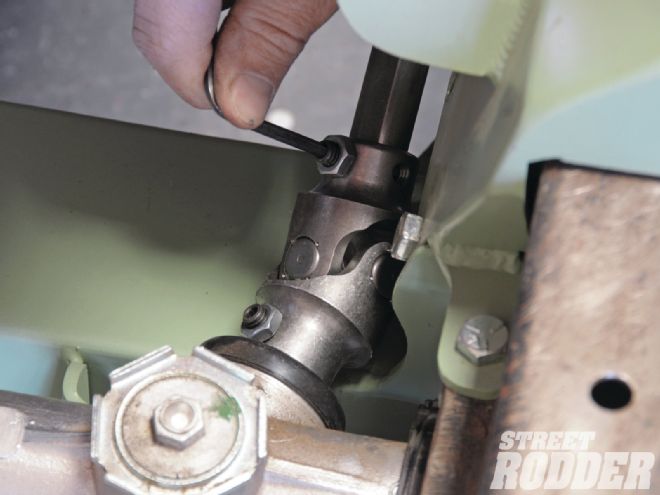
With the column adapter set and things assembled on top, it was time to move below to connect the steering shaft to the new Chassis Engineering rack-and-pinion. It’s tight between the rack and the chassis; Chassis Engineering recommends using self-locking set screws on the U-joint to ensure proper clearance for final assembly.
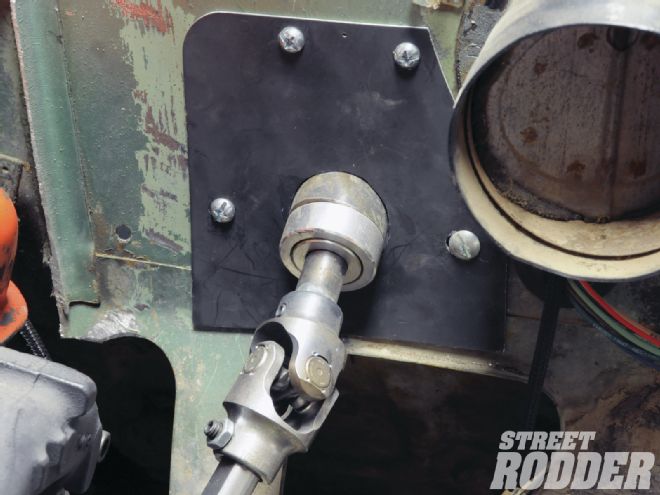
There just wasn’t enough clearance from the rack to the column to run a single shaft. Just by a smidgen too. (Tested with the exhaust manifold in place.)
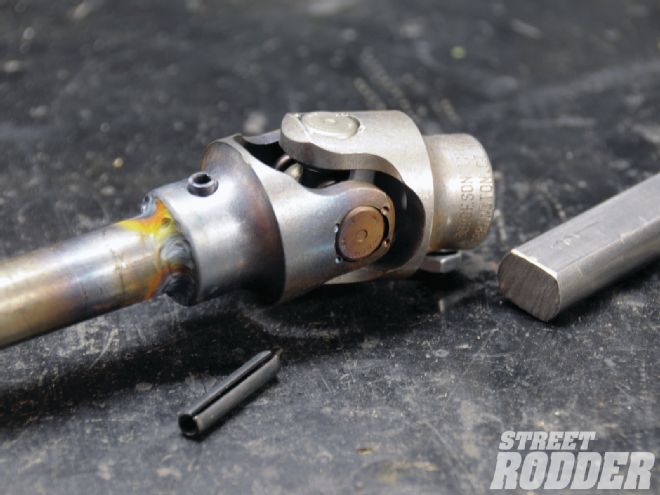
Once everything was spaced correctly, tested, and turned, we welded the upper U-joint to the original steering shaft. This U-joint adapts the round factory shaft to a common DD-shaft. During assembly we used a bolt to hold the two together; in the end it received a 3/16-inch roll pin. Never rely on a bolt to secure the U-joint to a round steering shaft.
To help secure the column in place, we made a column support bracket out of some sheetmetal. Combined with the factory underdash bracket and the new rod end bracket, our steering feels very secure and safe.
Sub Total$367.60 Total Spent to Date '51 Chevy Business coupe$2,750 Chassis Engineeringfront suspension$2,052 rear suspension$602 brake lines, valve, etc.$137 Walton Fabricationtrans crossmember$169.95 Engineered ComponentsMC brake bracket$130 master cylinder$75 engine and trans (traded for a Duster)$250 Energy Suspensiontransmission mount$40 Chassis EngineeringSB engine mounts$86 gaskets for engine (oil pan, intake, timing)$90 trans seal and inspect$125 Swap Meetintake and valve covers$60 Painless Performancewiring harness$335.95 Local partsbulbs and sockets$13 Coker Tiretires$970 mount/balance$45 paint/primer for wheels$36 U-Jointsdriveshaft, hardware$138 Grand Total$8,472.50
To complete our steering, we spent under $400 with the DD 3/4-inch shaft, three U-joints, the column saver, and the rod end for support. Grand total is just under $8,500.