If you are going to the trouble of upgrading the brakes on your C10, you are more than likely going to want to have matching wheels on the front and rear of the truck. Since the upgrade to the front from stock drum brakes to disc brakes in the accompanying article changed the bolt pattern from six lugs to five lugs (5-on-5 bolt circle), it's necessary to address the rear axles in order to have matching wheels. You have a couple of options in how to go about doing this. To keep your existing rear axle housing, you can change the bolt pattern by replacing the axles (and brake drums) with new ones in the bolt pattern you need or you can have the axles and brake drums redrilled. If you choose to have the axles redrilled, you should install new wheel studs, rather than reusing the old wheel studs.
 To have the stock rear axles and brake drums redrilled to match the new bolt pattern of the front disc brakes, I took my Stepside to Brian Elbert at B&D Fabrications. Brian does this kind of work, along with other rearend repair and modification, everyday, but the process still takes about 5 hours to complete.
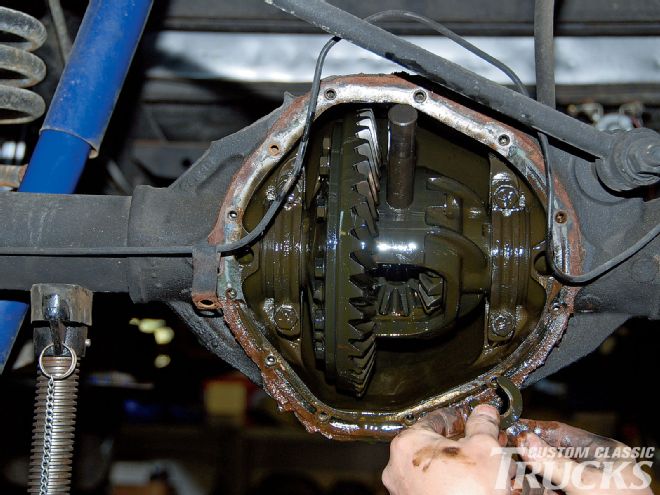
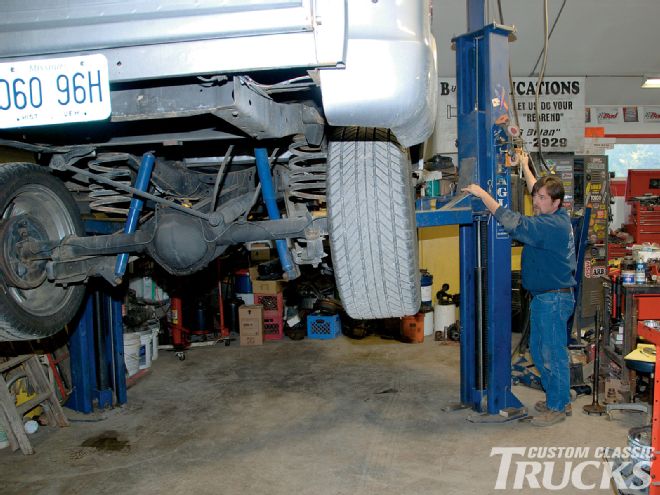
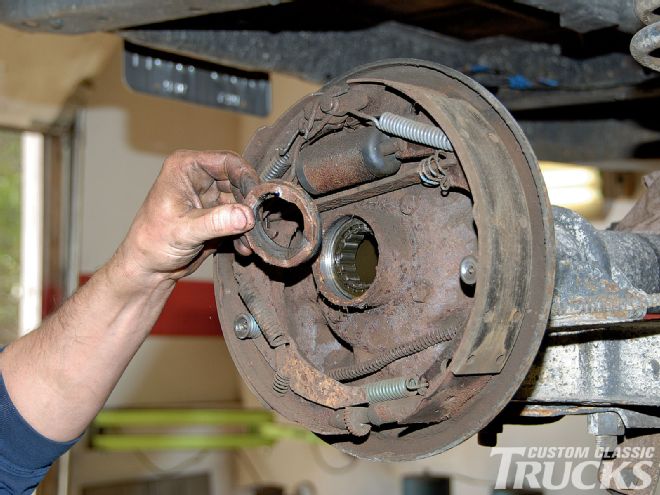
In either case, you will be required to remove the axles from the housing. To do this with a typical GM truck rearend, jack up the truck and secure it safely on jack stands if you are not using a garage lift. Put the transmission in neutral, as you will need to be able to rotate the gears in the differential. Place a drain pan under the rearend cover and then loosen the cover bolts enough so that the gear lube drains out of the rearend. While the gear lube is draining, remove both rear wheels. When the gear lube has drained out of the differential, completely remove the bolts securing the cover and set the rearend cover aside (letting it soak in a parts cleaner would be a great idea). Now remove the cross-shaft retaining bolt and then pull the cross-shaft outward. The cross-shaft does not need to be removed completely, just enough so that the axles can be pushed inward. When the axles are pushed inward, the axleshaft C-clips should fall right out. The axles can now be pulled out. After pulling the axles out of the housing, inspect them for wear or other damage.
If you choose to replace the axles, you will first need to determine the axle diameter, axle length, and number of splines, and then find suitable replacements that have the desired bolt pattern. Unless you are able to purchase new axles that meet your specifications, you will need to verify that any candidates for replacements are not bent or otherwise damaged in any way that would make them unusable or short-lived.
The cross-shaft retaining bolt must be removed and then the cross-shaft (round bar stock parallel to the ring gear) is pulled outward enough so that the axles can be pushed inward. When the axles are pushed inward, the C-clips that retain the axles within the housing will fall out, allowing the axles to be removed.
If you have access to a machine shop that routinely redrills axles and brake drums, this is perhaps your best bet, as you already know that the axles are the correct size and will work. For our '68 C10 project, we chose to forego the salvage yards looking for axles, and went straight to B&D Fabrications to have the axles redrilled. The intent was to have the brake drums redrilled as well, but there were already several holes in the existing brake drums, so those were replaced with new drums. After Brian Elbert at B&D Fabrications does his magic on the axles, they can be reinstalled.
After removing both axles from the axlehousing, Brian chucks up the axles in his metal lathe. While some people might not think about it, Brian knew that the brake register (hole in the middle of the wheel) of the GM rally wheels I planned to use would not fit over the hub end of the existing axleshaft. After measuring the wheel, he first turned down this end of the axle to the appropriate size. He also used fine emery cloth to lightly polish the portion of the axle that rides in the bearing located at each end of the rearend housing. Now it was time to locate the new holes for the wheel mounting studs. When going from one five-bolt pattern to another five-bolt pattern the process is pretty simple. However, since we're changing from six-lug to five-lug, it requires more steps. To ensure there were no weak spots caused by new holes being located too close to existing holes, he welded up one existing hole in each axle. This necessitates that the axles go back onto the lathe for a few cleanup passes to ensure no welding slag remains to interfere with the new mounting studs. With that completed, the new holes could be drilled. Brian feels that his drill fixture is proprietary to his business and asked that I not take photos or discuss that portion of the process. I respectfully obliged. For my specific vehicle, the holes are drilled to 1/2-inch diameter and then reamed to 0.515 inch. The wheels studs are then press fit at 0.530 inch.
 Brian recommends always replacing the oil seal anytime one is removed from the axle by using a pry bar. For the small price of the oil seal, it is simply not a place to cut corners.
Brian recommends replacing the bearings located at each end of the axlehousing and insists on replacing the oil seal whenever an axle is modified or replaced. The relative low cost of these two items makes this sensible when compared to the expense of having a damaged rearend repaired. Insert each rear axle, then slip a C-clip into the groove at the inner end of each axle, then slide each axle outward. Now push the cross-shaft into place and secure with the cross-shaft retaining bolt. Install a new cover gasket, reinstall the rearend cover, and secure with the bolts. Now refill the rearend with gear lube and reinstall the wheels and tires.
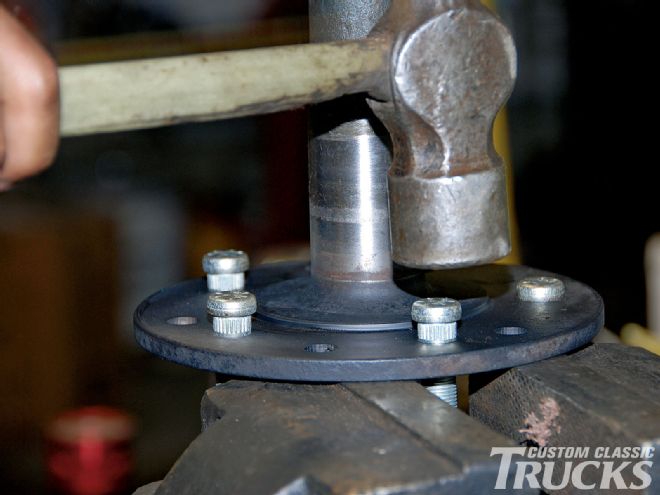 Before installing the wheel studs, Brian uses a small grinder to remove any welding slag or burrs that may be left over from the filing or drilling process. With the axle supported by a vice, the wheel studs are installed by the Armstrong method and a Ford hammer.
With the new disc brakes installed on the front and a matching five-lug bolt pattern front and back, the large-diameter, six-lug wheels that came with the truck must be replaced. Since my plans for this truck are more along the lines of a daily driver shop truck/parts chaser/magazine test mule, I plan to keep the expenses down and the reliability up by installing a simple set of GM rally wheels shod with some BFGoodrich T/A radial tires. I also have a fair amount of bodywork slated for this truck, so I don't want to install something flashy that will be covered with sanding dust and other bodywork grunge.