Click Here for Part List
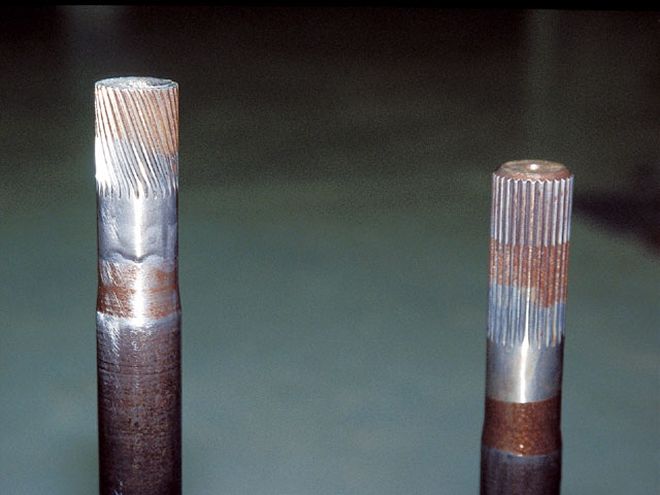 The force of the accident twisted off one of the axle shafts (left) where the splines connect with the carrier.
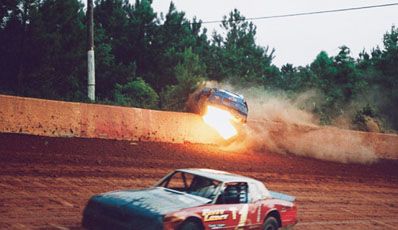
This upgrade can be done in your shop, but low labor costs make it worth going to an expert.The crash was downright nasty. There was fire, a car climbing the wall, and mud flying everywhere. In other words, a real crowd pleaser. Thankfully, good construction practices paid off and the driver walked away. The old Monte Carlo, though, wasn't as lucky. Among the many items on the repair list was a busted rearend.
Instead of simply throwing the same parts back at the rearend, we decided an upgrade was in order. Granted, there is no guarantee that anything short of a Sherman tank would have survived this mishap without some serious damage, but that's not the point. Because gear ratios multiply torque, it is possible to inflict over three times the torque your engine produces on the rear axles. Combine that with the fact that, depending on conditions, a dirt racetrack can be as slippery as glass or provide a tremendous amount of traction. And let's face it, most of us aren't like Winston Cup teams that replace an entire rearend after a set number of laps. Most racers run 'em until they break, then fix them as best they can and keep on going. Knowing your rearend is capable of handling a season's worth of abuse without letting you down can save us all a few headaches.
A thorough inspection showed the damage to the rearend was not as substantial as first thought. The left-side axle had sheared off at the splines from twisting forces. Obviously, a new set of axles was in order, but to find out what else we needed, we took the center chunk to a professional. Richard Mellentine is a former Winston Cup gear specialist who has recently set up shop on his own-RM Gear and Harness-building transmissions, rearends, and wiring harnesses for racers on all levels. A complete inspection produced no more damaged parts, but Mellentine did recommend several steps we could take to beef up the rearend without increasing rotating weight.
Dig In The first step is a complete disassembly of the rearend's center section. Every piece is meticulously inspected-except for the bolts, which are immediately thrown in the trash. "There's probably nothing wrong with any of them," Mellentine explains, "but it's cheap insurance. Bolts are subjected to a certain amount of stretch if they are properly torqued into place. It's a good idea to replace them after every couple of teardowns. Since I don't know the history of this rearend, I'll go ahead and replace them now."
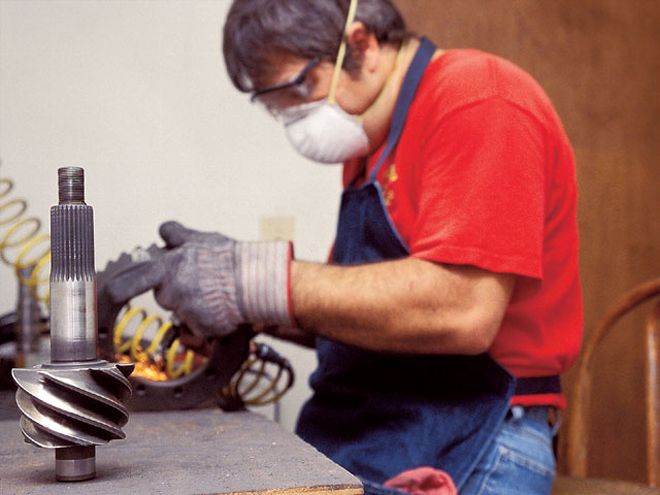
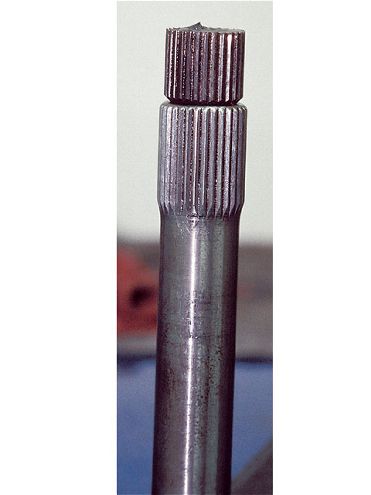 To reduce the chance of tearing up another set of axles, we went with 31-spline units from Quick Performance. Here, the broken piece of our old axle is sitting on top of the new one to give you an idea of the size difference we are talking about. A little goes a long way.
Another piece headed for the junk bin is our cast-iron carrier. It's bulky, heavy at 13.4 pounds, and prone to cracking. Most racers will upgrade this piece with an aluminum spool, but we turned to Quick Performance to try its new ultra-lightweight steel spool. This spool uses just five finger-shaped flanges for bolting up the ring gear and is actually lighter than most aluminum spools at only 5.6 pounds. Because we are reducing rotating weight in the spool by a jaw-dropping 7.8 pounds, it allows us to beef up the axles to make them stronger without hurting performance. The axles that were damaged were 28-spline units, so we are switching to thicker 31-spline axles (1.195 inches in diameter for the 28-spline versus 1.325 for the 31). And of course, the new spool had to be ordered to accept 31-spline axles.
Spit Shined If the ring-and-pinion is damaged in an accident such as ours, it is usually in the form of broken or cracked gear teeth. This ring-and-pinion turned out to be fine, but since Mellentine had it out on the table anyway, he recommended cutting and polishing the gears to reduce friction and heat buildup. Mellentine is one of the rare gear specialists who does not depend on an REM machine when it comes to polishing gears. Instead, believing he can do a better job himself, he does all the work by hand. His setup is surprisingly simple and effective-something most racers can do themselves.
Click Here for Part List
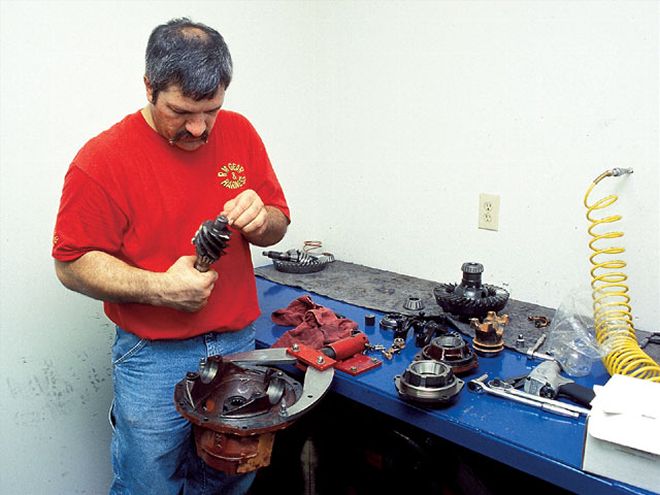 A damage assessment required a complete tear-down. Drivetrain specialist Richard Mellentine found no damage on the ring-and-pinion but did suggest several improvements to help both speed and dependability.
Since our ring-and-pinion has already been run in several races, it's easy to see the wear pattern where the teeth have been making contact. Before he begins polishing, Mellentine uses a die grinder to knock the sharp edges off the ends of the teeth on both the ring-and-pinion. It's obvious from the wear pattern these areas are not making contact with the mating gear and are only stress points. Also, when the car is under heavy acceleration, thrust forces cause the pinion to work its way to the top of the ring gear (the outside edge). "Depending on how deep the pinion is set to contact with the ring gear, under heavy load it can actually walk itself up the ring gear and start rolling over the outside edge," Mellentine explains. "So I'll also cut the top edge down so that if the pinion teeth come near the edge of the ring gear it won't be hitting that sharp edge. When you have the pinion hitting a sharp edge, it starts putting stress points in the pinion, which causes heat and increases the chance of cracking something."
Polishing is done with a buffing wheel mounted to a bench grinder. One neat tip here if you are attempting this yourself is to use a screwdriver on the spinning buffing wheel to cut a groove into the face of the pad. This allows you to polish both the drive face and coast face of the gear teeth at the same time and to reach all the way to the bottom of each tooth. It took less than 20 minutes for Mellentine to put a mirror finish on both the ring-and-pinion. The final task before everything hit the parts washer is to smooth any rough spots inside the housing with a die grinder. Again, rough spots are the first places cracks will appear under stress and are also magnets for excessive heat.
Big Bearings Another weak area Mellentine pointed out in our center section was the inner pinion bearing. Whenever power is applied to the wheels, the inner pinion bearing is under load. The more power put to the rear wheels, the greater the load. Standard sizes are fine for street cars, but the larger bearing helps distribute the increased load caused by high-horsepower race cars. Bearing failure is not the only problem we are trying to avoid here. As the bearing wears, it slowly loses its ability to hold the pinion in the correct position. The slop that comes into play will increase heat gear wear, and the potential for breaking gears. The larger bearing requires that we also install a larger pinion retainer; both are the same pieces Mellentine used when building Winston Cup rearends.
 Instead of depending on a polishing machine, Mellentine grinds and polishes all gearsets by hand.
The rest of the assembly process is straightforward for a Ford 9-inch rearend. Mellentine recommends 20 in-lb of preload on the pinion bearing. He says that after 30 laps of practice the bearings will take a set and-if you were willing to take the rearend back apart and actually check it-that number will be down to 5 or 6 in-lb.
Along with the bigger inner pinion bearing, Mellentine also recommends using a steel spacer instead of a crush sleeve. "A stock crush sleeve is fine in a street car," he says, "but in a race car it's just going to keep crushing as you put pressure on it. What happens is you will loosen the pinion and bearing up, and you are going to start having gear failures, bearing failures, seal leakage, and things like that. By going with the solid steel spacer, you aren't going to have that problem. As the bearing takes a set, you are going to get a little bit of looseness, but you want some and it's not going to be enough to cause a problem."
Click Here for Part List
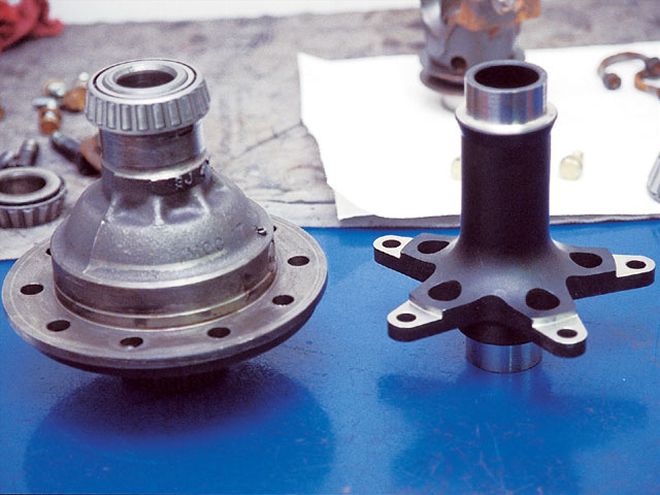 On the left is the 13.4-pound carrier we are ditching in favor of the 5.6-pound five-bolt steel spool from Quick Performance. It's a win/win situation: We are getting a stronger piece and losing 7.8 pounds of rotating weight at the same time.
Final Check Unlike many gear specialists, Mellentine uses gear-check paint on both the drive and coast sides of the teeth all the way around the ring gear when checking lash. When doing a wear pattern test, you are looking for a consistent pattern all the way around the teeth and for the contact on the thrust face to be near the bottom of the teeth. When the gears are under torque, the contact patch will move up the face of the ring gear teeth. You want the pinion gears to make complete contact with the ring gear teeth and not walk off the top.
Also, instead of checking just a single point for lash, Mellentine marks four points on the ring gear and checks lash with a dial indicator in all four locations to make sure there are no warping or runout problems. Lash must be between 0.006- and 0.009-inch to fall between Mellentine's acceptable parameters. If lash is too tight, the rearend will suffer from excessive heat buildup and can scuff the gears. Too little and you run the risk of breaking pinion teeth. Finally, Mellentine resets the dial indicator to the back face of the ring gear and spins the pinion-again to check runout. For this check, he wants to see no more than 0.0025-inch variance. This check is not for the quality of installation but for the quality of the ring gear and spool. Too much variance means there is an alignment problem. There's no fix in this situation other than to determine which piece is at fault and replace it.