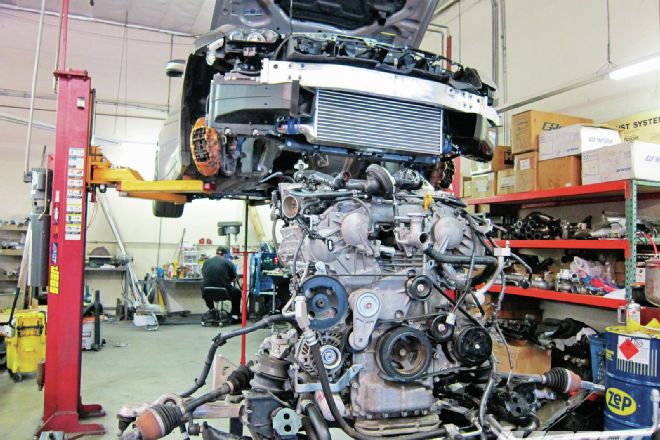
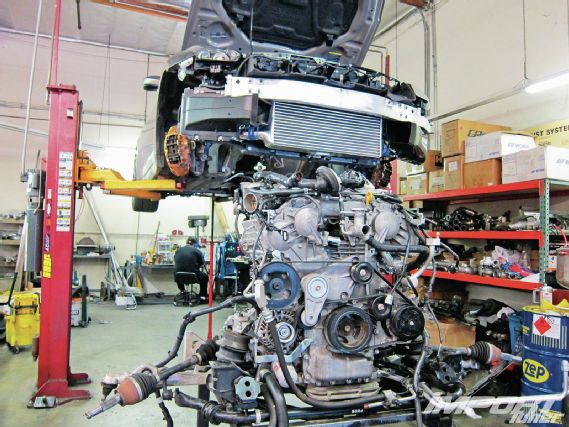
It’s fair to assume that if you’re currently in the stages of building a high-performance engine, you’ve already pushed your engine to its limits or plan to in the near future. To accommodate your custom build, we’re going back to the basics with the help of our favorite question answerer, Eric Hsu, to help clear up many of the misconceptions that come with building an engine. Eric also gives some key pointers on building an engine, from machining the block and picking the right parts, to proper tuning for the most power.
 |
Top 7 Engine Building Tips
|
Top 7 Engine Building Tips
There isn’t a universal set of rules that govern a proper engine build, as every builder has their own theories and methods, but the following are insightful tips we have acquired over the years that we are now going to pass on to you in the hope that you will consider them when you undertake building a performance engine.
 |
Top 7 Engine Building Tips
|
Top 7 Engine Building Tips
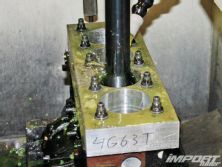
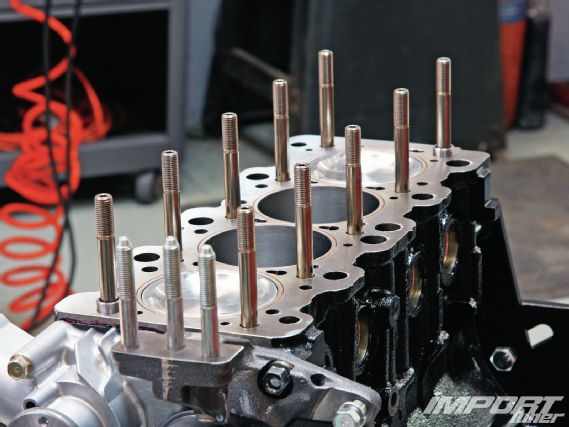
Cylinder Boring/Honing
It’s unfortunate, but most automotive machine shops do not put enough attention to detail into honing the cylinder block. Reputable machine shops will go to great lengths when boring a block in order to simulate the same internal stresses the block is under while running. This includes bolting on components that stress the block (torque plate, water pump, head studs, etc.) in its assembled and torqued state.
 |
Top 7 Engine Building Tips
|
Top 7 Engine Building Tips
Honing should always be done with a torque plate (usually a thick, heavy piece of precision-ground steel (minimum two inches) or thick piece of aluminum plate with holes cut into it for access to the cylinder bores) and with the studs and type of head gasket that will be used in the final assembly of the engine. This assures that the cylinder block is honed while in its assembled and torqued state. Torquing the head gasket in place during the boring/horning of the block will apply a certain amount of un-even pressure on the cylinder walls, distorting the final round dimension the machinist wishes to achieve. Some race engine machinists take it a step further and will even run heated coolant through the cylinder block during honing to further simulate the cylinder block’s expansion at operating temperature, states Eric.
How important is it to use a torque plate? We had a machine shop measure the bore distortion with and without the torque plate on a Nissan KA24DE block. Our machinist measured almost 0.001-inch difference, which may seem inconsequential, but in the world of racing that fraction of an inch means everything. Eric mentions it’s safer to run more piston-to-cylinder wall clearance than less; especially if your bores are not perfect.
Head Gaskets
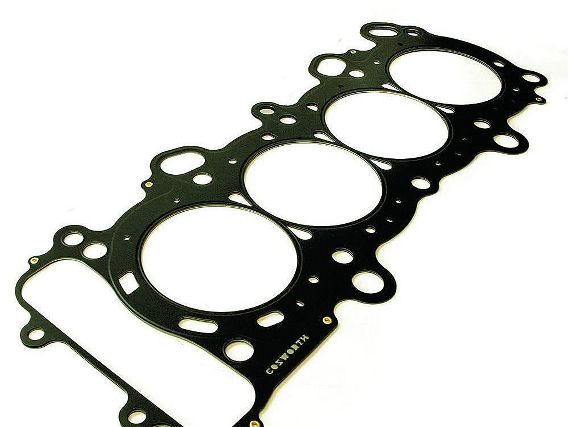
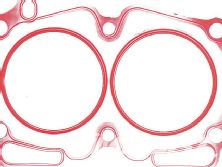
Stock head gaskets maintain proper sealing under normal driving loads. But as compression ratios and combustion pressures go up, a stock head gasket may not be able to maintain a leak-free seal. But beware: not all multi-layered steel gaskets are created equal. Factory or generic MLS (Multi-Layer Steel) gaskets used in modern vehicles aren’t designed to seal under extreme conditions. What distinguishes performance head gaskets from ordinary head gaskets is their design and stronger combustion chamber armor. You’ll notice some of the generic MLS laser-cut gaskets have ripples in the layers after being riveted together, states Eric. This is due to poor dimensional consistency from attempting to laser cut a 0.15mm piece of stainless steel.
 |
Top 7 Engine Building Tips
|
Top 7 Engine Building Tips
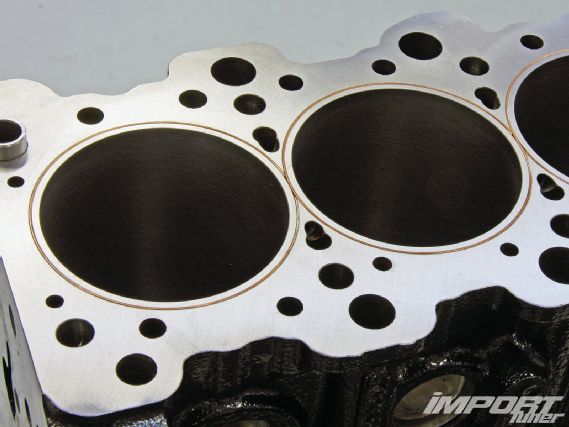
Over the years, performance engine builders have used a variety of tricks to keep their engines sealed, such as using copper O-rings around the combustion chambers. Copper O-rings are great in theory and can improve cylinder sealing in some cases, but they do cause additional cylinder head deflection, which is also detrimental to cylinder head sealing. Aside from the quality of the head gasket seal, it’s important to keep in mind the quality of the factory cylinder head castings as well. For example, the Mitsubishi 4G63 head castings were never designed to handle 600+ horsepower. They were designed for 300 horsepower and trying to seal double or triple the power for more than a quarter-mile is asking a lot from the cylinder head.
 |
Top 7 Engine Building Tips
|
Top 7 Engine Building Tips
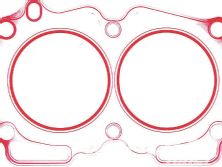
Some performance oriented head gaskets (e.g., Cosworth, HKS, Tomei, A’pexi, etc.) are designed with stopper layers that increase the sealing force immediately around the cylinders and are stamped from dies, which allow for very exact dimensional tolerances. Development of the stopper head gasket was brought about by those wanting to improve an MLS gaskets design for higher boost levels. The stopper head gasket’s folded layer design raises the gasket around the cylinders by 0.15mm to help increase the clamping load when torquing the cylinder head. Increasing gasket height by 0.15mm might seem inconsequential in terms of sealing, but those protrusions from the top and bottom layers significantly affect how well the gasket seals, as is shown on the ink imprint diagram comparing a Brand X gasket (left) versus a Cosworth (right). The side-by-side comparison shows that the Cosworth gasket produces a better impression around the combustion chambers than the Brand X unit. If your engine continues to blow gaskets even after using aftermarket gaskets and O-ringing, Eric has a simple solution: Turn the power down.
|
Top 7 Engine Building Tips
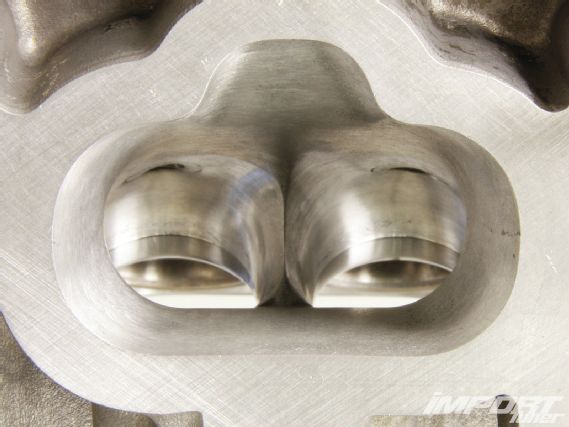
The Black Art of Cylinder Head Porting
Head work is an art form that you can’t just pick up and master overnight. It takes years of skill and practice to perfect, along with the use of the proper tools. Simply hogging out the ports with a Dremel to achieve maximum size would ruin the head, not to mention your engine’s overall performance. As appealing at it might look or sound, you do not want a monster port job on a daily driver. In theory, you can continually machine the ports bigger and flow additional air, but the proper ratio of velocity to flow must be maintained or else low and mid-range torque will suffer.
 |
Top 7 Engine Building Tips
|
Top 7 Engine Building Tips
You can know everything there is to know about your head, but without the skills and experience, you or your machinist will never bring out its full potential. It is generally agreed that DIY head porting is a bad idea. Unless you really know what you are doing, you should take the head to an experienced, reputable machinist.
Most cylinder head specialists can port all types of cylinder heads, but there are still a large number of old-school machinists that like to treat cylinder heads from Mustangs and Integras exactly the same. This same specialist will use their vast V-8 knowledge based on flow bench testing to oversize the port volume on your B18C1 cylinder head to the point where the midrange powerband has been compromised badly. A custom port job is expensive, but fixing a bad standard port job costs even more.
Determine beforehand if the engine will be used in road race, drift, or drag competition, or simply used for street performance. Ideally, if you enhance one aspect of your cylinder head, then all others should be enhanced. Planning ahead can help you determine all your cylinder head modifications, such as camshaft profiles, valve size, valvesprings, valve stems, and seals.
OEM Head Bolts vs. Aftermarket Head Studs
When building an engine, the horsepower and torque potential of an engine often dictates the type of head fastener that should be used. Typically, head studs are better suited for high-performance vehicles with greater power requirements, while head bolts are more practical for daily drivers.
 |
Top 7 Engine Building Tips
|
Top 7 Engine Building Tips
Choosing whether to use head bolts or head studs can be an important decision that affects the way a car performs. While they are both fasteners and serve a similar function, there are numerous differences that make head bolts and studs distinct from one another.
During engine assembly or after intensive internal maintenance, it’s common practice to replace the factory head bolts. Head bolts, also known as torque-to-yield bolts, are designed as one-time use bolts and will permanently stretch once installed. OEM head bolts are designed to provide both a twisting force and a vertical clamping force, which means that when the combustion chamber begins to accumulate load, the bolt will both stretch and twist. Because the bolt has to react to two different forces simultaneously, its capacity to secure the head is slightly reduced and it forms a less reliable seal in high-powered engines.
 |
Top 7 Engine Building Tips
|
Top 7 Engine Building Tips
By contrast, a head stud can be tightened into place without any direct clamping force applied through the tightening, as a nut is torqued into place against the stud. The nut torque provides the clamping force, rather than the torque of the fastener itself, and the rotational force is avoided entirely as the pressure from the nut will make it stretch only along the vertical axis without a concurrent twisting load. The result is a more evenly distributed and accurate torque load compared to that of the head bolt, and reduces the chance of head gasket failure.
From a manufacturing perspective, in order for a head bolt to be cost effective, it is often made from low-grade steel with a class rating of 10.9 and a typical tensile strength of 150,000 psiabout the same tensile strength as an SAE Grade 8 bolt available from your local hardware store. Aftermarket performance head stud companies like ARP manufacture fasteners from at least six different steel alloys ranging from 8740 chrome-moly to chromium-cobalt-nickel alloys and titanium, all using a cold forging process to ensure molecular integrity as well as being heat treated prior to thread rolling and machining to harden the metal. This patented metallurgical process enables ARP to manufacture a head stud with a tensile strength ranging from 180,000 to 270,000 psi, with strength and fatigue properties far superior to OEM head bolts.
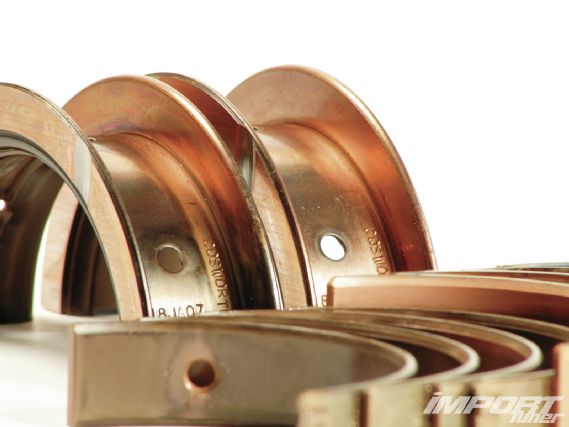
OEM vs. Aftermarket Bearing
New crankshaft and rod bearings are almost always a must when rebuilding an engine, but not all bearings are created equal. Factory bearings are usually made of weak alloys that can neither handle abuse nor high oil temperatures. In fact, many factory engine bearings can start delaminating once they reach a temperature of as little as 230 degrees Fahrenheit during sustained use.
 |
Top 7 Engine Building Tips
|
Top 7 Engine Building Tips
Tri-metal (e.g., Clevite) or quad-metal bearings (e.g., ACL and Cosworth) have greater wear resistance properties and can withstand higher engine loads for extended periods compared to OEM bearings. Steel-backed bearings layered with tri- or quad-layered alloys are designed to handle severe forces from high boost and/or high horsepower. OEM manufacturers have shifted to using aluminum bearings in today’s vehicles, which is easily recyclable and good for the environment, but less than ideal when used in racing or high-horsepower applications due to their fragile construction.
 |
Top 7 Engine Building Tips
|
Top 7 Engine Building Tips
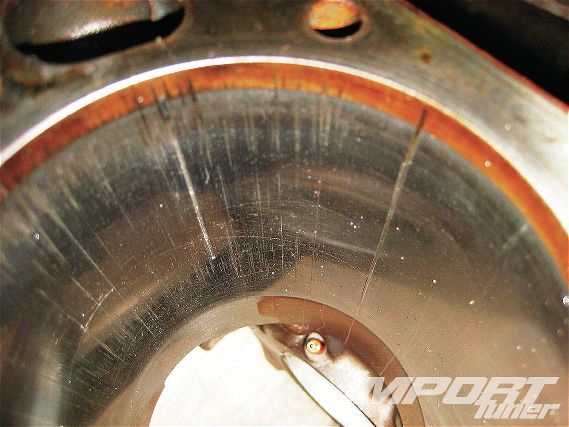
When removing old bearings, inspect them for unusual wear or damage such as scoring, wiping, and dirt or debris embedded in the surface. Inadequate oil cooling is also a cause of many high-boost engine failures on street and road race cars. Anything other than normal wear may indicate an underlying problem that needs to be corrected before the new bearings are installed.
 |
Top 7 Engine Building Tips
|
Top 7 Engine Building Tips
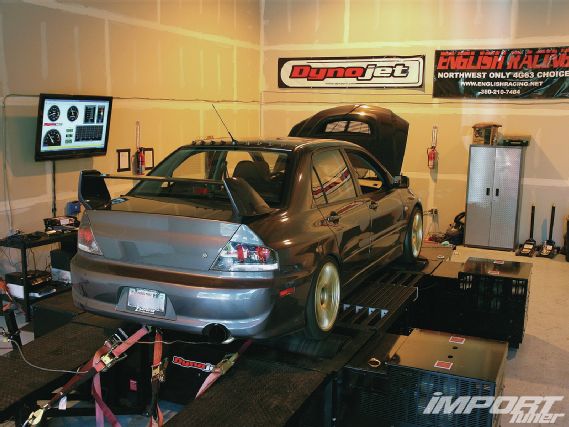
Quality Engine Tune
Cars can leave the dyno shop with an excellent tune, but have you ever wondered if the tuner actually tuned the engine in multiple weather conditions? The reality is probably not. An experienced tuner with a large database of previous tunes might be able to provide a better-quality tune, but the only way to truly have an engine properly tuned for all weather conditions is to have the engine actually tuned in hot, cold, humid, or arid weather conditions, depending on where you live or the conditions you drive in. This can be done in real time while in different weather, or via fast-rate data logging. The point is that fine adjustments need to be dialed-in for different weather conditions for the perfect tune. And in our aftermarket tuning world, it rarely is. A perfect tune is the key to long engine life.
 |
Top 7 Engine Building Tips
|
Top 7 Engine Building Tips
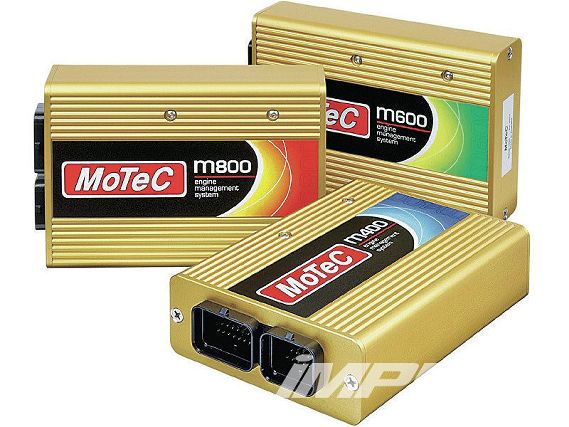
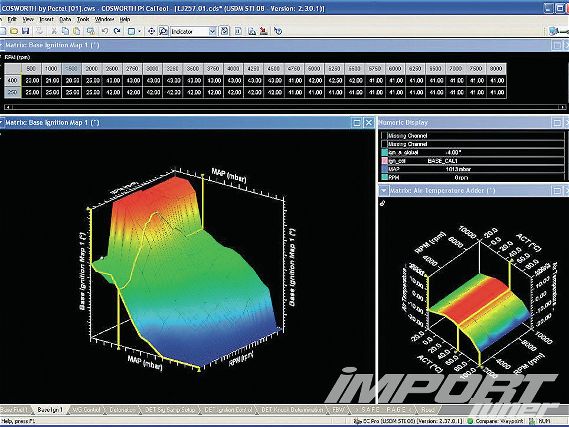
Stand-alone ECU vs. Piggyback ECU
The choice of ECU is also important to the life of an engine. Running a piggyback ECU on a highly boosted engine isn’t recommended. While some tuners insist that newer factory ECUs can do the job, I am not one of those people, Eric explains. Newer factory ECUs that calculate fuel and ignition outputs via an algorithm with closed-loop fuel trims, closed-loop ignition trims, and knock-count map switching is not my idea of complete and direct engine control. In order for any engine to run in optimal condition, a proper tune and choosing the correct ECU is vital to the job. If you want an extreme-duty, high-boost engine to live, you’ll need to use a high-quality stand-alone. A piggyback ECU controller that takes signals from your existing sensors and modifies them to trick your ECU into reading a different value is a cheap alternative, and is limited in the ability to get a proper tune. Stand-alone engine management systems such as those from Motec or Pectel do not always fit everyone’s budget, but what sense does it make to drop $10 to 20K in an engine and then cheap out on the very thing (ECU) that controls your expensive investment?
|
Top 7 Engine Building Tips
In closing, Eric leaves us with a final thought. The reality is that it isn’t easy to create a DIY, 600-horsepower, 30-psi boosted Mitsubishi 4G63 engine package that will last for more than 40,000 miles. That’s why it is better to buy an engine from an engine builder that’s done it before if your budget allows. If you can afford it, you should always use the parts they suggest and even have them do the install and tuning, if at all possible. If you’re going to try and do it yourself, get ready to remove and rebuild the engine multiple times. Either that, or you can drive your car like a bitch and rarely go into boost. Then your engine can last you 100,000 miles.
 |
Top 7 Engine Building Tips
|
Top 7 Engine Building Tips