 | Project Toyota Corolla - Part 4: A Crash Curse in Cam Theory
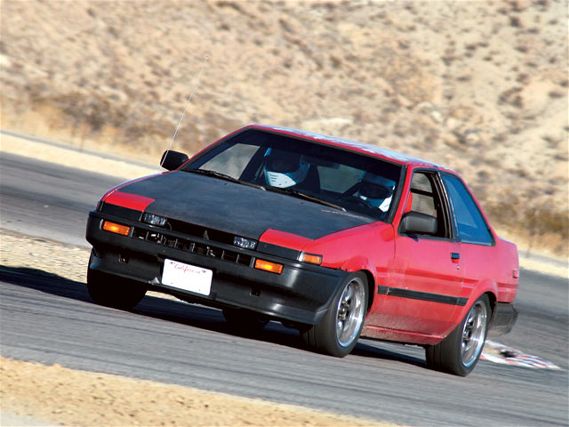
After spending almost a year reinventing the wheel and trying to sort out our custom coilovers from Koni and Ground Control, we finally have the time to make some additional power. In the case of our big-port, low-compression (9.4:1) 4AGE engine, lifted from a first-generation MR2, additional power is strictly a relative term. But the game plan goes like this. While there are plenty of variants of robust Toyota 4AGE motors that make respectable and healthy power, they require stupid amounts of money and maintenance, as well as parts that take half a year to arrive. That pretty much loses the point of having a track beater.
So we'll settle on reliability necessitated out of budget and time, and shoot for a track car with superb handling and just enough power to make things interesting. This rules out aftermarket turbocharging, ITBs, carburetion, retuning (since these old ECUs require replacing a chip) or tearing into the engine, all of which might add up to expensive return trips from the track aboard the back of a tow truck before everything is idiot-proof.The already idiot-proof options are the usual bolt-ons: cams, header and intake. We left the intake side alone as it still has the restrictive stock flapper-door airflow meter that probably functions better as a mousetrap. In order to remove the intake restriction, we would have to change to a Japanese MAP-based ECU and wiring harness, or install a modern hot-wire MAF meter and recalibrate the existing ECU. We'd rather not dig in to 20-year-old wiring, thanks.
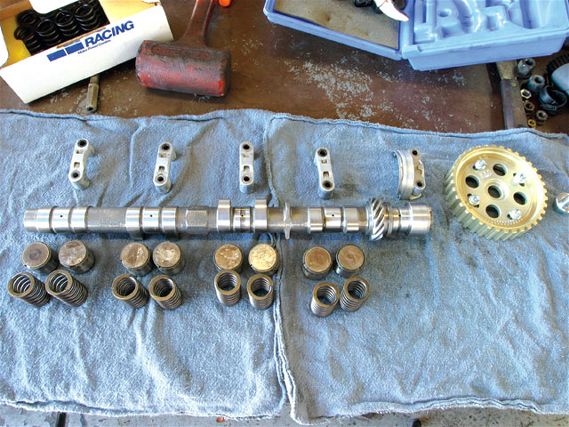
So it boils down to cams and headers. Several options of intake and exhaust cams are available from companies like HKS, BC, PDM Racing and Toda, but since the 4AGE is now so old, most manufactures have discontinued much of the selection, leaving only one grind available for a given duration. We went with Toda Racing's recommendation for a direct bolt-on application of 272-degree, 7.9mm lift intake and 264-degree, 7.9mm lift exhaust cams, along with a set of adjustable cam gears, lightweight valve springs (with a 20-percent increase in spring rate) and a Kevlar-reinforced timing belt.
Toda offers an assortment of 4AGE cams with yet higher lift and longer duration, but more aggressive cams have steeper ramp-up angles (or a more oblong lobe) that could potentially flick out the stock shims (on top of the valve buckets) at high revs. According to Toda, any cam with over 9mm of lift would risk this and should be converted to a shim-under-bucket design, as well as a retune to increase the rev limits in order to make full use of the larger cam. Toda makes a shim-under-bucket conversion kit, but it can also be done on the cheap with OEM Toyota parts. For the exhaust headers, TRD supplied a US-made, ceramic-coated four-into-one manifold (since most Japanese headers will not clear the US-spec left-hand-drive steering column).
Cams: theory, design and realityInstalling the Toda cams is a straightforward process, since the 4AGE uses a direct cam lobe-on-bucket design. Each lobe sits on top of the valve assembly it actuates and is spaced by a shim situated above the bucket. There are no timing chains, VTEC solenoids, rocker arms or secondary lobes. Just a matter of pulling the valve covers, loosening the timing belt, removing the cam gears and caps, and yanking the bumpstick.
 | Project Corolla's rat-nest engine gets the Toda treatment with new cams, gears, valve springs and a reinforced timing belt.
For the valve springs, we once again enlisted the help of our project car mechanic, Mark Dibella at MD Automotive, since he had the trick tools needed to change out the valve springs without pulling the head. Installation is the same procedure in reverse, making sure each cap came from the same spot, each lobe and shim bucket has the correct clearance, and the cam and crank are indexed correctly.
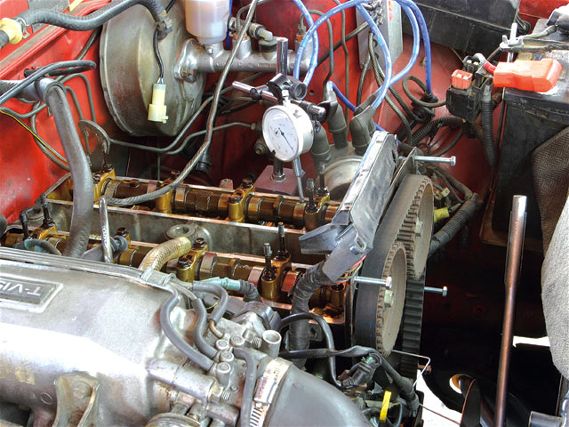
We could have just tested the cams before and after, and made life easier, but we had to take the geek route instead. While the original cams were still in, we took a dial indicator and measured (as accurately as we could) the bucket or valve height for cylinder one, for every 10 degrees of crank rotation. This would provide a rough profile of intake and exhaust valve opening and not just the cam lobe profile, which doesn't account for slop or expansion in the valvetrain. If we were working on an engine with rockers, getting the valve profile would be even more important on account of the motion ratio and all the variables of thermal expansion. We repeated the same process for the Toda cams.
Now we have lift profiles of the Toda and stock cams, which allows us to plot a graph and see the differences. This is the most important part of cam design. Opening and closing profiles are absolutely critical in affecting performance and valvetrain harmonics. Lift and duration are only the basic requirements, as they put the cam into the ballpark of airflow. But how a valve opens and closes (as stipulated by the profile) will affect whether or not a cam allows a head to optimize its flow.
 | Before tearing out the original cams, we put a dial indicator to the top of the intake and exhaust buckets and measured the valve lift profile of the stock and Toda cams.
In the case of the Toda cam, it has an asymmetrical lobe profile--valve opening is fast and smooth while closing is slower and longer, so as to not smack the valve too much against the valve seat. The profile also has to be a compromise between airflow and the physics of reciprocating masses. If a valve opens to full lift too quickly, acceleration forces mean it will maintain the momentum of opening, even after the acceleration rate has peeled off from the profile. In excessive amounts, this is valve float. Most tuners will upgrade the valve spring rates to compensate, but this has the drawback of additional wear on the lobe's surface.
If you really want to be fancy and impress the girls with your ber-geekness, take derivatives of the lobe or position profile and figure out the first, second and third order derivatives. In other words, now you have the valve's velocity, acceleration, and jerk profiles. This is fancy math and real-world cam design, since the smoothness of the acceleration and jerk profiles ultimately affect valve harmonics and spring surge. A lobe that accounts for the natural and operating frequencies of the valvetrain can potentially use much lower valve spring rates while avoiding valve float and spring surge.
| The shim-over-bucket design of the stock 4AGE. Valve shims sit on top of the buckets, which push down on the valves. As the cam lobe swings by and pushes down the buck, the valve will open. If the lobe profile is too aggressive, there is a chance of flicking the shim out of the top of the bucket. For lifts beyond 9mm, Toda recommends switching to a shim-under-bucket design, where the cam acts directly on the bucket.
For the purposes of this article, we'll settle for plotting the cam opening and closing through the 720 degrees of crank rotation for one complete four-stroke combustion cycle. This will help visualize the combustion process, since we've also plotted the number-one piston position (in grey) using the piston motion kinematic equation based on stock stroke and rod length dimensions, as well as the ignition timing at wide-open throttle (orange line) and the charge expansion process, to see where the valves are opening relative to piston position.
So now we have a pretty graph that shows what the valves are doing at a given point in the crank's rotation, based on stock cam timing. This is where the adjustable Toda cam gears come in. The high-grade T6 7075 aluminum pulleys use a Vernier timing degree system that indicates changes in cam timing in crank degrees, offering twice the resolution as opposed to the conventional cam degrees of many other adjustable cam gears. We can now advance and retard the intake and exhaust cam timing independently, dyno the car and see how cam timing affects overall power and power delivery. The amount of valve overlap can be determined by shifting the valve position curves (by the degrees that the timing has been advanced or retarded) and measuring the duration where both valves are open at the same time.
We started with back-to-back dyno runs between the stock and Toda cams, which gained 10 whp overall, but changed power delivery drastically. Over 20lb-ft of lower-end torque was sacrificed for power gains above 6000rpm (where the stock cam fell off). If we weren't rev-limited, the Toda cam would have made more power as the power curve was still climbing at rev cut.
Having 10hp more up top isn't worth the huge losses down low, so we played with the cam timing, hoping to regain some of that lost low-end performance as well as bringing peak power down to 500rpm before redline. Having no idea which way to adjust the cams, we consulted several local 4AGE experts who have used this cam combination before.
Unfortunately, everyone had a different story and no one used the same low-compression, big-port engine we had. So we started by systematically advancing and retarding each gear separately, by four crank degrees. Even though ours isn't an interference engine where the valves can smack the piston if timed wrong, too much overlap in valve timing might cause the valves to clip each other and open a whole other can of worms.
 | Of the few headers available for the 4AGE, the ceramic coated TRD four-into on pice is probably the only accessible unit that will clear a left-hand-drive-steering column
Even though we could narrow down what changes occurred when each cam was timed individually, we expected different results when both cams were retarded by eight degrees. We were lucky that wasn't the case, because we ended up with the best of both worlds, near-stock low-end torque and high-end flow/power that stretched to redline. Even with further combinations of retarded cam timing, we reverted to our optimum configuration.
From what we could tell, advancing either the intake or exhaust cam resulted in a loss of power while retarding the cam timing would increase power and torque. We kept retarding the exhaust cam in increments of four crank degrees, which increased low-end performance with minimal sacrifices to peak power. By 12 crank or six cam degrees of exhaust cam retardation, we lost a few horses at the top and regained most of the low-end torque of the stock cams. After fiddling around with smaller increments of exhaust timing, we settled back on eight degrees of exhaust retardation.
The process was repeated for the intake cam with the exhaust set back to zero. As intake valve timing changed, we found the peak power rpm would change, without affecting low-end performance. Retarding the intake would bring peak power down below rev cut while advancing would raise it, which would explain the drop in peak power at our stock rev limit. We decided on eight degrees of intake retardation, putting us at 111 wheel-hp at 7000rpm, just 500 rpm short of rev cut.
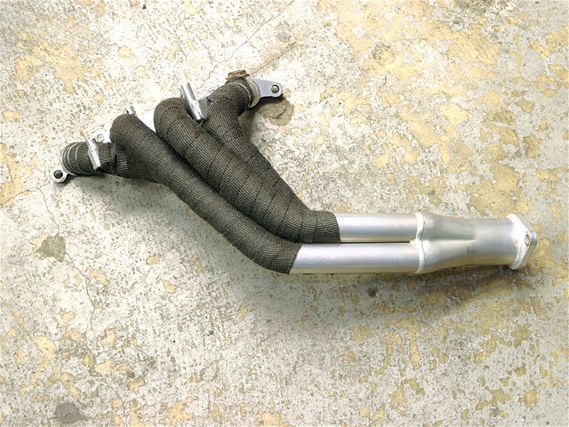 | We thermal-wrapped the tops of the primaries as the stock cast manifold had already melted a distributor cap
HeaderHoping our good luck would hold, we installed the TRD four-into-one ceramic-coated tubular header to see if peak power would increase by magic. Conventional theory goes that a four-into-one header (where each primary merges into a single collector leading to the downpipe) will yield better high-end performance on account of the high-rev flow capabilities, while a four-into-two-into-one design (with two series of collectors) will yield more mid-range torque. We consulted with Jack Burns, guru of Burns Stainless, and a fabricator of Top Fuel dragster manifolds, to see how good the TRD header was out of the box. At an average length of 22 inches for each primary, this unit is a decent design for street use. According to Burns, an ideal primary length of 26 inches for this engine and cam combination would yield ultimate flow as well as a properly built collector.
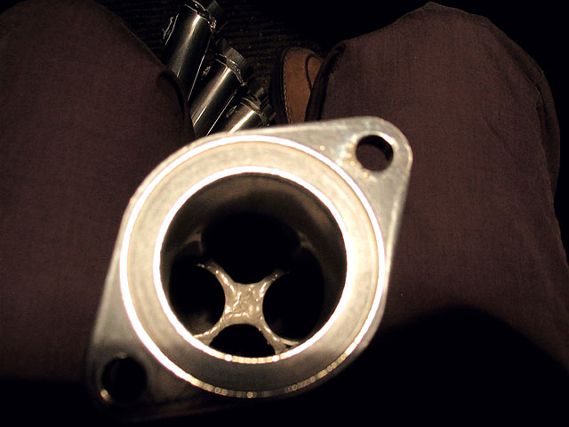 | If we were trying to make more power with the existing hardware, we'd probaly cut out the TRD collector for a race-quality unit from Burns Stainless, as well as increase the primary runner lengths and retun the EDC to work with a hot-wire MAF meter
We did see some signs of added flow, as our overall A/F dropped especially where the now-deleted EGR valve was supposed to open at around 3000rpm. The stock ECU is tuned to inject less fuel when the EGR is open, since there is less fresh combustible air in the cylinders. With the EGR deleted, the cylinder is now filled with fresh air, but still the same amount of fuel, causing the mixture to go lean. We think this is the reason for the huge dip at 3000rpm as well as the drop in power between 5000 and 7000rpm. Again with proper tuning and a higher rev limit, this set-up should be capable of more output. Regardless, we've seen an overall gain of roughly 10 percent, which isn't much on a 100hp car, but the same percentage gain on a S2000 would account for over 20 wheel-hp, something no S2000 bolt on-hardware could claim without a retune. n