Diesel enthusiasts are always searching for more horsepower and torque, and injecting nitrous oxide is one of the easiest ways to literally add hundreds of horsepower to your diesel vehicle. Since nitrous oxide has a greater oxygen content than the air we breathe (36 percent versus 21 percent), the gas can be used as a power-adder for virtually any diesel engine. Nitrous also acts as a chemical intercooler, as it enters the intake stream at -127 degrees, which raises the air density level dramatically. Also, nitrous oxide will help burn almost every last drop of fuel available and can be injected in greater and greater amounts until smoke from excess fuel is all but eliminated.
Diesel vs. Gas Systems: The Basics
In the world of gasoline-powered engines, nitrous is measured in terms of a horsepower “shot,” or the amount of extra power the system should add, based on the amounts of fuel and nitrous that are injected into the engine. With diesel engines, however, things work a bit differently. Since diesels can operate over a wide range of air/fuel ratios, the power they produce depends directly on the amount of extra fuel that’s available to burn. With an engine that doesn’t burn excess fuel well, nitrous-oxide injection can actually promote huge power gains, as much as 200, 300, or even 400 extra horsepower. However, if the engine is already efficiently burning fuel, the same nitrous jetting might only make 60 to 70 additional horsepower.
Testbed: Spraying a 600hp Ram
For a real-world example of how nitrous oxide can increase performance, we turned to our ’95 Dodge Ram 3500 project truck, known as Triple Threat, which will serve as a test mule for a home-developed nitrous system.
While the truck is no slouch with 601 hp at the wheels, we discovered it has a whole lot of extra fuel to burn (as evidenced by the trail of black smoke during hard acceleration runs). The Dodge had previously run a 7.76 at 89.5 mph in the eighth-mile, indicating low 12-second potential, and a small shot of nitrous would be just what we’d need to get as close as we could to the 7.49 rollcage mandate. Since the truck has already received reliability upgrades that include ARP head studs and a fire-ringed head, we feel confident about adding the extra power.
| Nitrous System Line
Building Our Own System
We already have a bottle and a few nitrous- related odds and ends lying around, so we’re making our own system to show just how easy it is. We’re using parts from Nitrous Express exclusively, because it makes products that are tailored specifically to diesel applications, such as the larger lines, solenoids, and nozzles necessary for making good power. If you’re the type who would prefer to buy a kit rather than build one, NX also offers single-stage, dual-stage, and progressive systems made specifically for diesels.
Dyno Testing
After spending a few hours installing the nitrous system and with the juice armed and ready, we hit the rollers of the chassis dyno to see how much additional power our Dodge can produce. Our first run was made without the bottle (to establish a new baseline), and we were a little surprised when the truck made only 567 hp, or about 35 horses less than its previous 601.
The truck and engine hadn’t undergone any changes or upgrades since our initial baseline tests were conducted, so we didn’t know where to attribute the power loss. We armed the nitrous and, with a conservative 0.063-inch jet, the Cummins made 681 hp—a whopping 114hp increase. This type of gain indicates there’s additional fuel that isn’t being burned.
Since boost on the dyno was still fairly mellow (for compound turbochargers) at 62 psi, we stepped up the nitrous jetting again to a big 0.093 pill. When we hit the bottle on the second dyno pull, the engine suddenly stumbled and nearly quit running right in the middle of the sweep. Fearing the worst, we checked under the hood and could not see anything wrong. Fortunately, a few onlookers saw the intake get sucked flat, and the boost hose to the high-pressure turbo fully collapse. We’re not sure whether it’s oil that coated the boots during our previous head gasket failure that caused this problem, or the air filter collapsed, or what, but we decided to pack it up and leave future testing for a later date. Still, with a mere 0.063 jet picking up 114 hp and about twice that in torque, we were very happy with how our homemade nitrous unit performed, and we look forward to really opening it up in the future.
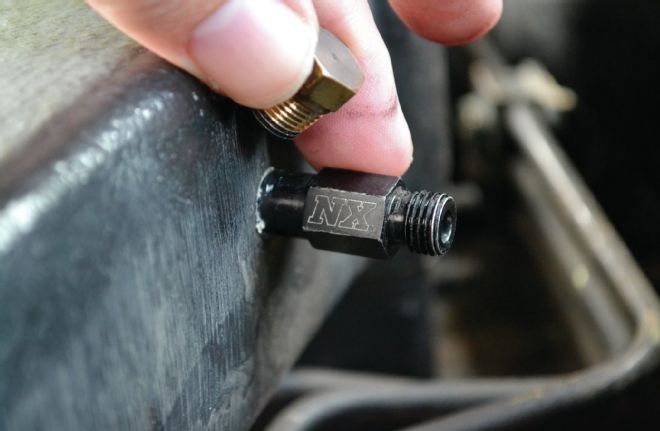
| The first step in installing our nitrous system is drilling and tapping the intake manifold. While a nitrous nozzle can be installed anywhere in the intake stream, the intake horn is a common and convenient place. For some unknown reason, our intake had already been drilled and tapped for a 1⁄8-inch NPT fitting, so we just removed the plug and installed the nitrous nozzle. For those who have to drill and tap the intake, make sure to remove it first! Otherwise, you’ll end up having to deal with small metal bits flying through your engine.
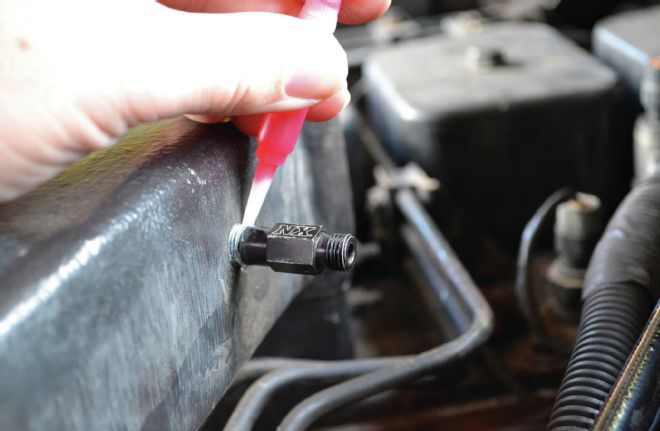
| Next, we’re installing a Nitrous Express 0.157-inch nozzle, making sure to use Teflon tape to fully seal the fitting in the intake horn.
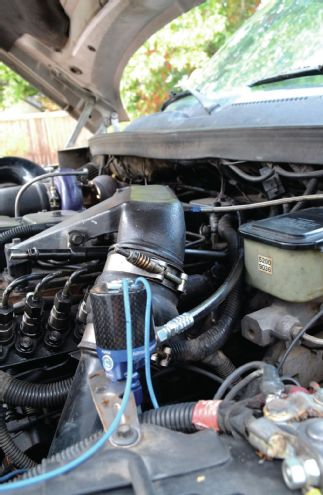
| Although nitrous and fuel solenoids can be mounted in various places along the frame, firewall, or elsewhere, we’d refrain from mounting them directly on the engine, as the brutal diesel vibrations (especially on the Cummins) can actually rattle solenoids apart. We mounted ours on top of the battery hold-down, right next to the intake horn.
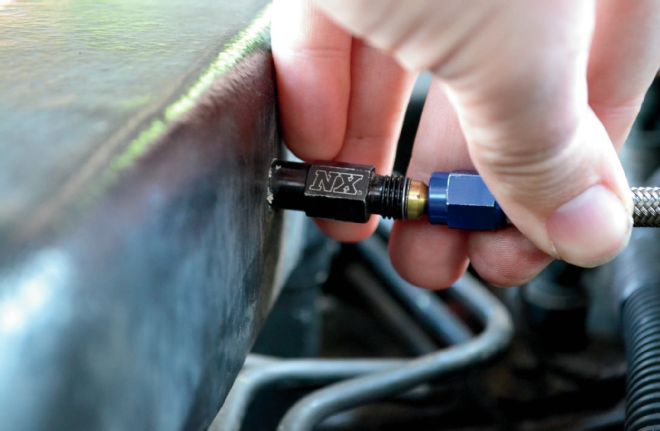
| Again, Teflon sealant is used when connecting an AN-4 line (with an AN-3 end) from the nitrous solenoid to the nozzle. An AN-3 line (like those supplied in most kits) has an internal diameter of 0.078, which means that size nitrous jet is the largest that can be used with the AN-3 line. The larger, AN-4 line has almost 2.5 times as much flow area.
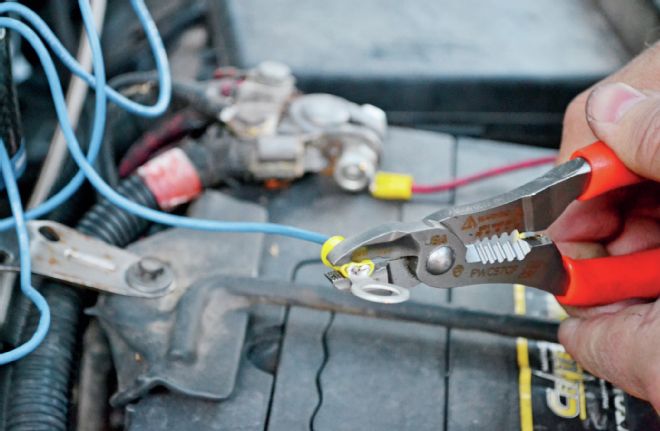
| With the solenoid mounted and the line run, it’s time to do some wiring. Most nitrous solenoids draw a tremendous amount of amperage, so a relay must be placed inline to avoid melting the activation switch.
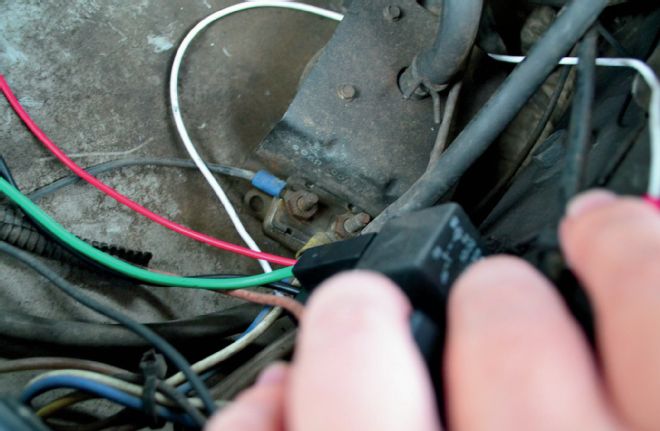
| The relay has two small red and white wires, which are used to trigger the solenoid (switched power and ground), and two larger black and green wires that are run to the solenoid, and positive post on the battery.
| With our nitrous solenoid mounted and our relay in place, all that’s left is putting a switch on the trigger wire that will activate the solenoid. We’re running a wire to a small toggle switch that will be placed by the truck’s brake controller. When wiring in this type of switch, make sure it’s not accidentally left in the on position, as leaving a solenoid “hot” for more than about 30 seconds can fry it. If you’re worried about mistakenly flipping the switch, an additional arming switch or Hobbs switch can be placed inline.
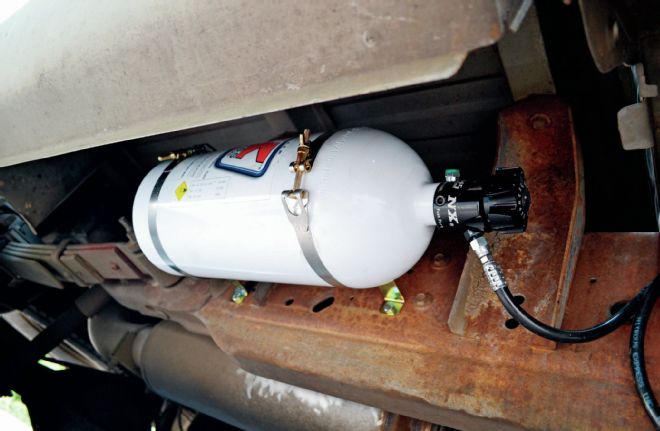
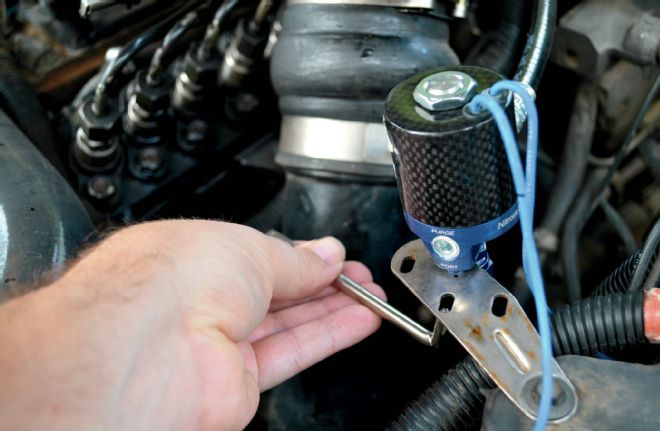
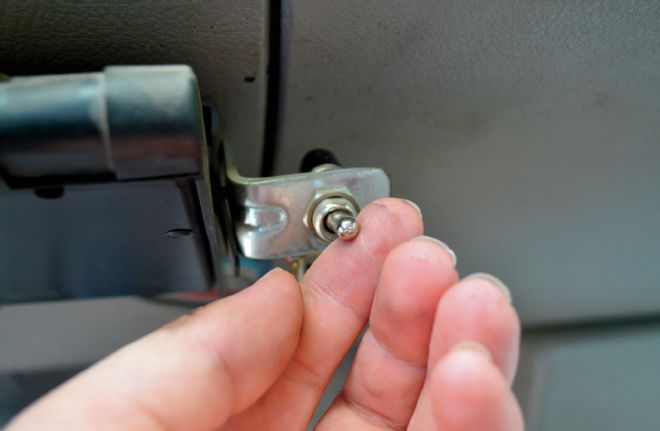
| Bottle brackets are seemingly always in the way when they are mounted in the bed, so we’re taking a slightly different approach to ours and mounting them below the bed and on the frame, out of sight. Not only does this give a stealth aspect to the install, it’s more convenient.
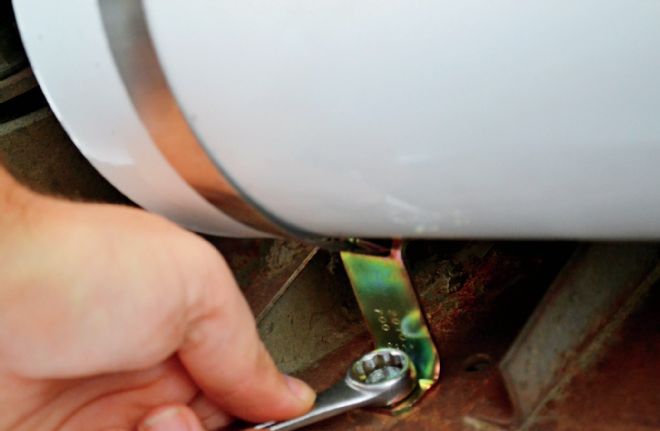
| Since the siphon tube on the nitrous bottle is angled toward the bottom, that’s how we’re mounting our setup, at a slight angle. We’re using two “tall” brackets to ensure the bottle clears the flanges on the frame.
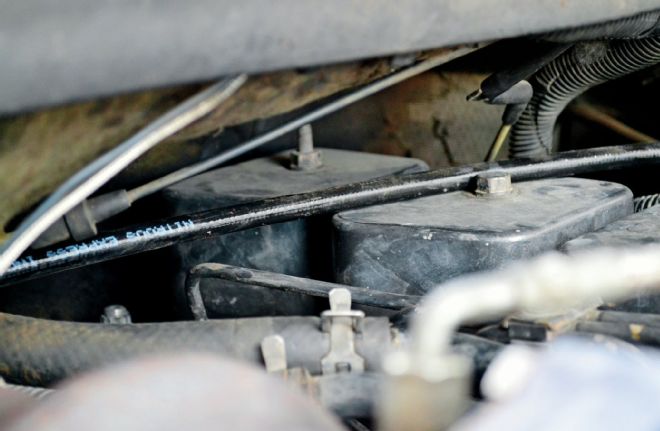
| In the engine bay, the line is routed back along the firewall. Even though doing this will subject the line to a fair amount of engine heat, our real goal is to keep it away from downpipes and turbo-exhaust parts that are extremely hot. We’ll probably still insulate it from heat at a later date.
| With the bottle installed and the engine bay plumbed, all that remains is to run the nitrous line. The extra line is looped underneath the frame to take up the slack.
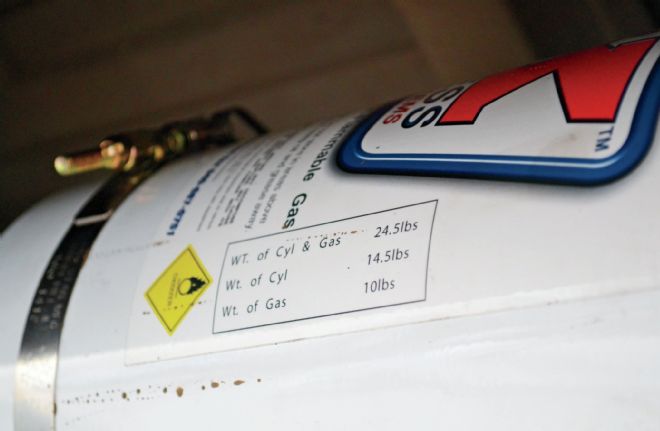
| After dry-firing the solenoid a few times to make sure it works, we filled the bottle with 10 pounds of nitrous oxide. Bottle pressure of 950 to 1,000 psi is recommended for optimal performance. Now we’re ready to hit the dyno and the dragstrip and enjoy having an extra 100 to 300 hp on tap—simply with the press of a button!
Nitrous Dos, Don’ts, and Maybes
DO make dyno or dragstrip runs with a full bottle. Keeping bottle pressure at 950 to 1,000 psi is very important for power.
DON’T accidently trigger the nitrous when the engine isn’t running, because the next time you start it, a large backfire can occur. If this happens, crank the engine over without starting it for about 20 seconds to purge out all the nitrous.
While some folks use nitrous for spooling turbochargers, it’s advised that you
DON’T activate a big shot before the engine gets to about 15 to 20 psi of boost. Again, a parts-destroying nitrous backfire can occur.
Nitrous can overspeed turbos in a hurry from the excess drive pressure it creates, so if you’re right on the edge already, it’s important that you
DOinstall an external wastegate. However, since compound turbos have two turbine wheels to drive and a whole lot of exhaust area, we felt secure with just an internal wastegate.
Remember that nitrous is illegal for street use, so
DON’T forget to turn off your bottle when the system is not in use!
NITROUS GAINS
RPM HP NITROUS HP GAIN
2,000 300 302 2
2,100 338 343 5
2,200 377 445 68
2,300 397 493 96
2,400 442 544 102
2,500 489 599 110
2,600 502 614 112
2,700 537 640 113
2,800 556 669 113
2,900 567 681 114
3,000 563 674 111
3,100 558 668 110
3,200 553 660 107