Before starting repairs or modifications to your car's 12 volt wiring system, it's helpful to know a few things about such topics as the types of wire that are typically used, how to use a crimping tool or soldering gun and practices to avoid. It's also good to know what to look for to detect wiring that needs replacement.
Wires used for 12 volt automotive applications come in various sizes -- the term used to describe the size of a wire is "gauge," which is a number (the smaller the number, the bigger the wire). Some signs that indicate a wire needs replacement include cracked or brittle insulation, improper routing, or proximity to hot parts, such as the exhaust. It is important to always use the same gauge wire as a replacement for any wire that has been removed. In a car's 12 volt electrical system there are primary wires, secondary wires, the battery cable (which is an extremely large gauge wire that is responsible for delivering high currents from the battery to the starter) and ground wires, or ground straps. Except for some ground straps, all wires have colored insulation surrounding them, and the primary wires (which are small and may be bundled together in a harness) can be traced throughout their routes with the help of a wiring diagram, and they can be identified by their color. Often, these wires lead to a specially designed connector, which may require special tools to disconnect. Never force such a connector apart, or you could create a high-resistance connection that may adversely affect the operation of your vehicle. Secondary wires, also known as high tension cables, are wires that carry the high voltage current of the ignition system. Although these wires carry a small amount of current, they have extra thick insulation because of the very high voltage used by ignition coils and spark plugs. Ground straps often don't have insulation, and come in various sizes.
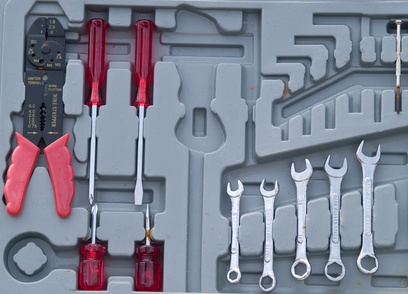
In the course of most electrical work, you will probably need to use a crimping tool to join wires together via a butt connector, or to attach terminals to the end of a wire. To use this tool, remove a short portion of insulation from the end of the wire and insert the end (or ends if you are joining two wires) into the terminal or butt connector. Terminals come in a variety of types, from the common "eye" terminal to the "hook," "tab" or "spade," and also "snap" terminals, which come in two types -- male and female. Between the jaws of the crimping tool are various places which will fit over the terminal or connector according to the size of the wire to be used. After inserting the wire into the connector or terminal, place the jaws of the crimping tool over the terminal or connector at the appropriate spot (the crimping tool will accommodate a variety of wire sizes) and squeeze the tool shut vigorously. Tug lightly on the wire after crimping to check if the crimping was successful. A light tug should not result in any movement of the wire. Sometimes connections are made with solder, in which case you should always use rosin-core solder for electrical repairs. First, use a soldering gun to heat the wire that is being connected. Then, touch the solder (which usually comes in a roll) to the heated wire, allowing a small amount to melt and make the connection.