Last month, we introduced a new truck to the Truckin family of project vehicles, a ’04 Ford F-250 6.0L Diesel. It’s a pretty unique truck in that it’s a SuperCab shortbed, as opposed to the crew cab longbeds that make up the bulk of Super Dutys. That makes for a versatile rig that can get in and out of tights spots on the trails as well as the parking lots, but can still tow anything you put behind it with ease. The truck has served us well in both departments, spending many of its miles in the deserts of the Southwest and Baja. We began to clean the truck up with the help of an RBP grille and Recon lighting, but this month we turn the attention to the 6.0L powerplant.
Our Super Duty has relatively low miles on it, and recently had a trip to the dealership for a new turbo and several maintenance items, so it was a prime candidate for some increased power. We went with the old faithful combo of intake, exhaust, and tuner to see how our otherwise stock 6.0L reacted to some aftermarket action. We consulted a local shop that specializes in diesel performance and asked what they typically recommend to their customers and they said “S&B-SCT-MBRP.” Fortunately for us we knew what that meant, and got to work ordering an air intake and filter kit from S&B Filters, followed by a turbo-back exhaust kit from MBRP Performance Exhaust, and finally a SCT Performance Livewire TS programmer and monitor.
For the installation, we headed to Fullerton, California, for a visit with Bryan Cook of Cook’s Tire and Tune, where the crew knocked out all three installs in about half a day. The difference these parts made on this truck was incredible. The midrange horsepower and torque was like night and day, and the sound was awesome but thankfully didn’t have that cab drone that we like to steer clear of. Passing power was also insanely improved. Our big little Super Duty is a whole new animal that we can’t wait to get back out on the dirt! Check out the step by step below and check out the manufacturers’ website to see what they have available for your gas or diesel truck.
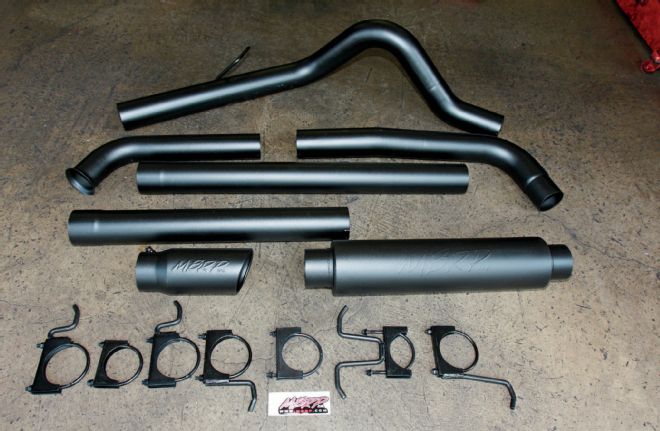
| 4 Inch Turbo Kit
1. First on our install list was PN S6212BLK from MBRP Performance Exhaust. This is a 4-inch, turbo-back kit that minimizes backpressure and provides a deep, mellow tone without that annoying drone in the cab. It also comes in a bulletproof black powdercoating over stainless steel and best of all, it adds up 18 hp and 28 lb-ft of torque to most 6.0L diesels.
| S B Performance Filters
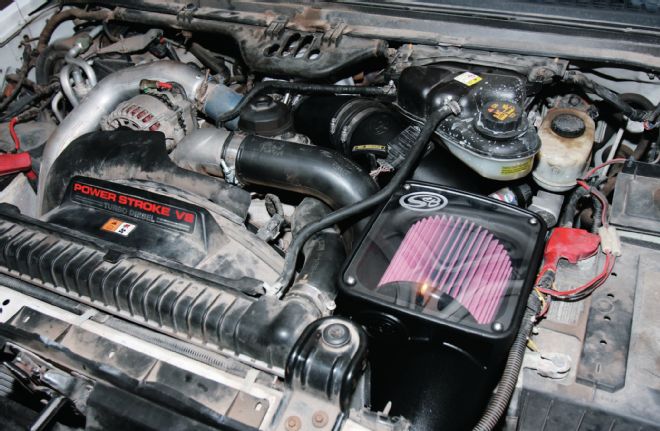
2. S&B Performance Filters and intakes was the second click on our list. And we ordered up PN 75-5070 for our application. The S&B intake boasts their signature clear top, new tubing that runs all the way to the turbo, and all silicone seals and couplers for an airtight seal and a long life.
| Sct Livewire Ts Performance Programmer Monior Jpg
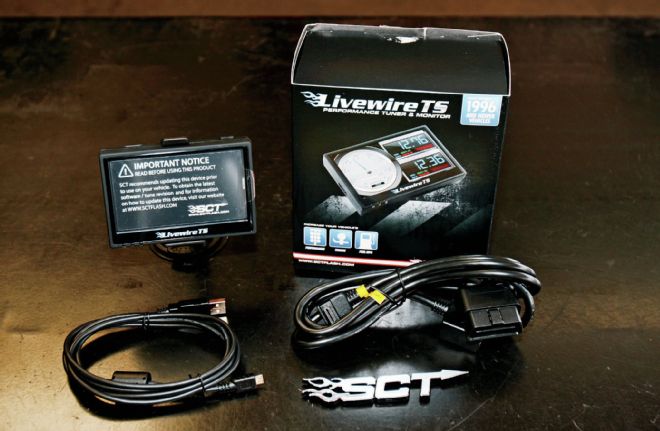
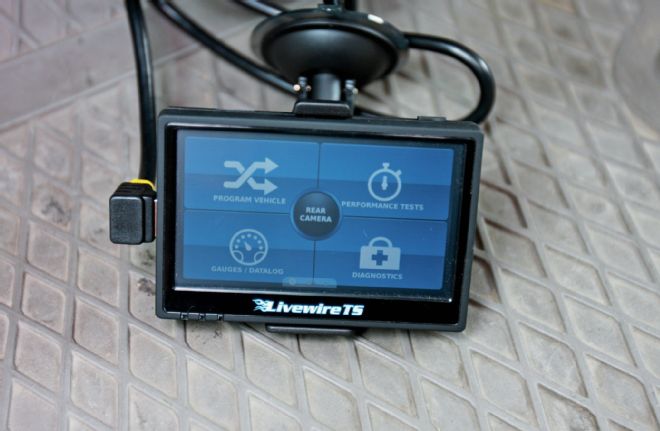
3. SCT’s Livewire TS Performance Programmer & Monitor for Fords (PN 5015) comes preloaded with three different tunes for diesel, including Street, Performance, and towing along with infinite possibilities for custom tunes. Besides being more versatile than many other tuners on the market, the Livewire also acts as a full-time monitor for all of the engine vitals with its 4-inch touch screen monitor, and the unit includes a performance calculator to record and log your results with various tunes.
| 2004 Ford F250 Exhaust
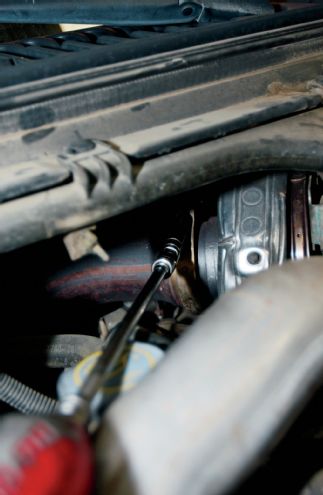
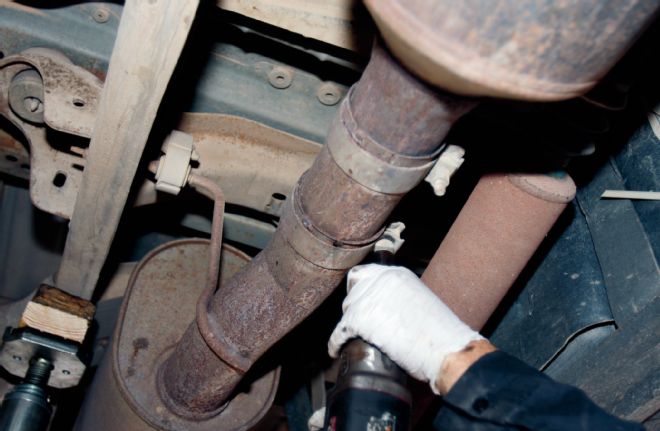
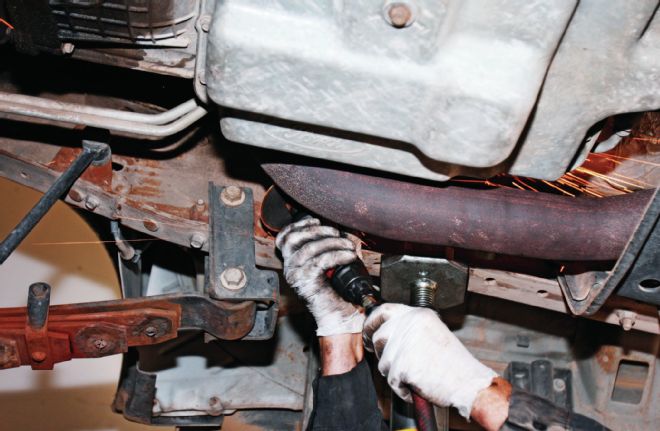
4. We got the truck onto the lift at Cook’s Tire & Tune in Fullerton, California, and began the install. Cook’s (besides having a great name) is a whole lot more than a lube and tune or a tire shop, yet has the ability to get customers in and out in a hurry. We started underneath the truck with the exhaust, which requires first removing the clamp that attaches the downpipe to the turbo.
| Downpipe
5. With the F-250 high on the lift, we hit the other end of the downpipe and separated it from the cat pipe. This is the only joint that has the traditional-style flange.
| Tailpipe Loosened
6. Next, all of the clamps leading back to the tailpipe were loosened up and slid back.
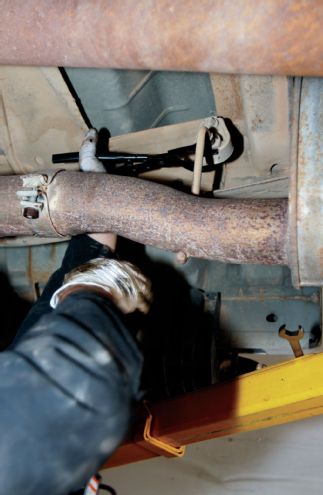
| Stock Hangers
7. The stock hangers are reused, so care was taken while removing them all. Cook’s even had the right tool for the job, although we’re guilty of using a screwdriver many a time.
| Tailpipe
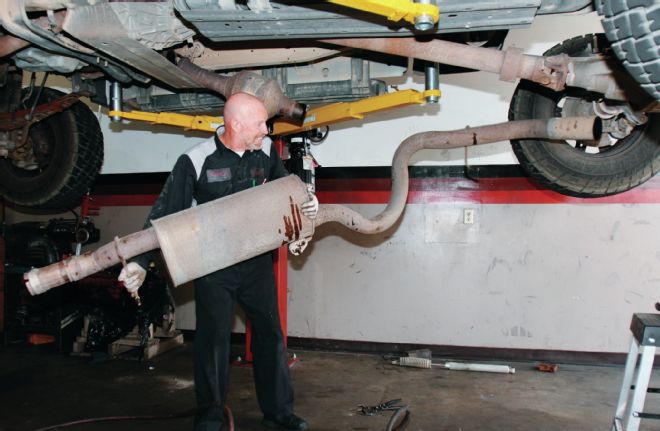
8. Rather than cut the tailpipe in half, we opted to remove the right rear shock and get rear half of the exhaust out in one fell swoop.
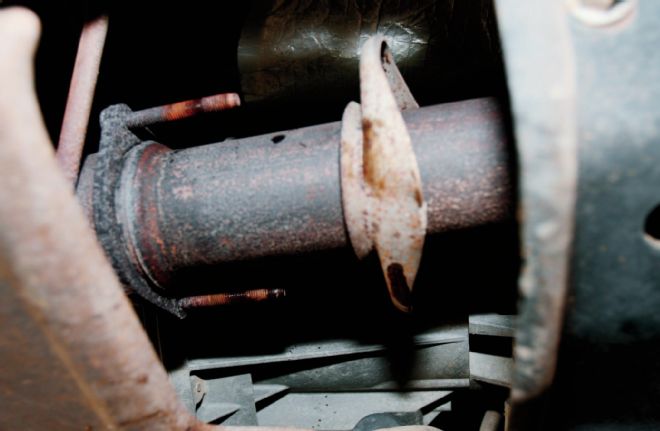
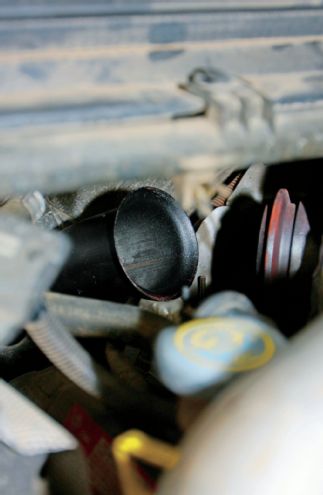
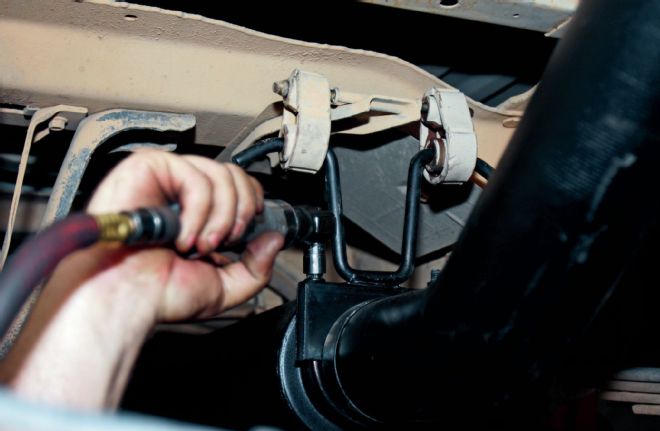
| Catalyctic Converter
9. This is the section you’re going to want to keep. The catalytic converter is deleted on the MBRP kit, but they provide an extra pipe that your existing cat can be spliced into, creating the versatility of both max performance, and keeping your truck smog legal if you’re in a green state.
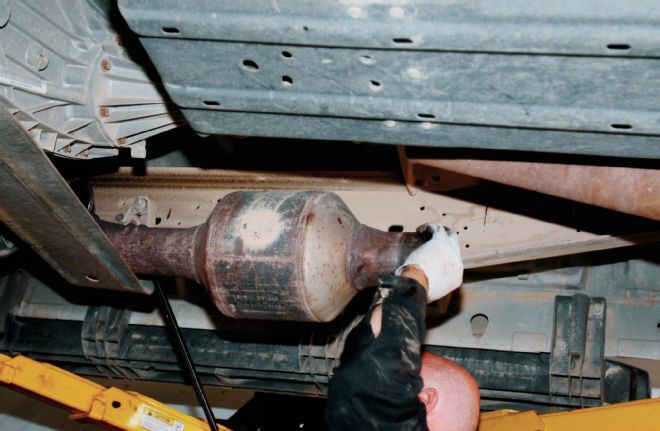
| Downpipe Cutting
10. We did have to do some cutting with the downpipe. It was either that or removing the transmission crossmember, so out came the die grinder. After that, both halves slipped right out.
| Mbrp Downpipe
11. The MBRP downpipe comes in two pieces, so the first half was fed back up to the turbo and clamped loosely to the turbo until the rest of the components were installed.
| Mid Pipe Installed
12. Then, the “mid” pipe was installed over the downpipe and clamped into place loosely.
| Stock Rubber Hangers
13. Just to throw us off a little, Cook’s hung the tail section next using the stock rubber hangers.
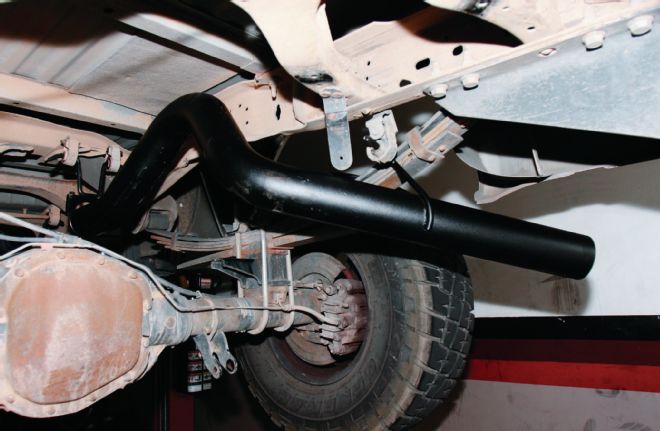
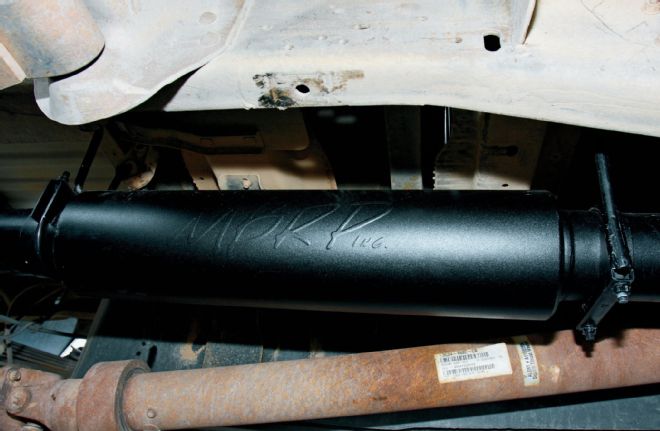
| Mbrp Muffler
14. Then the MBRP muffler was slipped onto both ends of the pipe and twisted into place. These mufflers are directional so you need to make sure it’s going in right. (Pro Tip: If you adjust the muffler just right it will read MBRP in just the right spot when you peek under the truck from the passenger side.)
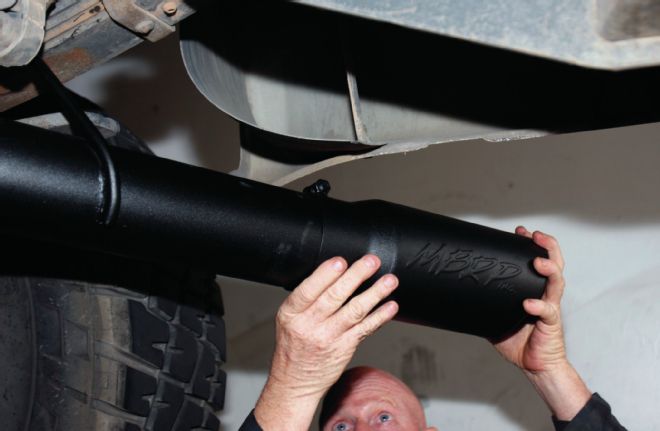
| Mbrp Embossed Tip
15. The last component to fit up is the MBRP-embossed tip. It was slid on and awaiting final adjustment. Now is the time to do any twisting necessary to minimize any clearance issues.
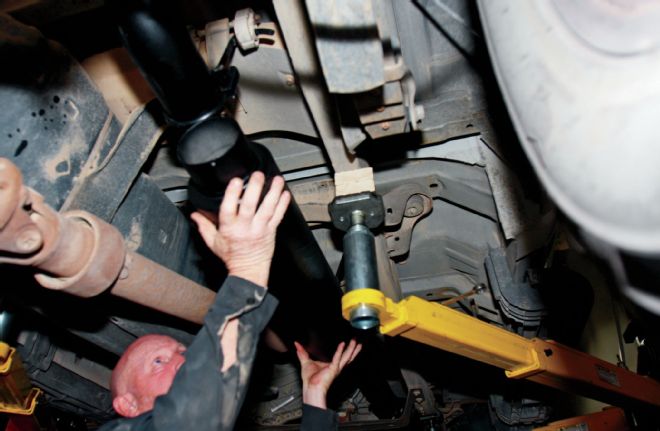
| Exhaust
16. From there we started up at the turbo, and tightened down each clamp as we worked our way down the exhaust.
| Air Intake
17. With the exhaust complete, we dropped the truck down and turned our attention to the air intake.
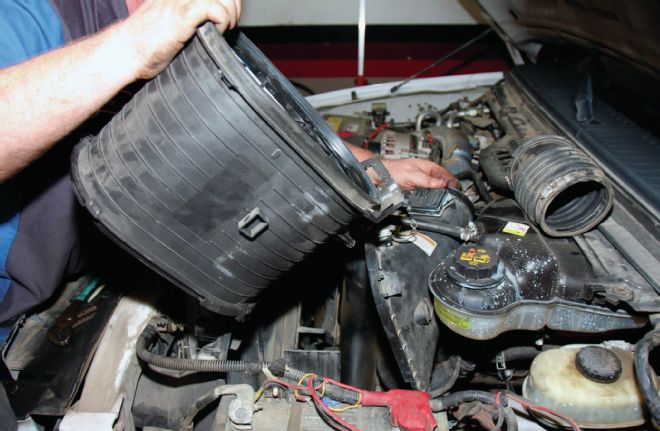
| Atock Air Intake Assembly
18. To remove the stock air intake assembly, it’s easiest to first pull out the filter section.
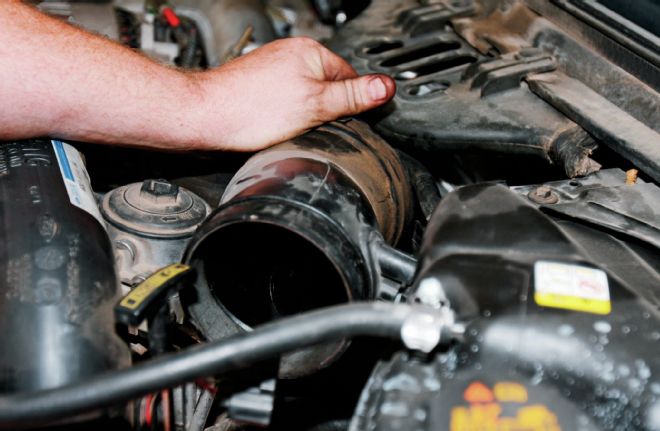
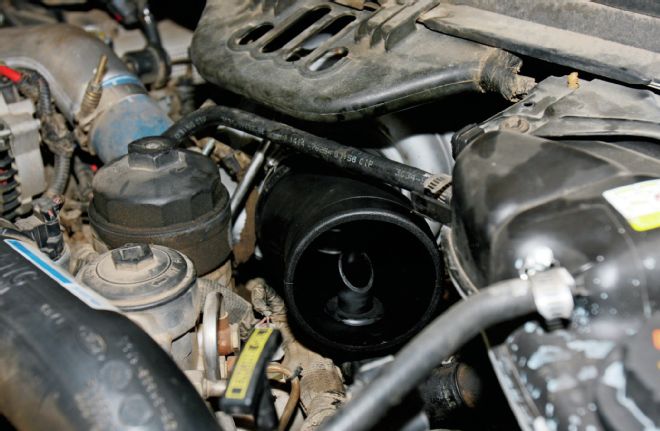
| Front Snout Rear Tube
19. Once the bulk of the system is out of the way, the front snout and rear tube can be removed. The MAF sensor and restriction gauge plugs must be removed at this time.
| Turbo Connect
20. The final section connects directly to the turbo. Once that clamp is removed, the breather tube can be detached and the final OE piece can be removed.
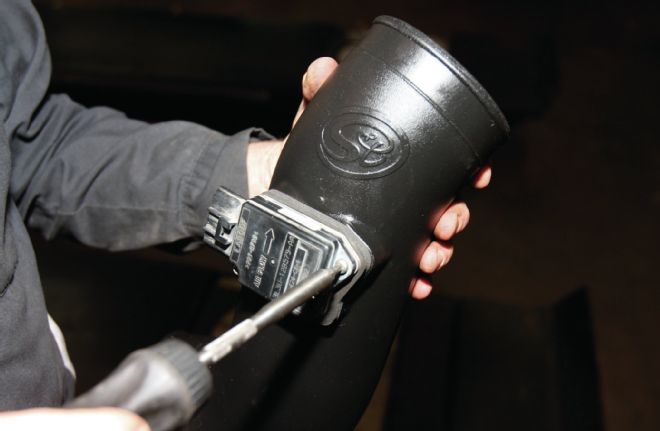
| Maf Sensor
21. The MAF sensor was relocated to the new section of intake tubing with the supplied gasket and hardware.
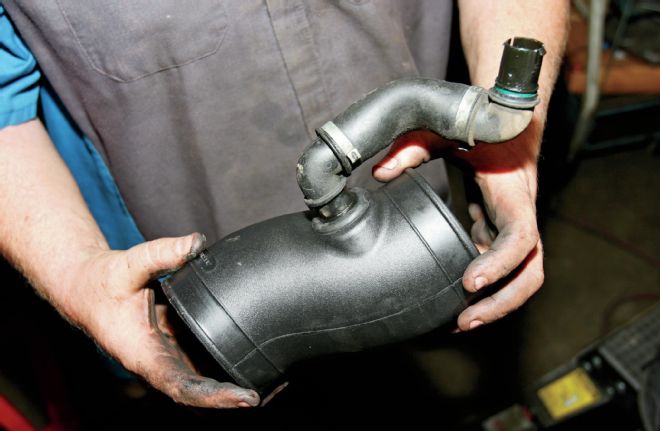
| Stock Breather Tube
22. The stock breather tube was attached to the new tube that connects to the turbo.
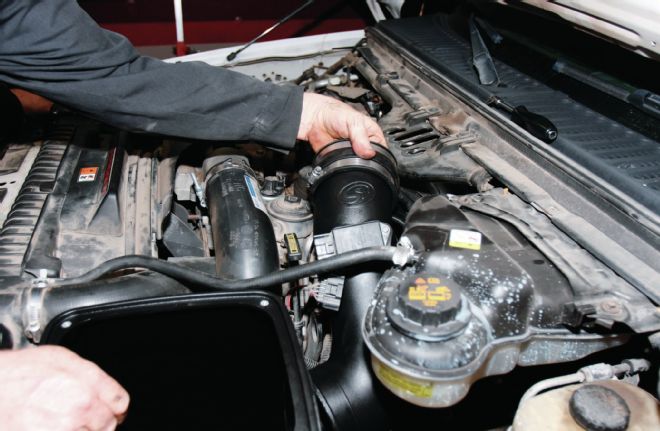
| Silicone Couplers
23. Using the supplied silicone couplers and clamps, the first section of the S&B intake was installed.
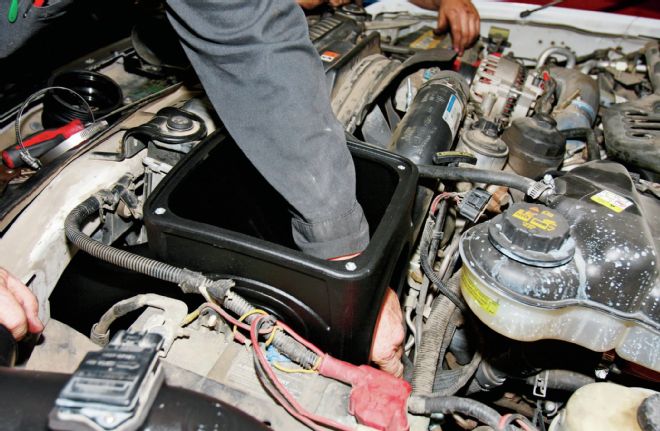
| S B Airbox
24. Next, the S&B airbox was dropped into place. The bottom has prongs that settle into a pair of factory brackets with a little persuasion.
| Coupler Restriction
25. With the coupler attached, and the restriction gauge in place, the centersection was dropped into place. Make sure the silicone seal is installed on the rear of the airbox first. The two electrical connectors can now be plugged back in.
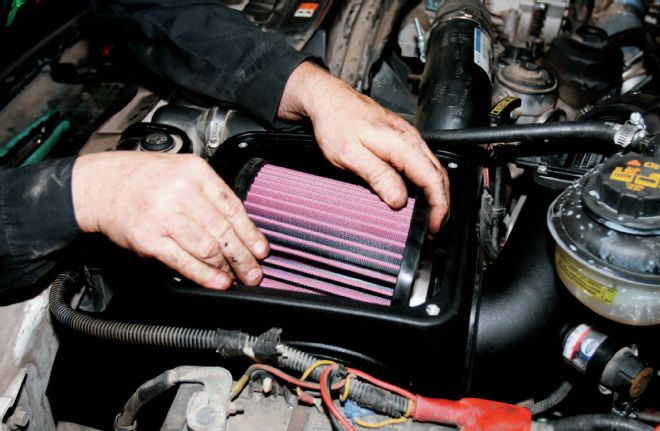
| Filter
26. Finally, the filter is dropped into the box and clamped into place. The last item to be installed is the S&B signature clear lid. It’s held on with four screws and seals the box tight.
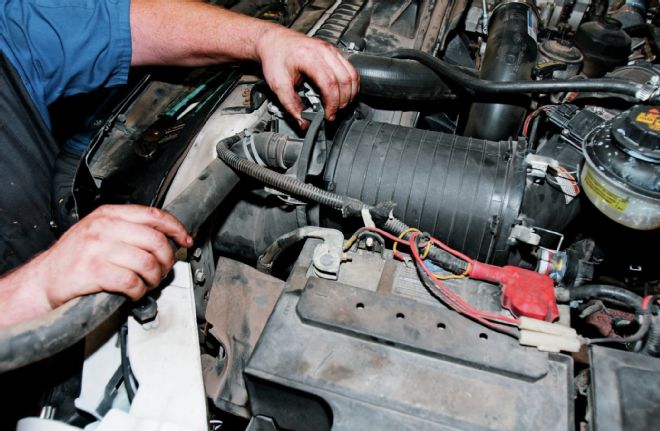
| S B Intake
27. The S&B intake kit adds form and function to the underhood area of the Super Duty.
| Livewire Ts User Manual
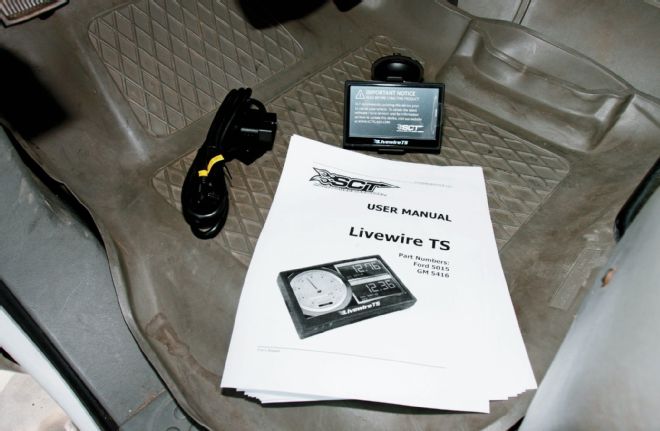
28. Moving into the cab, we printed out the complete instructions for the Livewire TS, snapped the monitor into the mount and gave ourselves a quick lesson on the SCT product.
| Livewire Ts Programmer
29. Soon we plugged in the unit and followed the prompts. There are a ton of cool add-ons that come standard with the Livewire, but for now we just wanted to extract some power out of this 6.0-liter!
| Livewrire Ts Program Vehicle
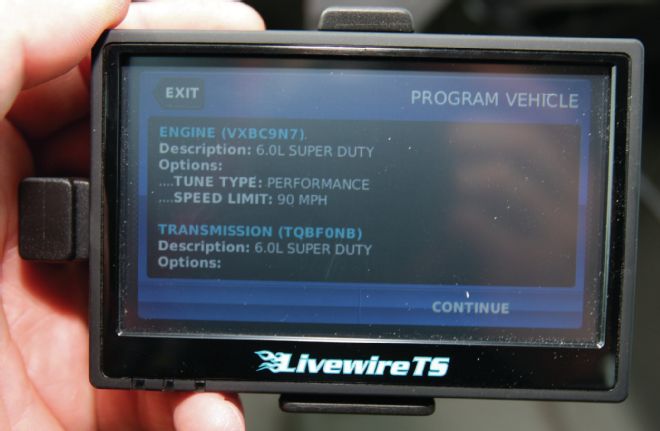
30. Once in program vehicle mode, the programmer scanned the truck and came up with all the correct information. From there we chose the Performance option, over the street or towing to really see what a canned tune will do for the truck. Once we have some fun with it, we will most likely keep it on the street setting unless we’re hooking up the trailer.
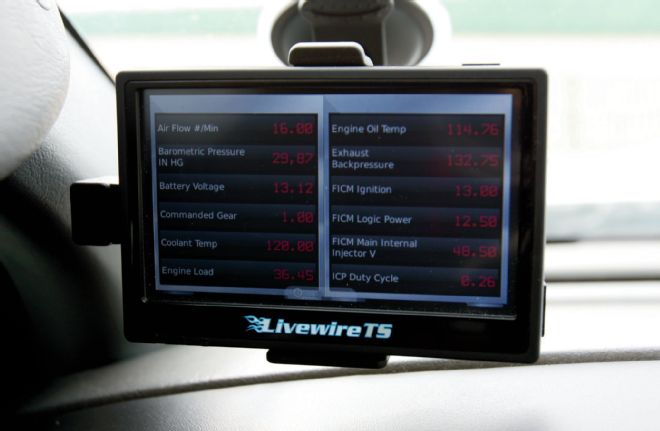
| Livewire Ts
31. Once the tune was completed, we moved over to the gauge section. There are several options and displays. This one lists just about everything. We decided to leave it there until we have some time to study up a little more.
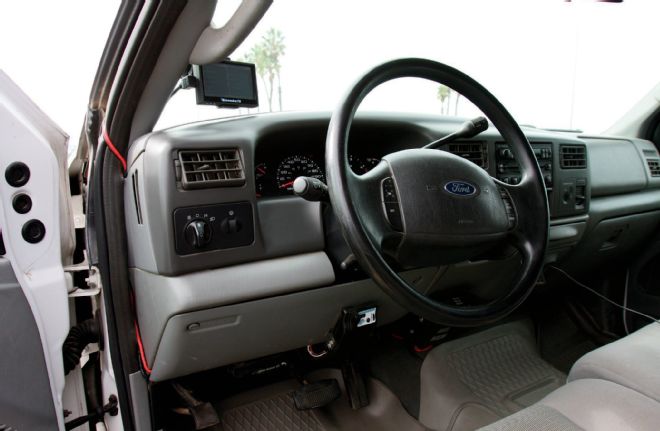
| 2004 Ford F250 Dashboard
32. We mounted the monitor in the bottom left corner of the windshield and ran the cord as stealthily as possible around to the plug under the dash (the red wire is for a race radio, not the programmer). Then the fun began! We have done various forms of this combo many times before, and this truly is one of the most dramatic changes we’ve encountered. On Performance mode, we were breaking 35-inch Generals loose all day long. This combination of products truly woke this stock 6.0-liter up in a big way.