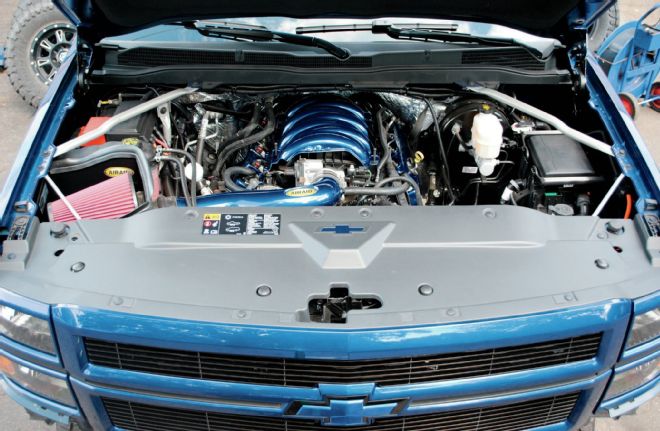
When it comes to buying a brand-new truck, many people still think the stock performance is all that’s available. Fortunately, with today’s engines, if you desire more performance from your truck, it’s as easy as making it inhale and exhale better while programming it to be more accurate. GM trucks have been known to push out their fair share of power with the 5.3L V-8 that has been around for the past several years. With the complete platform change starting with the 2014 models, you can bet that the all-new EcoTec3 5.3L V-8 was going to be stronger and quicker than ever. But around these parts, stock is never enough! Once we got our hands on this project truck, a ’14 Chevy Silverado 1500 Crew Cab standard bed 4WD, we knew we had to pump up the power a little in preparation for the giant lift that’s coming its way. We contacted Airaid and ordered their intake system (PN 201-285, $439) to help get a little more air into the motor. For getting the air out of the motor, we first swapped the factory exhaust manifolds for a set of Shorty headers from Doug Thorley Headers (PN THY-353-C, $589) then added a cat-back exhaust system from MBRP Exhaust (PN S5080, $754).
| Chevy Ecotec 5 3l V8
Since this truck was going to be lifted to the extreme, we opted for the custom black coating on our aluminized exhaust system. This ensures that it will always look its best for years to come with zero maintenance. We then picked up a DiabloSport InTune (I-1000, $389) to not only tune the motor to make the best use of our bolt-on parts, but to recalibrate the speedometer for when we changed out the stock tires to larger ones. We handled the intake install first in the driveway due to its ease of installation (we even put our friend Kristin to work as a hand model), but took the truck to Rimz One in Morresville, North Carolina, to handle the headers, exhaust, and programmer install. Having a lift is not necessary, but it makes it a lot easier, so they stepped up and helped us out with this install. Check out the next few pages to see how these simple installs can not only make your new 5.3L perform a lot better, and sound a lot meaner while doing so.
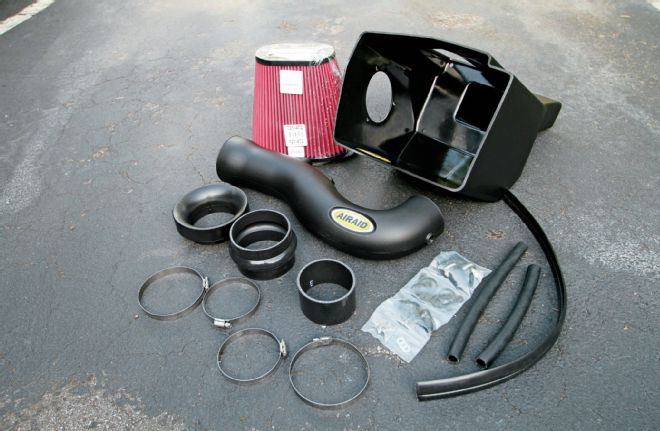
| Airaid Intake
We contacted Airaid and ordered their intake system (PN 201-285, $439) to help get a little more air into the engine. Airaid supplies all the parts needed to make for a quick and easy install.

| Doug Thorley Headers
The factory exhaust manifolds were swapped for a set of shorty headers from Doug Thorley Headers (PN THY-353-C, $589). Besides, nothing looks quite as good as a set of headers peeking out of the fenderwell of a lifted truck.

| Mbrp Exhaust
The cat-back exhaust system from MBRP Exhaust (PN S5080, $754) comes coated in black, giving you a clean, maintenance-free finish, which is also handy for a lifted truck.

| Diablo Tuner
The DiabloSport InTune (I-1000, $389) is the perfect pick to tune the EcoTec3 to make the best use of our bolt-on parts. It will also recalibrate the speedometer for when we change out the stock tires to larger ones.
| Stock Gm Ecotec Engine
The stock engine bay is taken up by a large factory airbox that somewhat restricts the airflow. By removing it and replacing it with the Airaid unit, you not only get better airflow but a cleaner-looking engine bay.
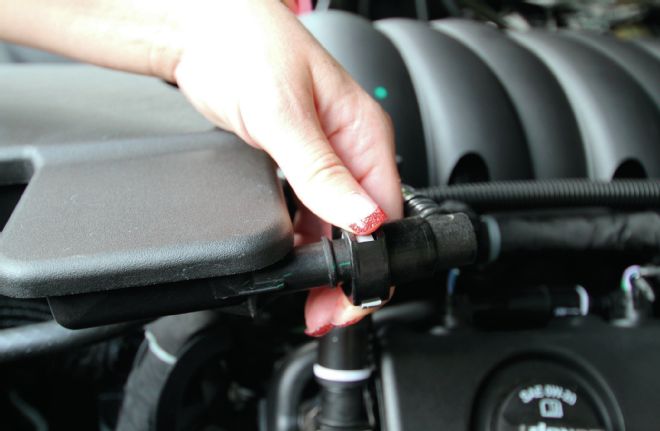
| Pcv Removal
To begin disassembly for the Airaid install, remove the plug on the mass airflow sensor. Unplug both PCV breather lines on the back of the factory intake assembly as well as from both valve covers.
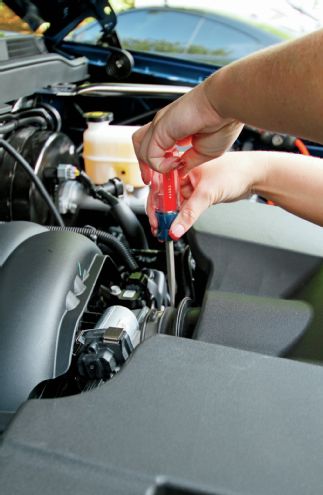
| Factory Intake Hose Removal
We loosened the large hose clamp holding the factory intake assembly to the throttle body as well as the hose clamp connecting the center box to the air filter box.
| Stock Intake Box Removal
Then, we lifted up the factory airbox assembly and completely removed it from the truck.
| Factory Airbox Removal
We removed the front passenger fender brace to allow room for the new airbox and ease of removal of the factory airbox. Then we removed the screws holding the factory airbox together and removed the entire box from the truck.
| Mounting Tray Removal
The four bolts in the airbox-mounting tray were removed. We’ll hang onto the bolts, since we’ll need them to secure the new parts.
| Air Filter Adapter Mount
Next, we mounted the air filter adapter to the cold airbox with supplied hardware.
| Airbox Installed In Inner Fender
Now we could slide the cold airbox into the inner fender area and secure it with three of the four bolts we removed from the airbox-mounting tray.
At this point, we could install the barbed elbow fitting into the intake tube, then transfer the MAF from the factory intake to the Airaid intake tube using the supplied bolts.
Now the supplied hose clamps could be installed onto the airbox and the throttle body. They were left loose at this stage.
| Airaid Intake Installed
Next, we fit the intake tube into place and tightened all the hose clamps to secure it.
| Breather Hose Connection
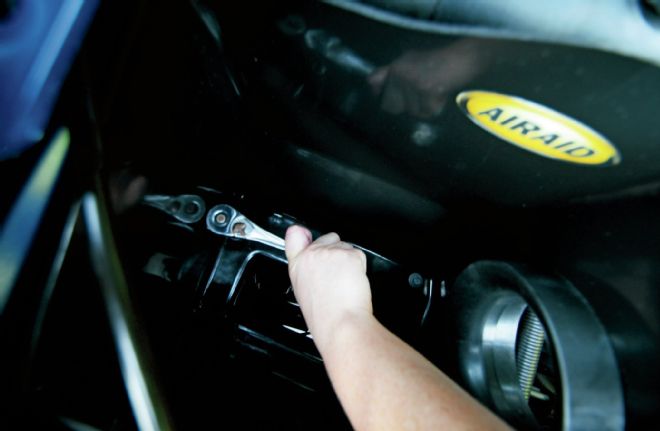
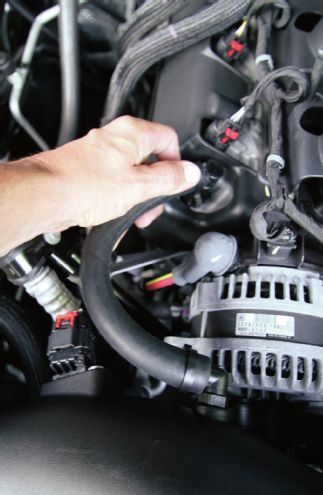
The supplied quick connect fittings could now be installed onto the breather ports in the valve covers and connected to the supplied hoses and the barb fittings on the intake tube. Don’t forget to install the supplied CARB sticker if it’s required where you live.
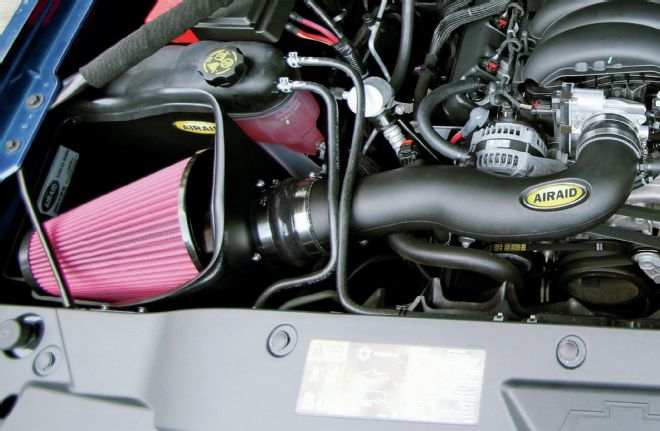
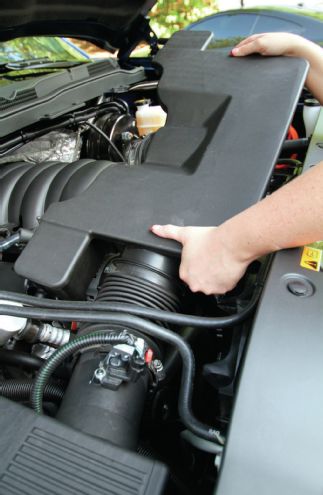
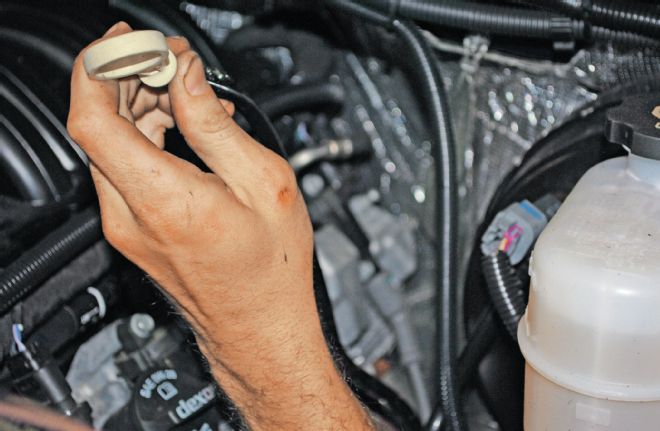
| Air Filter Installed
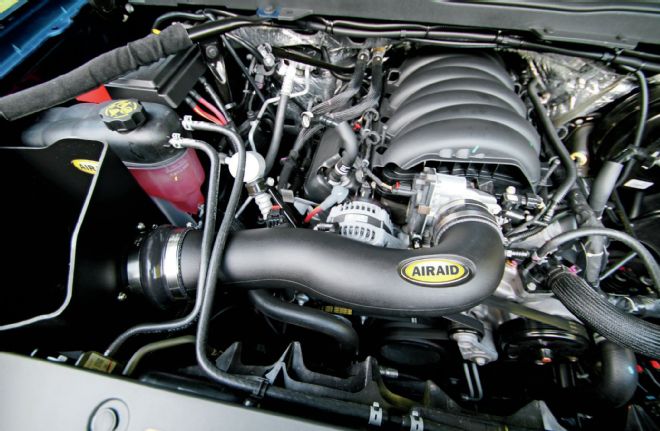
Finally, we installed the air filter and reinstalled the fender brace that was removed earlier. The Airaid intake makes the engine bay much more appealing.
| Factory Exhaust Manifold
We began the Doug Thorley header installation by removing the stock exhaust manifolds. Like we always say on a late-model header install, patience is a virtue—and so is having a variety of tools at your disposal.
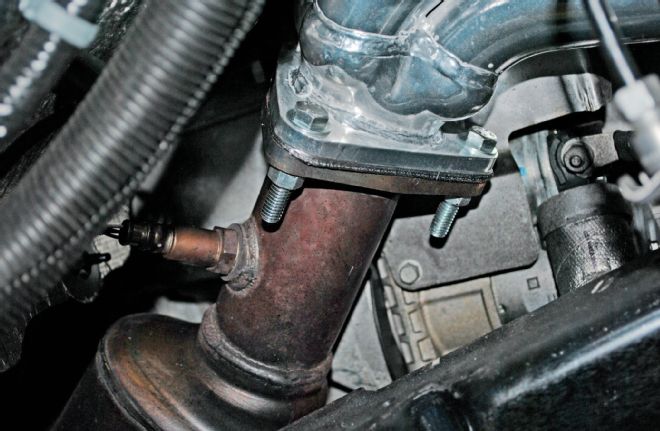
| Factory Y Pipe
First we removed the bolts holding the factory Y-pipe in place.
| Dipstick Unmounted
Then we unbolted the dipstick mount and moved it out of the way. Now the exhaust manifolds were clear to be unbolted and removed.
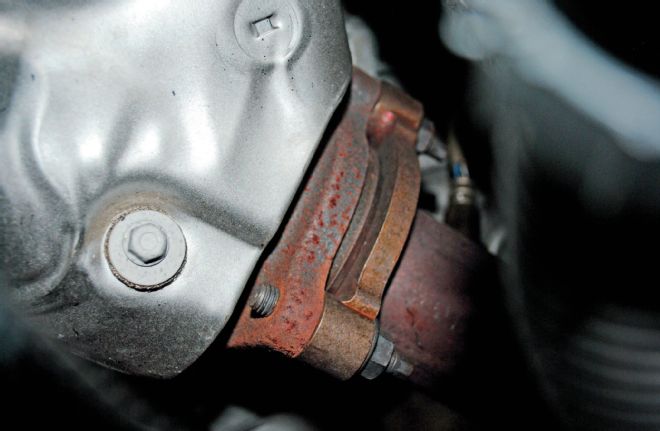
| Header Connected To Cats
After removing the factory manifolds, we connected the headers to the factory CATs with the supplied bolts.
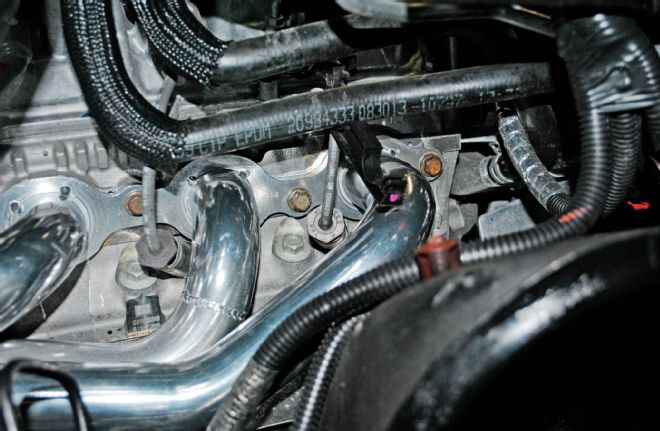
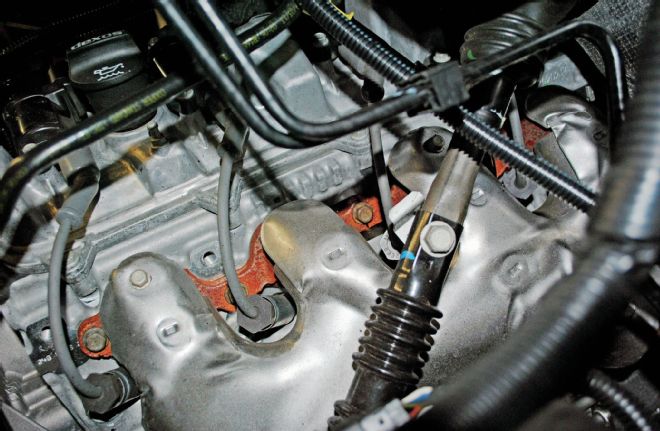
| Headers Installed
Then we secured the headers to the heads using the bolts we removed from the factory manifolds.
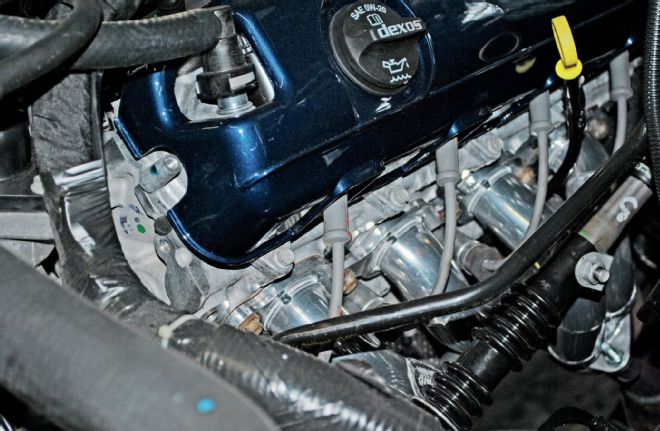
| Ceramic Coated Headers Installed
The ceramic-coated headers not only expel spent gases more efficiently, but also clean up the engine bay even more.
| Stock Exhaust
Heading under the truck, we turned our attention to the stock exhaust. The easiest way to remove the factory exhaust is to cut it before the axle, then remove the rear section from the rubber exhaust hanger.
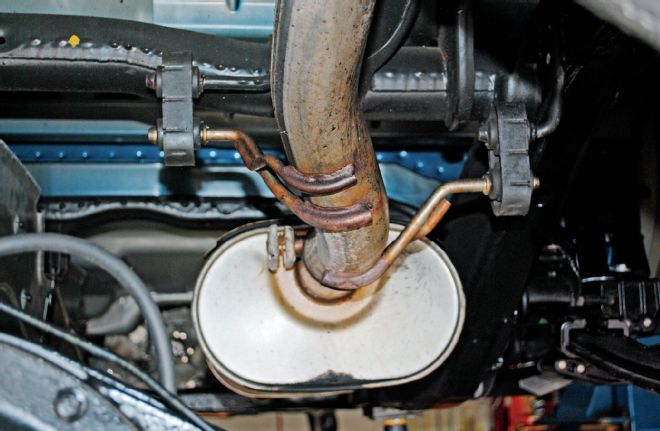
| Stock Muffler
After unbolting the front of the exhaust from the catalytic converter, we removed the muffler from the exhaust hangers.
We started at the cat with the black-coated MRBP components by loosely fitting the parts and working toward the tailpipe, using the supplied hardware in conjunction with the factory exhaust hangers.
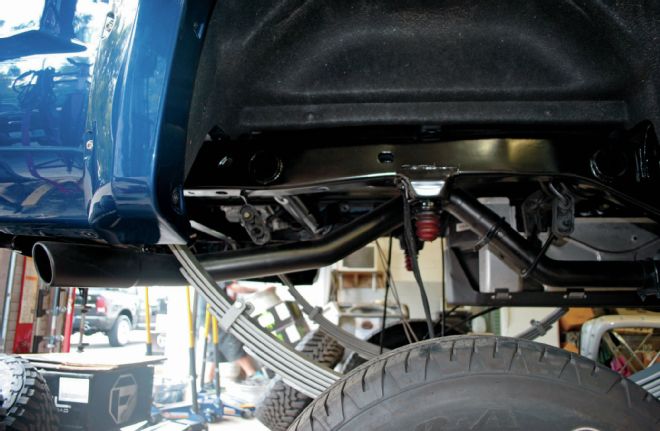
| Mbrp Exhaust Installed
Once the tip was set in the proper location, we tightened down all the clamps.
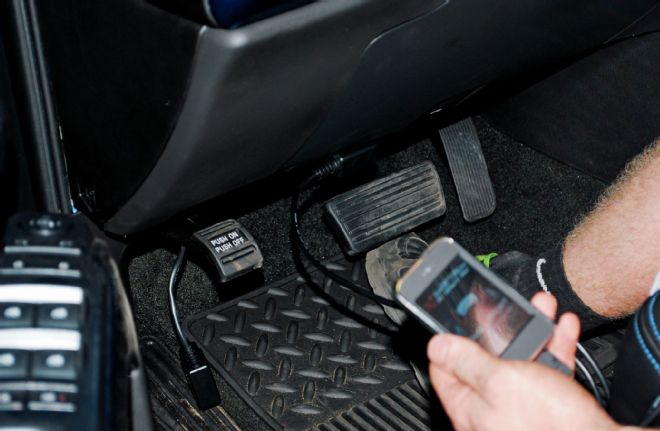
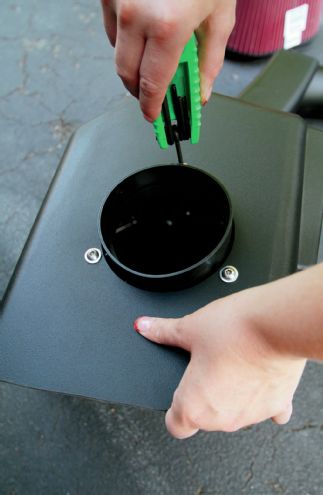
| Connecting Tuner To Computer
To finish off our install with our DiabloSport programmer we plugged the supplied cord into the OBD-II port under the dash.
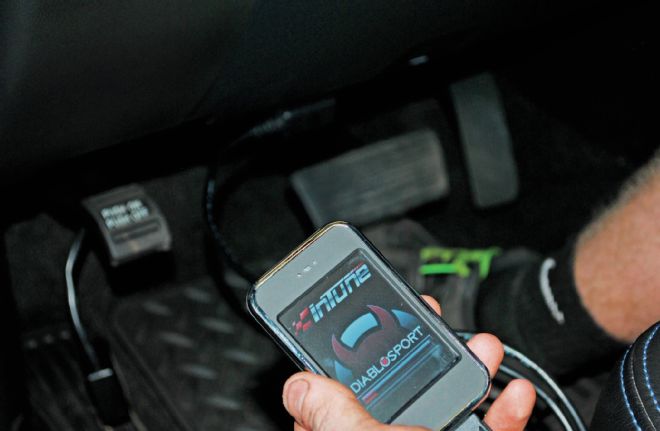
| Diablo Tuner
Just like the advertised plug-and-play installation, we turned the InTune on and followed the instructions on the screen. After a few minutes, our new tune was installed.
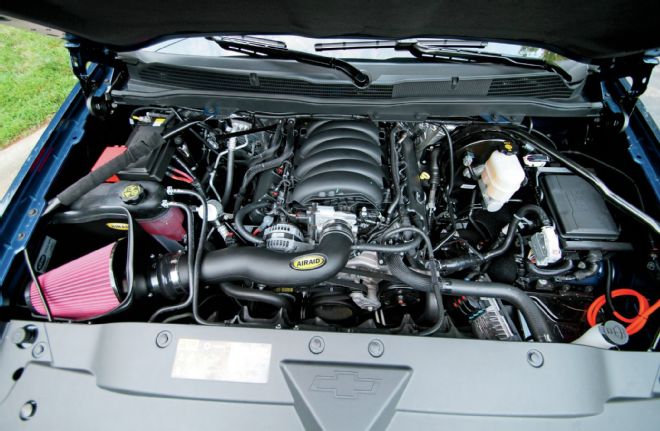
| Upgraded Gm Ecotec Engine
We fired up the truck and were immediately happy with the new sound of our EcoTec3 engine. We got the powerful tone we were looking for, and the response and acceleration were improved on the spot. Hopefully we’ll get some better mpg out of it, too!


