When you buy a new truck, there are always little things that you want to change. Whether it’s the feel of the ride or the brightness of the headlights, everyone has something they would change on their truck. For this truck owner, he absolutely loved everything about his new Ram 1500, except for the audio system. It was too muddy and didn’t have the depth he was looking for. After reviewing his options, he selected a Pioneer AVIC-X950BH head unit. This deck features a 6.1-inch touchscreen, navigation, Bluetooth, HD Radio tuner, SiriusXM, traffic tuner, and AppRadio mode. AppRadio works in conjunction with an app on your phone to display and control your contacts, calendar, maps, and more right from your head unit.
To go along with the new Pioneer head unit, we added a pair of TS-D1720C 6¾-inch components for the front and a pair of TS-D1302R 5¼-inch speakers for the rear. The D-series speakers are some of the best around. The cones are made of dual-layer IMX aramid/basalt fiber. Which is, needless to say, far better than the factory paper material. These Pioneer speakers, combined with the new head unit, will ensure the best quality sound possible, whether we’re listening to SiriusXM, Pandora, or streaming from our iPhone. To complete the install, we ordered a PAC interface and in-dash mounting brackets to make our install go as smooth as possible.
| Painless Pioneer Audio Upgrade 01
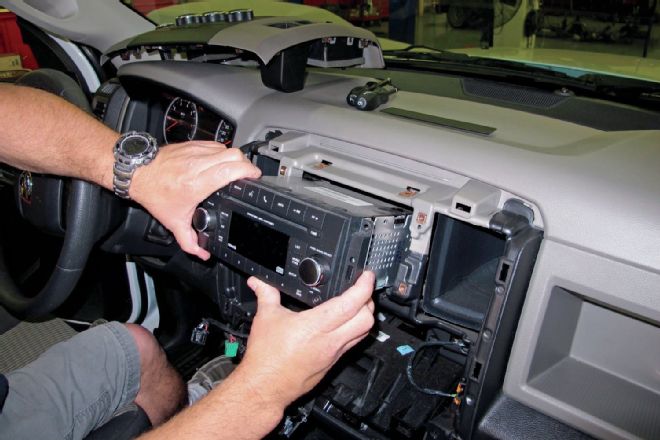
1. In this Ram truck, the dash comes apart pretty easily. After pulling the dash faceplate off, the four screws holding the factory receiver were removed and the receiver slid out of the dash.
| Painless Pioneer Audio Upgrade 02
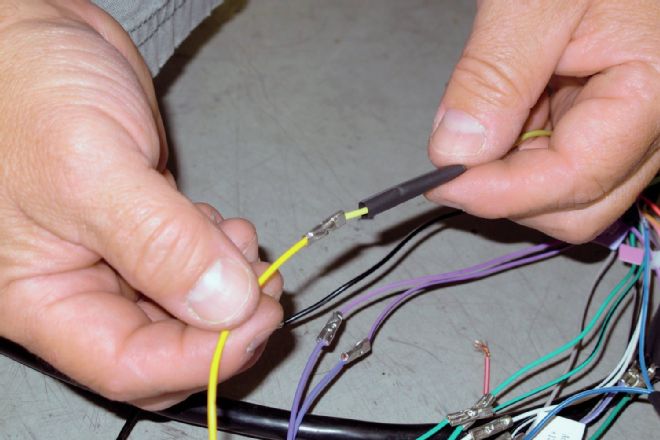
2. To make the install a breeze, we ordered a PAC interface from Crutchfield. This works with the factory CAN bus system, making for a smooth and flawless install. The first step was to wire the PAC interface harness to the harness from the Pioneer unit.
| Painless Pioneer Audio Upgrade 03
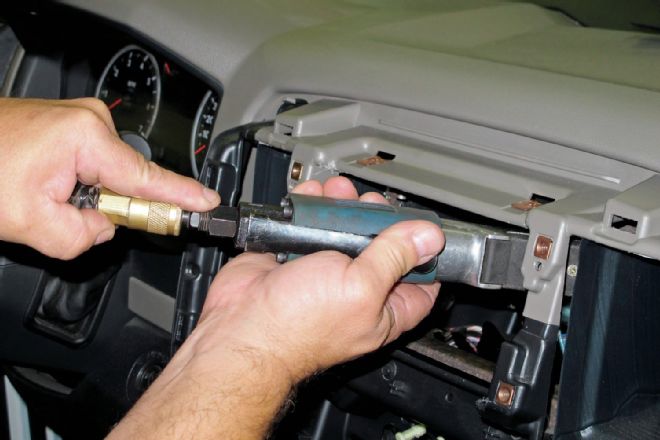
3. Next, we test-fit the deck into the truck and realized we needed to trim the dash support brace a bit for clearance. Using a pneumatic saw, we trimmed it and cleaned out the shavings.
| Painless Pioneer Audio Upgrade 04
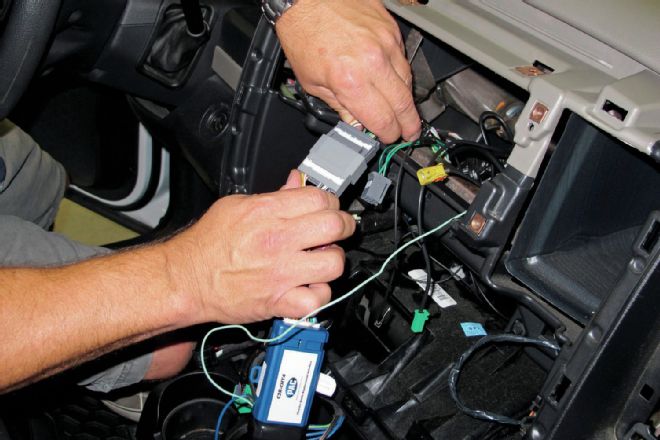
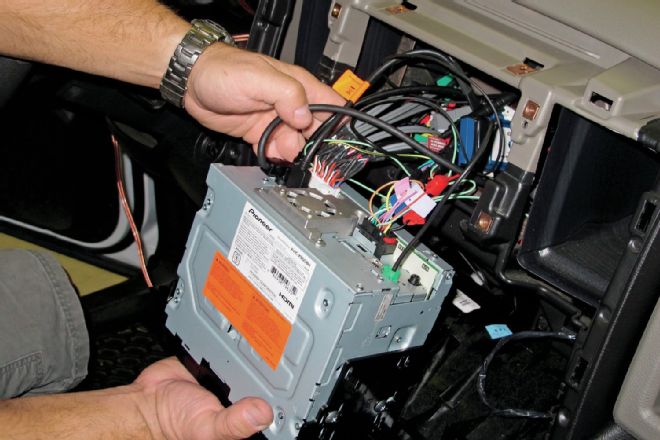
4. The PAC unit plugs right into the factory wiring harness. The other end plugs into the back of the Pioneer receiver.
| Painless Pioneer Audio Upgrade 05
5. After making the rest of the connections, we mounted the dash mounting brackets to the sides of the receiver and slid it into place.

| Painless Pioneer Audio Upgrade 06
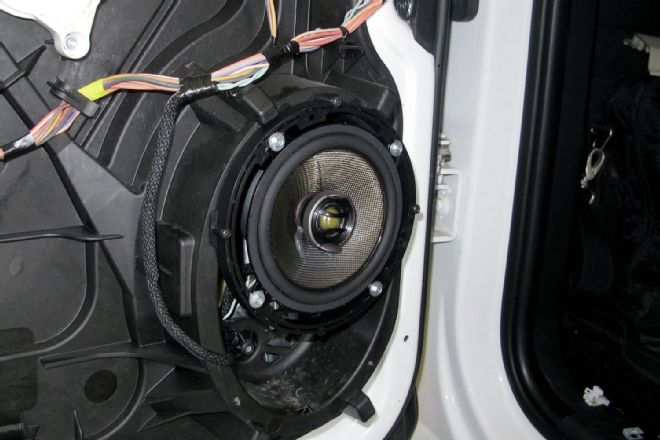
6. To make the new 6¾-inch speakers fit in the factory location, we used the adapters that came with the speakers. These mount to the doors, and the Pioneer speakers mount to them.

| Painless Pioneer Audio Upgrade 07
7. Next, we removed the factory tweeters in the dash and replaced them with the Pioneer versions. As you can see, we had to make adapters since the Pioneer tweeters were smaller and wouldn’t fit in the opening.
| Painless Pioneer Audio Upgrade 08
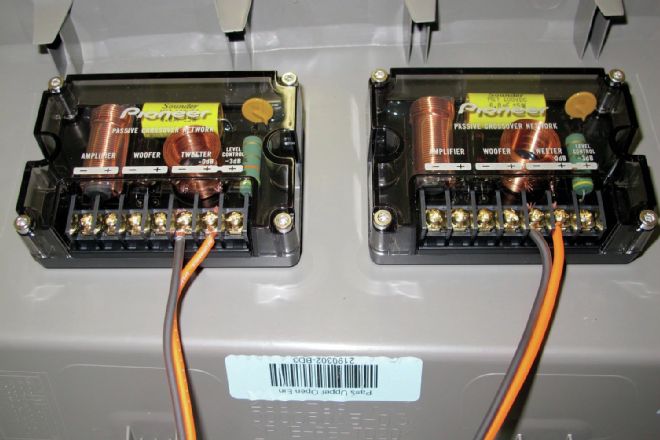
8. The components included these crossovers to prevent the mids and lows from reaching the tweeters. To hide them, we mounted them on top of the glovebox behind the dash and ran the wires to the respective speaker.
| Painless Pioneer Audio Upgrade 09
9. The rear speakers are coaxial, so the tweeter is mounted to the woofer. This makes for a quicker and easier install. But like the front, we needed to use the included adapters. Once the Pioneer speakers were mounted in the doors, we made the connections and tested the system.
| Painless Pioneer Audio Upgrade 00
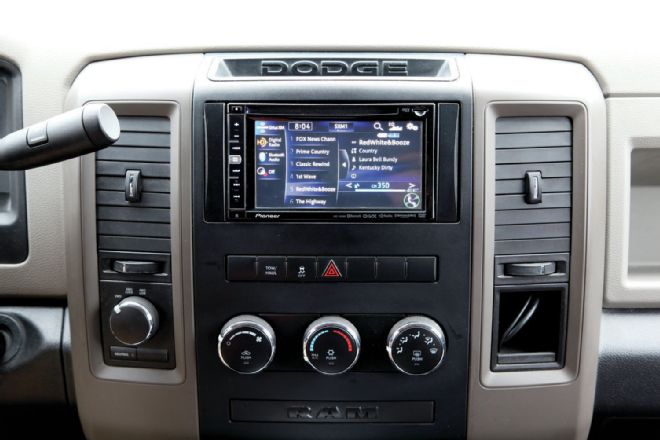
10. The new head unit looks perfect in the dash and the speakers sound exponentially better than the factory paper cone speakers.