It was a sickening feeling, the type that makes your stomach turn. The deeper we went, the more we uncovered. And the more we uncovered, the more worried we got. Each layer revealed a new secret about the life of our truck and by the time we were the done, we went from a feel-good story about prepping the body for paint to something more akin to a horror flick. Hidden under coats of paint, seam sealer, body filler, and fiberglass were decades of rust, improper repairs, hail damage, and abuse.
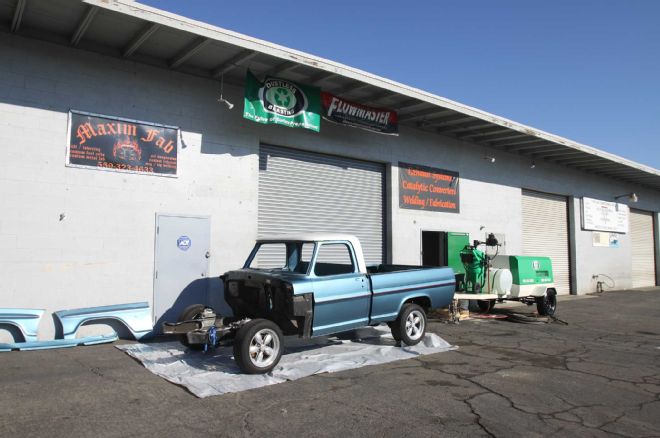
We knew when we bought the truck for a good price that there were some issues lurking under the paint. Project Speed Bump was your classic "10-footer," a truck that looks great from 10 feet away, but shows more and more flaws the closer you get. There were some bubbles forming under the paint and the cab corners and driprails definitely needed attention, nothing uncommon for these years of Ford.
What we weren't prepared for was just how bad things were. That is until we met Greg Puente of Maxim Fab in Clovis, California. In addition to doing some sick fab work out of his shop, Greg also owns a Dustless Blasting franchise and offered his services to help us get a better idea of what was hiding below the surface of our Bumpside.
Dustless Blasting is a "green" media blasting system that is said to be quicker and more efficient than sand blasting, while solving the paint adhesion issues that can plague soda blasting. Dustless Blasting uses silica-free recycled bottle glass beads that are mixed in a hopper with water and sprayed at high pressure toward the object that needs to be stripped. Not only does the addition of water add mass to the media and reduce dust, but it also keeps the media cool, eliminating the warping of body panels that can occur with other methods. The system also includes the use of a rust inhibitor that is sprayed on the metal after blasting that decontaminates the surface, removes chlorides, and permits the textured surface that is paint-ready.
Meeting all of our criteria for media blasting, we were anxious to see exactly what shape our body was in under all those layers. We headed up to Maxim Fab and followed along as Greg pointed his Dustless Blasting nozzle at our tired old 1967.
| Project Speed Bump Part 3 Trailer
After stripping down Project Speed Bump to just a body shell, we headed up to Clovis, California, to meet up with Greg Puente of Dustless Blasting.
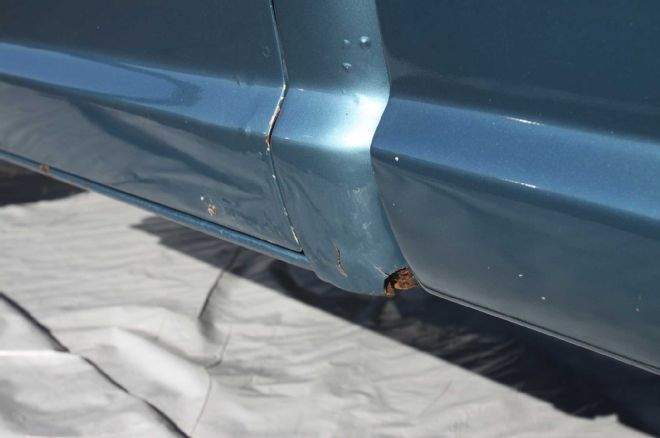
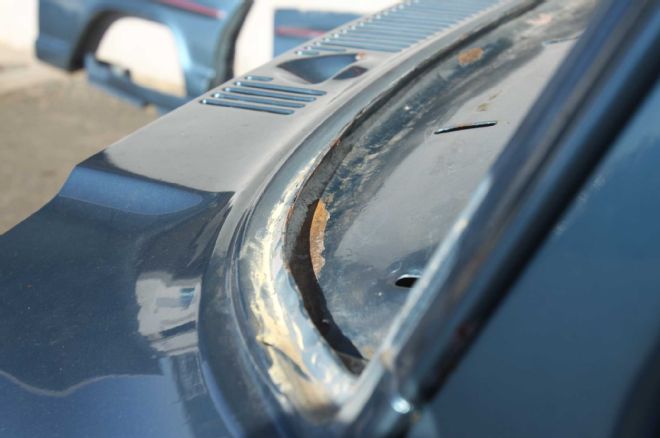
| Project Speed Bump Part 3 Cab Corner
We knew, even before blasting that the cab corners were going to need to be addressed, we just didn't know how extensive the cancer was.
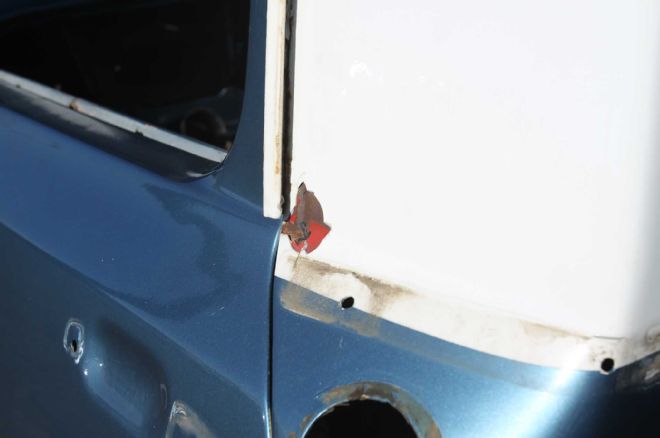
| Project Speed Bump Part 3 Cab Paint
This chip in the cab not only revealed the thickness of the paint layers, but also hinted at what we might find underneath the paint.
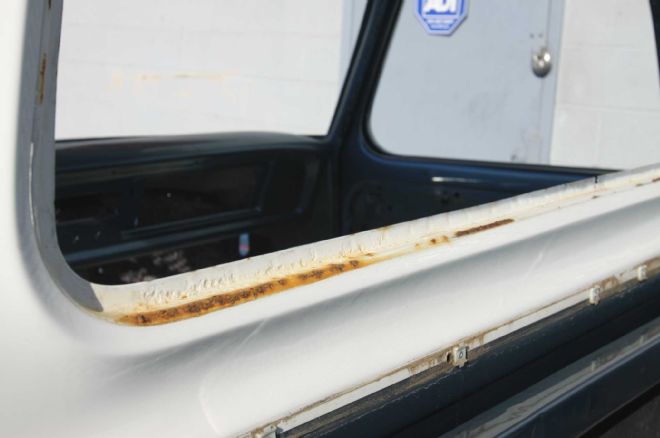
| Project Speed Bump Part 3 Window Frame
With the rear window removed, we could see that the rear window frame wasn't immune to the spreading rust.

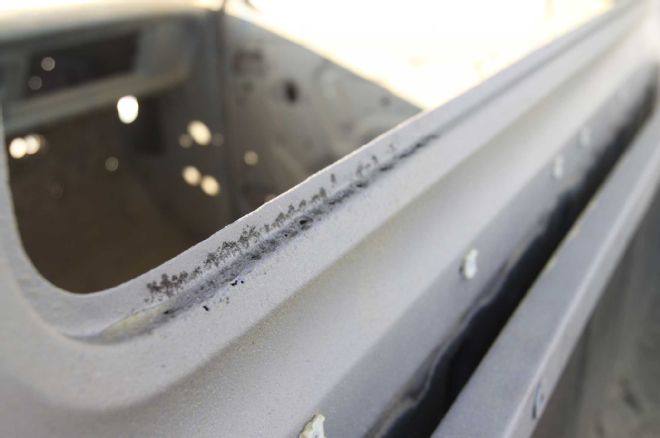
| Project Speed Bump Part 3 Drip Rails
Another problem area for this generation of F-Series truck are the driprails, and our 1967 was no different.
| Project Speed Bump Part 3 Dash Rust
Fortunately the dashboard was solid, only exhibiting a little bit of surface rust near the windshield frame.
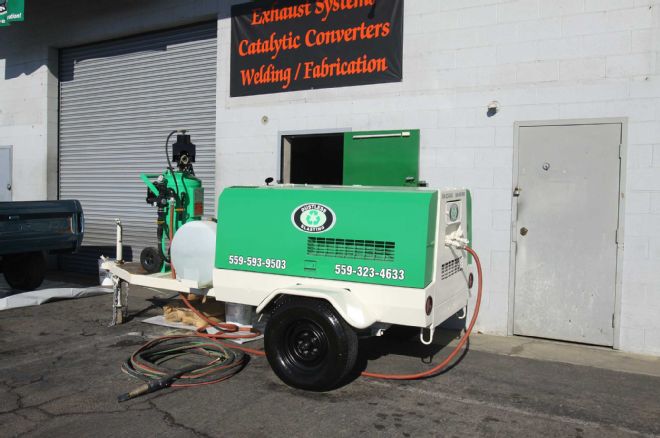
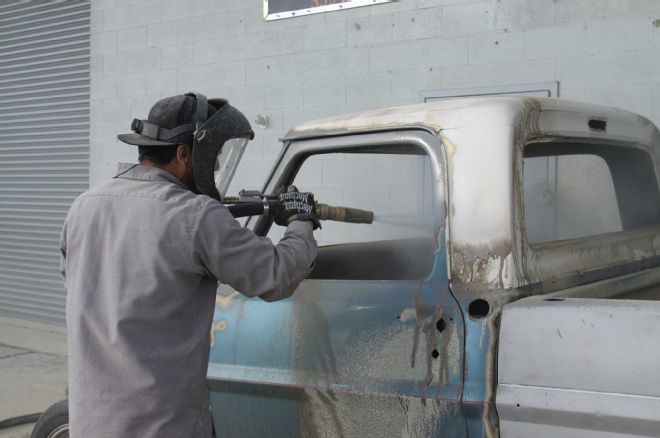
| Project Speed Bump Part 3 Blasting Trailer
The entire Dustless Blasting process is completely mobile, with all of the machinery contained on this trick trailer.
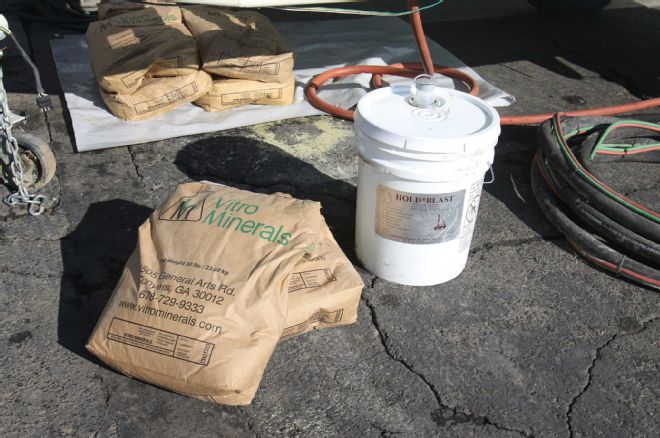
| Project Speed Bump Part 3 Media
A rust-inhibiting surface passivator, recycled glass beads, and potable water make up the media that is sprayed by the Dustless Blasting process.
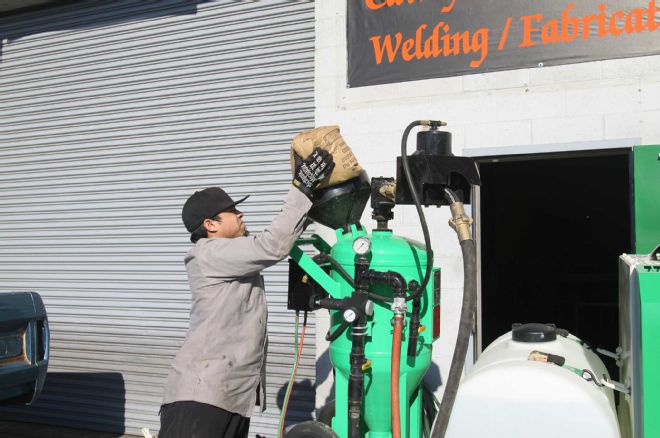
| Project Speed Bump Part 3 Hopper
Once the media was poured into the blast chamber, we were ready to fire up the machine and start blasting.
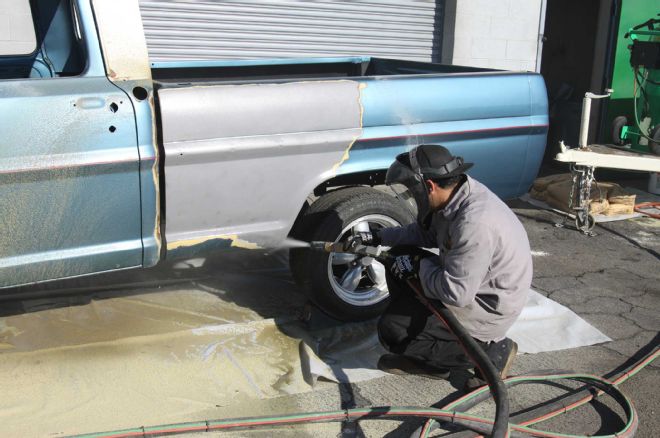
| Project Speed Bump Part 3 Blasting
The process itself works amazingly fast, with thicker layers, such as bedliner and body filler, needing multiple passes to expose bare metal.
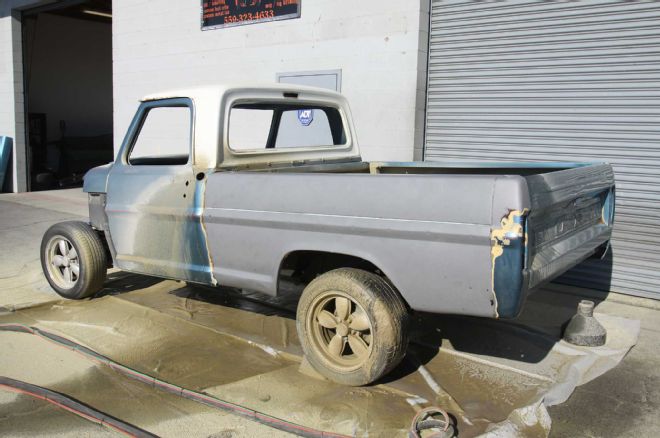
| Project Speed Bump Part 3 Exposed Bed
Within about 15 minutes, we already had the driver's bedside exposed, which looked better than expected. Unfortunately it was all downhill from here, as we would soon find out.
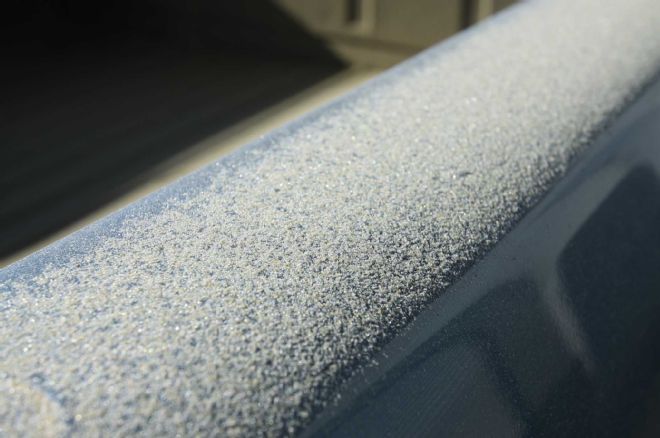
| Project Speed Bump Part 3 Media
Here is a look at the Dustless Blasting recycled bottle glass up close. These abrasive glass beads are environmentally friendly and can cut through many different types of coatings.
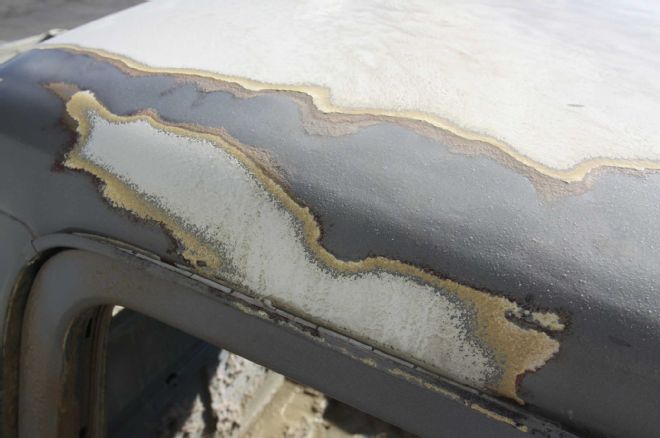
| Project Speed Bump Part 3 Layers
Clearly our Bumpside had been repainted a few times. If you look closely you can see the original black (confirmed by the VIN), along with layers of primer, red, yellow, blue, and white.
| Project Speed Bump Part 3 Blasting
It took about three-quarters of a day to completely blast the F-100, and when we were done the true condition of the body was finally revealed.

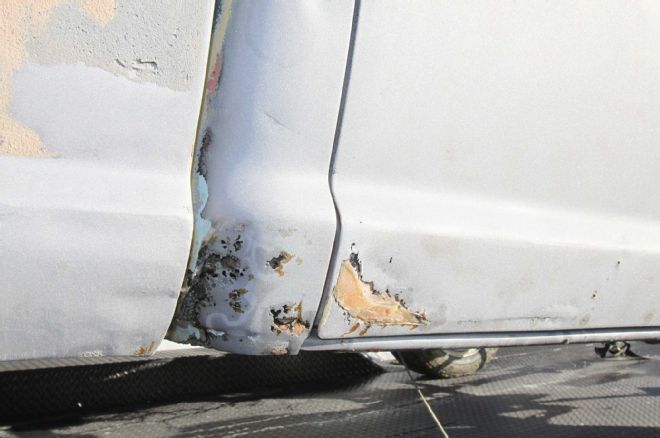
| Project Speed Bump Part 3 Drivers Corner
As expected, the driver's cab corner exhibited some major rust. Unexpected was the fact that someone attempted to repair it by pouring resin in the corner from the inside. The lower doorskin rust is also common, but again it suffered from a shoddy repair job.
| Project Speed Bump Part 3 Window Frame
Underneath the rusty paint in the rear window frame were a series of pinholes affecting the structural rigidity of the frame.
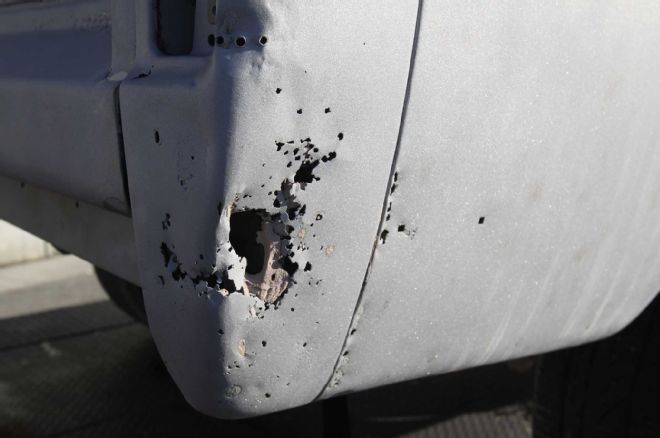
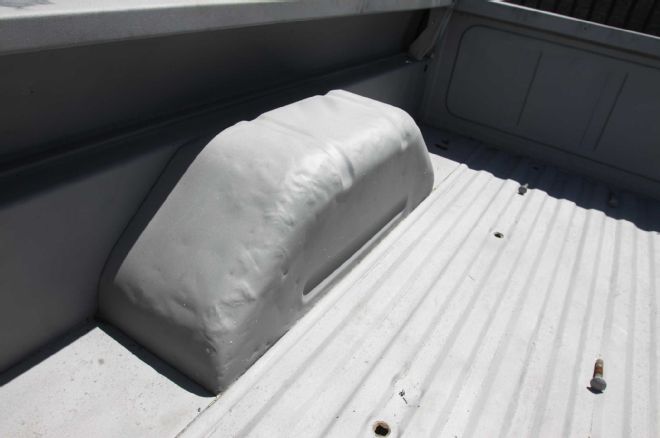
| Project Speed Bump Part 3 Bed Corner
Both rear bed corners suffered from extensive corrosion, the worst of it being on the passenger side.
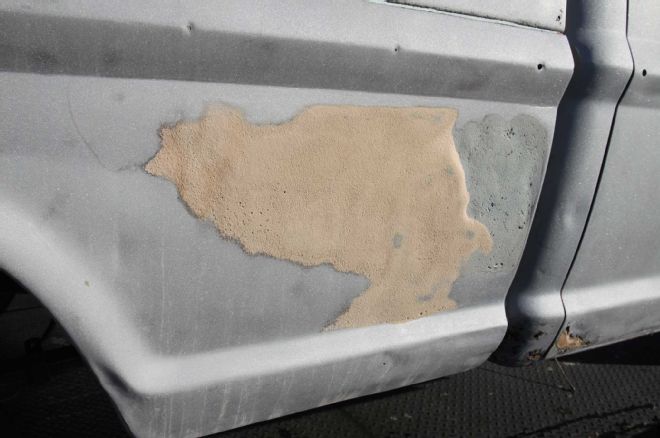
| Project Speed Bump Part 3 Pass Bedside
From what we could tell from the two different types of body filler present, the passenger's bedside had been dented and "repaired" multiple times. The filler you see here was over 1-inch thick in spots and it appeared that no one had ever attempted to pound the bedside out.
| Project Speed Bump Part 3 Pass Door
Much like the driver side, the passenger rear cab corner had significant rust, as did the lower doorskins. Both were repaired with resin from the inside and body filler from the outside.
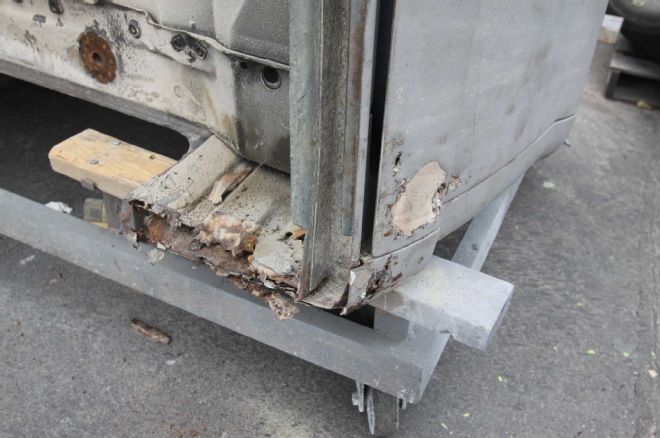
| Project Speed Bump Part 3 Cab Corner
Here is a better look at the rear cab corner after blasting, which proved to be in much worse condition than we expected.
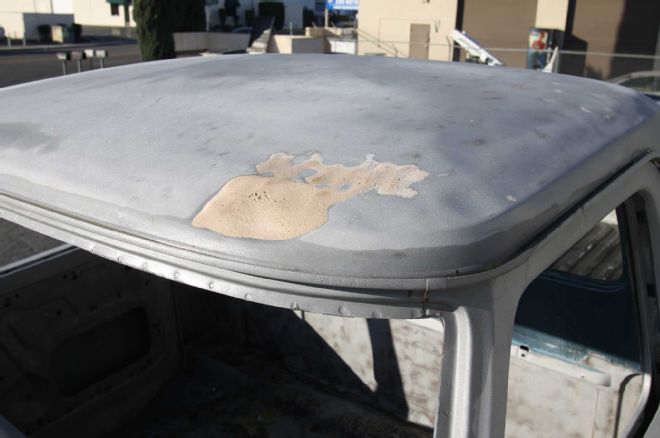
| Project Speed Bump Part 3 Roof
Another curious repair was on the roof, where in addition to ample hail damage, was a huge dent that had once been covered over with body filler.
| Project Speed Bump Part 3 Bed
Much like the roof, it appeared that the bed had lived a hard life with ripples, dents, and holes everywhere.
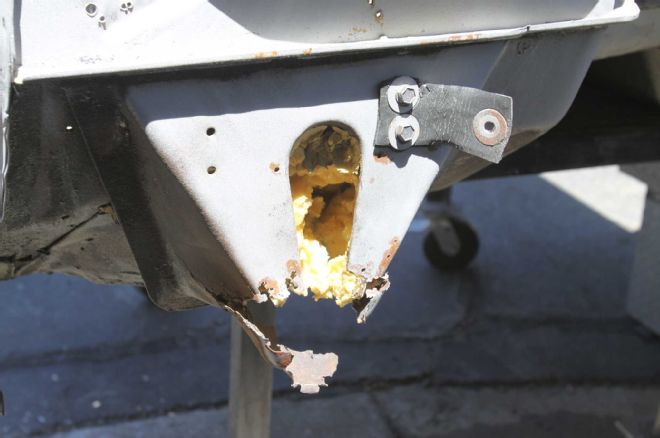
| Project Speed Bump Part 3 Cab Mount
Blasting also revealed rusted-out cab mounts, which are also very common to the 1967-1972 Ford trucks, but as you can see here, there was hardly enough metal to qualify ours as anything structural.
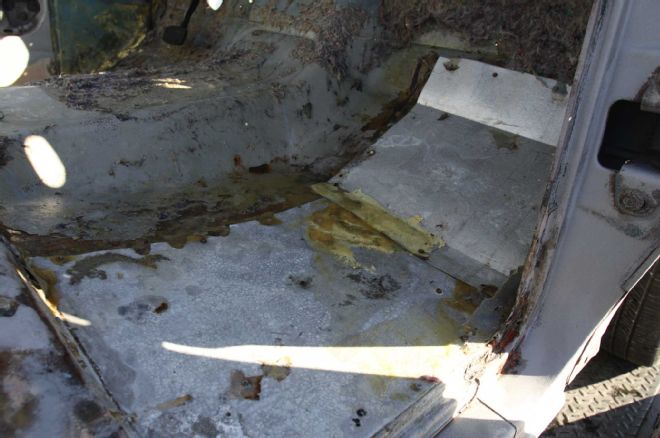
| Project Speed Bump Part 3 Floorboards
Out of all the shoddy work that was uncovered by the Dustless Blasting process, none was more shocking than the floorboard "repairs." At some point, the floorboards had rotted out of the truck and instead of a proper repair, someone replaced the floors with tin flashing, held in place by sheetmetal screws. To hide the patch job, the flashing was covered over with fiberglass, more tin, and finally a layer of carpet insulation.
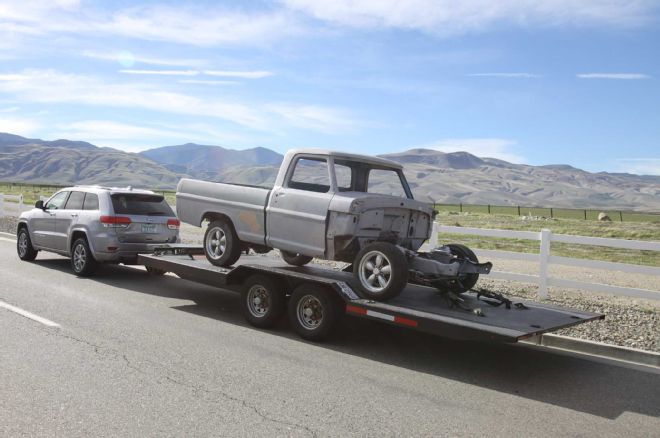
| Project Speed Bump Part 3 Trailer
With the condition of our body finally known, we loaded Project Speed Bump on the trailer, and made an appointment with the bodyman.