We all know the feeling. You finally get your dream truck and you’re already itching to dig into it with the latest parts and components. However, as many have experienced, cash is at a minimum these days and so the fantasy of installing all of those
Chevy truck parts and components gets thrown right out the window.
Luckily, as enthusiasts,
do-it-yourself mods and upgrades are plentiful. If you’ve spent any time in your favorite online truck forum, you’ll know there are open threads available with other users showing you how they improved their truck right from the comfort of their very own garage.
That said, we realize that sometimes the best modifications to your truck are the ones you can do right from home for no cost at all. The
2007.5-2014 full-size GM trucks are quite handsome from the factory and need little, if any, drastic exterior modifications other than an aftermarket grille or some side steps to make it stand out. After all, GM engineers and designers get paid big bucks for this exact reason. Sometimes, these trucks are better left alone.
When it came to the factory badging and decals on the truck, they became quite the eyesore, especially since it stood out on black paint. The exterior just looked busy. We were looking for that custom, clean look but weren’t looking to pay for it. It's about time we show you some simple, how-to tech, right?
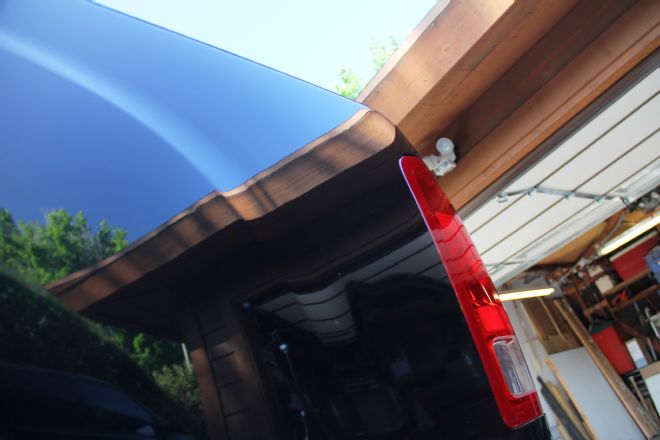
We decided a quick badge and decal removal would allow the factory body lines on our
2009 GMC Sierra 2500HD Duramax to shine more aggressively. Best part is the removal cost us absolutely nothing other than an afternoon in the garage. We got right to work using a household hair dryer, a small can of Goof Off for the adhesive removal and finished up by sealing up the paint for a scratch-free shine with a coat of wax.
| 2009 GMC Sierra SLT Duramax Badge Removal
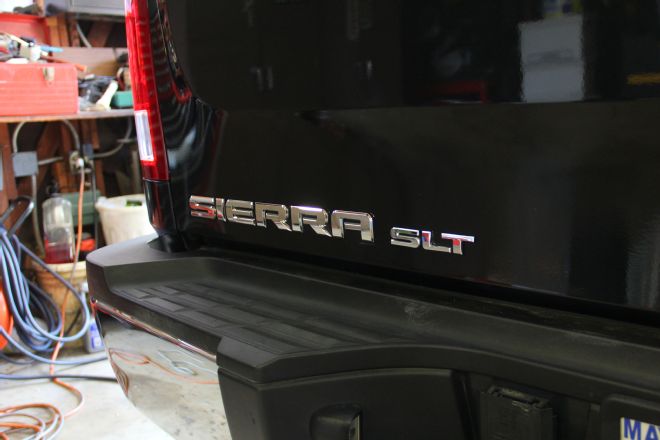
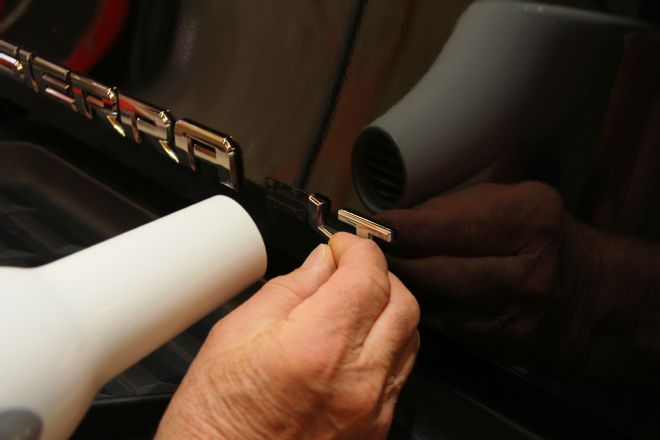
It’s important to note that the factory
GMC Sierra SLT badging is individually placed and applied. That said, keep in mind that each letter will have to be heated and removed one at a time.
| 2009 GMC Sierra SLT Duramax Badge Removal
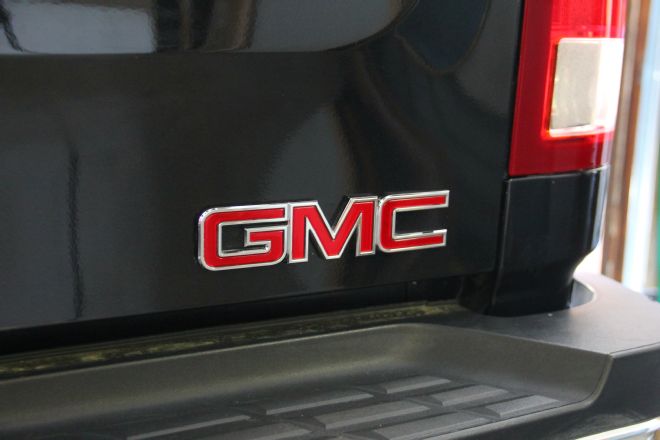
Luckily, the
GMC badging at the bottom of the tailgate is applied in one piece. This means our removal took less time.
| 2009 GMC Sierra SLT Duramax Badge Removal
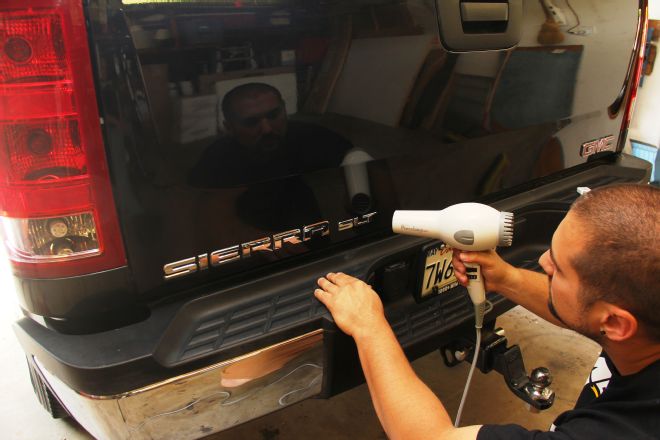
To get things going, we began by heating up the smaller, “SLT” badging first with a household hair dryer on the High/Heat setting. This allowed to get comfortable and find a rythm before we started on the larger pieces.
| 2009 GMC Sierra SLT Duramax Badge Removal
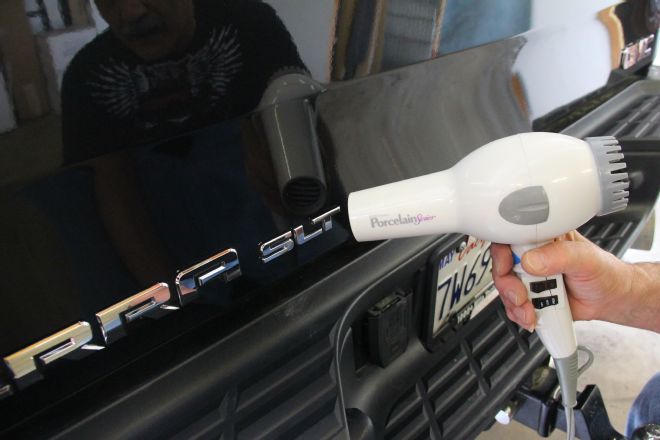
We applied even and steady heat to the area of the badging we wanted to remove.
| 2009 GMC Sierra SLT Duramax Badge Removal
Not long after the heat is introduced, the double-sided adhesive tape begins to loosen and separate from the paint. (Note: If the badging moves or twists under pressure, the badge is ready for removal).
Once the badge is removed, the factory double-sided adhesive will leave behind a heavy amount of residue. No worry, though, as your finger nails will remove a majority of it or you can roll it off with your fingertips. No need to pry too deeply either. We removed what we could and will leave a bit of the elbow grease to the adhesive remover instead.
| 2009 GMC Sierra SLT Duramax Badge Removal
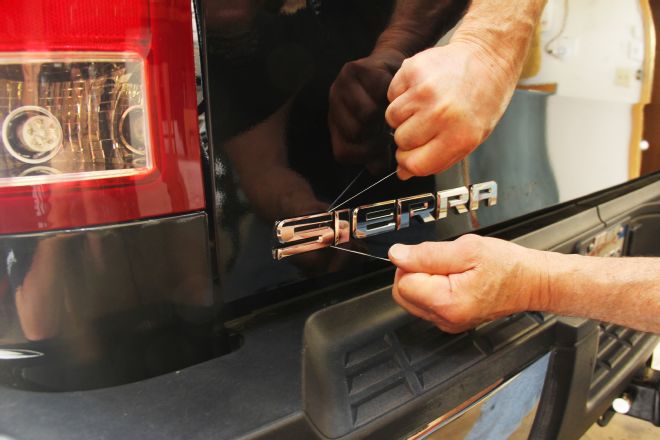
With the smaller SLT lettering removed, we decided we liked the look and began heating the larger, SIERRA badging. Once each letter was heated, we used a piece of dental floss (Mint flavor, of course) and separated the glue from the paint. Some pulling and sawing on the floss is necessary, depending on the amount of heat applied, in order for the badge to separate easily. We repeated the steps on each letter until they were all removed. Moreover, the GMC badge removed as one entire piece.
| 2009 GMC Sierra SLT Duramax Badge Removal
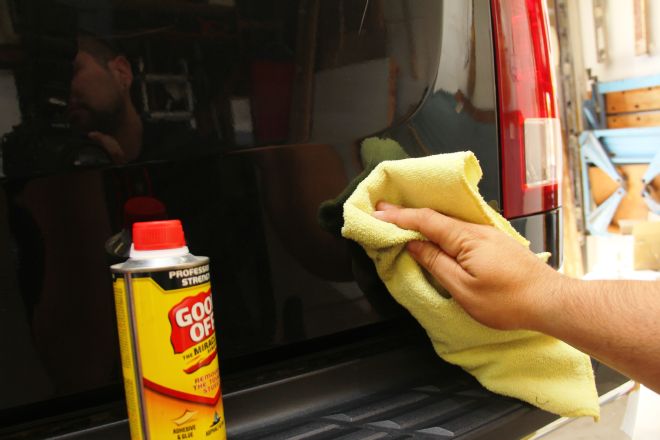
From there, we used a clean microfiber towel with a bit of Goof Off to rub out the excess glue and adhesive. Since this adhesive remover is harsh on the clear coat, for good measure, we clay barred, cut using some rubbing compound, and applied a nice coat of wax to the areas where we removed the badges.
| 2009 GMC Sierra SLT Duramax Z71 Decal Removal
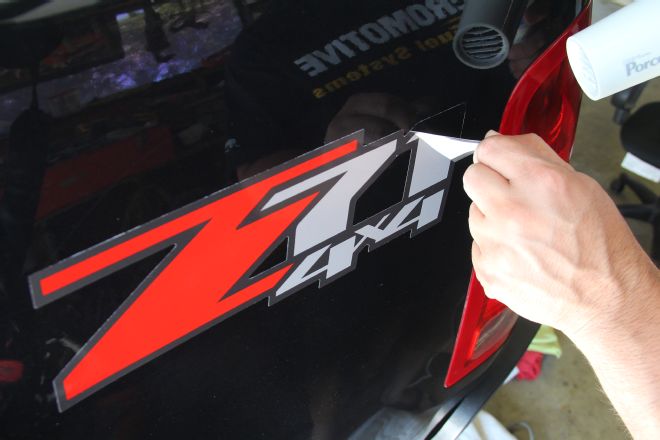
For the “Z71 4x4” decals, we applied the same process to those as well. A little heat on the corner of the decal allowed us to peel up the edge and remove the entire piece. Again, we prepped the area for a nice coat of wax after the removal to protect the area.
| 2009 GMC Sierra SLT Duramax Rear Panel
All said and done, a couple hours in the garage and some good old fashioned elbow grease netted us some great results. Better yet, we did it all for no cost at all. With no badges or decals on the back of the truck, it now looks clean and simple. What’s more, we did it ourselves!
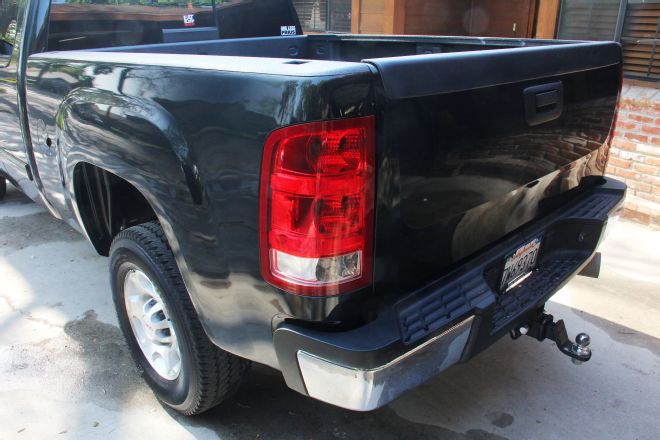
| 2009 GMC Sierra SLT Duramax Rear Panel And Tailgate