The Ultimate Tow and Work Truck project keeps moving along, and this time we’re detailing the installation of front and rear winch-ready bumpers with the Integrated Warn PowerPlant HD and Superwinch Talon 9.5 winch.
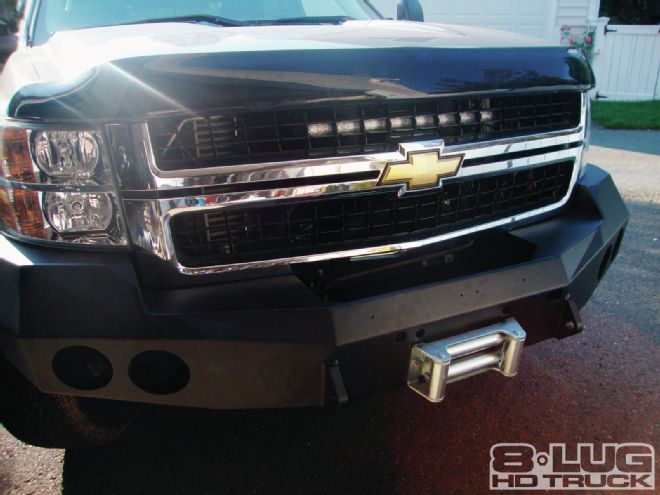
One look at the factory Chevy front bumper, and you’ll see why we needed to change it. From afar, it looks big and strong. Get up close, and what appears to be chrome-plated steel is actually plastic. The bumper is so flimsy, it looks as though if you clipped a Yugo, it would become damaged.

| 01. The bumper was first unwrapped from its protective shrink wrap and padding.
We looked around for a bumper that was built strong. In fact, we wanted one that was overbuilt. It also had to look great. Finally, we wanted a winch. Since we work this truck hard and tow heavy, we wanted a winch that could keep up. We turned to Warn Industries for its PowerPlant HD winch. Warn has been around since 1948 and has been building winches since 1959. What sets the PowerPlant HD apart from all the others is it has a built-in air compressor. The opportunities to use this feature are limitless. A few of the obvious are to be able to air up our truck and trailer tires on the road—as well as the toys we haul in our toy hauler: motorcycles, ATVs, and a golf cart. If we get a flat on the road, we can even use air tools in conjunction with an air tank to accomplish the task just that much quicker. Do you air down before four-wheeling on sand? How do you air back up? The air compressor, coupled with a healthy 12,000-pound winch, seemed like a no brainer.

| 02. The brackets were bolted to the backside with supplied hardware.
| 03. The bumper was bolted to the framerails. It fit the first time. (Was this too easy?)
However, when we started asking around for a beefy winch bumper to be the new residence of the PowerPlant, we couldn’t find one. Even Warn didn’t make one. So we started surfing the net looking for a company advertising them. None. Nada. Zip. Next, emails were sent to a dozen bumper manufacturers asking for the combo we wanted. We got a few replies—all negative. One even went so far as to say it wasn’t possible. Seems the big problem is nearly all winches mounted in bumpers are mounted foot-forward, meaning the four mounting bolts are facing forward. The PowerPlant is mounted foot-down, meaning—you guessed it—they bolt to the floor of the bumper. Now, when we’re told something is impossible, it drives us nuts and doubles our resolve. So when we got a call from Dixie Meekins at Winch Ready who said she could do it, we were all ears. As it turns out, she had mounted the PowerPlant before in its Stealth bumper, but on a Ford. And it was problematic. The clearances are all different on our Chevy, but she was willing to do it if we were. This would be a one-off custom install. We knew going in it would require some fitting, but by the time we were done, we knew why Warn didn’t offer one.

| 04. Here’s a side view with the roller fairlead temporarily mounted.
We asked Dixie to send us matching front and rear Stealth bumpers. She got busy fabbing them up and making the necessary alterations to convert the front to a foot-down winch. We ordered the rear bumper with extra holes to accommodate the factory backup sensors and additional lights. Once they were complete, they were sent off to be powdercoated (since our truck is more go than show, we only gave painting them to match a fleeting thought). When we arrived at the depot to pick them up, we were impressed by the packaging. Over the years, we’ve seen our share of goods damaged in transit, but these found their way to us in pristine condition. After unpacking the front bumper, we were immediately struck by the lines of it; they matched the contours of the truck evenly. It was well thought out and built with perfect welds. The steel was thick and finished in black textured powdercoat.

| 05. Warn shipped the winch in this attractive retail box. Everything arrived in pristine condition.
Front Bumper Mounting
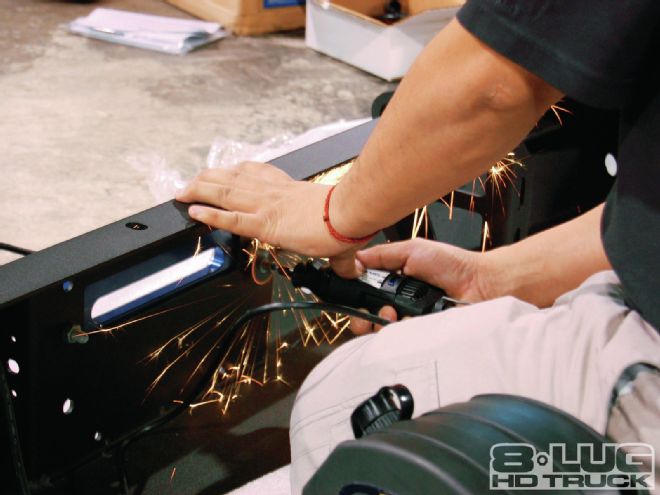
We yanked off the factory bumper, loosely installed the new brackets to the Stealth bumper, and slid it in place…or tried to. Seems the bumper wanted to use the same factory holes as our Boss snowplow mount. Off goes the plow mount. On goes the bumper. We hope it doesn’t snow. Next we mocked up the winch. Mounting holes lined up perfect. Could it be this easy? No. We found when the bolts were snugged, the selector knob that switches the PowerPlant from winch mode to compressor mode was hitting the vertical support. No matter how we adjusted the winch, it would not clear. It seemed it just wouldn’t fit. Perplexed, we called Dixie and explained the dilemma and she was puzzled. We sent her digital photos, and after talking to her fabricator, it was determined that the support we encountered was necessary for a foot-forward winch—not ours—so we were free to cut it without fear of weakening the bumper. After getting the all clear, it was a simple matter of taking a cutting wheel and notching it for clearance. The winch was adjusted both vertically and laterally, all fasteners were tightened, and we moved on to the lights.

| 15. Next, relays were mounted and the wires were braided for neatness.
Front Light Installation
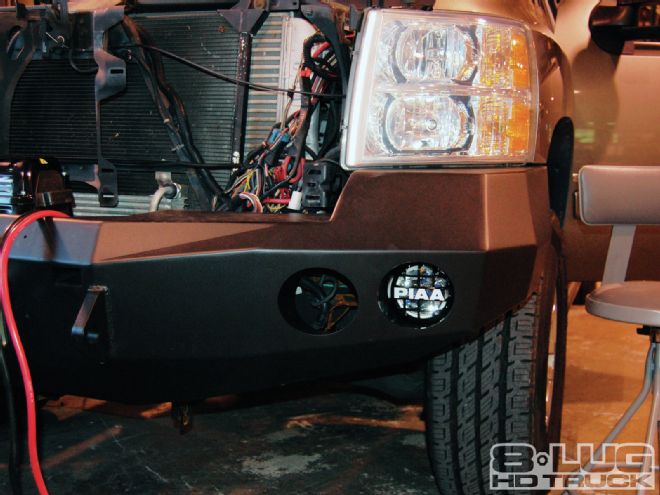
According to the Winch Ready website, the front bumper is designed to accommodate two pairs of PIAA 510 series lights. We contacted PIAA and selected one pair of spotlights and one set of floodlights. They come in identical housings and are complete with wiring harnesses and LED switches. Everything was taken over to Superior Communications, a company that has tons of experience wiring emergency vehicles. All wiring was soldered, heat shrinked, and then taped by Tommy Chang to ensure a trouble-free future. We put the floods on the outside and wired them to the factory switch; this would disable them when our high beams were activated in compliance with Federal Law. We don’t want to be caught by the light police. The spots were relegated to the inside positions and wired with a relay to the PIAA switch, which found a home on the dash. One thing we noted was the optics on the lights are so precise that we had to disassemble them to flip them over, as the mounting tabs required them to be mounted upside-down in the bumper. This ensures the beam remains focused. After wiring and mounting, the grilles were popped on—which really provided the finishing touch. We turned on all four and made the mistake of looking at them. Stupid bright!

| 16. PIAA engineers would probably have a fit if they saw how we cut up their pretty harness, so don’t tell them. It was necessary so we could tap into the truck’s wiring harness to utilize the factory light switch.
| 17. Here, the first lamp is fitted inside the bumper cutout.
Rear Bumper Installation
We looked for a suitable winch to mount in the rear bumper. We knew we would use this for pulling equipment onto a trailer or even unsticking ourselves. Seems to make much more sense to be able to pull yourself out the way you went in. When we told Dixie our plans, she cautioned us to make sure the winch we ordered had the capability of remotely mounting the solenoid box, as there wasn’t room for it behind the bumper. This limited our options, as many of the larger, higher-quality winches had integral solenoids we knew may not fit. We narrowed our search down by looking only at winches that came from the factory with synthetic cable. Our options were further restricted by needing one that was weather sealed and waterproof, since it would be mounted behind the rear wheels and would be constantly bathed in salt from treating snow-covered roads. Superwinch got the nod by offering its new Talon series, which had everything we were looking for—and more. The new design has the holding brake in the gearbox—away from the drum—which keeps damaging heat away from the synthetic cable. It also boasts a 9,500-pound line pull and is fast at 63 feet per minute (FPM). The remote is also weather sealed and has a cool LED light built in for when you’re winching in the dark.

| 18. All four are now installed, tested, and aimed. The outside lights are fog (controlled by the factory switch) and the inside lights are driving (controlled by the dash-mounted PIAA switch)
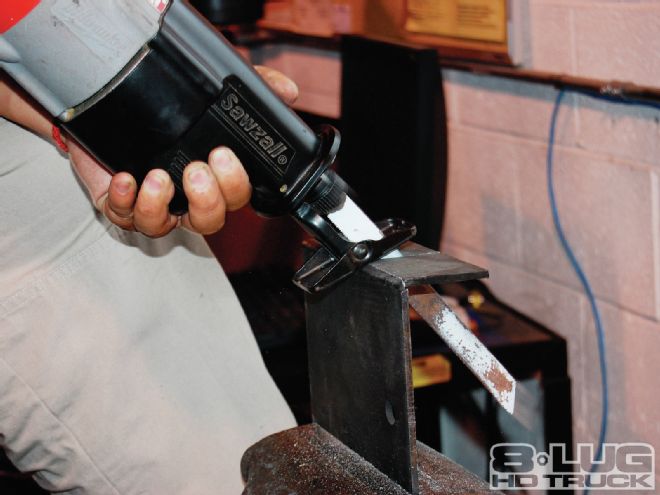
| 28. The hawse fairlead bolts were too long and needed to be cut...
As with the front bumper, we hit some snags. First, the backup sensors didn’t fit, since the replacement bumper was much thicker. The bumper was ground a bit and the sensors were sanded a bit, and they finally snapped in. Next, the factory trailer plug was a no go. We considered forcing it like the proverbial square peg in a round hole like we usually do, but it seemed easier to just replace it and hardwire it in. Again, all wiring was soldered, heat-shrinked, and taped. When we went to relocate the factory license plate lights, they wouldn’t fit. Not even close. We called Dixie back and she sent us a set that would fit the pre-drilled holes. We opted for a hawse fairlead in the rear as opposed to the roller fairlead that we use in the front for a couple of reasons. First, it’s easier on the synthetic cable. Second, Superwinch sent us one that was a beautiful billet aluminum piece and was a work of art in itself. We also had to find a way to mount the rear license plate; a roller fairlead would be too big. The hawse fairlead was bolted on, but the supplied bolts were too long, so those were cut off and the Talon was bolted to the back of the bumper. As it turned out, there was plenty of room to accommodate the solenoid box, so it wasn’t necessary to remove it—a big bonus. Now the bumper with the winch was hoisted (heavy!) to the rear framerails. But when we went to bolt it in, all the holes were gone. Off the bumper came, and the brackets as well, for some “notching.” After that, it went on easy and was securely bolted up. Wiring came next and required Tommy to use an additional 15 feet of 2-gauge red cable that went straight to the positive terminal of the second battery after making a stop at an inline circuit breaker. Grounding was handled at the frame. The coil-corded remote was plugged in and the winch ran smoothly. We then had to spool on 80-feet of 3⁄8-inch 12-strand AmSteel-Blue synthetic cable. With an average strength of 19,600 pounds, it’s rated at more than twice what the winch is. It should stand up to whatever we hook to it. We wound the rope carefully onto the spool, making sure it fed on and off the bottom as instructed. At the end, we attached the included absurdly large hook. The final act on the rear bumper was to attach the license plate. Since the cable exits the bumper where the tag belongs, we looked for a place to relocate it. Nothing was cosmetically pleasing, so we wound up taking the rear spring-loaded license bracket from a ’94 Chevy Caprice and mounted it upside-down, right above the slot where the cable feeds through the bumper. On the Caprice, the tag covered the fuel inlet. On our truck, it concealed the winch. This allows us to flip the plate up when we need access to the winch and back down when done. A very slick setup.

| 29. ... and the reverse sensors wouldn’t fit without some massaging of the bumper, as it was too thick. That’s a problem we don’t mind having.
| 30. The bumper-mounting bracket required some notching to fit the framerail.
Loose Ends
If you’ve been paying attention, you’ll recall that we had to remove the Boss snowplow mount from the undercarriage to make room for the bumper mounts. It was painfully apparent that any viable solution was over our collective heads, so we enlisted the help of Will Fries, owner of Xtreme Fabrications in Westminster, Maryland. Will crawled underneath, summed up the situation, and (using a little ingenuity, and a lot of equipment) fabbed us some very solid mounts. He cut slots in heavy steel that matched the factory frame holes exactly and made precise welds that looked perfect. Everything was finished up with Grade 8 bolts that gave it a heavy-duty look.
We knew that once we went down the custom road, we were in for a bumpy ride, but we really had no idea how rough. We wanted it all, and in the end we got it.


