Many of us have wished our eight-lug trucks could operate as a dump truck. Any time you’ve tried to unload dirt, rocks, and other heavy loads, the issue probably came to your mind, too. Jim Springer of Hermitage, Pennsylvania, decided to stop dreaming and actually build a dump bed for his Dodge 2500. Here’s the story in his words:
I started out by buying plans from http://www.dumpbeds.com for about $22. I then got a material list put together and went shopping at the local metal yard. From there, I took the bed off the truck and stared at it for a long while (ha!).
The truck has a 3-inch body lift on it, which helped out a lot. You don’t need a body lift—you just want to be able to build the framework that I used. You will just be able to mount the cylinder directly to the front crossmember of the bed. I wanted to build a frame to go under the bed so the lift would not put stress on the bed itself. This was not suggested in the plans, so a lot of measuring was involved.

| 01. The pump assembly was the easiest part—just buy it!
I used 2½-inch-wide, ¼-inch-wall-thickness square tubing and made the framework from there. I also had to incorporate the hinges in this framework. I figured the hinges had to be lower than the framework so the front corners of the bed didn’t hit the cab of the truck. By putting the hinges lower than the framework, the bed actually moves back as it goes up.
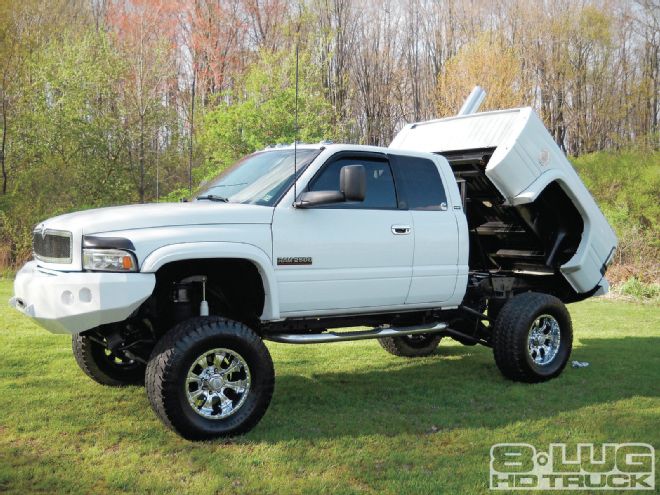
| build Your Own Dump Truck Dump Bed Installation 2001 Dodge Ram 2500
“You don’t need a body lift—you just want to be able to build the framework that I used. You will just be able to mount the cylinder directly to the front crossmember of the bed. I wanted to build a frame to go under the bed so the lift would not put stress on the bed itself.”
The next issue was the rear bumper. I wanted to make the truck look like it didn’t have a dump bed on it when it was down. Most people don’t put the rear bumper back on. I had to move the hitch down and back about 2 inches so the bumper didn’t hit. I then had to box in the rear part of the frame so the hinges had some place to be mounted in. I used a piece of 1-foot, ¾ inch tube to go through the framerails and then cut a piece of solid barstock to fit inside that. I also put grease fittings in the tube to keep everything moving well.
Once the framework was finished and I had the hinges on, I had to make all new mounts for the bumper. Then I moved on to the scissor lift. This is where the plans came into effect. The plans had a nice list of materials to get started, so I wasn’t going in blind. The plans even included a nut and bolt list. I purchased a 3x10-inch cylinder and a 12-volt electric-over-hydraulic pump off the Internet. I then turned to the plans to see what they had going on. I found that the overall width of the scissor was going to be too wide to fit in the center between the framerails due to the fuel tank. Back to the drawing board. Actually, it wasn’t too bad, I just had to make it more narrow to fit. From there, it was just a matter of plasma cutting and welding and a lot of measuring. I used the front-most factory crossmember on the truck for the bottom mounting point of the scissor; I boxed it in for added strength, of course. Once this was done, I then put the scissor lift together and mounted it to the crossmember. This determined where the crossmember had to go for the upper mount, which was on the framework mentioned earlier. Once the mock-up was done, I took it all back off, finished welding everything, and gave it all a good coat of POR-15 to try and prevent rust.

| 08. This photo shows the subframe after we painted it with POR-15. Living in the Salt Belt makes you try hard to keep things from rusting.
Now the only thing left to do was find a place to put the 12-volt pump assembly. I ended up removing the spare tire. Since I run 38-inch tires, the factory spare won’t help me out at all. It was a tight fit along with my air tank, but I got everything to fit and even had room for the train horn.
I then put everything back together and wired up the pump, filled it with ATF, and tried a test run without the bed on. Everything went as planned, so the only thing left was to paint the underside of the bed with the POR-15 and mount it back on the framework.
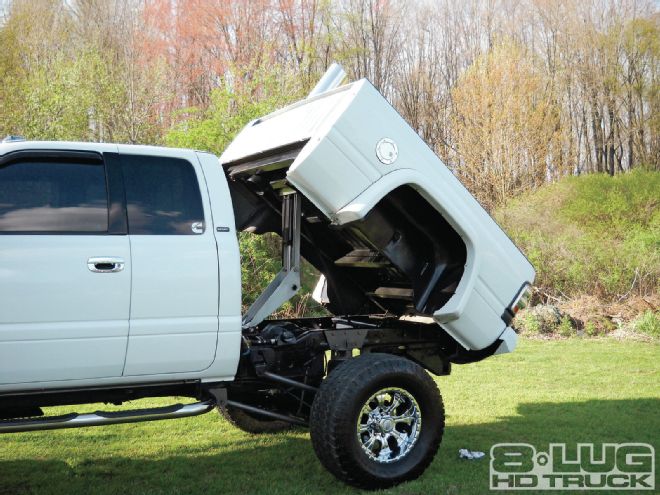
| build Your Own Dump Truck Dump Bed Installation dump Truck Bed In Use
“Once the framework was finished and I had the hinges on, I had to make all new mounts for the bumper. Then I moved on to the scissor lift. This is where the plans came into effect.”
To do this, I drilled up through the framework and mounted the bed using all-new Grade 8 bolts. I actually used one of the body lift blocks that I didn’t need and cut a ½-inch spacer to use under the front-most mount on the bed so when the bed is down it’s not a metal-to-metal contact situation. I also had to make a mount to hold the fuel filler neck, because you can’t have it attached to the bed anymore. Now when you get fuel, you have to put the bed up. Not too bad to do, since it gets a lot of attention. After all that was done, several buddies told me I couldn’t run a stack! So I went in search of how to do that. I found what is called a bell and a ball setup. It’s actually used on a tri-axle dump truck for a heated bed insert. I then got an 8-inch stack from Pypes. I got all the elbows and the bell and ball setup from Commercial Truck and Trailer in Girard, Ohio.
I had a couple of buddies make me a billet mount to hold the stack on the bed (Thanks, T and Davey).
Well, I think that’s about it. The project took about 3 weeks to complete just working on it after work here and there for a few hours at night.


