Chances are good that your RV came equipped with pleated day-night shades. If your RV is a motorhome, you probably have some sort of sun visor as well. While RVs have changed and improved over the years, for the most part, pleated day-night shades and sun visors are still in the Stone Age.
Pull-down sun visors are hard to manipulate and don’t offer very good coverage. Powered sun visors do not provide full protection from the heat and glare of the sun. Pleated shades are notorious for being difficult to operate and for breaking strings. Fortunately, you don’t have to put up with them forever.
MCD Innovations is the leader in this field and supplies many of the name brand manufacturers with shades for their new units. MCD shades are also available for retrofit installations, so be prepared to toss those old day-night shades out and replace them with more energy efficient, user-friendly shades. This can be done at MCD’s facility in Texas and at a growing number of dealers nationwide, or as a do-it-yourself project.

| made In The Shade Rv Tech rv Rear Angle Side View
The MCD Story
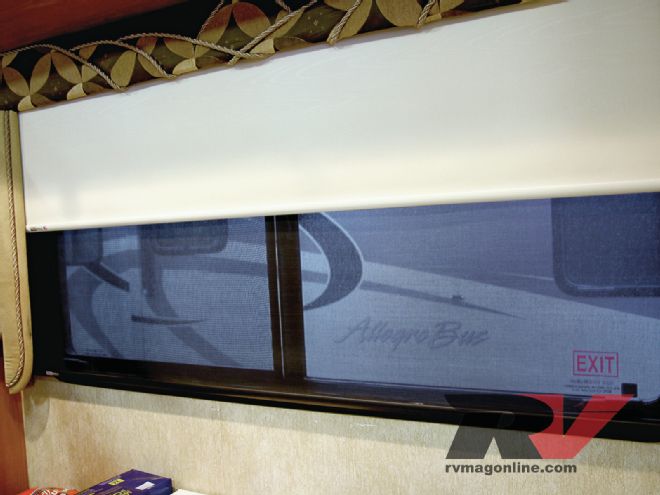
MCD’s most popular product is the American Duo dual-roller shade system, which incorporates a pair of roller shades that can be manually operated or motorized. One roller is configured with light-blocking privacy material while the other roller is fitted with MCD’s exclusive ClearView Solar screen. They are easy to see out of, control heat transfer, reduce UV-ray penetration. It’s not uncommon to find a 10- to 40-degree difference between the temperatures on the sunny side of the screen and the inside of the screen.
Also, the ClearView Solar screen greatly improves AC and furnace efficiency by helping to keep the inside of the RV cool on hot days and warm on cold days.

| 01. Pleated day night blinds can be a constant source of aggravation.
Here’s What We Learned
We selected a coach that came with pleated shades, a pair of motorized sun visors in the windshield, and manual sunscreen shades in the cockpit side windows.
The dual windshield visors were powered units, but had big gaps on each side that allowed the early morning or late afternoon sun to blind the driver. The side shades, although referred to as “sun screens,” were basic bug-screen quality. They also required a bit of gymnastics to extend or retract when driving—obviously, not safe. The pleated shades in the living area offered no better conditions.
We replaced the pleated shades with MCD American Duo GlideRise manually-operated shades and the windshield and cockpit side shades with American Duo powered shades.

| 02. The original powered sun visors used a scissors mechanism and did not afford complete coverage of the windshield and allowed sunlight to blind the driver.
First Step: Measuring
The first step in any shade installation is to measure the windshield area and any valances in the living area. Motorhome windshield configurations vary from model to model so this was the trickiest part. In some cases the shade can simply roll down and lay against the windshield A-pillar trim if the trim is wide enough. In many, if not all cases, the A-pillar trims may need to be modified. In our particular case we decided to remove the A-pillar trim pieces, install the shade full width against the sidewalls, and then notch the trim to fit around it. This allowed the shade to lay flat against the A-pillar trim when lowered and provide a no-gap privacy barrier.
We first removed the cockpit area drapes and tracks and disposed of them. The original sun visors were removed but the wires were left so that we could use the existing switches and wiring to control our new American Duo shades. We then measured the width and drop that would be required for our new windshield shades. Measuring the width is best done with an extendable pole of some sort, or two pieces of wood clamped together, rather than a standard measuring tape. That way the measuring device can be slid down along the windshield A-pillar trim to verify that there is adequate clearance at all points. Once the length and drop have been determined those numbers were supplied to MCD, who custom makes the shades.

| 03. Windshield measurements are best done with a telescopic pole, rather than a measuring tape. The set width can then be tested at various positions.
The cockpit side windows were also measured to determine how much width was required. Two different shades were used on the right side so that the passenger’s side window and entry door were separate units. Next, the valances in the interior living area were measured. A small adjustable pole was used to determine the exact width required for smooth operation. Finally, all the measurements were given to MCD.

| 04. In this installation, the windshield trim was notched out to enable full width coverage of the shade material and allow the fabric to guide along the trim when lowered.
Installing Windshield Shades
We started with windshield shade. We removed the old sun visors. Now, all we had to do was mount the shade and wire it up.
MCD roller shades come preassembled as a complete unit, which includes a mounting track and are easily installed. Mounting clips are installed on the ceiling overhead and then the shade assembly snaps into place.
Windshield shades are large and have some weight to them, so seven clips are typically used to hold them securely in place. Two clips should be placed side by side at each end of the shade; the other three clips should be evenly spaced. The shade assembly was then lifted up and snapped into place.

| 05. The original cockpit side sunscreens did not afford full width coverage and were difficult to operate when driving. The drapery rails were removed and no longer needed.
The wires from the shade motors were then connected to the existing wires from the old sun visors. The original driver’s sun visor was operated from a rocker switch on the left side console. The passenger’s visor could be operated from a second switch on the driver’s console or from a switch to the right of the passenger seat.
We chose to connect the nighttime privacy shade to the original driver shade wiring and the daytime sun shade to the original passenger shade wiring so that it could be controlled from either seat location. We also ran a wire from the ignition key switch and connected it to the tan wires on the motors to take advantage of MCD’s safety interlock design.
The windshield A-pillar trim was then notched to allow clearance and a piece of trim installed to dress up the edge. The windshield A-pillar trim was then reinstalled and we were ready to program and test the shades.

| 06. An extendable pole was used to measure the living area valances to determine the proper shade width.
MCD powered shades have adjustable limit settings for the top and bottom parked positions. In addition, MCD windshield shades have a unique second set of restrictions that are active when the ignition key is on—hence the name “Dual-Range Safety Motors.” The ignition-on limits are typically set to a position that will not allow the shades to drop down so far that they could block the driver’s vision. Should a stuck or malfunctioning switch or other problem occur when driving, the shades will only extend to their safe setting, allowing the driver to safely navigate the RV. Once the ignition key is switched off the shades are free to fully extend to the dash to completely seal off the windshield area.

| 07. Dual clips are installed on each end of the large windshield shade to help support its weight.
Installing Cockpit Side Shades
For the cockpit side shades we chose American Duo remote powered shades. Remote powered shades utilize wireless remote controllers to operate them. Each shade must be provided with constant 12-volt DC hot power, which can be obtained from one of several sources.
The remote controllers are battery powered and do not require any electrical wiring so they can be located at any convenient location. A single shade can even be linked to multiple controllers if desired. Remote controlled powered cockpit side shades are a very safe and convenient feature and eliminate any unsafe reaching or adjusting while driving.
We chose to install two separate shades on the passenger’s side, one for the window and another for the entry door, so that the window and entry door shades could be lowered independently. The shade clips were then installed beneath the overhead cabinets and the shades were snapped into place. Constant hot 12-volt wiring was available in the cabinets above the shade locations, so we tapped into those locations and extended some wires to the shade motors. One two-channel remote controller was installed on the sidewall to the driver’s left to control both day and nightshades. A pair of two channel remotes was installed on the passenger’s sidewall to control both the passenger window day and night shades as well as the door shades.

| 08. The windshield side pillar trim was notched to allow the shade to extend into that area.
Final Step
The last step was to hide these shades from view. Unlike the living area shades, which were hidden in valances, these were exposed. Some trim boards were covered with vinyl to create custom valances to hide the shades as well as to create a virtually lightproof seal along the sides to maintain privacy and prevent streetlight penetration at night. The shades were then tested and the upper and lower limits were programmed into memory.
Installing Living Area Shades
Next we installed our shades in the living area. We could have installed remote powered shades throughout the RV and utilized a central 14-channel controller to operate them, but to keep within our budget we chose to use the manually-operated GlideRise shades.

| 09. The cockpit side shades were wired to 12-volt power sources in the cabinets above. The passenger’s window and entry door each had their own shade to allow independent operation.
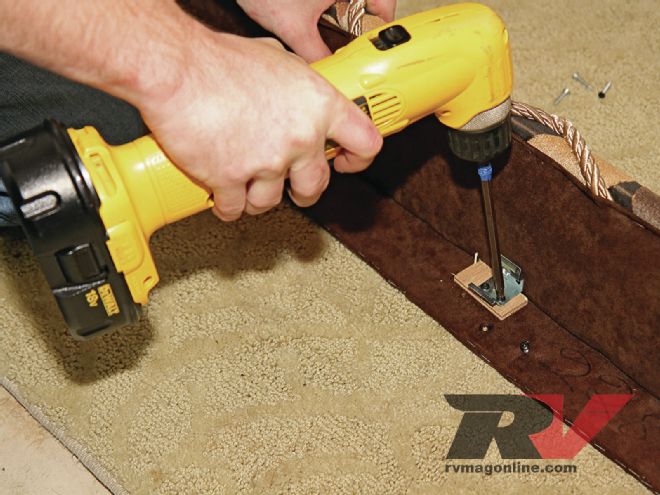
The GlideRise shades were more than adequate for the task and did not require any electrical wiring. In most cases we removed the screws from the bottom of the valance legs to tip them out a bit and make it easier to remove the old shades. In some instances we found it easier to remove the entire valance from the wall, which was attached with a few screws. We then removed the old pleated shades and disposed of them. The mounting clips were also replaced with the new MCD clips, which were designed for the American Duo shade mounting tracks.
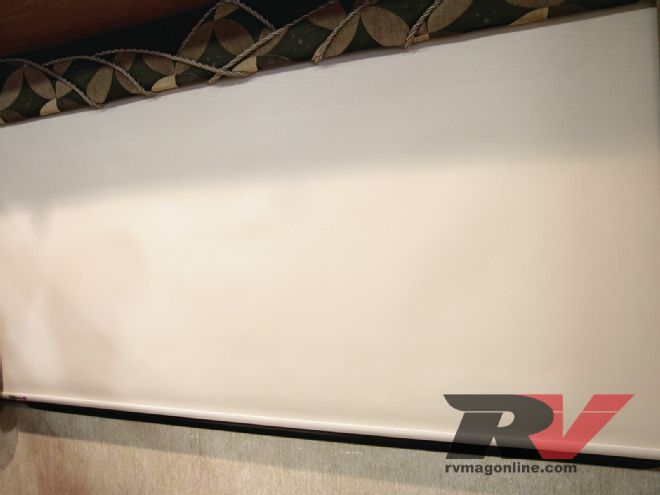
The valances were then refastened to the wall and the shade assemblies snapped into place. To extend the manually-operated GlideRise shades, you simply pull down on the shade’s hem rail and latch them at the position you choose. To retract the shade just give it a tug and let go. GlideRise shades have a controlled retract rate so they won’t snap up like the typical residential shade. Both the retract rate and the upper limit can easily be adjusted simply by turning thumbwheels on the end of the shade roller.

| 10. Battery powered remote switches were mounted on the cockpit walls to operate the cockpit side shades.
The Results
The improvements of this upgrade were nothing less than amazing. String replacements from broken day-night shades are now a thing of the past. The new privacy shades provide an almost totally dark nighttime environment, something that had never been achieved before.
Their ease of operation is unmatched when compared to manhandling the original day-night day-night shades. The powered windshield shades now totally seal off the windshield area. No more issues with early morning or evening sunlight passing around the edges of the shades to blind the driver. The side cockpit shades are now easy to operate when driving and totally seal off the area for nighttime privacy. Fighting with drapes is no longer an issue.
All MCD shades are made in the USA. Perhaps their biggest claim to fame is their unique ClearView Solar screen. The ClearView screen makes it virtually impossible to see into the RV during the day, but is nearly invisible to those looking out, even at an angle. Yet it has an insulation value that is astounding.

| 11. Vinyl covered boards were used to create custom valances and privacy shields for the new cockpit side shades.
Tests with a dual-probe thermometer showed vastly reduced temperatures when monitored inside the screen as compared to the sunny side of the screen. MCD’s Solar screen helps keep the coach much cooler on hot, sunny days and much warmer on cold days.
We think of it as transparent insulation, because it holds hot or cold air back as well as radiant sunlight energy. On cold mornings when the sunscreen is first raised you’ll receive a blast of cold air from the windshield. That air has been trapped there overnight and the MCD shades have minimized the heat loss that is so common to large windows or windshields.
MCD shades are a great investment in energy savings and comfort and a worthwhile upgrade and a DIY project for many RV owners.

| 12. The screws holding the valances to the overhead cabinetry were removed to ease access when removing the old shades and installing the new clips.


