One of the first things that most truck and SUV owners customize on their rigs is the wheel-and-tire package. This is the proverbial low-hanging fruit, it requires little to no modification (depending on what size tire is being added), it's relatively low cost, and it makes the biggest difference in appearance and performance. It's no secret that one of the hottest trends right now are wheels with a fake beadlock ring, commonly referred to as "streetlocks." These wheels give an aggressive look while maintaining a lower cost than traditional beadlock wheels, and they carry full Department of Transportation (DOT) approval. However, what most people don't know is how the traditional beadlock wheel works or if they should be running them instead.
The premise behind the beadlock wheel is simple: they provide a mechanical means for attaching the bead of the tire onto the wheel. Dodge military trucks were the first to utilize the technology, and drag racers, off-roaders, and even motorcycle and ATV riders have since adapted it. A few OEM manufacturers have even gotten into the game. In '13 and '14, Ford offered the Raptor with optional factory-installed beadlock wheels; however, the truck was delivered with the tires mounted traditionally and it was then up to owners to purchase a special kit from Ford Racing to make the wheels function as beadlocks. Currently, Jeep Wrangler owners can also purchase beadlock wheels for their '07-'15 JKs through Mopar Performance.
Beadlock wheels are intended for the One Percent: the people who regularly head off the highway and routinely run lower-than-factory air pressure. With the extreme popularity of vehicles such as the Ford Raptor, Toyota TRD Pro family, Ram Power Wagon, and Jeep Wrangler, it's never been a better time for people looking to get out and explore. While these specialty wheels might not be for everyone, there's no better time than now to take a close look at what they are and how they work. After all, new wheels may be all that's necessary to take your adventure to the next level.

| Genuine Beadlock Wheel
01 Imitation beadlock wheels have become quite the rage in recent years. Truck and SUV owners have flocked to them for their aggressive off-road look, without all of the hassle and expense of a true beadlock. However, there are a lot of people who can benefit from the advantages a true beadlock brings to the plate.
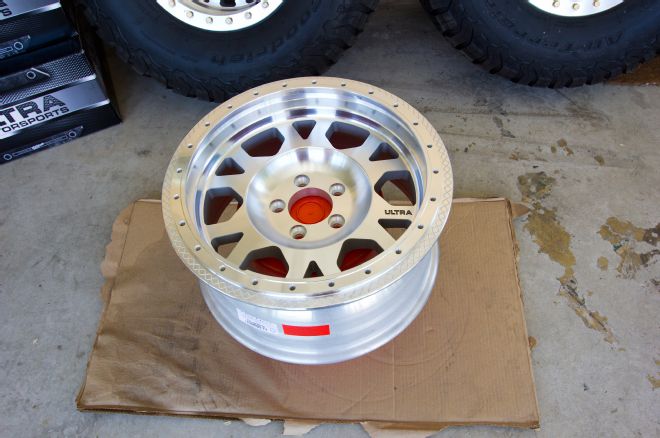
| Ultra Motorsport X103 Xtreme Beadlock Wheel
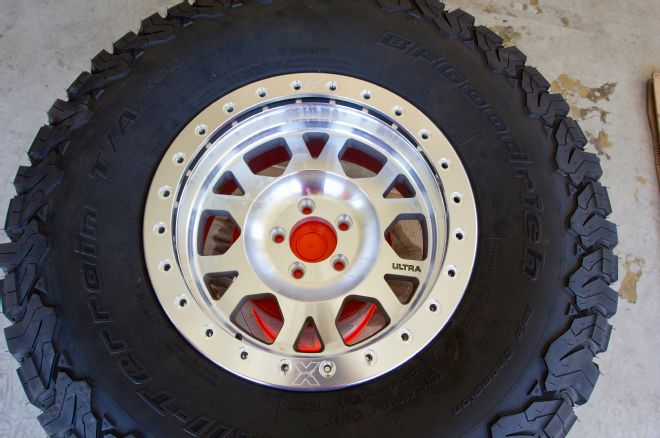
02 The Ultra Motorsport X103 Xtreme beadlock wheel is constructed of low-pressure cast aluminum. They are available for 5 or 6-lug applications and in 15x8, 16x8, and 17x9-inch sizes. The 17x9-inch wheel seen here tipped the scale at 35.5 pounds with lock ring and hardware.
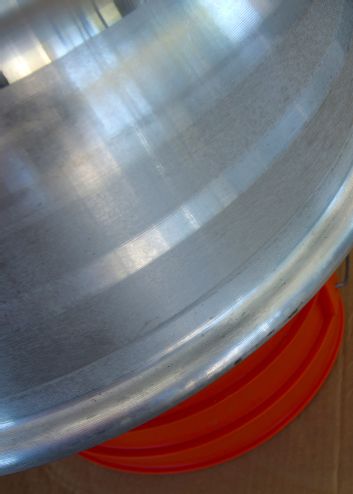
| Ultra Motorsport X103 Xtreme Beadlock Wheel Rear Tire Profile
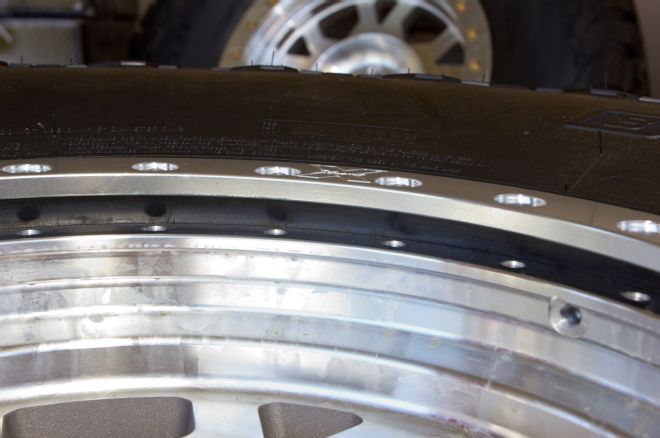
03 Much of the mystery of the legality of beadlock wheels can be debunked quite easily. Seen here is the profile of the rear tire bead-mating surface. The U.S. Department of Transportation (DOT) has set a standard profile that this and the outer bead must match to receive approval. Since a standard beadlock wheel does not have this same profile on the outer bead-mating surface they cannot be granted DOT approval. Mystery solved.
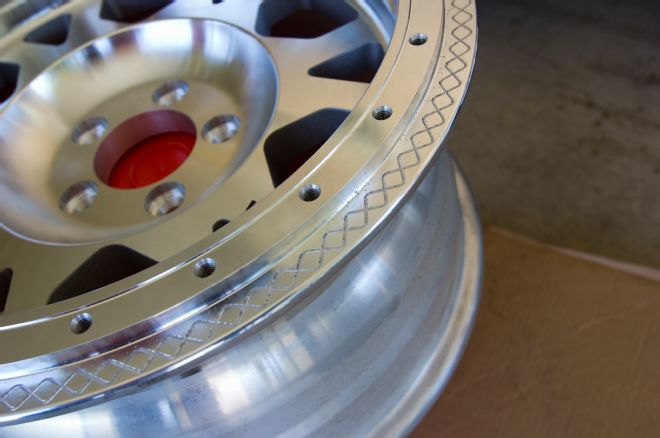
| Ultra Motorsport X103 Xtreme Beadlock Wheel Outer Tire Bead Machined Shelf
04 Instead of mounting from the inside like a traditional wheel, the outer tire bead resides on a machined shelf on the front edge of the beadlock wheel.
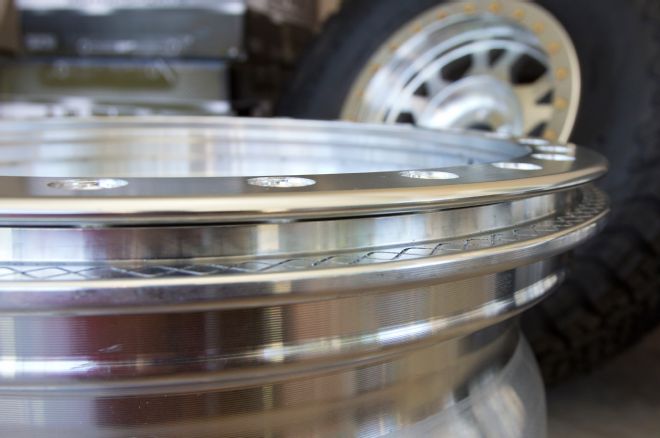
| Ultra Motorsport X103 Xtreme Beadlock Wheel Space For Aluminum Ring Bolts
05 An aluminum ring bolts to the outside of the wheel, pinching the tire's bead surface between the lock ring and the machined shelf. This is what creates the pressure the locks the tire's bead onto the wheel.
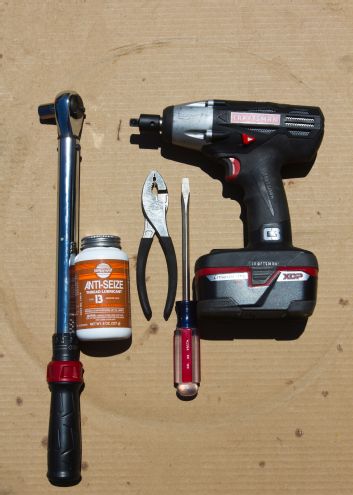
| Anti Seize Lubricant Flat Head Screwdriver Pliers Torque Wrench And Impact Drill
06 The tools required to mount tires on a beadlock wheel at home are really quite basic. What you'll need is a bottle of anti-seize thread lubricant, flat-head screwdriver or tire iron, pliers, 3/8-drive torque wrench, and an electric impact.
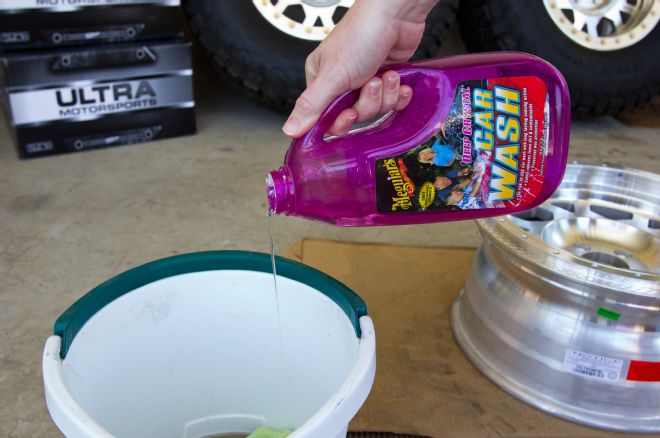
| Mixing Soapy Water
07 Soapy water is going to be your best friend for mounting tires at home. We used standard car washing soap mixed with water to about a 50/50 ratio. Dish soap would also work exceptionally well.
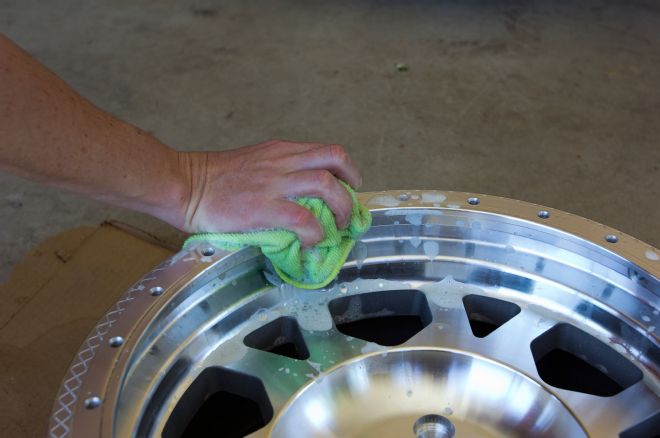
| Ultra Motorsports X103 Xtreme Beadlock Wheel Washed With Soapy Water
08 With the wheel placed flat on the ground, backed by a piece of cardboard to protect its finish, it's a good idea to lather the bead with a coat of soapy water in preparation for dropping the tire on.
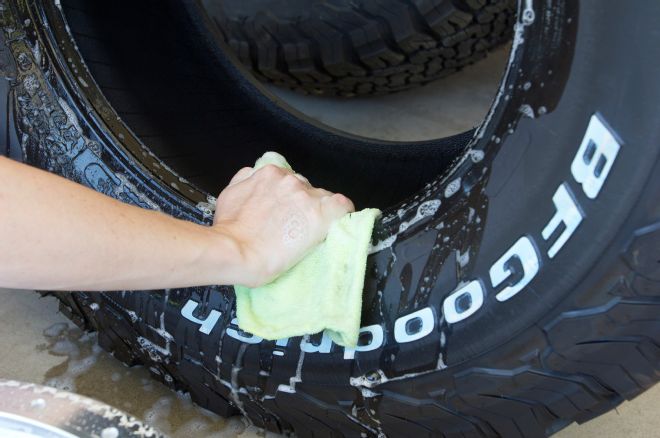
| Bfgoodrich Ko2 All Terrains Lubes With Soapy Water
09 Before placing the tire on the wheel it is important to identify which side you want facing out, as some tire are directional while some have white or colored lettering one side. We chose to mount our BFGoodrich KO2 all-terrains with the white letters facing in, so the next step was to lube this bead with a profuse amount of soap.

| Dropping And Wiggling Bfgoodrich Ko2 All Terrains Onto Ultra Motorsport X103 Xtreme Beadlock Wheel
10 After lubing the inside bead of the tire and outer lip of the wheel, the tire can be dropped on and wiggled into place. Depending on the sidewall compound of your tires this step can either be quite easy, or an extraordinary pain. Leaving the tire to warm in the sun will loosen things up enough to pop the tire over the outer lip of the wheel.

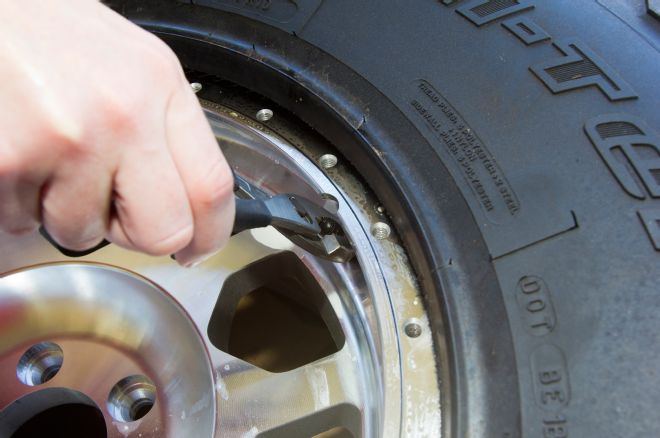
| Valve Stem
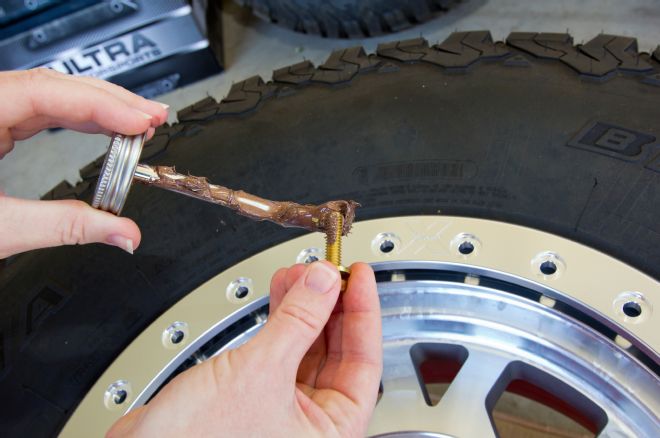
11 Before moving any further the valve stem needs to be installed. A quick dunk in the soapy water will make fitting the stem a snap.
| Slipping Valve Stem Into X103 Xtreme Beadlock Wheel
12 While lifting the tire off the bead, gently slip the valve stem into the wheel from the inside out. Once through, grab the valve stem cap with a pair of pliers and wiggle into place. There are special tools for performing this task, but we've found them to be entirely unnecessary. The valve stem may also be installed before dropping the tire on the wheel. However, for us it's one less thing to worry about while forcing the tire into place.

| Using Gravity To Slip X103 Xtreme Beadlock Wheel Into Place
13 After the tire is placed loosely on the wheel the next step is to prop the combo up on a 5-gallon bucket. This will allow gravity to help pull the tire into the proper position along with making the next steps of installation a bit easier on the back.
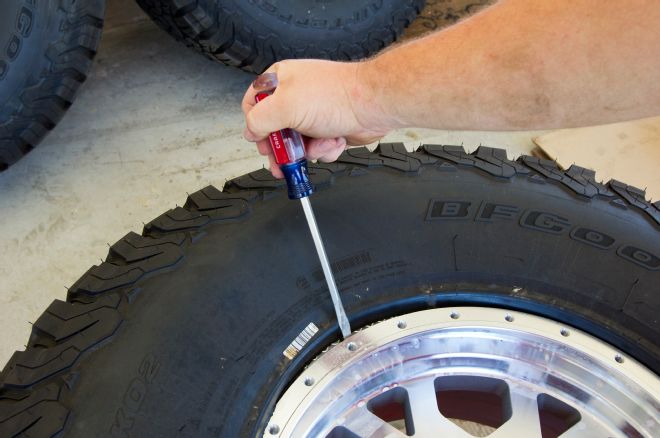
| Wedging X103 Xtreme Beadlock Wheel Into Place With Screwdriver
14 Next, the outer bead of the tire needs to be moved into the proper position on the wheel. Using a flathead screwdriver or tire iron, gently wedge your tool between the tire bead and wheel lip then move the back and into position. You want the tire bead to but firmly up against the machined edge of the wheel, not over it. Take your time, and be careful not to mar the wheel's finish.
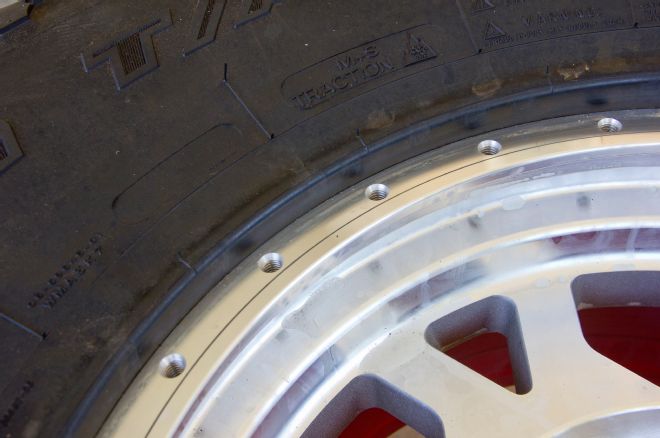
| X103 Xtreme Beadlock Wheel Fit Correctly To Bfgoodrich Ko2 All Terrains Tire
15 This is what the tire should look like around the entire circumference of the wheel face. If you have this you're good to move onto the next step. If not, grab your tools and get it perfect.
| X103 Xtreme Beadlock Wheel Logos Oriented Correctly
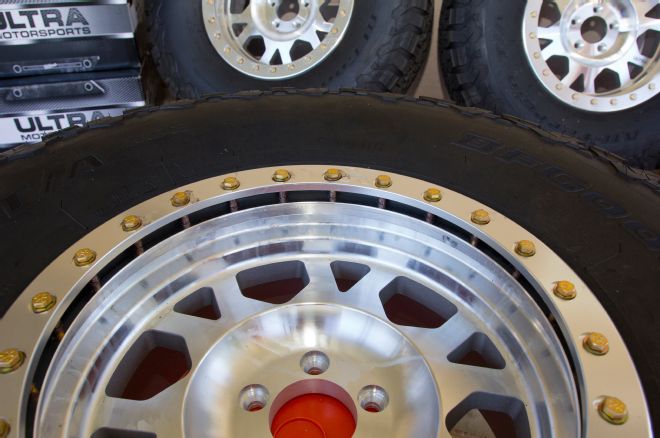
16 Our Ultra Motorsport beadlock wheels use an aluminum locking ring, which is engraved with the company's logo. This is the time to ensure the logos are all oriented correctly, in the same position on each wheel. Being off by just one bolt would be enough to drive us mad.
| X103 Xtreme Beadlock Wheel Lock Ring
17 This is where the magic happens. Without the bolts installed you can get a good sense of just how much of the tire's bead is going to be compressed by the lock ring. When tightened, the lock ring will fully compress the tire bead and will touch metal-to-metal with the wheel face.
| X103 Xtreme Beadlock Wheel Securing Lock Ring With Grade 8 Bolts
18 Each of the lock rings are secured with 24 Grade 8 bolts. The bolts require a generous coating of anti-seize lubricant to protect against fusing with the aluminum wheel. Thread locking compound should never be used.

| X103 Xtreme Beadlock Wheel Hand Threading Grade 8 Bolts
19 Once coated, the bolts should all be threaded into the wheel by hand. This will ensure that cross threading does not occur. Don't forget the washers!
| X103 Xtreme Beadlock Wheel All 24 Hand Thread Grade 8 Bolts
20 Threading all 24 of the lock ring bolts by hand is a daunting task, but is essential to the process. This is not a step to skip or cheat on!
| X103 Xtreme Beadlock Wheel Tightening Grade 8 Bolts
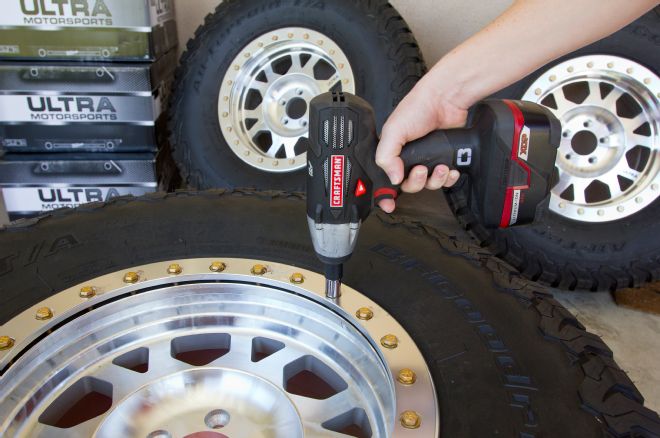
21 Every beadlock manufacturer has a slightly different process for tightening the bolts. Most ask for them to be tightened in a crisscross pattern. Ultra specifies a slightly different process for getting their lock rings snug. Working in a circle, we used an electric impact to tighten the bolts until the lock ring was touching the wheel surface. This was completed in three steps. Care must be taken to not over tighten the bolts.
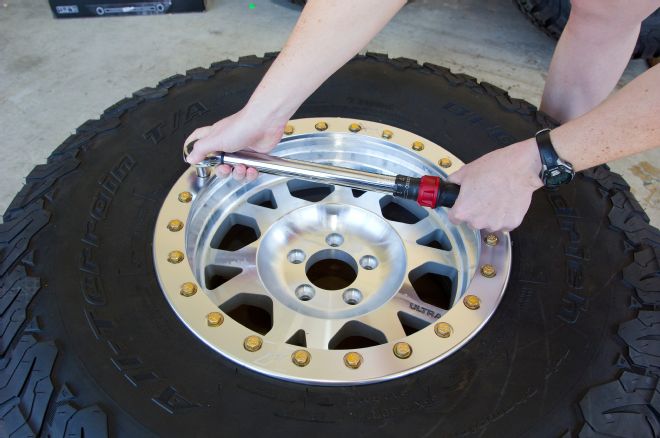
| X103 Xtreme Beadlock Wheel Tightening Grade 8 Bolts
22 After the bolts are snugged the wheel can be removed from the bucket and placed back on the ground (this will provide the necessary resistance) before torqueing. Following the same circular pattern, the bolts are torqued first to 14 ft-lbs and finally to 20 ft-lbs. We then made one final pass, again at 20 ft-lbs, to ensure every bolt was properly tight.
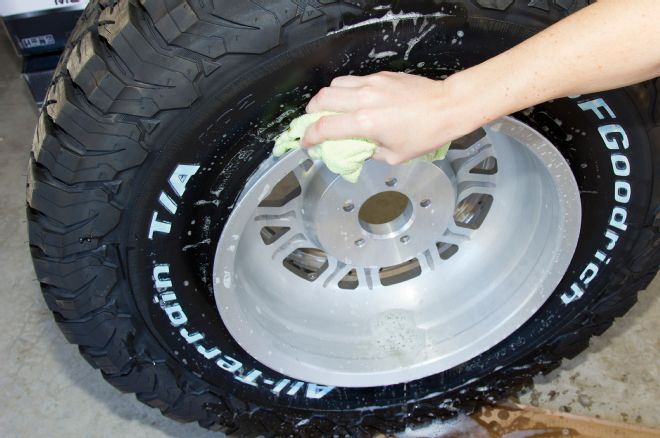
| X103 Xtreme Beadlock Wheel Wiping Down With Soapy Water
23 With the front bead lock ring tight, the rear bead can be seated in the traditional way. Again, lots of lube should be applied so that the tire may move freely into position.
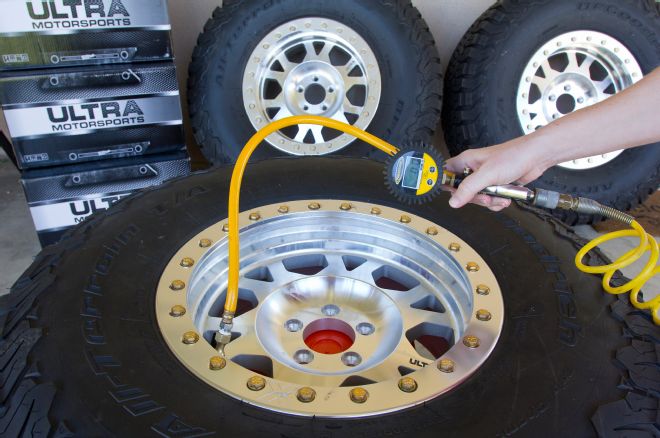
| Inflating Bfgoodrich Ko2 All Terrain Tire
24 We propped the wheel back up on the bucket, again to get a helping hand from gravity and used our Power Tank tire inflator to add air. The Power Tank tire inflator allowed us to remain a safe distance from the tire in case something goes wrong. Rear bead seating should occur between 7 and 15 psi and will produce an audible pop. Never exceed 40 psi to seat a bead; instead stop, add more lube, and try again.