The harmonic balancer in the Chevrolet Venture is a device mounted on the crankshaft pulley that dampens torsional forces from the engine. These forces can damage the engine at high speeds. The balancer consists of weights and rubber clutches that counter-balance these forces, and forms a single assembly with the crankshaft pulley.
Loosen and remove the negative battery cable from the battery with a box or socket wrench. Apply the parking brake and shift the transmission into gear (Park if automatic and First if manual).
Loosen the lug nuts on the right front wheel with a lug wrench. Lift the vehicle with a jack and lower it onto jack stands.
Remove the wheel nuts on the right front wheel with your fingers. Remove the splashguard around the right front wheel by removing the clips that hold it in place.
Rotate the drive belt tensioner counter-clockwise with a socket wrench. Remove the belt.
Loosen and remove the central bolt on the crankshaft pulley with a wrench. A breaker bar might be necessary to loosen this bolt. Use a six-point socket to ensure the tightest possible fit on the bolt. You may also use an assistant to pass a large screwdriver or marlin through the pulley to hold the it in place while you loosen the bolt.
Place a jack under the frame on the right front side of the engine compartment. Loosen the subframe bolts on the right side, and lower the subframe with the floor jack but not more than five inches. This will provide enough clearance to pull the pulley/balancer from the end of the crankshaft.
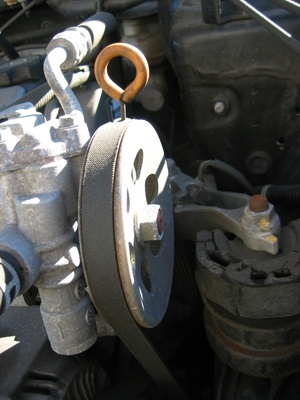
Thread the pulley removal tool onto the end of the crankshaft. Remove the pulley/balancer. Take care not to shift the weights on the pulley/balancer.
Place the new pulley/balancer on the end of the crankshaft, and push it into place. Align the slot with the key in the end of the crankshaft.
Apply clean engine oil liberally to the crankshaft bolt, and thread it onto the crankshaft. The oil will prevent the threads from galling, or seizing together. Tighten the bolt to 76 foot-pounds with a torque wrench.
Jack up the subframe and install new subframe bolts, tightening with a wrench.
Install the drive belt. Rotate the tensioner counter-clockwise until there is room to slip the drive belt over the pulleys. The tensioner will automatically adjust to the correct belt tension.
Clip the splashguard in the right wheel well and put the wheel onto the lug bolts. Hand-tighten the lug nuts. Lower the vehicle off of the jack stands with the jack, and finish tightening the lug nuts with a lug wrench when the vehicle is on the ground. Reattach the negative battery cable, and tighten with a wrench.