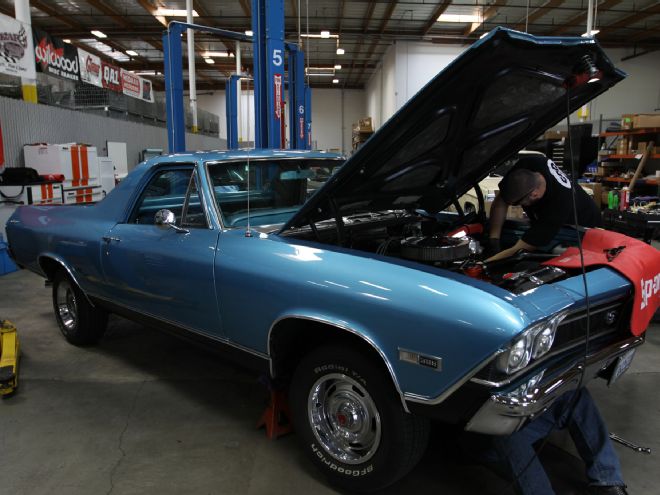
There’s an old expression, “Why stop when you’re having fun,” but when the subject is a 1969 SS396 El Camino that couldn’t stop to save its proverbial soul there wasn’t anything fun about it. Such was the case for Balboa Island, California, resident Frank Waite and his big-block–powered Elky. Any time that Frank took his El Camino out for a drive there was always the associated stress worrying whether it would be able to stop in time. One look at Frank’s ’69 El Camino and it’s clear it’s been through a ground-up restoration from front to rear, including the factory front disc brakes, so the condition of the brake system wasn’t at question. It was all about how it was set up.
The problem associated with building a Chevelle with increased horsepower is oftentimes one discovers an inadequacy in power brake performance. It may not be with the first depression of the brake pedal but by the second pump the power assist has vanished entirely and the brakes feel gone. This lack of braking power is caused by a low supply of engine vacuum, mostly noticed when there is an increase in camshaft size. To obtain ample brake performance from the master cylinder and booster, a normal V-8 engine needs to produce at least 15 inches of vacuum at idle. Today’s aggressive street cams improve horsepower, but just as important as acceleration, is stopping performance.
The solution Frank found through research was to change over from a conventional vacuum-boosted braking system to Classic Performance Products’ Street Beast Hydra Stop hydraulic assist brake system. The application of a hydraulically boosted brake system is not unusual in specialized segments of the automotive industry. Take for example diesel-powered vehicles where no vacuum is generated, or turbocharged gasoline engines where a reliable vacuum source can’t be guaranteed throughout the power operating range.
The results of installing Classic Performance Products’ especially-adapted-for-street-machine-use Street Beast power brake booster were instantaneous and spectacular to say the least. Although CPP doesn’t claim stopping distances will be shortened, we believe with the Street Beast’s decreased pedal effort and a continuous, reliable source of brake pressure the driver can’t help but experience faster reaction times that should in effect be the same as decreasing stopping distances.
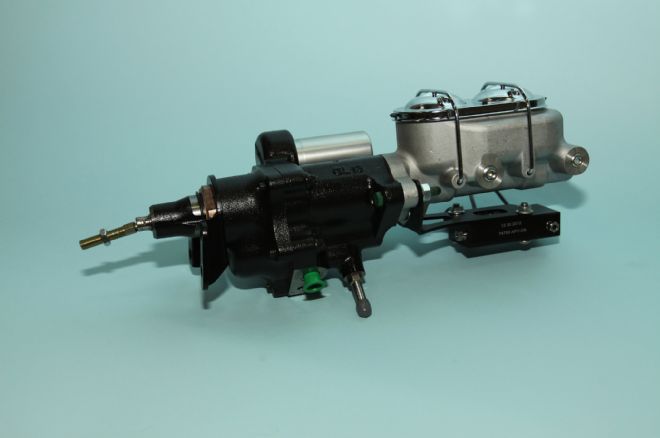
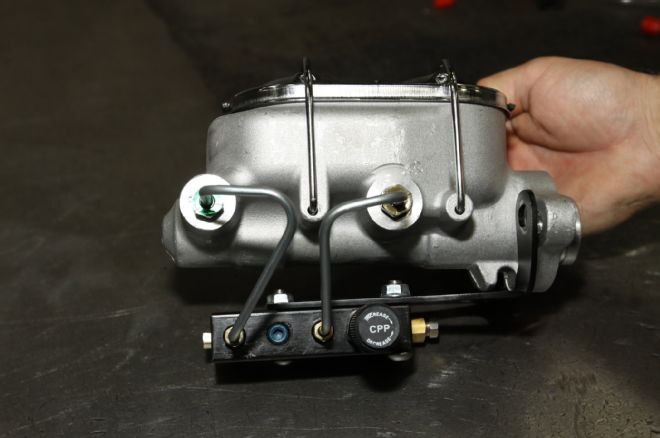
1. Classic Performance Products’ Street Beast is a compact, well thought out unit. Notice it comes equipped with an adjustable proportioning valve mounted in close proximity to CPP’s proprietary Corvette-style aluminum alloy master cylinder.
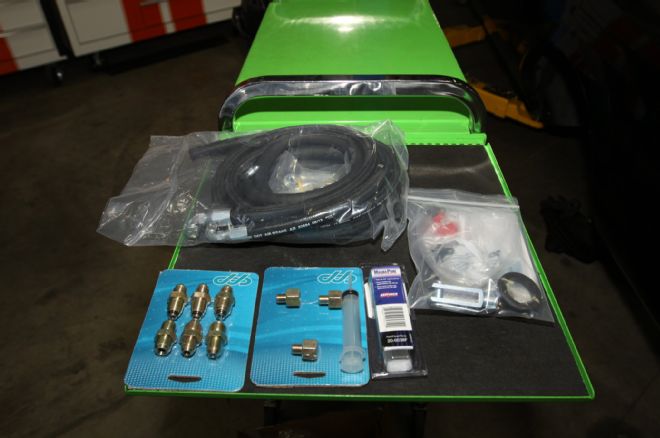
2. Packaged as a complete kit, the Street Beast includes U.S.-made, DOT-approved high-pressure lines in ample length, enabling a custom fit for installation into any application. Additionally, a brake master cylinder bleeding kit is included to ensure you have the tools necessary to properly bleed the master cylinder.
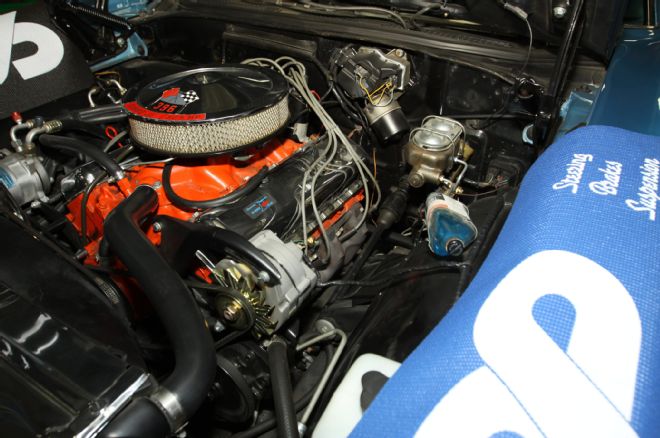
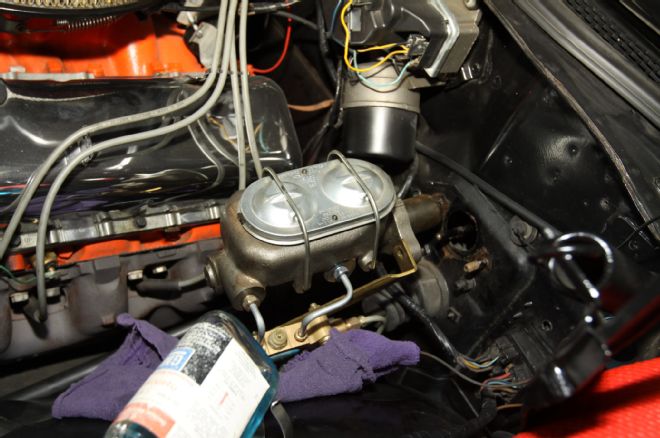
3. To supply the Street Beast with operating pressure, the vehicle must be equipped with power steering. CPP offers power steering conversion kits for cars without power steering. Note Frank’s El Camino lacked power brakes and had an improperly sized master cylinder that contributed to ineffective braking.
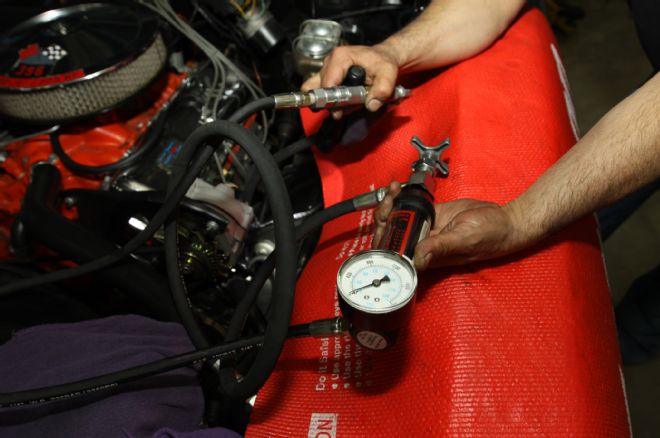
4. Never skip this vital first step: Before installing the Street Beast, the existing power steering pump had to be tested to ensure its output pressure was up to specification.
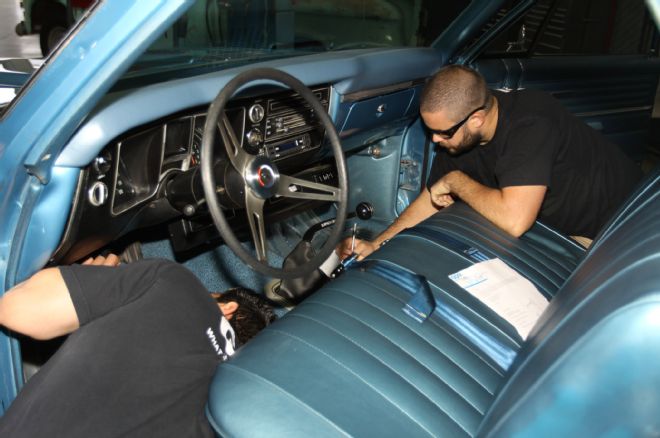
5. In order to disconnect the master cylinder, the brake master cylinder pushrod was disconnected inside the firewall by removing the clevis pin retainer clip on the brake pedal.
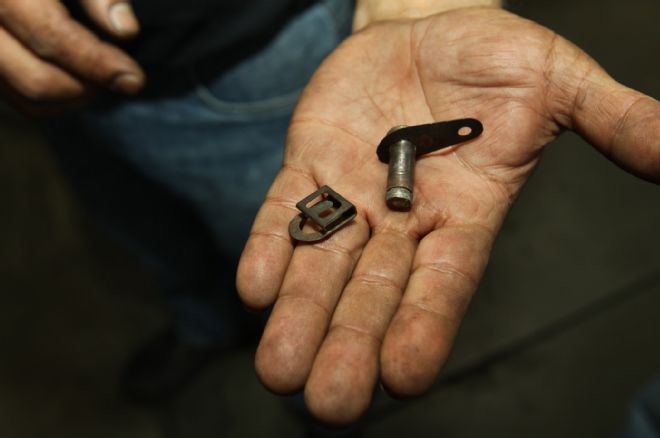
6. A real bear to disconnect; this is what the stock clevis pin and retainer clip look like. The eyelet is for a return spring to attach to.
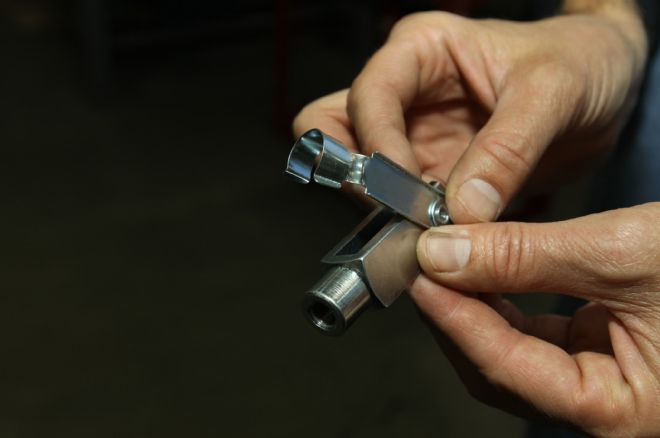
7. This much easier to install clevis is included with the Street Beast’s installation kit.
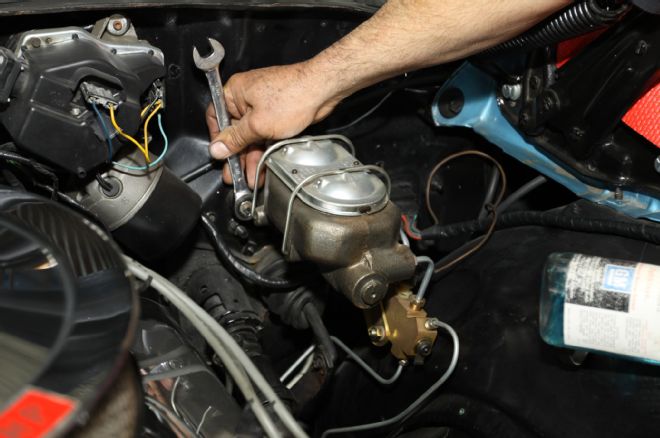
8. After the clevis pin has been removed from the brake pedal from inside the cabin the master cylinder can be unbolted (remove four nuts) from the firewall.
9. Care should be taken not kink or bend the steel brake lines connected to the master cylinder as it is pulled forward off the studs. Slight forward bending of the steel tubes is allowable if done with care.
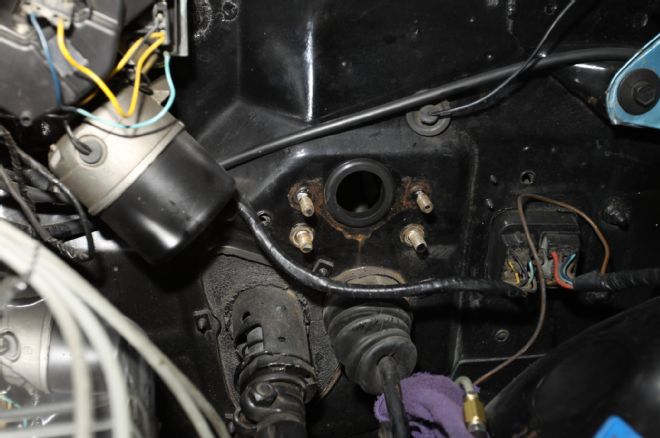
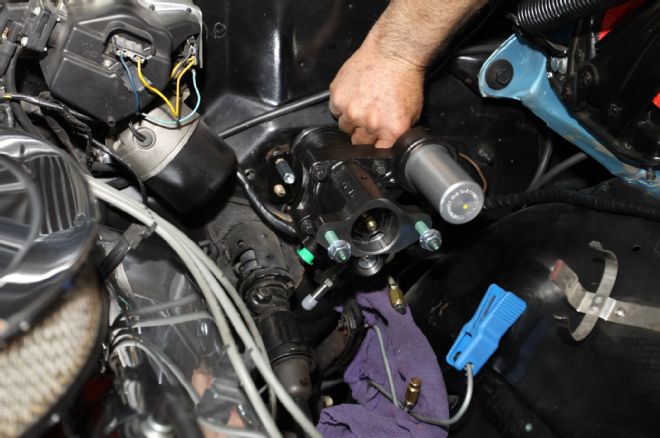
10. In Frank’s case, the hole in the firewall was large enough for the Street Beast to pass through. If not, the hole would have required opening up with a round stone on a die grinder.

11. Bench bleeding the master cylinder to ensure there are no air bubbles in the system is an absolute must. Prior to bleeding, the CPP master cylinder must be removed from the proportioning valve and Street Beast booster.
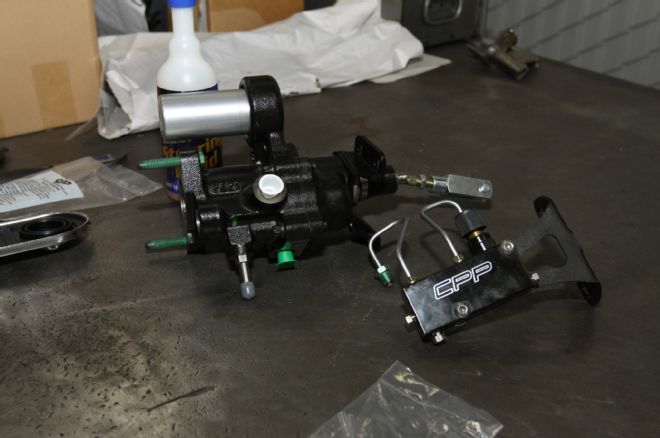
12. Here’s how the CPP proportioning valve and Street Beast booster should appear after separating.
13. The Street Beast booster must be installed to the firewall minus the master cylinder.
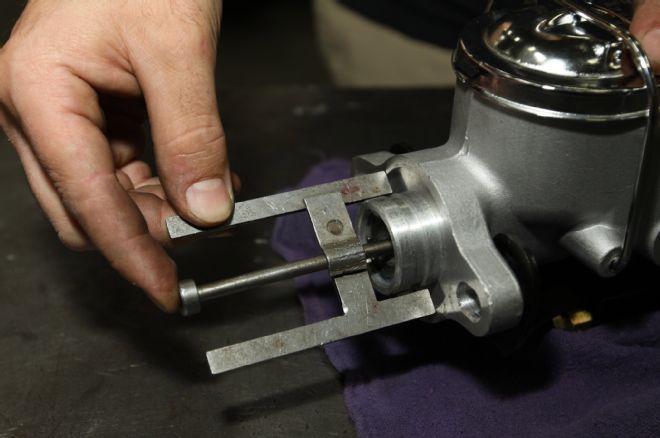
14. Next, in order to adjust the correct amount of pushrod free-play, a depth gauge must be used.
15. To adjust the CPP self-contained proportioning valve, the adjustment knob is turned clockwise to increase pressure and counterclockwise to decrease pressure.

16. This photo illustrates how completely the master cylinder must be disassembled in order to be bled properly. Notice the CPP brake bleeder kit (included) behind.
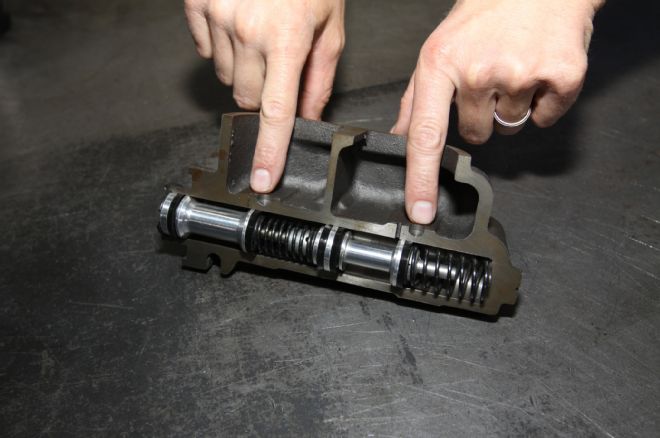
17. Front-to-front brakes and rear-to-rear brakes: This cutaway master cylinder reveals how both chambers (pistons) operate in tandem simultaneously to pressurize the front and rear brakes.
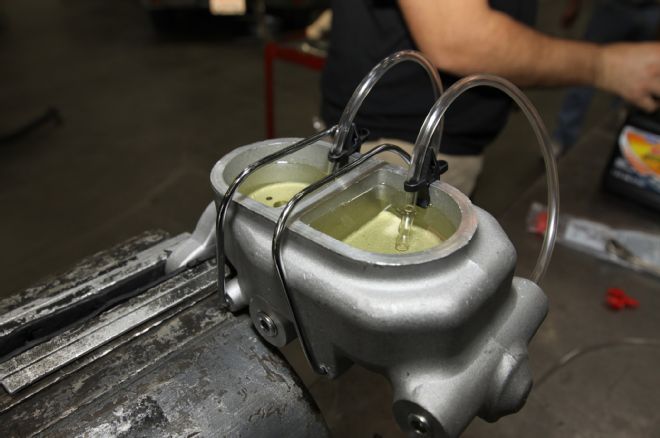
18. In order to bench bleed the master cylinder it must be clamped securely into a vice. Next, the bleeder hose fittings with hoses must be screwed into the output ports. Note how the hose clips hold the bleeder hoses in place. Fresh brake fluid was used to fill both reservoirs.
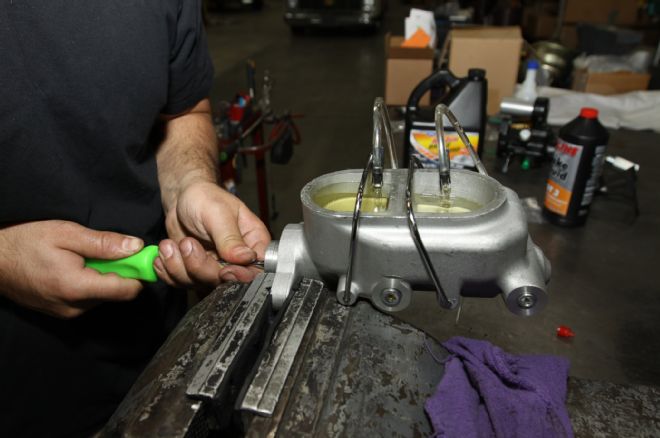
19. A round Phillips screwdriver was used as a pushrod to pump the master cylinder. Notice the air bubbles escaping from the two hoses as the master cylinder is pumped.
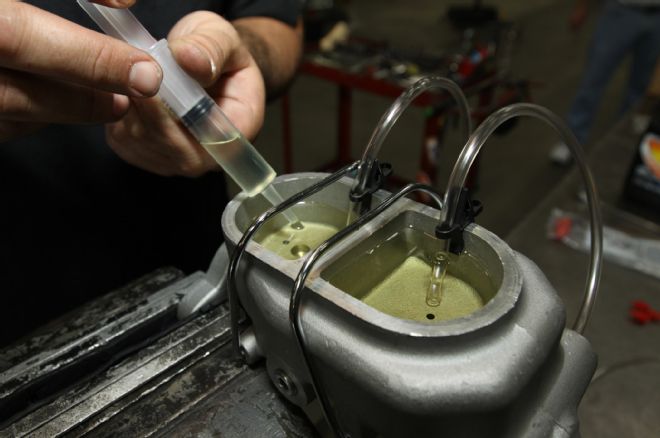
20. Drawing the brake fluid from the reservoir and then …
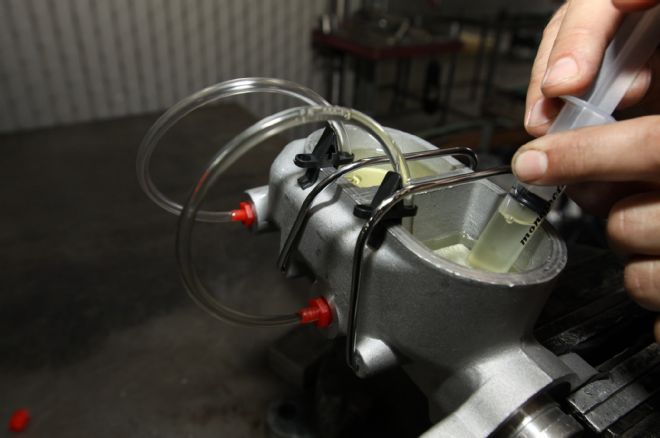
21. … using the CPP brake bleeder syringe to inject brake fluid directly into the intake ports accelerates the bleeding process. Once all the air bubbles have been removed from the master cylinder it’s ready to be bolted on and bleed the rest of the system (at the brakes).
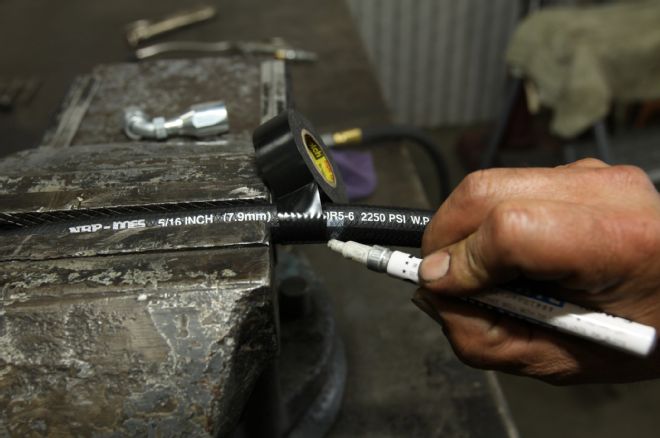
22. After determining the right length of hose to plumb the Street Beast with, the fittings can be installed. Wrapping the hose in electrical tape works best to indicate where to cut the hose.
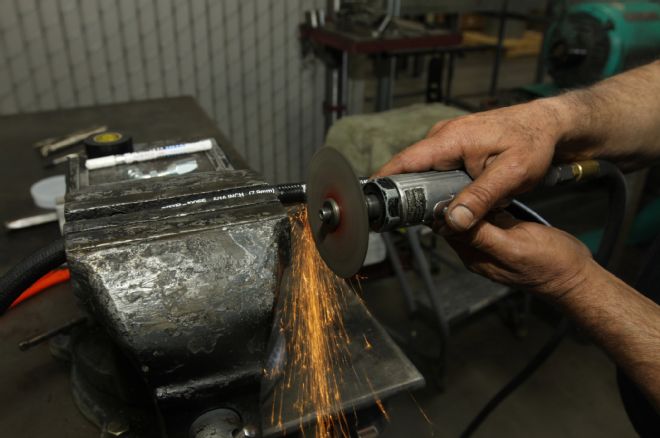
23. A 4-inch cutoff wheel on a die grinder is the best method to cut the hose, leaving a minimum amount of ridge (flare), allowing the female portion of the fitting to fit snugly.
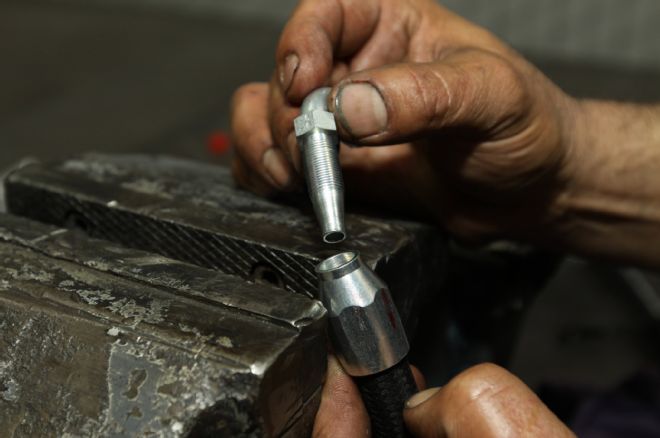
24. Next, the male portion of the fitting is screwed in and tightened down. As a precaution, it’s always a good idea to install a CPP inline filter into the Street Beast’s feed line.
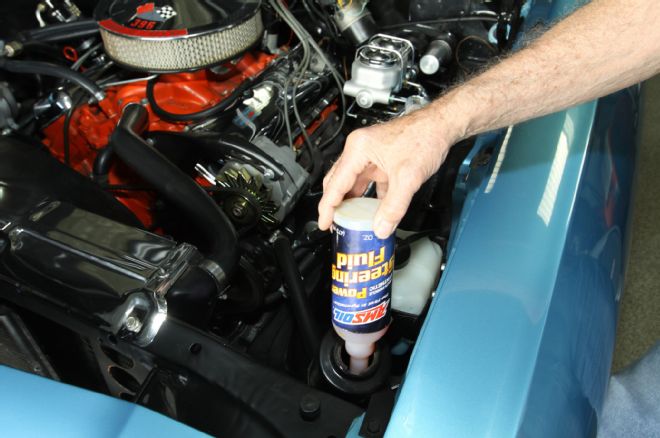
25. Power steering alone generates heat. Add a hydraulic brake booster and there’s sure to be extra heat in the system. Pouring in AmsOil synthetic power steering fluid with better lubricity and reduced friction results in cooler operating temperatures.