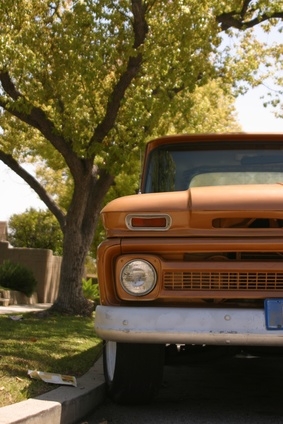
The 1969 Chevrolet truck has two headlights. Therefore, each headlight will have two filaments built in; one for the high beam and one for low beam. Headlight failure was prevalent on some early vehicles. The dimmer switch on these vehicles mount on the floor and exposes the wiring and connections to an abundance of moisture and corrosion. Another issue was the actual headlight switch or the plug that connected to it would heat up and the connection would fail. Headlight failure is unacceptable, and all issues should be addressed and corrected to maintain safe driving.
Put on safety glasses. Remove at least one headlight bulb, using a screwdriver to remove the hold-down ring around the headlight, and test it. Connect a jumper wire between one of the parallel prongs of the headlight and the positive terminal on a 12-volt battery. Connect a second jumper wire between the negative battery terminal or a grounded engine component and the single prong below the two parallel prongs. If the light is bad, replace it.
Inspect the entire fuse box for any blown or discolored fuses. The fuse box on a '69 Chevy truck is located under the dash on the driver's side of the truck. The '69 Chevy truck uses a glass tube fuse.
Inspect the ground wire, which bolts to the radiator support behind the headlight socket on most older vehicles, for a good connection. If the connection is burnt or discolored, unbolt it with a wrench and clean it with a wire brush. Most models have a small black wire that mounts to the chassis with a 5/16-inch self-tapping metal screw.
Charge the Chevy truck's battery with a charger or by running the engine for 15 minutes. If you are charging the battery, the red terminal of the charger should be connected to the positive terminal, and the black terminal connects to the negative terminal of the battery.
Pull the headlight switch to full-on position. If the switch is pulled out halfway, it lights the parking lights only. Click the dimmer switch several times; take notice as to whether the high-beam indicator lamp in the dash lights up. If the high-beam indicator lights up, test the dimmer switch.
Roll back the carpet or floor mat around the dimmer switch, found on the truck floor. Locate and remove the connector plug. Use two jumper wires and join all three wires of the dimmer switch plug together. If the headlights come on, replace the dimmer switch. If lights do not come on, check the plug with a 12-volt test light for a hot wire. One wire in the plug should light the test light unless the headlight switch is bad. Be sure the test light is grounded to a metal ground.
Remove the headlight switch. The main mechanism of the switch is behind the dashboard and the pull knob is on the outside of the dashboard. From under the dashboard, press the spring-loaded tab, located on the switch mechanism, and rotate the headlight switch to the left to activate the interior lights. The switch must be rotated to pull the knob and rod out of the switch mechanism. Unscrew the thin nut on the front side of the dashboard that holds the switch in the dash with a box-end wrench. Drop the switch below the dashboard and unplug it.
Probe the headlight connector plug with a 12-volt DC test light until the hot wire is found. If no hot wire is found, check the plug that comes through the cowl near the fuse box on the cowl side of the cab. Check the plug and headlight switch for heat related failure, melted or discolored wires.
Inspect the wiring harness plugs, on the firewall side of the cab, that go through the firewall, for burnt or discolored wires. These wires are located around the area where the steering shaft comes through the cowl.
Trace the wiring harness from the headlight bulbs or headlamps back to the cowl, checking for cracked, frayed or burnt wires. If any damaged wires are found, replace or repair the wiring harness.