Tire maintenance on your vehicle has a critical effect on how long the tires wear, riding comfort and safety. Since tires can be an expensive investment, keeping them properly cleaned and balanced can insure a longer life for the tread, better tracking and smoother operation. Whereas the heavy vehicles of yesterday helped to smooth and dampen vibration, cars are produced nowadays with much lighter chassis, making them susceptible to the slightest intolerances when it come to road vibration and suspension travel. Alloy wheels, being very lightweight by their construction design, must be balanced with particular attention. A few options exist for balancing alloy wheels the correct way.
Set the vehicle shifter in park or neutral, depending upon your transmission type. Loosen the rim lug nuts with a tire iron but do not take the wheels off. Raise the vehicle with a floor jack and place two jack stands under the front frame. Raise the rear of the vehicle with a floor jack and place two jack stands under the rear frame. Finish removing all the lug nuts with the tire iron, take the wheels off the car and place the wheels on the ground.
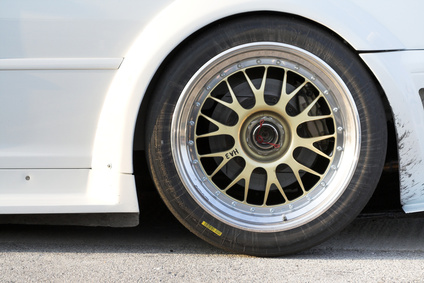
Use pliers to remove all existing old wheel weights on the rims. For stick-on weights, use a gasket scraper to shave them off. Fill a bucket with water and dish-washing soap. Use a tire brush to clean the inside and outside of each tire and rim, removing all mud and grime. For road tar, paint and cement, use lacquer thinner and a gasket scraper to remove the buildup. The rims must be spotless.
Set a static bubble balance machine on a level surface. Look down at the bubble in the window gauge. Square the bubble exactly in the middle of the crosshair by turning the adjusting knobs on the 3-foot stands. Place one rim over the machine cone, outside facing upward. Push the lever down on the machine to "float" the tire. Notice where the bubble sits. If the bubble sits in the 9 o'clock position, you will place increments of weights at the 3 o'clock position.
Detach 1/2-inch increments of weight from the adhesive strip. Place one 1/2-inch weight opposite the bubble position and note the bubble movement. Place as many 1/2-inch weights on the rim as needed to center the bubble in the window gauge. Mark the outline of the weights on the rim with a piece of chalk. Release the machine float lever, letting the rim sit on the machine frame.
Remove the adhesive backing from the appropriate amount of weights you need. Press the weights, sticky side down, on the rim lip inside the chalk marks. Remove the wheel from the balance machine and perform the exact procedure on the rest of the wheels. If any rim requires more than 3 ounces of weight, place half of the weight on the inside of the rim directly opposite the front rim weight position.
Extend a straight chalk mark line from the front of the rim to the inside of the rim, then turn the rim over on the machine and secure the weights (for halving the weights). When finished balancing all the tires, place the rims back on the vehicle and tighten all the lug nuts with the tire iron. Raise the vehicle with the floor jack and remove all the jack stands. Finish tightening all the lug nuts with a torque wrench, according to your repair manual's specifications.