The 2004 Chevrolet Cavalier came equipped with an AM/ FM stereo system with in-dash single disc CD player. Options included a satellite radio receiver and a stereo system capable of playing Mp3 files. Cavalier owners looking to upgrade their stereo system can find a multitude of stereo options via aftermarket outlets. You can choose to have your stereo replaced by a car audio professional, or with proper instructions, you can do it yourself.
Use a set of pliers to disconnect the negative battery cable from the Cavalier battery. Loosen the cable’s clamp and move the cable off of the negative battery lead post, away from the battery.
Move to the inside of the vehicle. Pull the dash panel, which spans the entire top of the dashboard, away from the dash.
Use a 7 mm socket and ratchet to remove the five screw bolts that hold the panel to the dash. The bolts are located on top of the dashboard, near the windshield.
Open the glove compartment. Remove the two bolts on the left edge of the glove compartment opening with the socket and ratchet.
Use a flat screwdriver or trim panel removal tool to pry the trim panel surrounding the stereo and climate control knobs from the dashboard.
Use the socket and ratchet to remove the three bolts that hold the stereo in the stereo mounting bracket. Two of the bolts are on the left side of the stereo and a single bolt is located on the right side.
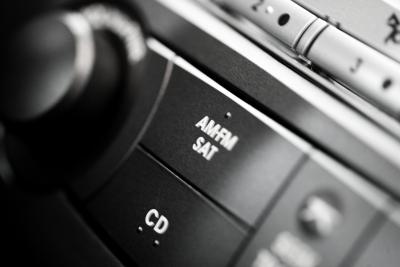
Remove the stereo from the stereo mounting bracket and pull the wiring from the back of the stereo. Disconnect the antenna wire (the black cable connected to the right side of the deck's back) from the factory stereo.
Connect the stereo wiring to a wiring harness adapter. Consult the harness manual for instructions on which adapter leads should connect to which specific stereo wiring group.
Insert the faceplate adapter (from the installation kit) into the stereo mounting bracket.
Connect the wiring harness adapter leads and antenna cable to the back of the new radio.
Slide the new unit into the faceplate adapter, until the face of the radio is level with the edges of the faceplate adapter.
Replace the three bolts around the perimeter of the stereo mounting bracket.
Place the stereo dock trim panel around the stereo and climate controls, and press it firmly against the dashboard to snap it into place.
Align the larger dash panel across the dashboard and replace the five screw bolts at the top edge of the panel. Replace the two bolts at the left edge of the glove compartment opening. Close the glove compartment.
Replace the negative battery cable clamp around the negative lead post of the Cavalier's battery. Tighten the bolt on the clamp with the pliers.