MIG welding, or metal inert gas welding, is the simplest type of arc welding to learn. A MIG welding torch delivers electric current to heat the weld, fill metal in the form of a thin wire, and inert shielding gas to prevent oxygen from corrupting the weld as it cools. Patch panels should be cut from metal of the same type and thickness as the metal being repaired, allowing the metals to heat evenly for a clean, strong weld.
Locate the damaged or rusted area to be repaired. Use the pick end of a body hammer to tap across the surface. Areas that flex or or dent are weakened or rusted. Mark an outline with a marker about an inch outside the effected area. Cut along the line with a die grinder to cut the damaged area away. Work to keep the cut as neat as possible by staying on the line.
Use an air grinder to polish the metal surrounding the cut to remove any rust or paint that remain. Remove the paint back from the edge at least an inch to allow for a strong weld. Use the piece you cut out as a template. Mark its outline onto a piece of similar metal of the same thickness. Cut the patch out with the grinder. Lightly sand the edges with a grinding wheel to smooth it and remove any rough spots.
Fit the patch into the hole you cut and clamp it in place with locking plier style clamps in at least two places. Set the welder to the default settings for power and wire feed, unless you are an experienced welder, in which case, make the appropriate adjustments. Put on welding gloves, a welder's apron and a welding mask.
Pull the wire out the tip of the welding gun to about 10 millimeters and cut off cleanly with a sharp pair of wire cutters. Hold the tip of the wire to the metal on the edge of the cut, and pull the trigger of the welder for two to three seconds to create a spot weld. Repeat this, spot welding the patch in place with one spot weld about every inch around the patch. Remove the clamps.
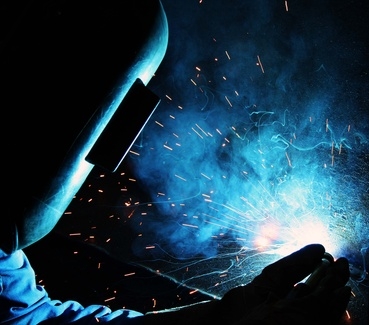
Starting between two spot welds, place the tip of the wire on the metal, holding the gun at about a 20 degree angle so that you can see the welding pool. Pull the trigger of the gun and work along the edge of the patch from patch to original metal in a tight, curved zig zag pattern ¼ inch wide.
Watch for proper pooling. If the weld is shiny and smooth you have adequate gas, good heat and proper wire feed. If the weld turns dark, adjust gas level. If the weld is unusually lumpy or rough, increase the power slightly. If the weld is not pooling properly, pull the trigger with the tip away from the metal to check the wire feed. Adjust as needed. Clip the wire to 10 millimeters before returning to the weld.
Continue around the edge of the patch, working in the rounded zig zag pattern, moving the gun at a steady pace. Work in 2-to-3-inch sections, allowing the welder to cool between sections. Continue around the patch until the weld is complete.