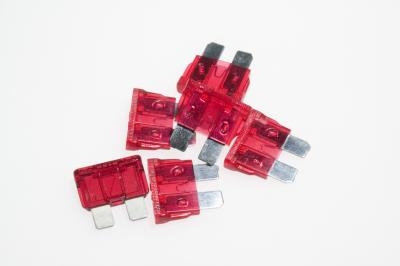
Within your vehicle there are several miles of electrical wiring. Some are thick cables that connect to powerful items like the starter motor and alternator, but most are the same thickness as wires that connect to your home stereo system. If you find you have an electrical fault in your vehicle, you can follow a logical approach to trace the source of the problem.
Locate your fuse box. It may inside the car or under the hood or in the trunk. Your vehicle manual will tell you where your particular fuse box is located. The fuse box is the one place in the vehicle where every electrical wire meets, so it is the best place to start tracing a particular wire.
Remove the fuse box cover. Unclip it or remove any screws using a screwdriver, then remove the cover.
Look inside the fuse box to locate the fuse that links to the wire you are attempting to trace. Each fuse has a label next to it or, alternatively, a labeled diagram on the inside or outside of the fuse cover. For example, if you are trying to trace the wires for your headlights, then look for the appropriately labeled fuse.
Look closely at the fuse you have selected. You will see a wire going to and from the fuse. Using headlights as an example, one wire goes toward the battery while the other wire goes to the headlight switch, then to the headlights.
Always check the fuse first, as it's likely to be the reason for the electrical failure. A fuse box usually contains a selection of different fuses so pry out the fuse using s small screwdriver. Read the label to ascertain the amperes, then put in a replacement fuse that has the same ampere rating. Push it into place using your fingers. Check the electrical item to see if the problem has been solved.
Make a note of the color of the wires connected to the fuse. Most wires are slightly different colors, making identification easier. For example, there may be three or four red wires, but it's likely that each wire has different markings, such as different colored strips or rings around the wire.
Follow the colored wire as best you can. Go to the switch you use to turn on the electrical item that the wires connect to. Look at the rear of the switch and you will find the same colored wire that you noted in the fuse box. Check to see if the wire is connected. If it's not connected, then reconnect it and your electrical item will work. Look for the same colored wire that leaves another terminal on the switch and verify its connection.
Look on the back of electrical item and you will see the same colored wire that connects to the fuse and the switch. Verify that it is connected. You've now traced the wire from the fuse to the electrical item, so now you need to trace the other wire from the fuse box to the battery.
Open the vehicle hood. Look on the positive battery terminal labeled "+". You will see a couple of thick red cables that you can ignore. Follow the other cables -- there may be two, so follow both of them. They go a boxed unit, where the wires separate and go to the fuse box. Remove the cover by unclipping it or remove the screws holding it in place.
Look inside the unit and you see many wires connected. Look for the same colored wire that you noted in the fuse box and check its connection. You've traced the wire for the particular electrical item you are checking. You can repeat the process for any other wire you need to trace.