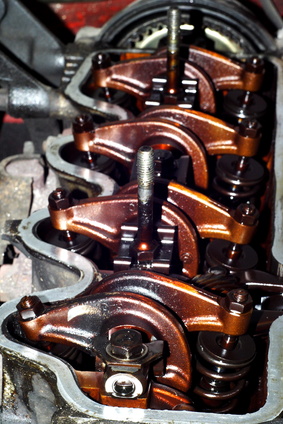
In 1989, the Ford 2.9-liter V-6 was offered as an option on the Bronco II as well as the Ranger XLT. The 1989 2.9-liter produces 140 horsepower, and 170 foot-pounds of torque. The lifters in the 2.9-liter can become clogged with minerals deposited into the top of the engine by the motor oil. This mineral deposit is also referred to as sludge. Sludge deposits in the top of the engine usually indicate that there are sludge deposits throughout the entire engine.
Raise the front of the vehicle with a 2-ton jack. Place jack stands beneath the lower control arms or front axle housing, depending on whether you have two- or four-wheel drive. Place wheel chocks behind both rear wheels.
Open the oil fill cap and empty one bottle of engine oil system cleaner into the engine. Replace the oil fill cap underneath the hood. Start the vehicle and let it run for no less than 30 minutes. Ideally, you could drive around for an entire day. The longer the cleaner sits in the engine (no longer than one day), the better the results will be.
Remove the oil drain plug from the bottom of the oil pan with an open-end wrench or 3/8-inch ratchet and socket. Place a 2-gallon or larger drain pan beneath the oil pan and allow the truck to drain for approximately 15 to 20 minutes. The longer you let the engine drain, the more sludge will come out due to the addition of the engine oil system cleaner. The engine should be shut off when you begin the draining procedure but should be moderately warm for increased oil flow from the vehicle.
Tighten the oil drain plug back into position after you have waited the recommended 15 to 20 minutes for the oil to drain. Use the open-end wrench or 3/8-inch drive ratchet and socket to tighten the drain plug between 25 and 30 foot-pounds of torque. Do not over-tighten the drain plug or you risk stripping the fine threads out of the oil pan and creating a more expensive project in the process.
Locate the oil filter and slide the drain pan beneath it. Remove the oil filter by turning it counterclockwise. You may need to use an oil filter wrench for this procedure, depending on how long the filter has been on the truck or how tightly it was installed.
Remove the new oil filter from its box. Dab your finger into a bottle of fresh motor oil and run your finger along the rubber gasket on the new filter. Lubricating the gasket creates a better seal for the new filter. Install the new filter by hand, turning it clockwise until it is snug. Tighten the filter between 25 and 30 foot-pounds of torque, by hand. Do not attempt to tighten the filter with a filter wrench or you risk crushing or damaging the internal components of the new oil filter.
Remove the oil fill cap and add 4-1/2 quarts of high-mileage oil to your vehicle. The manufacturer's recommendations for this engine are 4 quarts without the filter change and 4-1/2 quarts with the filter change. Start the vehicle and let it idle for five seconds. Step out of the vehicle and double-check that there are no leaks from the bottom of the engine. A filter leak will be immediately noticeable as it will randomly spray oil in high volume everywhere underneath your truck. An oil plug leak will spray out but more like squeezing a ketchup bottle. Shut the engine off after you have completed the pressure and leak check.