Rust. It’s the evil cancer that threatens to turn our beloved Jeeps into dust, and as most early Jeep enthusiasts know, Toledo didn’t do a whole lot to prevent the tin worm until the introduction of the YJ in 1987. If you own an old Jeep, chances are you’re waging your own battle against rust, and it’s a battle you may or may not be winning. More than a few of you probably have floorboards with unintentional, undesirable ventilation holes and are wondering what it takes to fix them. We were in exactly the same boat with a recent acquisition, so we set about fixing the problem for good.
We picked our craptastic brown ‘84 CJ-7 during a recent trip to Southern California. We needed another Jeep like we needed a hole in the head, but the deal was too good to pass up and before we knew it, we were dragging another Jeep carcass home. It had obviously spent its entire life in the Southwest because it was remarkably clean and rust-free with the exception of a suspicious soft spot in the driver-side floorboard. A closer inspection revealed a floorpan that looked more like it belonged in the rustbelt, with plenty of Swiss cheese and termites holding hands.
Some will argue that our Jeep’s floorpan really wasn’t that bad and probably could have been fixed with one of those epoxy rust repair kits, and they would be right. But since the rest of the Jeep was 100 percent rust-free and we intend for it to spend the rest of its days in sunny Arizona, we decided to do it right by cutting out the cancer and welding in new sheetmetal. Follow along as we muddle our way through our first floorboard repair so you can see what it takes to do the same on your own project. The method we used is one way of doing it; there are other ways that are easier and harder than the work we did. At the end of the day, though, we have a solid repair and shouldn’t have to worry about braking like the Flintstones anymore.
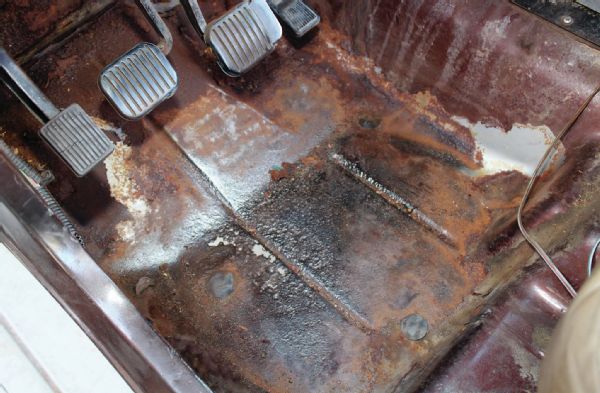
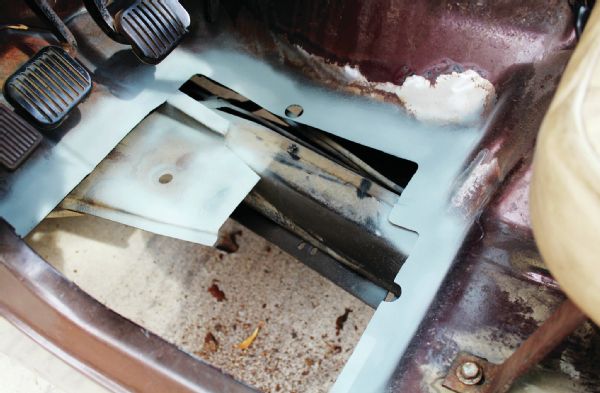
The first step in our mission was assessing the extent of the damage. We removed the carpet and then spent some time with a wire wheel to see where the bad sheetmetal stopped and the good sheetmetal began. Believe it or not, these undesirable ventilation holes started with a single hole you might have been able to stick the head of a pencil through. A large area of the floorpan was badly pitted and paper-thin where it wasn’t gone completely.
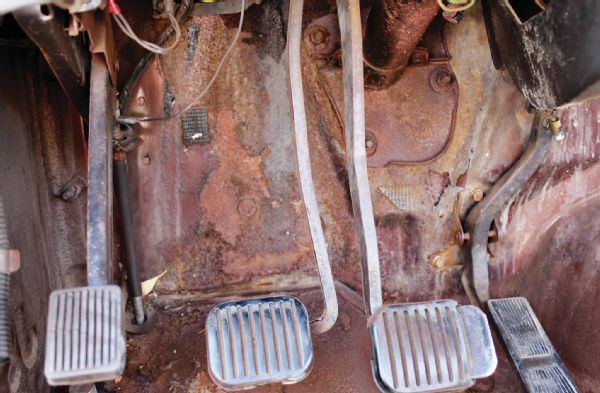
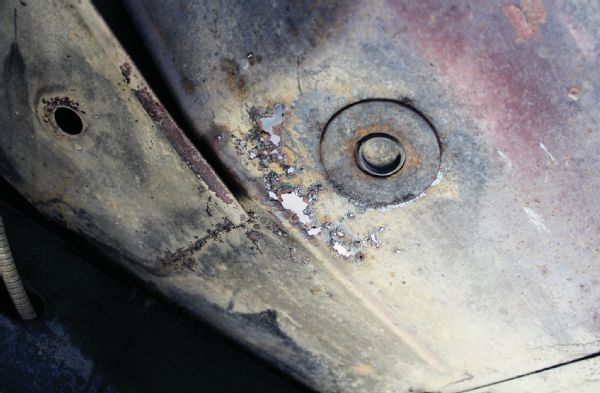
We were curious why the driver-side floorboard was rotten when the rest of the Jeep was 100 percent rust-free. Close inspection of the firewall revealed the likely cause. We believe that the Jeep had a leaky brake master cylinder at some point that was weeping brake fluid inside the Jeep. Over time, the brake fluid lifted the paint and soaked into the carpet, which then held moisture against the sheetmetal. Time did the rest. Fortunately, the vertical sheetmetal had only surface rust and was salvageable—just the horizontal sheetmetal needed replacement.
One of our Jeeping buddies had a floorboard patch panel laying around in his garage he had purchased years prior for another project and didn’t end up using, and we scored it by picking up the tab at lunch one day. Patch panels are readily available from a variety of companies, including Quadratec. We took some measurements on the old floor and transferred them to the patch panel to give us a rough cut line.
The floorpan really didn’t really look that bad from underneath, and our East coast readers are probably scoffing at us right now; a little rust-encapsulating epoxy and some fiberglass matting would fix it right up. But because the rest of the Jeep was so pristine and rust-free, we felt that welding in some new metal was the better, more permanent fix.
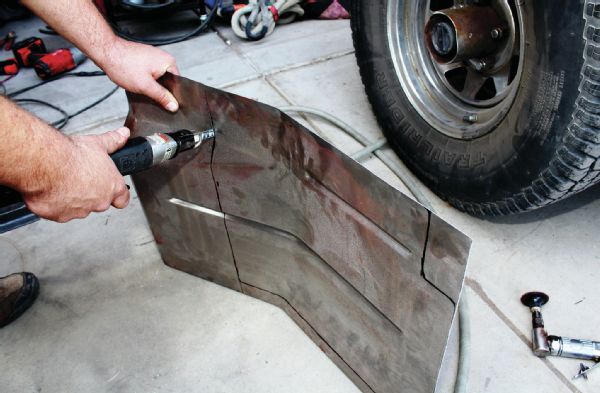
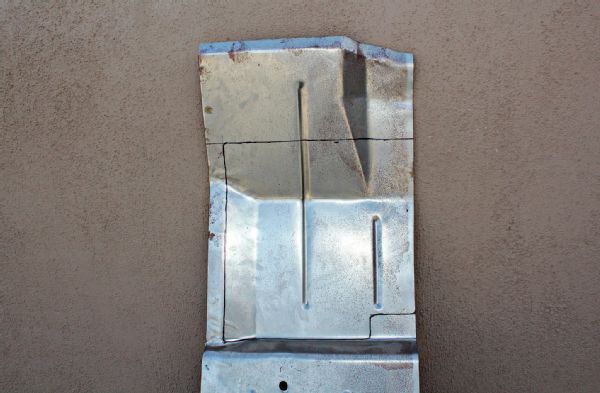
The ribs in the factory floorpan and the patch panel matched exactly, and they made handy reference points for taking measurements. After double-checking our measurements and finalizing the cut lines, we used an air-powered body saw and a throatless shear to cut the panel down the shape we wanted. A cutoff wheel or a hacksaw would have worked as well, but the saw made the cuts much more precise. This is one of those times where you want to measure two or three times and cut once.
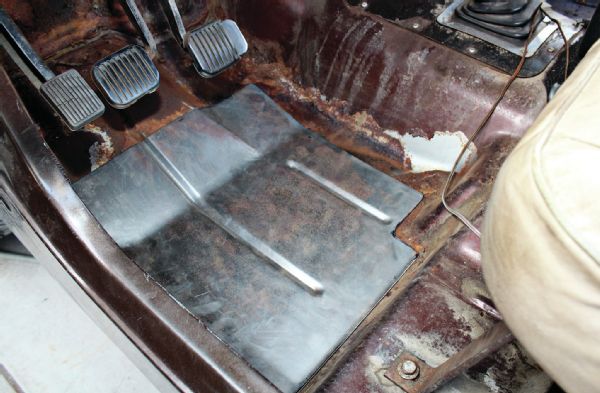
Once cut down to size, we laid the patch panel in the floorboard to check the fit. As it turned out, the patch panel was perfect and required very little massaging to match the compound angles of the floor. We could have used regular sheetmetal and formed it to fit, but using a patch panel was much easier and saved hours of fabrication time. Though we scored ours for the cost of a cheap lunch, an identical panel runs about $35 and leads to a much more professional-looking finished product.
We traced the outline of the patch panel on the floorboard and then measured inward 3⁄4-inch on each side to mark where we were going to cut the floor. This 3⁄4-inch of overlap all the way around gave us a solid area to rosette weld the patch panel into place. With everything in order, we proceeded to cut out the cancer. Note that we used a 1-inch hole saw in the corners so we would have nice, radiused corners in our finished cut.
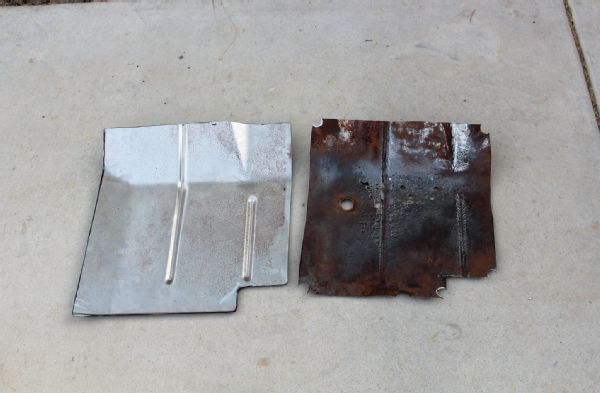
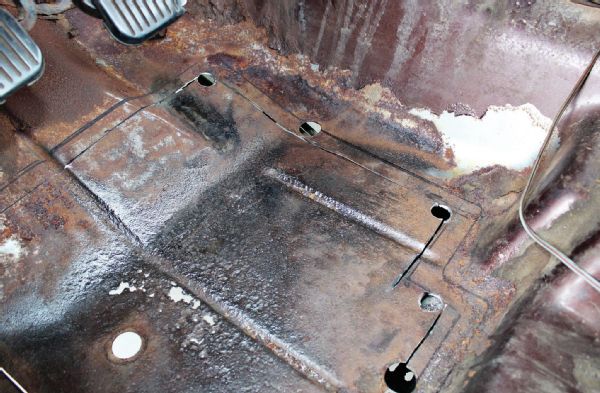
If everything goes reasonably well, the shape of the old sheetmetal and the new should look remarkably similar. You can see that the new panel is 3⁄4-inch larger all the way around so that we can rosette weld the patch panel to the good metal remaining in the floor. We double-checked fitment one more time, then drilled multiple 3⁄16-inch holes around the perimeter of the patch panel to prep it for welding into place. If you look closely at the original floorpan, you can also see the location of the four spot welds we had to drill out to separate the floor from a body support bracket.
Knowing there was no way we would be able to paint the area where the patch panel overlapped the floorboard when we were done, we prepped the area using weld-through primer. Made specifically for this kind of application, and as the name implies, weld-through primer protects bare metal surfaces that won’t be accessible later while being specially formulated to be able to weld right through without compromising the welds themselves. That’s the theory, anyway.
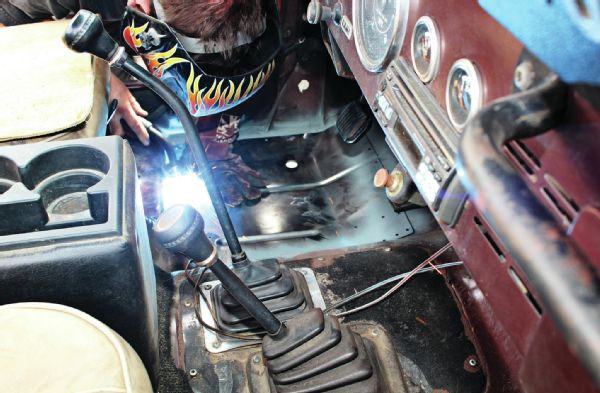
With everything prepped, we were ready to burn in the new sheetmetal. We turned to our friend and Jack-of-all-editing extraordinaire Verne Simons to do the actual welding duty. This didn’t go well at first. It turns out that weld-through primer is supposed to be used with flux-core wire and not shielded gas. We found out the hard way. We ended up removing the primer from the areas to be rosette-welded, and only then did the rosette-welds burn in properly rather than spit and shoot red-hot BBs everywhere. Live and learn.
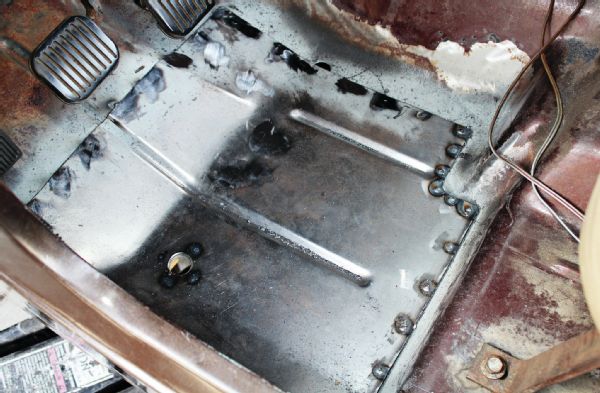
We rosette-welded the panel in multiple places around the perimeter and also the support bracket underneath. Overkill? Probably, but we also know it’s not going anywhere. We cleaned up the rosette-welds with a 120-grit flap wheel on a grinder, sealed the edges top and bottom with automotive Napa seam sealer (that stuff is nasty!), and then primed and painted the entire area. Once we were done you hardly knew a repair had been made, which was exactly what we were going for.
Body Mount Replacement
During the initial inspection of our recent acquisition, we noticed that the body mounts were in pretty rough shape. Most of the mounts were split, and in a few cases they were mostly gone. This can lead to the body sagging and even leaning to one side, but wasted body mounts are more than aesthetic. In extreme cases, they can lead to body fatigue and even sheetmetal cracking, which is not something you want to deal with if you can prevent it. We decided an ounce of prevention is worth a pound of cure and tackled replacing the mounts in what is (hopefully) the last of the body work we needed to perform on this particular project. Here’s an overview of how it’s done.
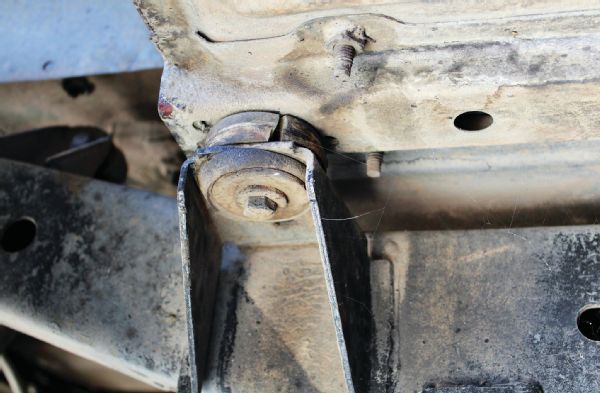
If the body mounts on your Jeep look like this, then it’s time to replace them. Most of the mounts on our project were cracked and badly deformed like this one, and they were most likely contributing to the Jeep’s slight list to the driver side. Replacing mounts like these is good insurance against future problems.
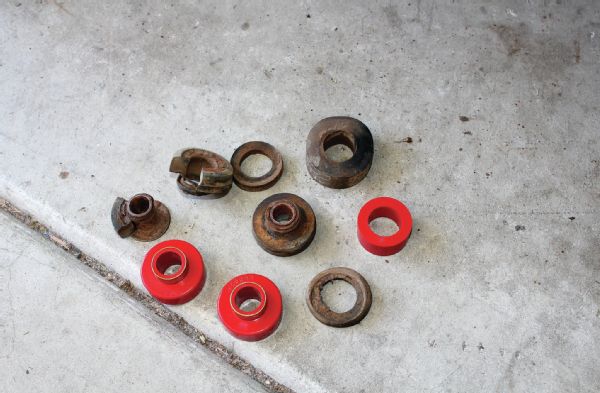
New rubber body mounts are available, but a better option for longevity is using heavy-duty polyurethane replacements like these stock-height replacements available from Daystar. Mounts with 1-inch of lift built in are also available. Polyurethane is impervious to the elements and vehicle fluids, so these should last for the remainder of the Jeep’s life and then some. We went with red mounts because that’s all our local dealer had in stock, but they are also available in black. The factory mounts came out in chunks, but fortunately, the Daystar mounts don’t re-use anything from the original mounts except the mounting hardware. Just to be safe, we obtained graded replacement bolts rather than re-use the rusty originals.

To replace the mounts, remove the body bolts from one side as well as the grille mount and then loosen the hardware on the other side. Use a 2x4 and a jack to raise the body off the frame, swap all the mounts and start all the body bolts. Then move to the other side and repeat. Resist the urge to over-tighten the bolts when torquing everything down. In a couple of hours we had a body that was firmly secured to the frame, which is always a good thing.