 Ali Mansour
Brand Manager, 4WD & Sport Utility
Ali Mansour
Brand Manager, 4WD & Sport Utility
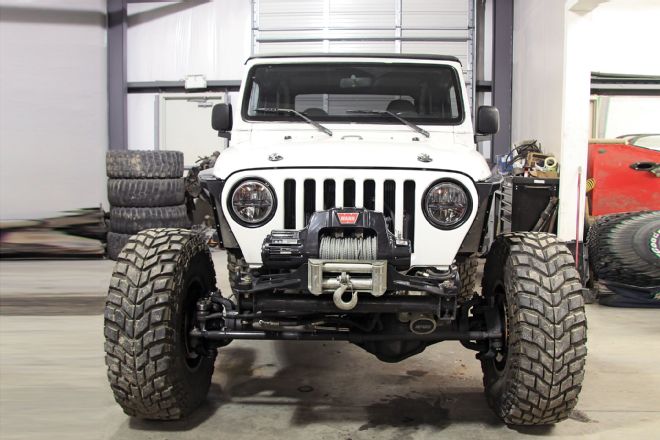
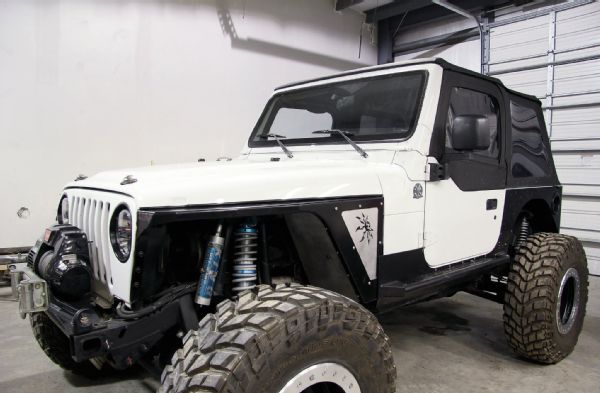
At the risk of sounding like a broken record, we can’t stress enough the importance of maintaining a low center of gravity. Driving off-road twists and tosses your 4x4 in directions the factory never intended. To accommodate the rugged conditions, we modify our rigs with an assortment of aftermarket parts, and body armor is one of them. One upgrade especially helpful for owners of 1997-to-2006 Jeep Wrangler TJs is to convert what is commonly known as a highline conversion.
There are a few aftermarket highline kits available. However, owners savvy enough with sheetmetal can actually raise your stock fenders on the cheap. We performed a DIY highline conversion on our 1997 Jeep Wrangler TJ years ago, which allowed us to run 37-inch tires with only a few inches of lift. Over the years, the makeshift highline kit has served us well, but we’ve had a few instances where the light-duty fenders were damaged on the trail and needed to be reworked. The reality of the DIY highline fender job: The stock sheetmetal is only so strong.
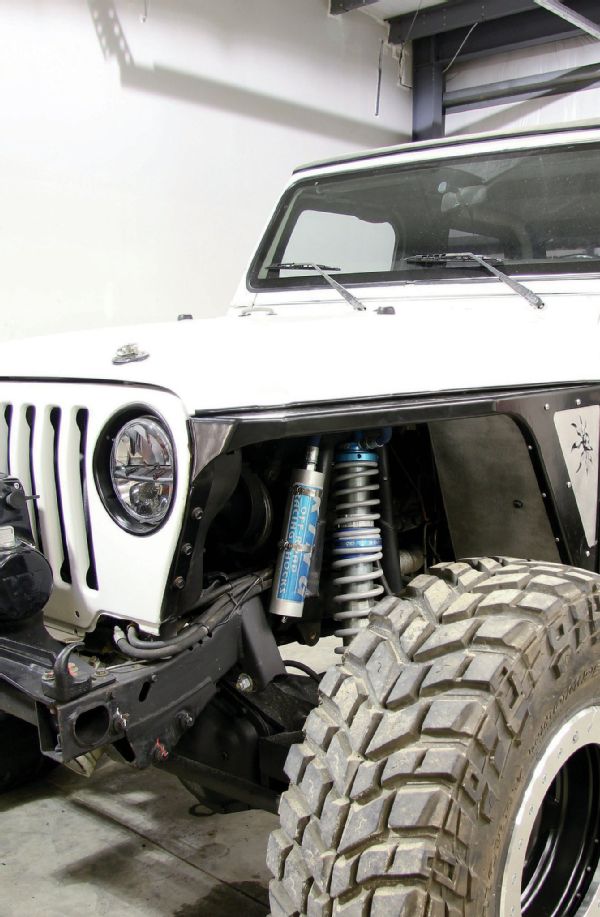
A few months ago, we made the leap to a set of custom East Coast Gear Supply Dana 60 axles, which increased our track width quite a bit. This major axle upgrade had us looking for larger tires, but we didn’t want to raise our Jeep any higher. With all the changes, our stock highline was no longer effective. Fortunately, there was an easy way to get the fender clearance we needed, without having to undo all our original highline conversion.
This highline solution came by way of Poison Spyder Custom’s DeFender XC Negative Series front flares. The company offers an assortment of front flares to fit rigs with stock and highline conversions. For the most tire clearance, though, the DeFender XC Negatives are the best pick. All PSC fenders are formed from 3/16-inch plate steel, which is said to create a fender that is 57-percent stronger than a traditional tube-and-plate flare.
Generally, installing a highline fender kit is a tremendous amount of work, mainly due to the need to relocate all the under-hood accessories and trimming the hood. We dealt with this issue years ago, along with ditching our original four-cylinder engine for a more powerful 5.9-liter Mopar V-8. The major portion of the highline conversion was already complete, so the DeFender XC flares on our application were a pretty easy install.
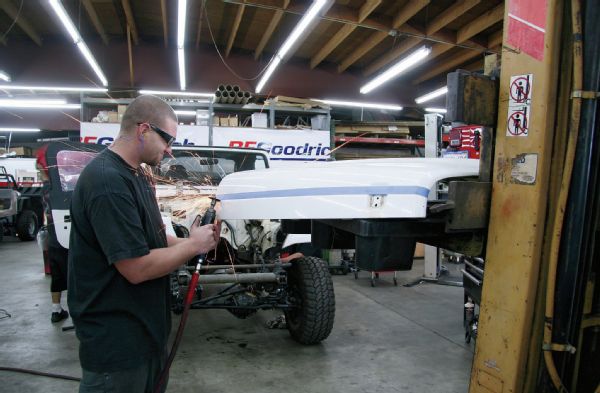
With the right tool set, the fender conversion can easily be installed in your driveway. To perform our install out of the elements, we borrowed garage space from our friends at Low Range 4x4 in Wilmington, North Carolina. We used up the good portion of the afternoon fitting everything in place, and suggest carving out a full day if you are starting with a stock TJ.
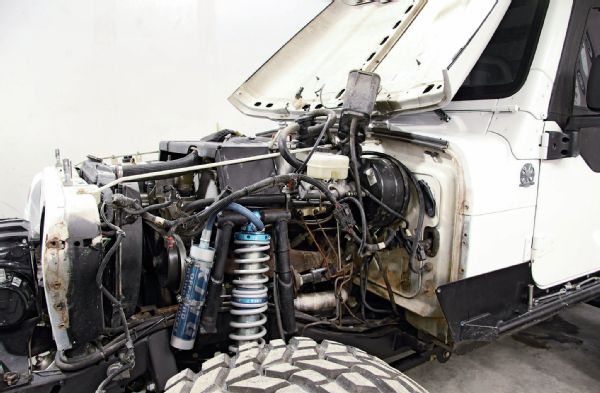
The DeFender XC flares completely replace your factory front fenders. Although unbolting the stock fender assembly is extremely straightforward, disconnecting the bevy of under-hood items that attach to your inner fenders takes some time. Given our Jeep was equipped with a DIY highline conversion, and 5.9-liter V-8 swap, most of our under-hood essentials had previously been relocated.
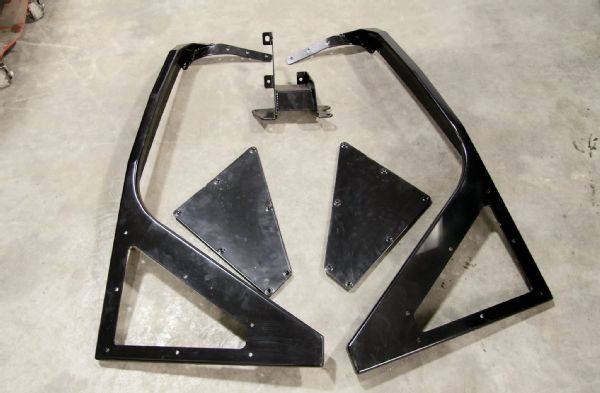
As soon as our fender kit arrived, we sent all of the bare steel components to Area 51 Powdercoating in Wilmington, North Carolina. We opted for the durable semi-gloss black powdercoat finish, which tends to hold up better over a basic rattle-can paint job.
The rear portion of the fender assembly uses the factory hardware and existing bolt holes in the Jeep’s tub. Our TJ is equipped with a type of boat-side rocker armor, which required us to trim around 3 inches from the fender’s bottom. Jeep’s equipped with a more traditional style of rocker armor shouldn’t run into any interference, though.
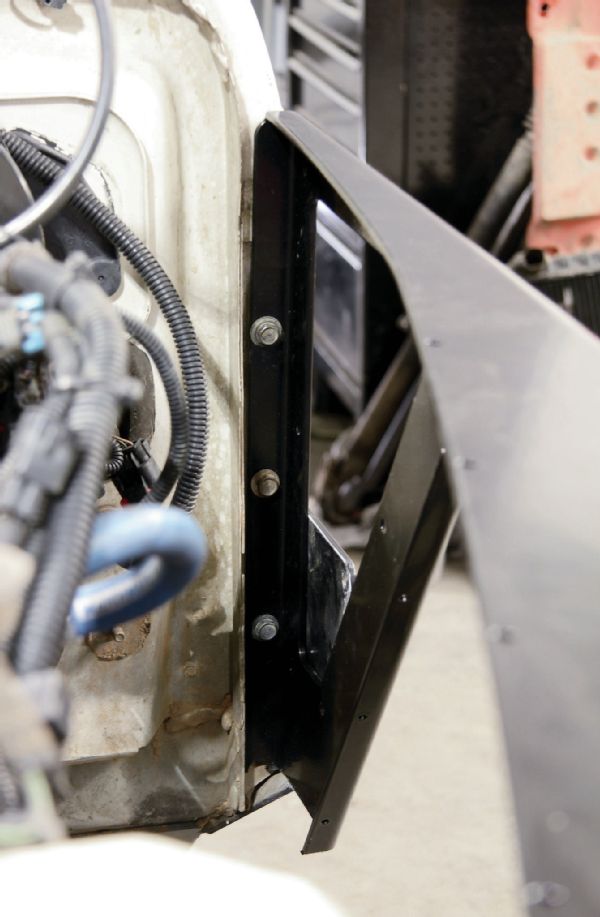
Up front, the fender is shaped to conform to the curves of the TJ’s front hood. We found it helpful to keep the grill assembly loose until all the fender hardware was started.
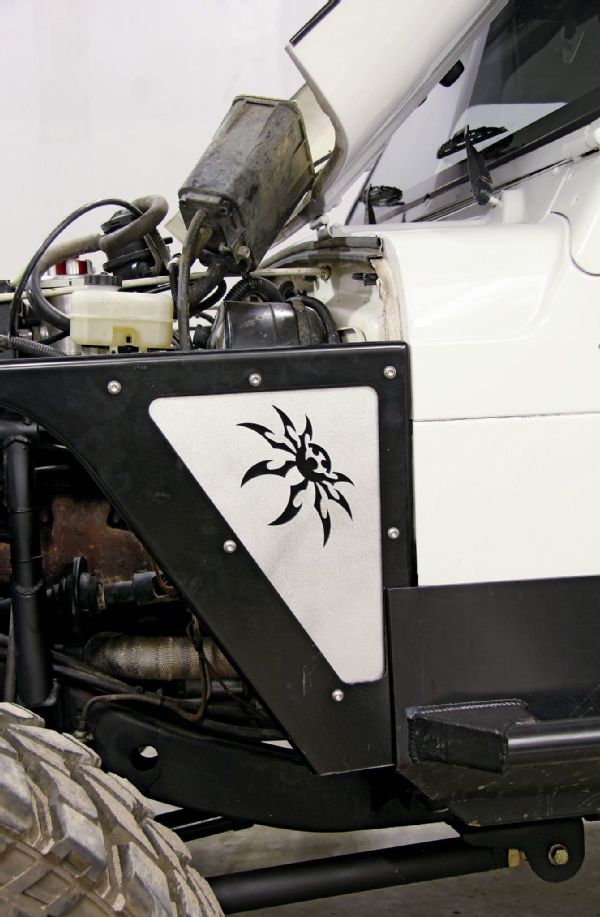
Poison Spyder includes aluminum inserts along with steel backing plates, allowing you to customize the look of your Jeep. We were digging the bare aluminum, so we installed the panels just as they shipped. Since the plates remove independent of the fender, we can easily take them out if we feel inclined later.
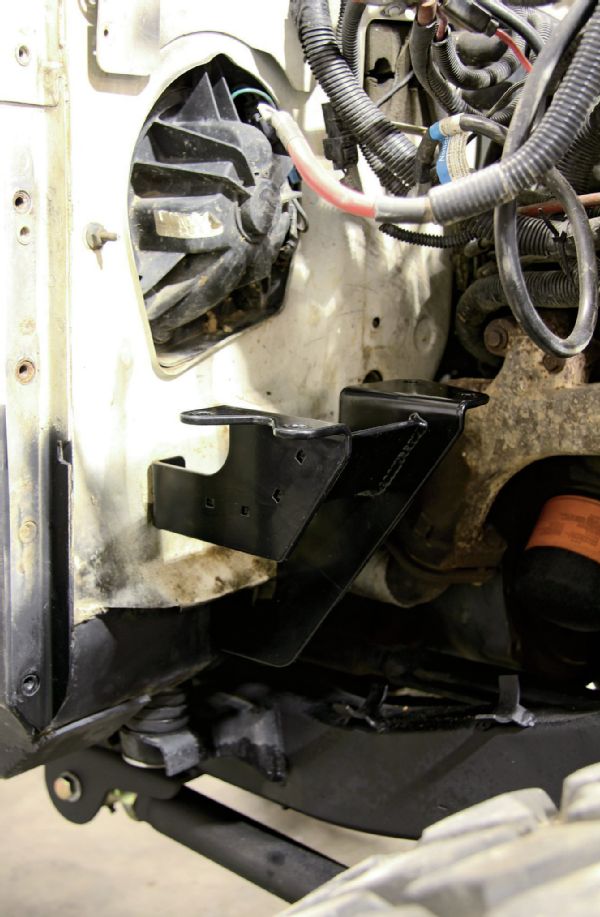
For the passenger side, Poison Spyder includes a battery bracket that allows you to reuse your TJ’s stock battery tray and hold down. This bolt-on bracket raises the battery and doesn’t require any new battery leads.

The inner fender kit comes with hardware, but you need craft your own mounts for any under-hood accessories you wish to mount to the panels. Our coilover conversion takes up a fair amount of space, so we opted to only run the upper and back portion of the fender configuration.
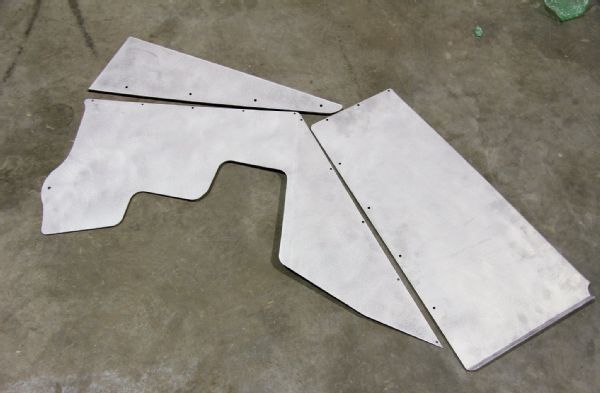
PSC’s three-piece aluminum inner fender kit is optional, but well worth having, same with the side panels. We left the aluminum bare for the install.
It’s been many years since we originally performed our DIY highline conversion, and we had to dig through the archives to find a few photos. With the raised fender height, you’ll need to trim 3 inches off your stock hood’s bottom. We used a tapeline and a cutoff wheel. To keep our hands from getting cut each time we opened the hood, we installed a small piece of trim molding purchased from our local auto parts store.
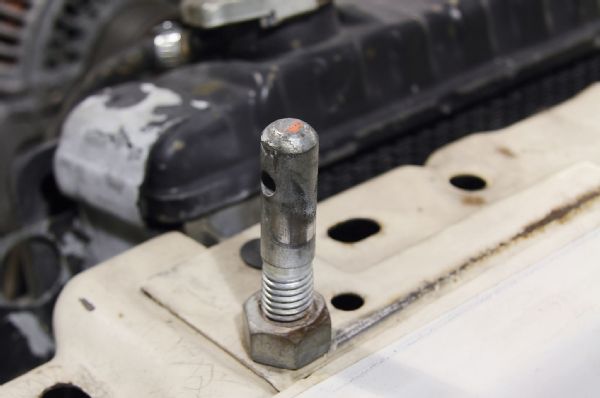
To latch the hood, we picked up this hood pin kit from Autofab. We used a hole saw, which sliced easily through the hood’s thin sheetmetal.
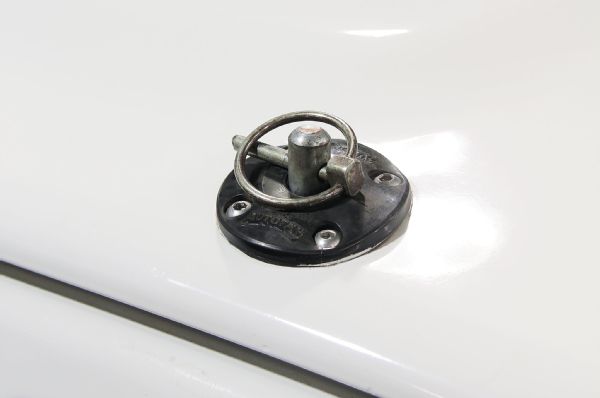
To latch the hood, we picked up this hood pin kit from Autofab. We used a hole saw, which sliced easily through the hood’s thin sheetmetal.
The only portion we didn’t have time to complete was our turn signal upgrade. Poison Spyder offers a small set of LED indicators, which will likely get you through inspection time. Because the fenders don’t offer a mounting hole for the light, the Jeep’s grill is likely where we will install our signal set.
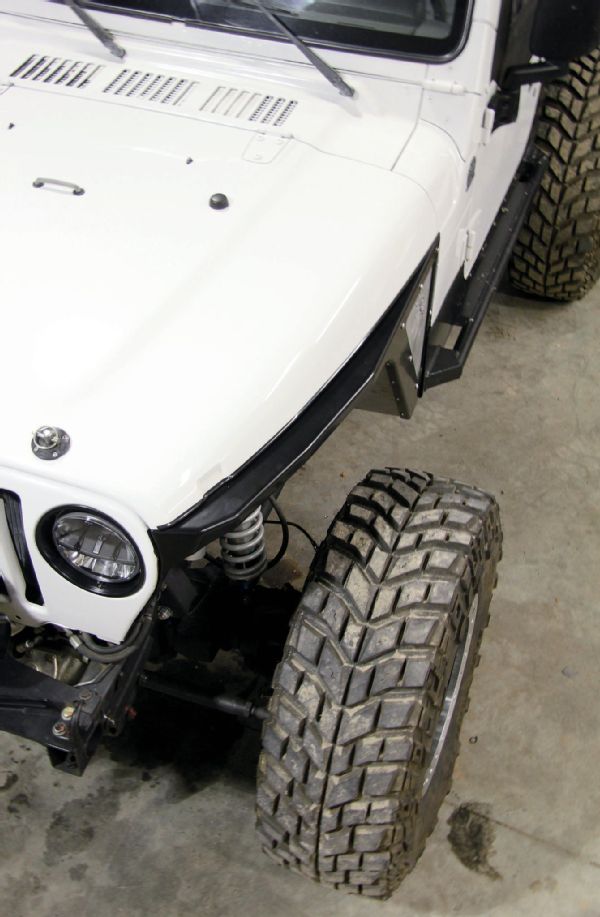
The Negative Series flares maintain a tight sweep with the hood, and in doing so, provide basically no fender coverage. This is fine for our trail rig. It allows room for bigger tires and lessens the chances of body damage off-road.