Turn Your YJ Into A CJ - Jp Magazine

Turn Your YJ Into A CJ - Nose Job Christian Hazel Brand Manager, Four Wheeler new Jeep Cj Front End parts Photo 15882002

No matter what type of vehicle you're talking about there's always the redheaded stepchild that people love to badmouth. Truth be told, in most cases we're the instigators. But for some reason we never shared the distaste some people have for the YJ. Sure, the headlights are square, but should that really earn a good vehicle the moniker "Wrongler", "fake Jeep", or "S#$%-box"? We don't think so.

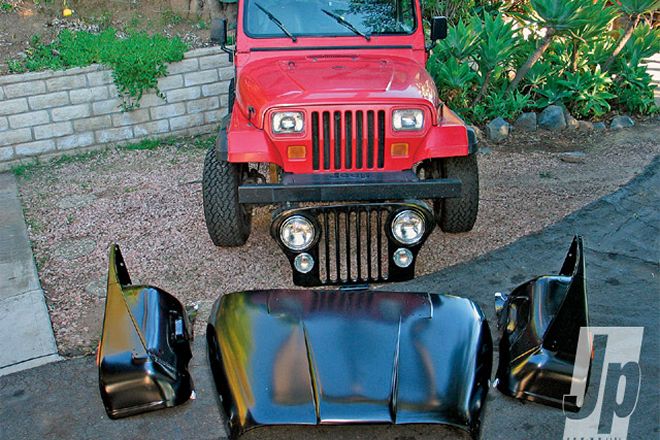
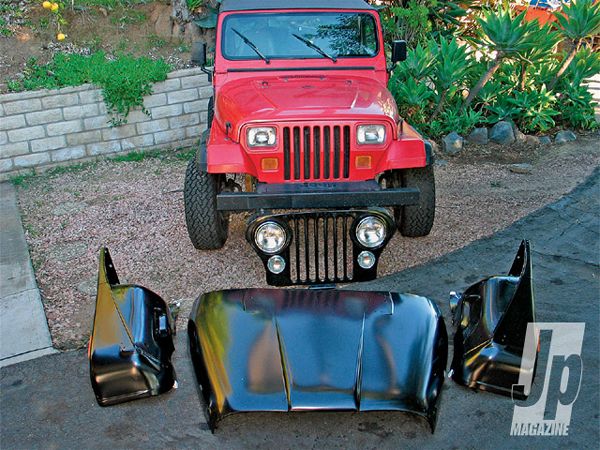
However, we know some YJ owners feel their skin crawl when looking at the '80s-era styling of their vehicle's front clip. We've gotten more than a few questions asking how to mount a CJ grille on a YJ, so we decided to order up some parts and see what's what.

We've often joked that we could build an entire Jeep from scratch using a phone and the 4 Wheel Drive Hardware catalog. One of these days we may actually try it, but for this story we come pretty close. The company had literally every body panel, light bezel, nut, and screw we needed for our '72-'86 CJ front clip. The parts arrived promptly and with no omissions or mistakes. Sadly, the days of Detroit-grade sheetmetal are over and most of the panels are thinner pieces manufactured overseas. While the fit was OK, some parts just weren't as rugged as we would have liked. Still, if you're thinking of undertaking a conversion like this and don't want to deal with the hassle of finding and restoring old, rusty factory parts, there's no easier way to go. Check out the conversion we did in an afternoon.

PhotosView Slideshow Naturally, the first step is to strip the whole front clip of the Wrangler. The Wrangler hood and grille are roughly 2 inches wider than the CJ parts, so if you choose to retain the YJ hood you'll have a gap on both sides. The aftermarket hood comes with the mounting nuts secured underneath just like the factory part, so it was simply a matter of lining up the YJ hood hinges and screwing down the fasteners. Here's that 2-inch width difference we mentioned. Had we to do it again, we'd order a heavy-duty fiberglass hood from 4 Wheel Drive Hardware for a little more durability on the trail. Although the manufacturer goes way, way overboard to protect the sheetmetal during shipping (the hood arrived inside a padded box the size of a hot tub) we noted some wrinkles here and there. The factory parts are 18-gauge, while the overseas replacement panels are thinner 22-gauge. The fenders and grille feel sturdy, having multiple layers of sheetmetal sandwiched together, but the hood is single-ply and feels very flimsy. With the CJ hood bolted up, we removed the jack, wiper fluid and coolant overflow reservoirs, and the air cleaner assembly from the fenders. These parts can easily be retrofitted to the new CJ fenders. We then removed the YJ fenders and radiator and unplugged the light harness from the side marker and headlights. Remove the grille's frame mounting bolt and then snake out the lighting harness from the YJ grille. The CJ grille's frame mount is quite a bit lower than the YJ's and is positioned back farther, but more on that in a bit. With the YJ sheetmetal completely stripped, it's time to mount the fenders. Despite their similarities, the CJ fenders are about 1-inch wider on the inside than the YJ parts, so they hit the framerails unless some trimming is done. We used an air nibbler and a small cutoff wheel to make short work of the trimming job. You don't need to remove quite as much material as we did, but even this moderate cut job will give us slightly better cooling and easier access to the fender-to-tub bolts from underneath. Here's the resulting clearance from our sheetmetal trimming. If you frequent mud you may want to leave a bit more metal behind the tire area, but we noticed no decrease in fender rigidity resulting from our trim job. We weren't kidding when we said 4 Wheel Drive Hardware had every nut and bolt we needed for the conversion. In addition to the sheetmetal, we ordered headlight buckets, side marker and directional lights, headlights, headlight trim rings, and even the mounting hardware. And it all fit like a glove. Regarding the radiator, the Wrangler unit tucks right inside the CJ grille's recess. You'll need to make brackets from two 15-inch long pieces of 1-to-2-inch strap steel or angle iron to mount the Wrangler radiator inside the CJ grille. You can either tack weld the brackets to the CJ grille, or there's enough meat to bolt them on using some small 1/4-inch bolts. With the fenders loosely bolted up, we test-fit the grille. Our YJ has a manual steering box, but some major sheetmetal trimming of the CJ grille will be required if the vehicle is equipped with power steering. The steering box pressure and return lines will need to go right where the author's grimy finger is pointing, so don't put the cutoff wheel away too quickly. There are a couple ways you could address the YJ's frame mount for the grille. Ideally, you'd cut it off and extend it 1-2 inches and drop it 1 1/2 inches. Or, if you're running a 1-inch body lift you could omit the lift puck from the grille mount and use some scrap steel to extend the YJ mount. Even with the YJ mount lowered, the CJ grille won't drop between the framerails far enough to prevent a big gap and this ugly misalignment of body panels. You'll need to trim a slight amount off the lower corners of the grille to allow it to drop between the framerails, pulling the fenders and hood gaps into alignment. In the grand scheme of things, converting the YJ front clip to CJ parts isn't a hard project. You don't even really need a welder, but the finished results will be a lot better if you cut and weld the grille mount on the frame. And although we chose to work in steel, don't discount the many fiberglass options you can check out at 4wd.com.