2002 Ford Ranger Body Lift - 4Wheel & Off-Road Magazine

2002 Ford Ranger Body Lift - Body Lift Basics Ali Mansour Brand Manager, 4WD & Sport Utility 2002 Ford Ranger Body Lift rear View Photo 9340385

Do you have an old truck that you want to put bigger tires on, but don't want to hack up or invest a ton of dough on a new suspension system? If so, a body lift may be just what you've been looking for.

Since the invention of body-on-frame construction there's been the need to lift the body from the frame. Factory applications have been used to clear larger transmissions and turbos, and gain interior room. The aftermarket world uses those few inches for that small-block engine conversion or that extra belly clearance when trying to tuck your drivetrain high within the body.

One of the best parts about a body lift is that it will usually set you back less than 200 bucks and can be easily installed by you and a couple of buddies over a weekend. Although a body lift is not particularly difficult to install, you will need to be patient and take your time. There may only be a few ground straps and wires to undo on some, but many later-model vehicles can require a fair amount of rerouting of wires and linkage to gain the appropriate height.

2002 Ford Ranger Body Lift measure Photo 9340388 
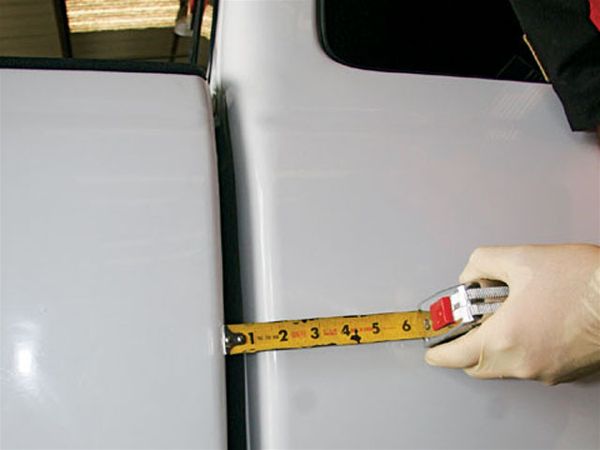
Before you get started it's a good idea to take a few initial measurements of the gaps between the bed and the cab and between the bumpers and body. These will aid you as reference points when it's time to tighten the body down.

We encourage you to use your head when tossing on a body lift. Like most things in life, too much of anything can be extremely bad. If there isn't a 6-inch body lift made, there's probably a good reason. Most guys find that a simple 1-inch body lift is all they need to gain that extra little bit of space before dealing with new drop-down brackets and cable bind, and these kits will hardly be noticed by the untrained eye.

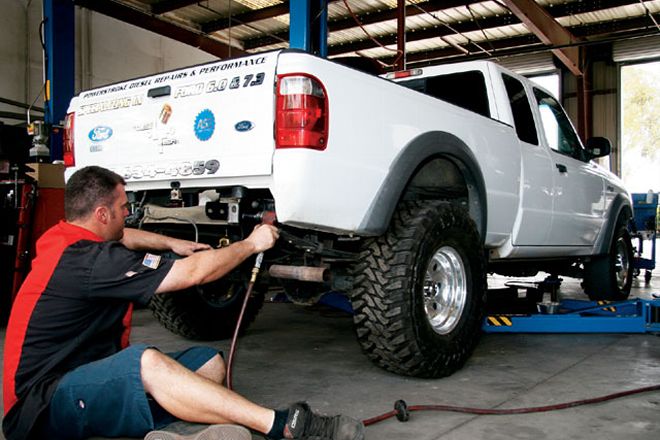
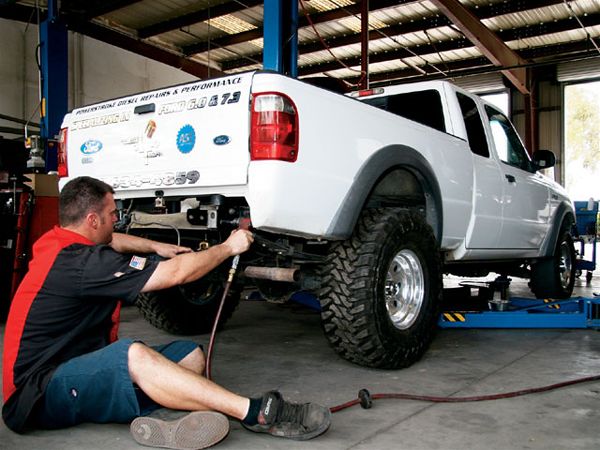
To show you the basics of installing a body lift we drove down to Diesel Tech where Loren Taylor and his crew of certified technicians gave their shop truck ('02 Ford Ranger) a 3-inch boost. Although we had the advantage of using a two-post lift to raise the truck, we could have just as easily installed the lift in a driveway using a few blocks of wood and a floor jack. In short, body lifts are extremely useful when used correctly and will give you that extra bit of room you're looking for without breaking the bank.

PhotosView Slideshow Many late-model vehicles have a series of ground straps and wires that can bind or break if not loosened or detached before you lift the vehicle. Each rig is different so be sure to check and double-check your instructions to ensure you don't rip apart some costly electronics. As your body lifts so does the radiator and shroud, but your fan stays in place. This is usually dealt with in two fashions: You drop the shroud down through a series of new brackets or you will need to cut the shroud in two to allow the bottom portion to be spaced down. Most body lifts will require you to unbolt the fuel neck from the body. This will keep the neck from becoming damaged whenever you lift the body. Once the lift is installed you will need to take the provided hose extension tube and sleeve it between the original filler neck to compensate for the new distance. When separating the frame from the bed it's easier to lift one side at a time rather than lifting the entire body at once. We used a transmission jack to keep the body elevated as we lowered the truck down from the rack. The same principle can be applied when using a floor jack. With the body supported, slide in the supplied body pucks that will give you the desired lift, then drop in the supplied longer bolt. If you are lifting a pickup as we are, you will notice that there are a few places where you will be unable to bolt in a puck. In this case, you will take the metal rectangular spacers from the kit and weld them to the frame and body to give you the additional support. PhotosView Slideshow It will be necessary to pull back the corners of the carpet to gain access to the body bolts that hold down the cab. The cab sits on a two-sided bushing that will need to be reused when installing the body puck, as it will sit atop of the factory bushing. The steering shaft will only allow a limited amount of extra length until the shaft pulls apart. To correctly extend your shaft, use the provided extension that bolts into the bottom part of the shaft, allowing for a longer shaft. Although there is room for most cables to stretch on the vehicle, one device that you always want working properly is your emergency brake. To adjust for the body's high location, you will need to drill two holes for the new guide bracket that will keep your emergency-brake cable from binding or becoming kinked when engaged. New bumper brackets are used to raise the bumper levels along with the body. After all the pucks and new brackets are installed, refer back to your original measurements to recreate the original gaps between the bumper and the body. To finish out the 3-inch body lift we went over to Ramona Tire to mount up a set of 33-inch Toyo MTs on 15x8 America Racing polished-aluminum wheels. The Toyo's 13.50-inch-wide footprint created a minor rubbing situation on the front bumper. In this case a little trimming was all that was needed to allow the tires to clear without any problems.