 Christian Hazel
Brand Manager, Four Wheeler
Christian Hazel
Brand Manager, Four Wheeler
As off-roaders, we put a lot of thought into making our 4x4s more capable. Bigger tires, beadlocks, improved suspension, lockers, and stuff like that are usually high on our priority list. But don’t forget with bigger tires and heavier wheels comes more inertia, which can quickly overwhelm your factory brake system. Stopping distances grow, and before you know it, you’ve plowed your fancy new bumper and winch fairlead right into that minivan in front of you.
There are many aftermarket brake upgrade systems out there for all sorts of vehicles. And while these big-brake systems come with massive stopping power, they often come with an equally massive price tag. But with some careful parts selection, you can improve the performance of your existing disc brake system without a bank loan. EBC Brakes has long been our go-to for high-performance pads and rotors. The company’s simple color-coding system makes it fairly easy to select a very high-quality pad for almost any driving style, and its catalog covers just about any vehicle we’ve been able to think of. Traditionally, we’ve run the company’s GreenStuff 6000-Series (street oriented, long life, low dust) or YellowStuff 4000-Series (high friction, high temperature, heavy load, low dust) pads. But when the company announced a new pad formula to its lineup, the Extra Duty 9000-Series, we had to try it.
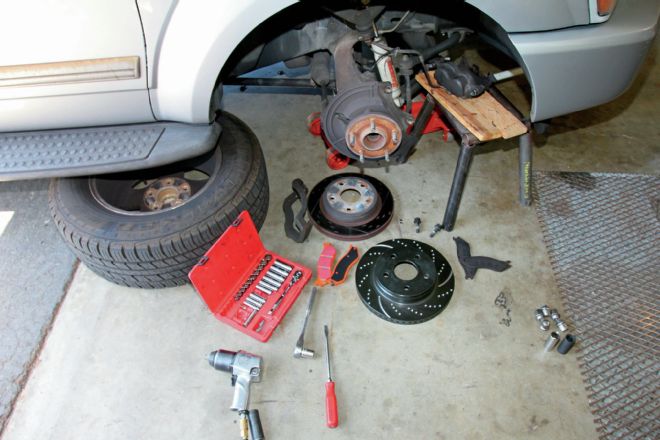
Designed for Jeeps, SUV, and trucks that see severe use and heavy towing, the orange-colored Extra Duty 9000-Series pads have a high-friction compound that promises great bite and long life. After taking stock of our available test mules, we decided to put a set of the new pads, along with four new EBC dimpled and slotted rotors, on our 180,000-mile ’04 Dodge Durango. Granted, it’s a 2WD model, but other than the stub shafts, the front brakes are identical to most ½-ton Dodge trucks and SUVs of the era. We installed a new set of over-the-counter parts store pads, and after bedding them in, we used our G-Tech Pro from Summit Racing to measure the 60-0 stopping distances. Then, we installed the new EBC pads and rotors, and after allowing them to bed in for about 1,000 miles, repeated the test. So follow along for some simple brake-job tips and to see how we shaved almost 30 feet off our stopping distance.
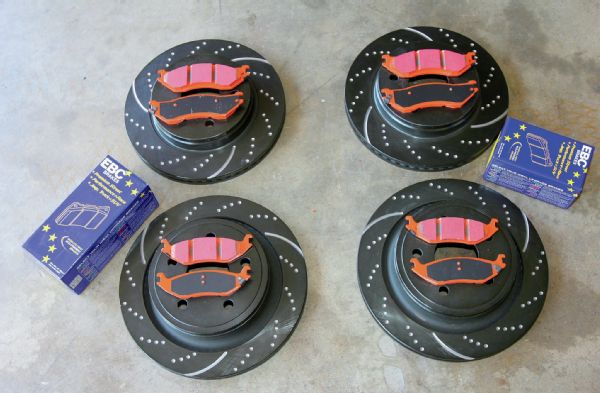
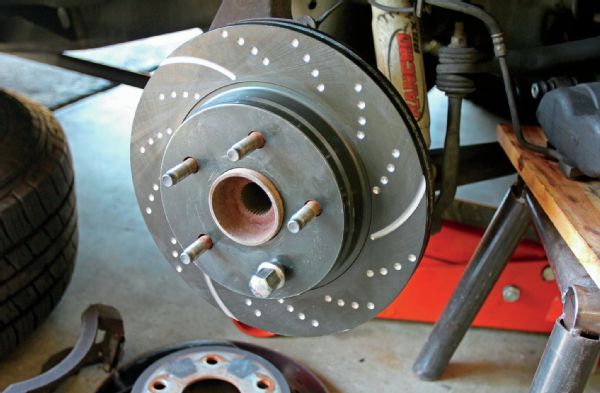
Unlike cheap China parts, the British-made EBC rotors perfectly matched the dimensions of the factory 13.2-inch–diameter front and 13.8-inch–diameter rear rotors. Close adherence to factory tolerances helps put an even bite on the rotors and ensures even pad wear over the lifespan of the brake parts. For heavy-use applications like ours (lots of towing), steer clear of drilled rotors, which can develop stress cracks under severe use. The black zinc plating of the 3GD-Series Sport Rotors will keep corrosion at bay, and the dimples and slots help evacuate brake gasses and aid cooling.
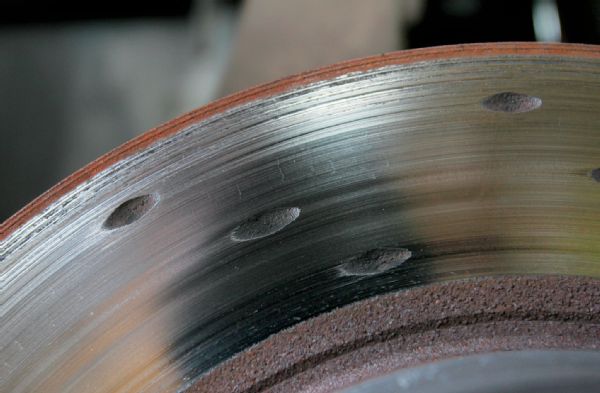
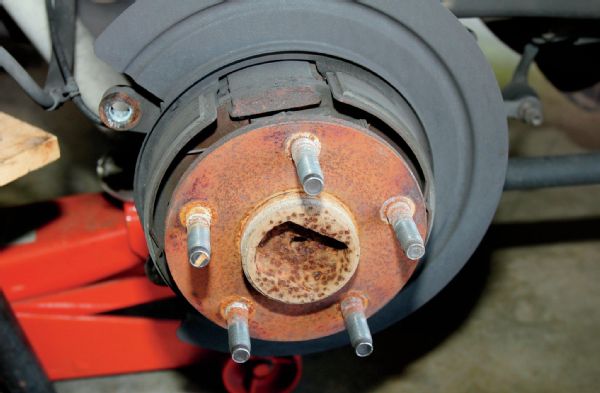
Years of heavy towing at the weight limit of the vehicle’s chassis on mountain roads had taken its toll on the old aftermarket front rotors. In addition to grooves worn into the rotor after an old set of $15 parts store pads blew apart, there are stress cracks just visible along the grain of the rotor casting. While not exactly unsafe or unusual, it’s far from ideal, so replacement is a much better option than machining or just leaving them alone.
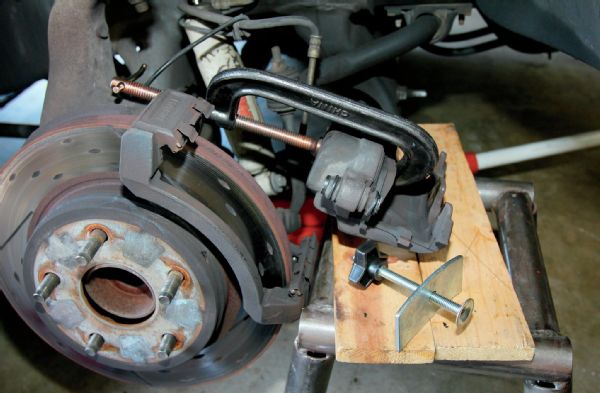
You’ll need to compress the caliper pistons back in their bores to install the new pads. You can buy or rent a caliper tool (foreground) but we always use an old brake pad and a big C-clamp. Go a half-turn on the clamp at a time, allowing the brake fluid to travel up to the master cylinder. Make sure you get the pistons fully compressed or the new pads won’t fit over the rotors.
You’ll have to remove the caliper brackets to access the rotors. Use a lug nut to hold the new rotor in place as you reinstall the caliper bracket and caliper. We always use blue Loctite on the caliper bracket and caliper bolts to keep things together.
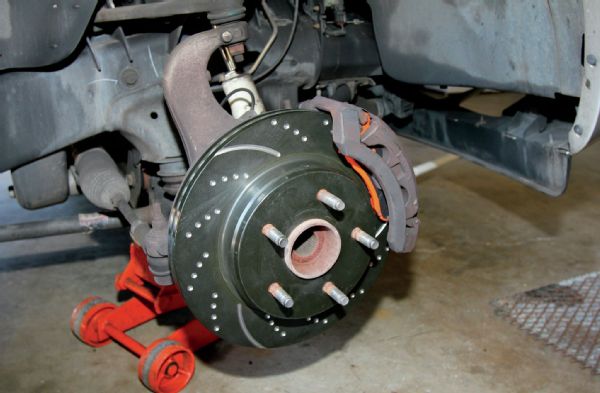
On most modern vehicles, you load the pads into the caliper brackets first and then lower the caliper onto the bracket around them. A gentle nudge with your palm should be all you need. Don’t go reaching for the dead-blow hammer if the caliper won’t go on. Instead, check the rotor is firmly against the wheel flange and/or the calipers are seated against the rotor and the caliper pistons are still fully retracted. Hammering the caliper on is a great way to break brake stuff.
Work one side at a time not only so you have a guide if you mess things up, but to keep the master cylinder from overflowing. After you reinstall your caliper, depress the brake pedal inside the vehicle to push the pistons back out and put the pads in contact with the rotor. This also helps ensure you won’t go coasting into a tree the first time you depress the brakes when pulling your truck out of the garage.
Out back, the install goes down just like the front with the exception of the emergency brake. Some vehicles employ a caliper clamp, but most modern vehicles since the late ‘90s employ a small drum inside the rear rotor hat. Normally you can get the rear rotors off without a fight, but if they don’t want to budge, you’ll have to back off the rear shoe adjusters a few clicks. Don’t forget to depress the E-brake a couple times to adjust the parking brake shoes back into adjustment before trusting the E-brake.
Bedding & Testing
Before you go out and tear up the tarmac with your new brakes, you’ll want to make sure the pads are properly bedded into the rotors. EBC pads come with a special break-in coating the aids in braking during the bed-in process. For the Extra Duty 9000-Series pads, EBC suggests roughly 1,000 miles of normal driving, avoiding hard stops if possible. During this time, look for a bluish band to form indicating rotor contact across the rotor face. Once a full contact band is achieved, you perform a series of stops (8-10) from 60 mph down to about 10 mph in succession and then coast the vehicle without applying brakes for a few miles to cool the rotors and pads down. Make sure the brakes are cool before parking the vehicle.
We followed this procedure in the interests of obtaining proper before-and-after numbers. With our G-Tech Pro installed on the windshield, we made a series of full-bore braking runs from 60-0 with the old parts-store pads and aftermarket front and rear dimpled and slotted rotors, averaging the best three runs. Then, several weeks later when the EBC parts had been properly bedded and broken in, we repeated the test, again taking an average of the best three runs. Here are our numbers.
Before (60-0 mph in feet): 160.0
After (60-0 mph in feet): 132.1