Ranchos 2.5-Inch Coil Kit - Jp Magazine

It seems like a short time ago that Jeep was heralding the introduction of a new and redesigned Wrangler for 1997. The changes to the YJ platform were the subject of much discussion among SUV enthusiasts everywhere.

154 9901 Ranchos 2 5 Inch Coil Kit jeep Wrangler Tj Front Shot Photo 30801169

Most folks had comments and questions about everything from the initial offering of airbags to the return to round headlights, but the one topic that generated the most interest among our trail-riding brethren was the quad-coil suspension. Many die-hard purists initially felt that once again off-road ability was being sacrificed for on-road handling.

154 9901 Ranchos 2 5 Inch Coil Kit kit Photo 30801088 
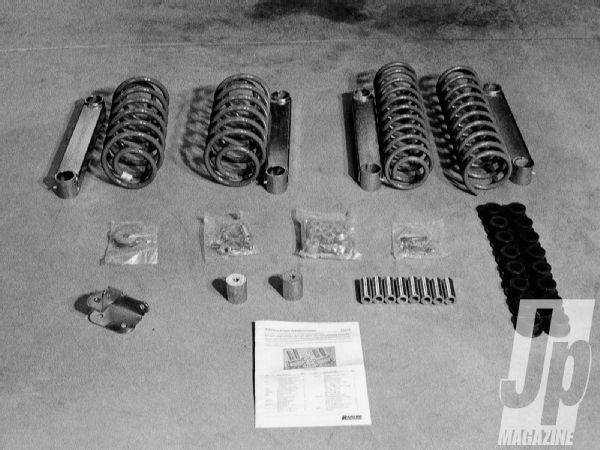
The Rancho kit comes with everything needed, including a detailed instruction manual with illustrations and photos.

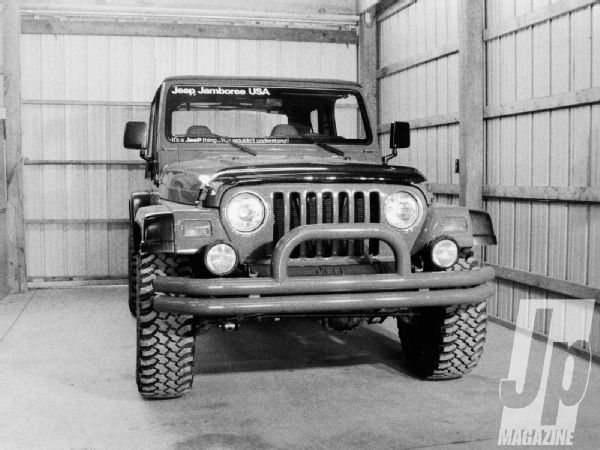
Our first testdrive was in a fully equipped 4.0L, five-speed model. The test trail at Performance Off-Road includes rockcrawling, hill climbing, and a goodly amount of mud. We admit to being quite pleasantly surprised at the capabilities of the TJ on all types of terrain and in all kinds of situations. On- and off-road, the TJ continued to impress and led us anxiously in pursuit of even greater vehicle performance.

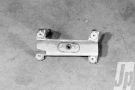
We decided to start with a Rancho Suspension lift kit. The 2 1/2-inch kit provides everything necessary to completely upgrade the entire system. Four new coils provide the lift, and heavier lower suspension arms equipped with poly bushings and zerk fittings handle the locating chores. The taller coils require longer shocks, so the kit contains four Rancho RS9000 adjustable shocks. Also included: a transfer case skidplate relocator kit, a track-bar relocator assembly kit, a shift relocator kit, bumpstop spacers, and comprehensive, illustrated instructions. The instruction booklet suggests an installation time of six to eight hours. What follows is the step-by-step installation process.

154 9901 Ranchos 2 5 Inch Coil Kit lubing Bushings And Sleeves Photo 30801097 
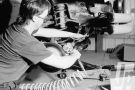
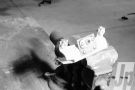
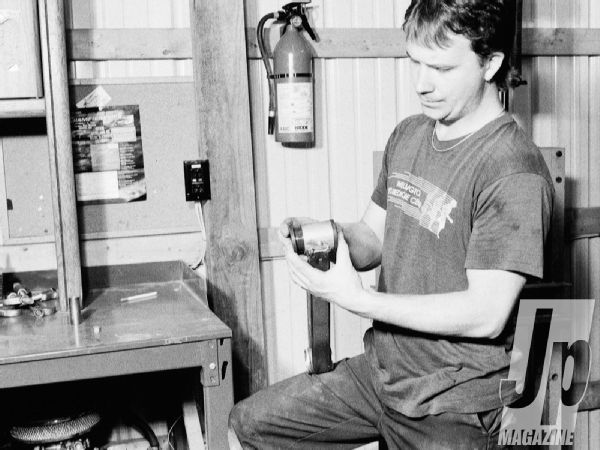
Installation prep includes lubricating the urethane bushings and sleeves and installing them in the suspension arms. Support the vehicle on jackstands. TALE OF THE TAPE ANGLES Stock Suspension Rancho Suspension AND CLEARANCES with 31/10.50 Tires with 33/12.50 Tires Approach Angle 43 degrees 52 degrees Departure Angle 25 degrees 34 degrees (due to low receiver hitch) (same hitch) Front Differential Clearance 9.25 inches 10.75 inches Rear Differential Clearance 9.25 inches 10.75 inches Skid Plate Clearance 9.75 inches 12.75 inches PhotosView Slideshow After removing the tires and wheels and placing a hydraulic jack under the axle for support, remove the lower stabilizer link bolt and lower shock mount bolts, then remove both shocks. There should be no weight on the springs at this point. Although the instructions called for removal of the bump stop and mount, it wasn't necessary on this vehicle. Remove the spring retainer clamp at the bottom of the spring located on the axle spring pocket. Lower the front axle enough to remove the front spring coils, then raise the axle back up to ride height and make a reference mark on the cam bolt and reinforcement bracket. The marks will be used during final assembly for alignment purposes. Rancho also includes instructions to address ABS brakes if the vehicle is so equipped.
Remove the lower suspension arm cam bolt at the axle bracket and remove the nut and bolt at the framerail mount, then remove the arm. Removing only one arm at a time makes it easier to align and install the new Rancho arm.

Place a shim on each side of the bushing, then install the arm. Make sure the grease fitting on the arm points toward the front of the vehicle, and the grease fitting near the frame bracket points toward the ground. Tighten the frame bracket bolt to 130 lb-ft.  Align the cam adjuster bolt so that the reference lines meet, then tighten to 85 lb-ft. Repeat the arm installation steps on the other side. Lower the axle, then compress the Rancho coil  to ease the installation. Make sure the bumpstop and spacer float inside the coil, and then rotate the end of the spring so it fits in the axle pocket, as shown. Reinstall the retainer clip to the axle spring pocket, and install the bumpstop.
Install the new Rancho shocks. Install the upper shock nut and bolt and the axle bracket bolts, then tighten it to 23 lb-ft. Reinstall the stabilizer bar links and tighten to 70 lb-ft. Reinstall the tires and wheels, and the front end is finished.
On the rear axle, start by disconnecting the stabilizer bar links. Next, remove the shock absorbers. Disconnect the track bar. We unbolted it from both the framerail bracket and the axle bracket to make the job easier.
Carefully lower the rear axle until the coil springs are free from their upper mounts and remove them.
A preliminary fit-up of the supplied Rancho track bar bracket allowed us to use the bracket as a template to mark and center punch the holes to be drilled. Drill the upper (top) hole to 13/32 inch, and the lower hole to 15/32 inch. Use the supplied hardware to attach the bracket to the axle, and be sure to install the included sleeve.

After reinstalling the track bar, raise the rear axle to ride height to remove the suspension arm. Remove only one arm at a time. The process is the same as with the front. Remove the mounting bolts at either end of the arm and then remove the arm.
Installation of the new rear arms is identical to the process used on the front suspension. Place a shim on each side of the bushing, position the arm in the framerail bracket, and install the mounting bolt. Repeat on the axle end of the arm. Be sure the grease fitting on the axle bracket end of the arm points toward the rear of the vehicle, and the fitting on the framerail end  points to the ground. Tighten the bolts to 130 lb-ft.
Remove the rubber bumpstops and bumpstop mount from the center of the coil pocket. Install the Rancho bumpstop spacer between the spring pocket and bumpstop mount. Use the supplied hardware to mount the bumpstop. Make sure the rubber damper is in its proper place between the bumpstop and spring pocket.
Lower the rear axle and install the compressed coil spring. Make sure the small egg-shaped coil is pointed to the top, and the pigtail is pointing to the rear of the vehicle. Center the coil in the spring pocket.
Attach the brake cables, then install the required longer shocks. Tighten the upper bolts to 23 lb-ft, and the lower bolts to 74 lb-ft. Reconnect the stabilizer links. Tighten the bolts to 40 lb-ft. Reinstall the tires and lower the Jeep to the ground.
Support the transfer case crossmember with a hydraulic floor jack, then loosen and remove the six bolts that hold the crossmember to the frame. Carefully lower the entire assembly about 2 inches. Place the Rancho spacers between the frame and the crossmember with the conical end toward the crossmember. Put a conical washer on each bolt, use a threadlocker, and then thread it into the frame. Tighten the six bolts to 30 lb-ft.
Installation of the supplied torque shaft bracket kit requires the removal of these four screws on the driver side of the transmission hump. These screws attach the torque shaft bracket to the floorpan. After removing the screws, just slide the bracket off the torque shaft.
This is the torque bracket. Remove the two self-tapping screws and the bearing plates and drill the two threaded holes to 9/32 inch. Use the supplied hardware kit to install the relocation bracket to the torque shaft bracket. Reinstall the torque bracket, making sure the torque shaft is level. Adjust the torque shaft bracket by shifting the transfer case into 4L. Loosen the lock bolt on the adjustment trunnion. Verify that the shifting lever is fully engaged in 4L. Tighten the adjusting trunnion lock bolt.