Lift It Yourself: Dirt-Cheap Lift Tips - 4-Wheel & Off-Road Magazine

Rick Péwé Editor-in-Chief, 4Wheel & Off-Road Photographers: Rick Péwé

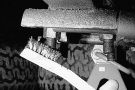
This story may seem a little basic for our seasoned readers, but slapping on a leaf-spring lift kit isn't always as straightforward as you might think. This is especially true on an older 4x4, where some of the instructions just don't cut it. "Remove bolt from bracket" may actually require a torch and a 2-ton hydraulic press instead of a Crescent wrench. In addition, other components may need to be replaced due to wear and tear, and it's much handier to get these extras first so you don't have to leave your 4x4 on jackstands and walk 10 miles to the parts store just to finish the job.

131 9802 Lift It Yourself Dirt Cheap Lift Tips jeep On Jack Photo 29174060

That's one of the reasons we called 4 Wheel Parts Wholesalers for our lift kit. The company stocks complete kits and replacement parts, and mail order can be extremely handy if you live in the hills or your schedule just doesn't jibe with running around and picking up parts. One phone call delivers everything to your doorstep, and technical advice is also just a phone call away.

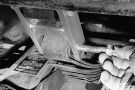
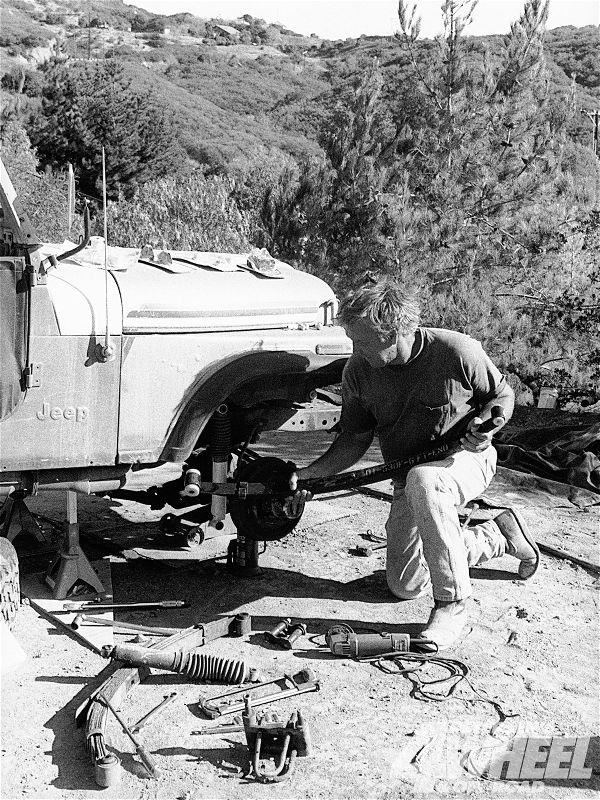
We decided to tackle a fairly representative vehicle, a '76 CJ-7 with unidentifiable re-arched lift springs that rode terribly. The Jeep has 33-inch tires and sees a variety of terrain, so Pat McCarty at the Van Nuys, California, 4 Wheel Parts Wholesalers store suggested Superlift 2 1/2-inch springs with Rancho RS 9000 adjustable shocks, and he recommended new U-bolts front and rear. With parts in hand, we decided to show you how to do it yourself, and we decided it would be a genuine in-the-dirt installation without the benefit of a clean shop, a level floor, and every tool known to man. If you're lucky enough to have a concrete slab, air tools, adequate lighting, a fan or a heater, or any other luxuries of the trade, your experience may be easier and quicker. However, there are some who thrive on adversity or can't afford a shop to install their parts. Whether you fall into the first or second category, follow along as we peruse the pitfalls of poor planning and show you the nitty-gritty of doing the job right.

PhotosView Slideshow The amount of lift gained from aftermarket springs varies due to the condition of the existing springs, frame, and axles. Different kits will also raise the vehicle different amounts and not always the exact amount the catalogue indicates. If you actually care about the precise amount of lift you're getting, measure a reference point front and rear on the body or bumpers, and write it down before and after the lift. Make sure you eliminate such variables as extra weight placed in the rear or new tires which alter the true measurement.
To support the vehicle safely, place the jackstands behind the spring pivot brackets on the frame. And for added safety, place the tires underneath the vehicle to keep it from hitting the ground should it fall off the jackstands. Use the tallest stands you can get, because the axle and suspension will droop considerably and may not leave you room to use a floor jack under the axlehousing. If you're working in the dirt as shown, a couple pieces of plywood under the jackstands will distribute the weight more evenly on the ground, which is better than the jackstand digging into the dirt and possibly getting cocked sideways.
A slick tip is to soak every nut and bolt with a penetrating oil before changing springs and shocks. If you're really on the ball, take your 4x4 to a self-serve car wash and use the high-pressure hose to get rid of mud and grease, then lube the nuts and bolts the day before you start work. If you live in an area where salt is used on the roads during winter months, this may be your only hope of getting rusty hardware off the axles and frame.
Because of the location of the U-bolts that hold the spring to the axles, the U-bolts bear the brunt of abuse from rocks, dirt, corrosion, and crud. Dirt that's packed between the exposed threads is best removed with a small wire brush and solvent. If you're planning to reuse the U-bolts, check for damage from rocks, such as crushed threads, and use a die or thread chaser to reform the threads for easier removal of the nuts. If the new springs have a shorter stack than the original, make sure the threads extend high enough so they can be reused with the thinner spring stack. On a spring-over vehicle, the axle must be supported by jacks or jackstands, with a support on the pinion yoke to prevent axlehousing rotation. On this spring-under 4x4, the axle stays on top of the springs and won't move until the springs are removed. The jackstands used here are too short to hold the axle high enough for us to use a deep socket wrench on the nuts, and the floorjack will barely fit under the axlehousing.
Worst-case scenarios include bent U-bolts on the exposed threads bottom which will prevent you from removing the nuts. In this case, cutting off the U-bolts is the only answer. If new U-bolts are in order, many shops will use a cut-off wheel or a grinder to save time. In this case, a hacksaw is used to saw through the top of the U-bolt so that it's released from the housing. This is one of the reasons many products are made to protect the threads or change the direction of the U-bolts, which points the threads up out of harm's way.
Once the spring plates and U-bolts are removed, the axle needs to be supported by jacks before the spring is taken off. The recently installed Daystar greasable shackles came off easily, but rusty, stock units have a habit of breaking the bolts, so replacement shackles should be on hand. The pivot-end bolt often rusts itself to the inner sleeve of the bushing, and you won't be able to get the bolt out without cutting between both sides of the bracket and the spring. Again, replacement bolts are very handy. It's a good idea to clean the axle tubes where the springs and the U-bolts mount, as well as the shackle and pivot brackets. Clean off the crud with a small brush and solvent, then coat the parts with paint to make installation cleaner. The rest of the axle and frame can be done later as time permits. The spring plates should also be freshened up, and spruce up the U-bolts and nuts if you plan to reuse them. 
Check out your parts before installation. The new Superlift springs have less of an arch and are longer than the ones we took off, but the old springs had two add-a-leaves installed, which arched the springs more and made them effectively shorter. Notice how much thinner the new spring is, which is why the old U-bolts won't work because the threads don't go up far enough on the U-bolt.
Before you install most aftermarket springs, such as this Superlift kit, you need to install the supplied polyurethane bushings. Special grease is available to lube the bushings for easier installation and a squeak-free ride on the road. On this CJ, the front springs are narrower than the rear and the bushings have a different thickness flange as shown. Make sure you use the proper size for your vehicle so installation is correct.
Sometimes brackets need to be spread a bit to get the new poly bushings in, and a hammer is also helpful. Grease the bolts for corrosion protection, and, after aligning the hole and bushing with a drift punch, slide the bolt in. Install the nut on the bolt, but leave it loose until everything is assembled in case the components are slightly misaligned. However, don't forget to tighten the nuts after installation is complete. On some vehicles with headers, the bolt may have to be inserted from the backside. Aligning the axle on the springs is easy, but care must be taken to do it correctly. The spring pad center hole must match up with the center pin on the spring; don't accidentally place it in the other two recesses as shown here. If the springs are too far apart or too close to allow the pins on both sides to engage the holes, use a ratcheting tie-down strap to bring the springs together or a spreader bar to force them apart to correct small alignment differences.
The U-bolt spring plate has a similar hole which must be aligned with the bottom nut of the center pin, and we found a few nuts that were too big to fit. If this is the case with your lift, enlarge the hole to allow the nut to fit through, then install the plate. The nuts on the U-bolts should be tightened evenly until they're snug and nothing moves around. Make sure the shock pin on the plate points in the right direction for mounting the shock.
Once the Rancho RS 9000 shocks are installed, the adjustable knob should face rearward for protection from rocks and road rash. The boots on our shocks were left off since we've found that they usually fill up with water and mud, which will eventually ruin the seals and the shock. The extra length of the U-bolts sticking out past the nuts should be trimmed to prevent them from hanging up on rocks and getting bashed. After the first 100 miles or so, all attaching hardware should be retightened and checked for safety and security.
A good trick before torquing the U-bolts is to tap them from side to side so they're centered on the axle. A crooked U-bolt can loosen after being used a while, which can cause strange handling characteristics. Tighten the nuts each time the U-bolts are tapped until they don't move anymore and are straight, then torque them to specifications. Overtorquing the nuts can cause the plates to bend and the U-bolts to bow, so don't overdo it.
Shock length should be checked before installation since the application charts aren't always accurate, and most vehicles have some inherent variations. In this case, when the suspension was at droop, the old shock stopped the axle from dropping to its full potential by 2 inches. The distance with the new springs installed and at full droop was 19 inches, and the distance from the bumpstop to the axle was 6 inches. This means the correct shock needs to be just over 19 inches extended and 13 inches compressed, and the Rancho shocks we used measured 20 inches and 13 inches. This will give the spring a bit of extra droop, and with new bumpstops it should also be satisfactory on compression. Once the Rancho RS 9000 shocks are installed, the adjustable knob should face rearward for protection from rocks and road rash. The boots on our shocks were left off since we've found that they usually fill up with water and mud, which will eventually ruin the seals and the shock. The extra length of the U-bolts sticking out past the nuts should be trimmed to prevent them from hanging up on rocks and getting bashed. After the first 100 miles or so, all attaching hardware should be retightened and checked for safety and security.
Actual testing showed a remarkable difference in the flexibility of the suspension. The resulting good ride and good articulation meant that the old springs rode poorly and needed to be replaced, and the actual ride height was the same in the front and half an inch higher in the rear. Now the Jeep can be loaded when a camping and 'wheeling trip is planned, and it won't sag in the back.