The standard black rubber coolant hose has its place in the automotive world, but when you need to step it up in the looks department, it’s good to know you have options.
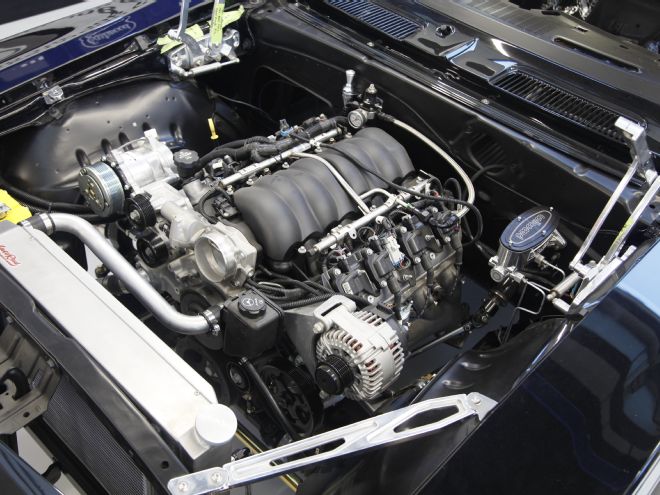
For our LS3-powered, Pro Touring 1969 Camaro we wanted to have something that would give us the ability to route the lines where we wanted instead of using prefabbed, off-the-shelf stuff. We also needed it to look good, so Jason Scudellari, TEN Tech Center Manager, suggested using exhaust tubing.
We liked the idea, so we went to summitracing.com and ordered up a couple 16-gauge, 1 1/2-inch diameter mild-steel, mandrel-bent U-bend pieces (PN SCH-015016U) as well as a 7 1/2-foot, 16-gauge, 1 1/2-inch-diameter piece of straight tube (PN WLK-47980). With a bit of welding experience and a little extra time and patience, it’s a fairly straightforward job.
To create the two hard lines—one coming from the water pump return to the inlet at the top of the radiator and one going from the outlet at the bottom of the radiator to the water pump—took us a total of about 3 hours. That included cutting, welding, a little grinding, and metal finishing.
Yes, it’s a little more work than simply connecting up some generic radiator hose, but for about $40 and a few hours time, our engine bay looks nice and tidy, and we have a custom, clean look.
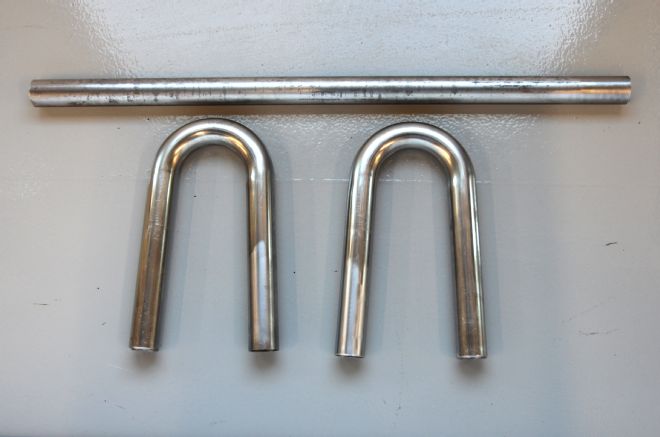
01. To get started, we jumped online and ordered two 16-gauge, 1 1/2-inch mild-steel U-bends (PN SCH-015016U) and one straight length (PN WLK-47980) of the same gauge and diameter exhaust piping from summitracing.com. All three pieces only set us back about $40.
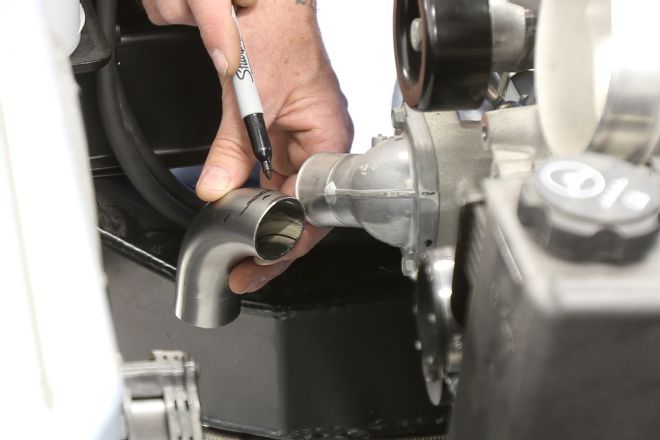
02. Our first order of business was to grab a Sharpie and mark a U-bend in the middle to get our first 90-degree turn.

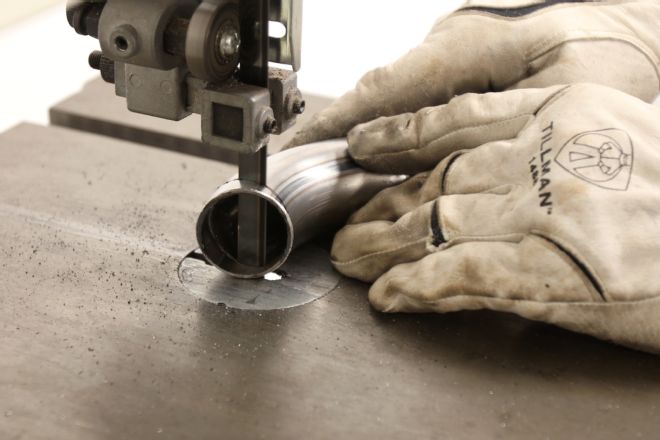
03. Having access to a bandsaw makes it easy to get precise cuts, but you can use a hacksaw or cutoff wheel if that’s all you have.
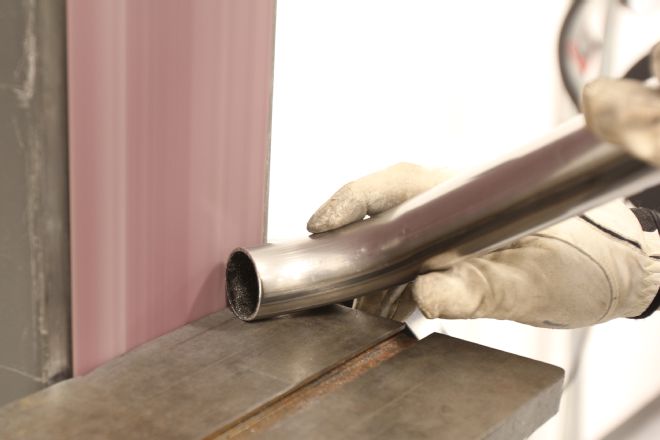
04. We then cleaned up the fresh cut using a belt sander armed with 40-grit paper. Again, use whatever you have available to get the job done.
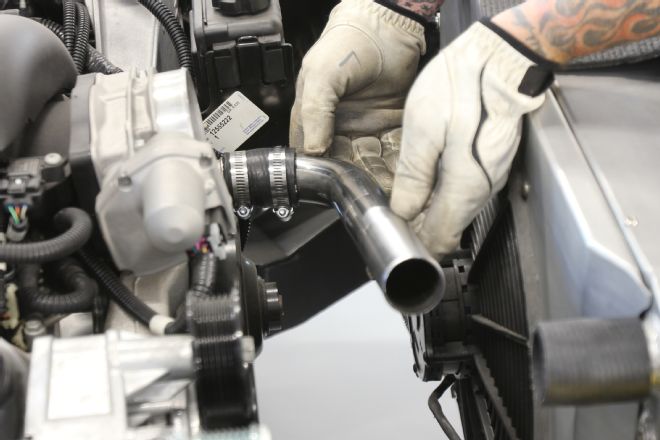
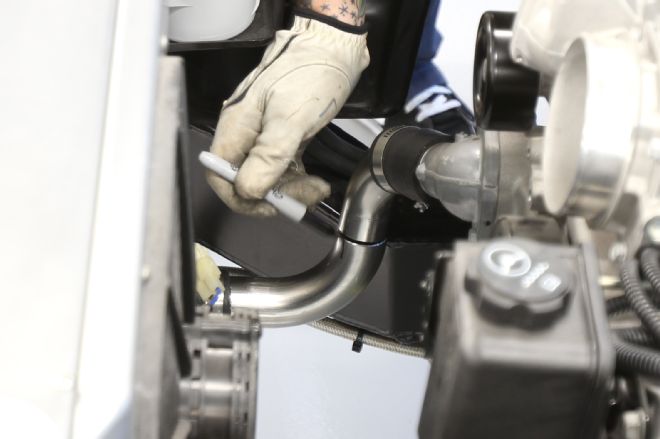
05. Using hose clamps and a bit of 1 1/2-inch id hose, we then mocked in the first cut coming off of the water pump’s outlet to get an idea where to cut the second piece going into our AutoRad radiator.
06. Using the other half of the U-bend tubing we cut earlier, a mark was made indicating where to cut the second piece of our hardline.
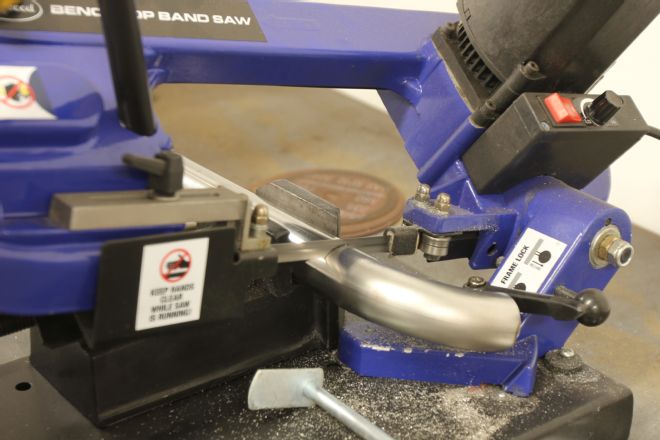
07. Using Eastwood’s Benchtop bandsaw made cutting the tubing quick and easy.
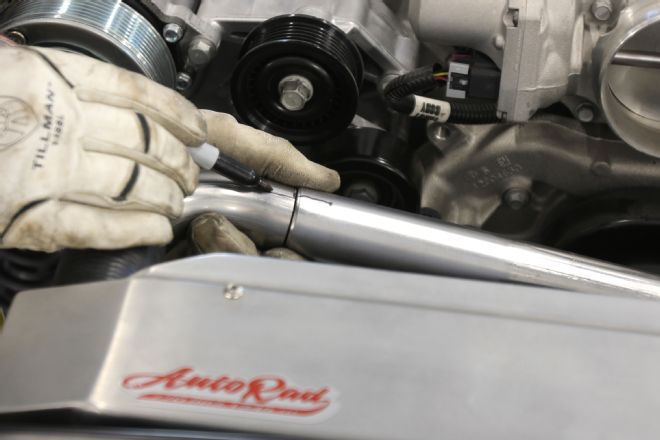
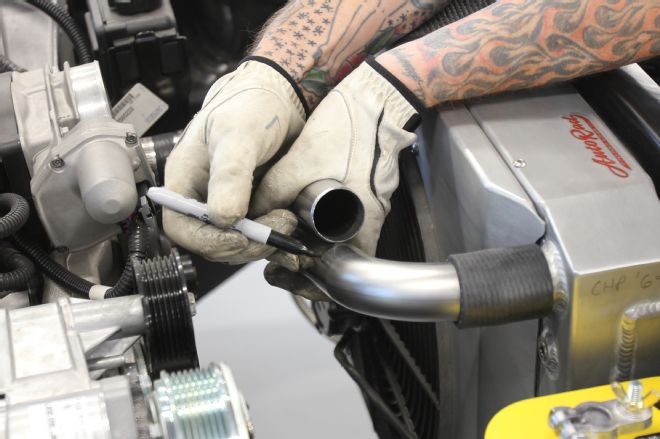
08. We mocked in both pieces of tubing then marked a straight line from one to the other to ensure the correct orientation once we started welding.

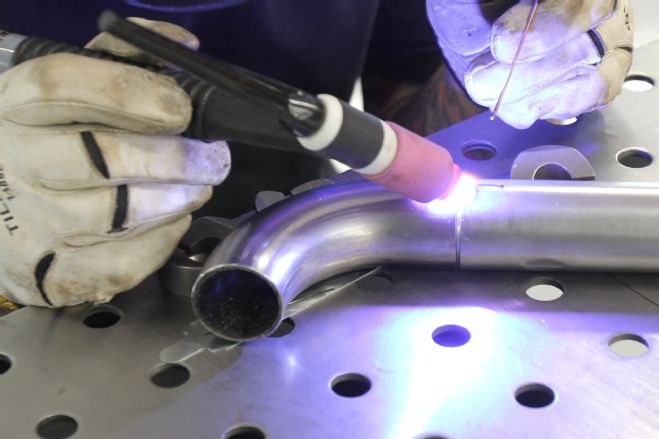
09. Using our Miller Diversion 180 welder loaded with 1/16-inch tungsten, we used 1/16-inch rod and welded the ends together, making sure to get a good bead all the way around the tubing.
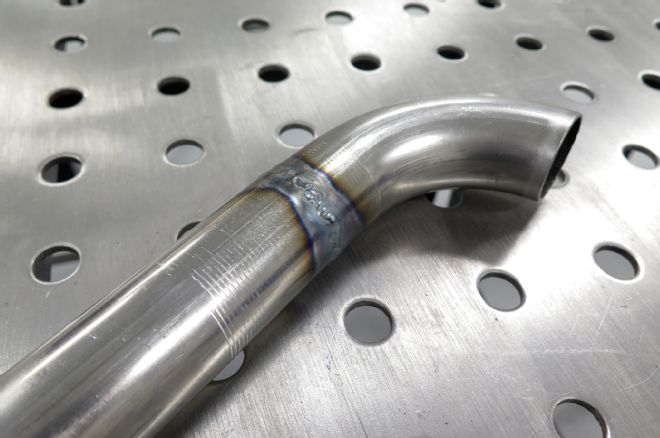
10. You can see the nice thick bead all the way around the tube. We weren’t concerned about aesthetics at this point.
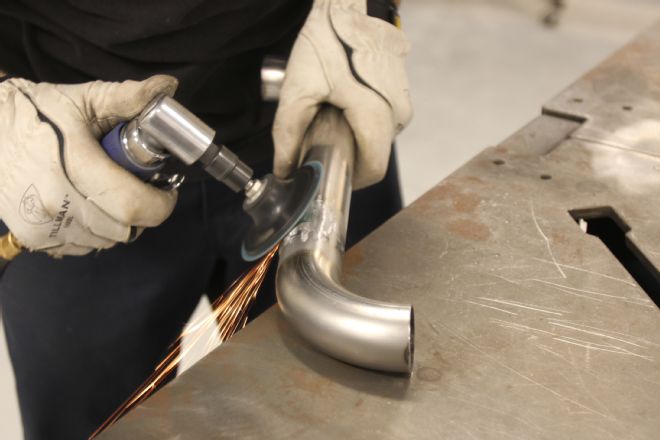
11. We then smoothed the welds down by using an angle grinder topped with a 36-grit Rolox disc.
12. From there, we hit the welded area with a DA topped with 80-grit sandpaper to knock down the deeper scratches. Next, we went with 220-grit paper to get a smooth, uniform surface.

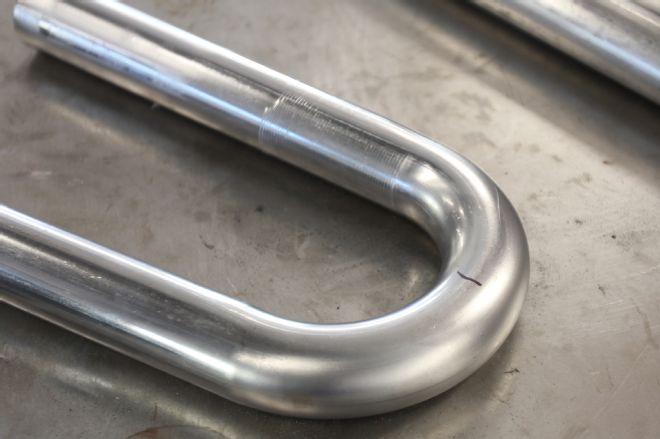
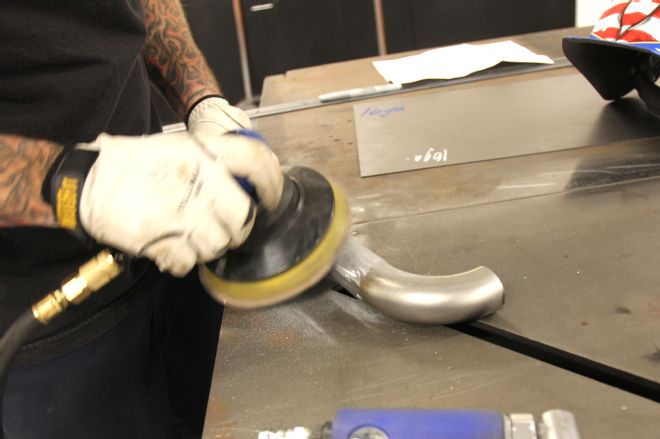
13. Even though there is a little more work to do here, you can see the weld beginning to smooth out. We eventually performed the same process on the entire piece to get a uniform look.
14. We did one last mock-up before metal-finishing the entire tube.
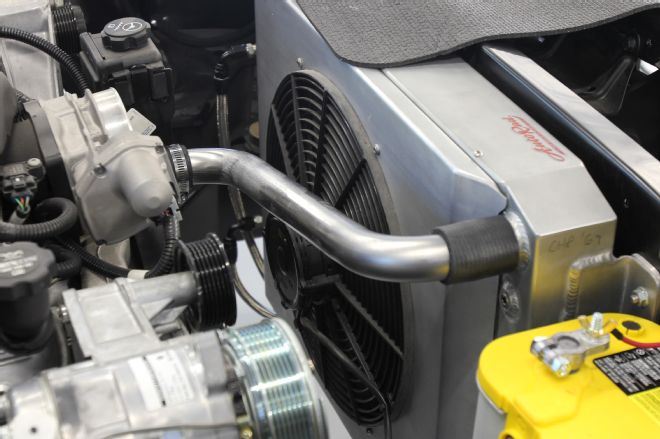
15. For the lower hard line, we used the second U-bend and went through the same basic mock-up and marking process as we did for the top hard line.
16. The space is a little more confined coming from the bottom of the radiator to the thermostat housing, so we needed to make the angled cuts a little more precise than we did up top.
17. Just like up top, we mocked in the bends and marked an orienting line where the two ends need to be welded.
18. The welding process is the same for the bottom hard line as it was for the top.
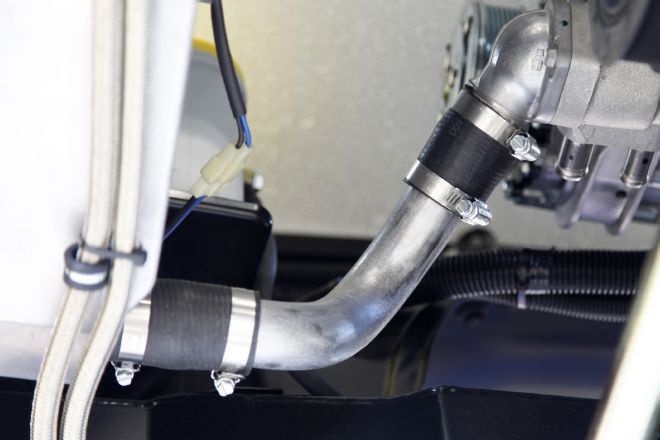
19. Here’s the bottom line all finished and looking sweet.
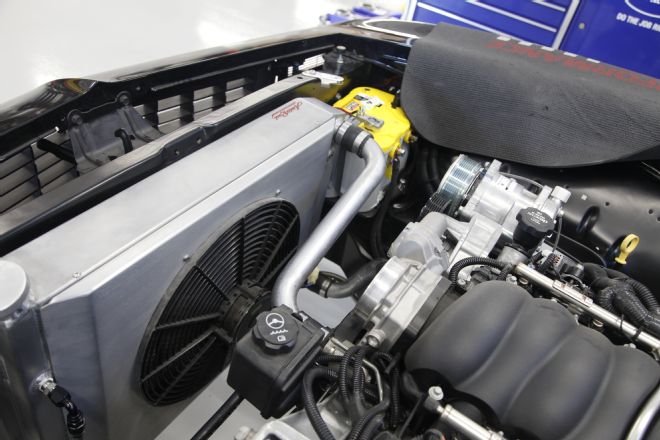
20. After about 3 hours and around $40 later, we were all done fabricating our coolant lines. They look great and add a nice custom touch to our Camaro’s engine bay.