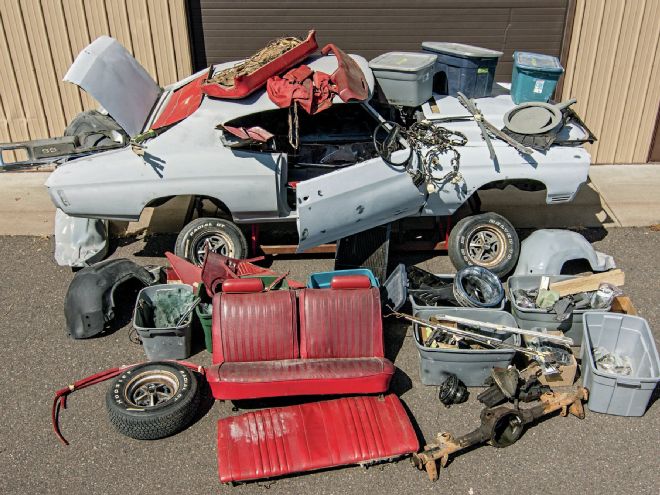
Our Basket Case Chevelle project car—a 1970 Chevrolet Chevelle SS396 that was literally delivered to Muscle Car Restorations in Chippewa Falls, Wisconsin, in crates and baskets—is getting new glass all around as part of its restoration. Last month we covered the installation of the side-window glass; now it's time to install the windshield and back glass.
Whoever took this car apart must have decided that new glass was in order, as neither came with the car. It's just as well, really, as original windshields are rarely worth saving. Anyone who has ever had a windshield replaced in a daily driver can attest to how dull a windshield can get in just a few years.
Original windshields are rarely worth saving
The back window, on the other hand, is spared most of the dirt, bugs, salt, gravel, and other road debris, so it might be possible to return it to near show quality with a good polish. But since all the other glass in the car will be new, a new back window is really the best bet in this case.
This story will depart from our usual practice of explaining how readers can do this themselves. But first, a bit of history. Butyl tape was often used in the '70s and '80s by the OEs and the glass replacement industry to bond auto glass to the car's body. By about the mid '80s, structural adhesive kits became available for replacement work, though butyl continued to be used after that. Today virtually all auto glass is bonded to the car with structural adhesives at the factory, and the use of butyl tape, even for replacements, has long been discouraged. The national Auto Glass Replacement Safety Standard specifically states that autos licensed for road use, even cars originally manufactured with butyl tape, should be changed to a manufacturer-approved or equivalent structural adhesive.
But these structural adhesive kits are generally only available to the commercial repair market, so the normal car guy really doesn't have access to these materials. You can choose to do it yourself with butyl, but this is not in keeping with most automobile manufacturer's recommendations and is contrary to the national Auto Glass Replacement Safety Standard for most installations.
Given the safety considerations, installation by a professional auto glass replacement company is recommended. If you choose to do the installation yourself, get a professional recommendation on the proper adhesive system, and then obtain and follow that adhesive manufacturer's current installation instructions for the adhesive being used.
The normal car guy really doesn't have access to these materials
What's wrong with butyl? It's not as strong as a modern structural adhesive. During a crash, the window could come loose, and the occupants lose the protection a windshield is designed to provide. Plus there is an increased risk of being ejected from the vehicle. And it's not repositionable. Once the glass is set down, that's where it's going to stay. As you'll see in a moment, being able to shift the glass in place can affect the quality of your resto.
So why show this to you if you can't do it? After reading this you'll know how it's supposed to be done, and you can make an informed decision about whether to do it yourself or hire a professional. If you hire a pro, this knowledge will enable you to ask the right questions in advance and then watch to be sure it's done right.
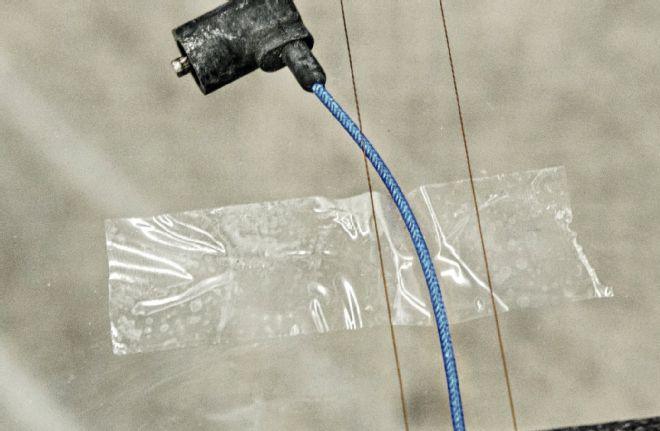
1 The first thing that's done with a windshield that has an antenna wire is to tape it to the outside of the glass so it doesn't end up on the wrong side of the glass once installed. That's a mistake you do not want to make.
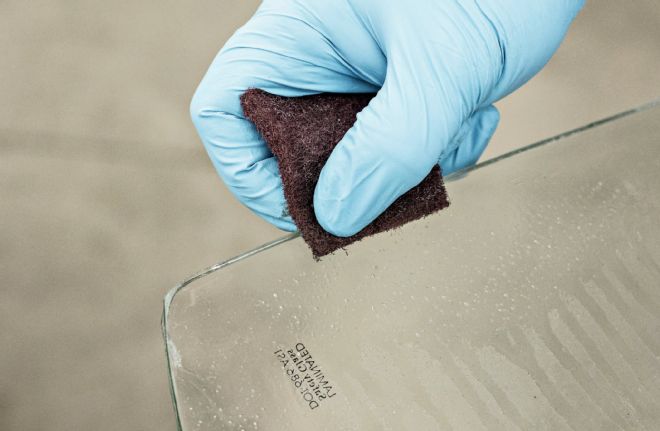
2 Auto Vision Center (AVC) in Eau Claire, Wisconsin, was chosen by Muscle Car Restorations to install the Chevelle's windshield and the back glass, which were supplied by Original Parts Group. AVC starts the installation by cleaning the sealing surfaces on the glass and the car using Dow Betaclean GC-800 glass cleaner along with a Scotch-Brite pad. The techs at AVC use Dow Automotive adhesives and believe it is best to use a single manufacturer's adhesives, primers, and cleaners, but any professional glass cleaner will work. The Scotch-Brite removes contamination from the glass to allow proper adhesion.
3 After the Scotch-Brite pad, the car surface is cleaned with the glass cleaner to be sure the surface is free of debris.
4 About a ⅜-inch-wide coat of Dow Betaprime 5504G all-in-one primer is applied to the bonding surface of the glass. Once dry, a second coat is applied to ensure complete coverage.
5 A single Betaprime coat is also applied to the painted bonding surface on the car. Coat the full width of the surface to ensure that the glue will contact only the primer when the glass is set in place.
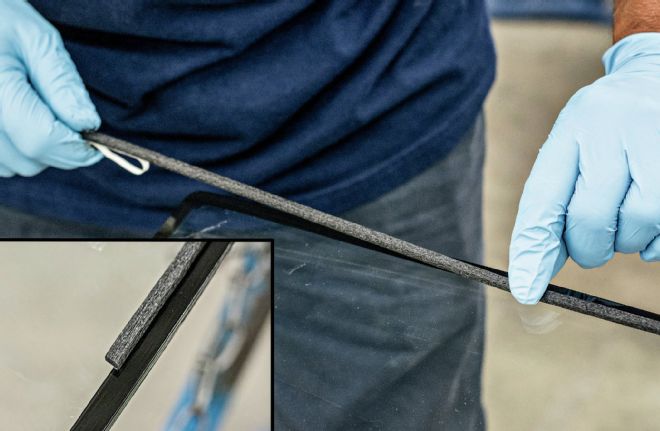
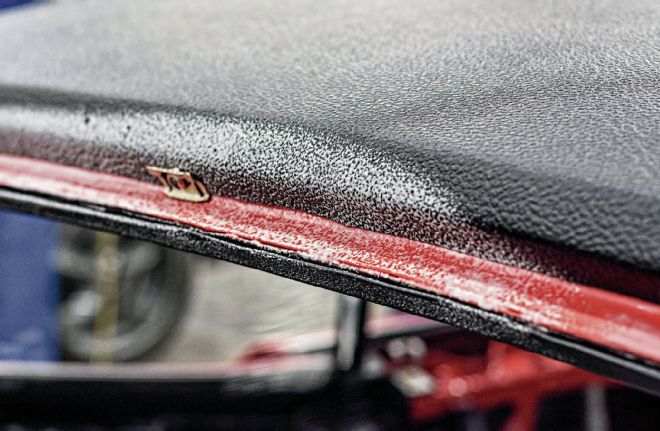
6 A peel-and-stick, 6-mil foam dam is applied around the windshield on the inside edge of the primer. This keeps the glue from oozing into the viewing part of the glass, provides a nice clean edge as seen from the outside, and properly spaces the glass from the car to obtain the ideal glue thickness. The dam should be 5/16 inch from the edge of the glass.
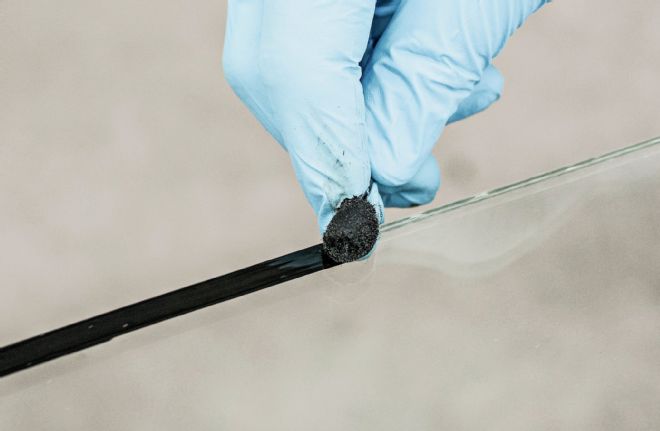
7 The urethane glue gun uses a special tip with a "V" cut out of the side to lay down a wide base with a narrow peak at the top.
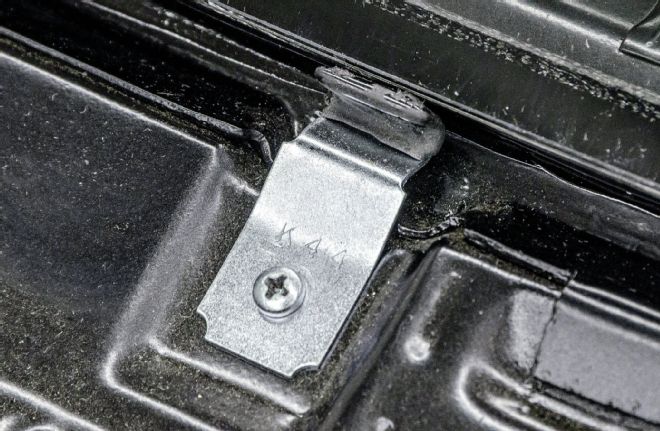
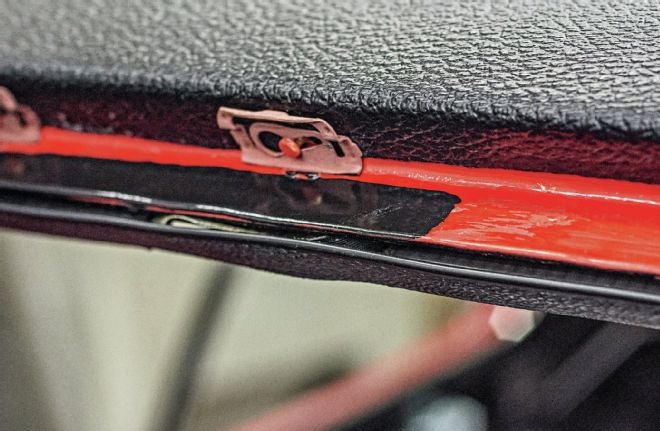
8 The height of the windshield is set by one of these stops on both ends of the cowl. It is a very good idea to set the glass in place using some foam scraps to be absolutely certain that the stops are in the right place. Side-to-side placement is adjusted by the installer.

9 There is about a 10-minute window to place the glass in the car. The windshield must be set down before the glue skins over. Note that the chrome trim clips are in place when the glass is set. Why?
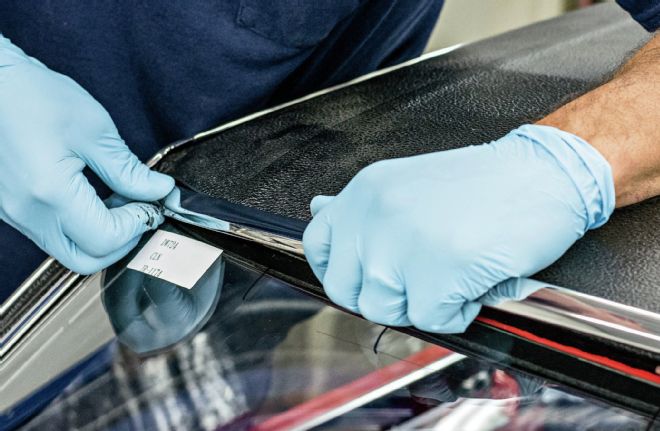
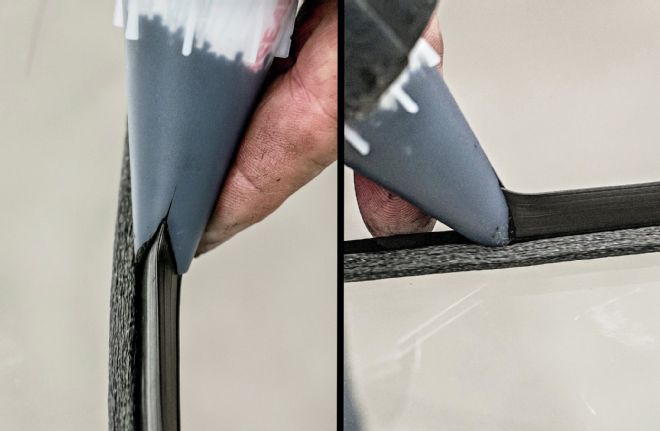
10 The chrome window trim is installed immediately to be sure that it fits correctly and lies flat against the glass while there is still some time to shift the glass in the opening.
11 When done correctly, there should be little to no glue oozing out from the edges. A little to the outside is acceptable because it will be covered by the trim. See how the foam dam makes a nice clean edge on the inside.
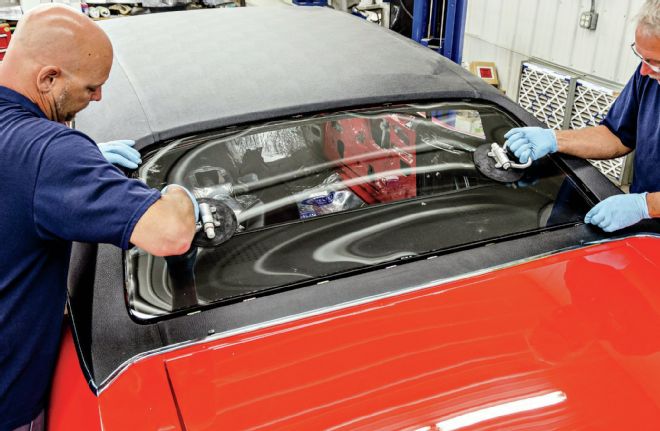
12 The back window installation follows the same procedure as the windshield.
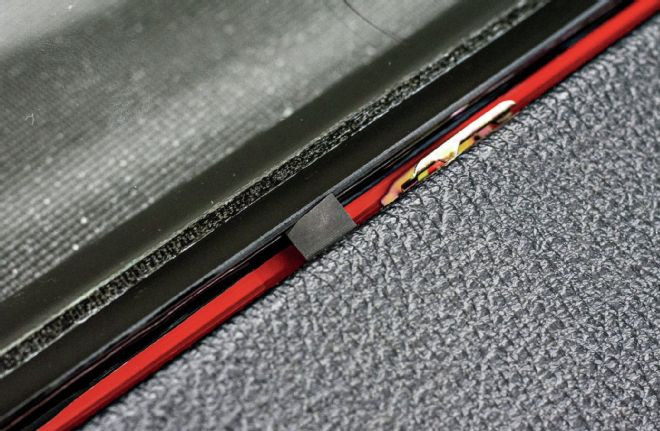
13 The only difference between the windshield and back glass installation is a lack of stops in the backlight to set the height of the glass. A pair of these small rubber blocks holds the glass in position until the glue sets. However, they are not put in place until the window is in so that they don't get knocked over or somehow get into the glue. Once the glue sets, they are removed and the trim is installed as in the front.